Snapshot
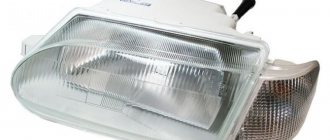
Block headlight (left): 1 — ventilation tube;
2 — low beam section cover; 3 — cover of the high beam section; 4 — light beam regulator in the vertical plane; 5 — lamp socket for side light and daytime running light; 6 - electrical connector; 7 — regulator of the light beam in the horizontal plane; 8 — direction indicator lamp socket Headlight unit (left): 1 — ventilation tube; 2 — low beam section cover; 3 — cover of the high beam section; 4 — light beam regulator in the vertical plane; 5 — lamp socket for side light and daytime running light; 6 - electrical connector; 7 — regulator of the light beam in the horizontal plane; 8 - turn signal lamp socket
Block headlight (left): 1 — ventilation tube; 2 — low beam section cover; 3 — cover of the high beam section; 4 — light beam regulator in the vertical plane; 5 — lamp socket for side light and daytime running light; 6 - electrical connector; 7 — regulator of the light beam in the horizontal plane; 8 - turn signal lamp socket
We show the replacement of lamps on the left headlight unit. For better access, move the air filter to the side. To replace the lamp in the right headlight unit, this is not necessary. For clarity, we show the work on a removed headlight. We change the lamps in the right headlight in the same way.
To replace the low beam lamp, remove the larger diameter rubber cover from the headlamp housing.
How the work is carried out
Let's figure out how to replace the low beam light bulb on Kalina with your own hands, the process is quite simple and, by and large, does not require any special devices, you only need your hands. But still, the tool may be needed at the preparation stage.
Preparation
It is important to ensure a comfortable and safe working environment, so remember the following:
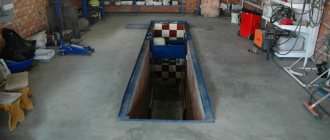
- The work can be done anywhere - even in the yard near the house, but it is advisable to go to the garage. There you can not be afraid of precipitation and, if necessary, find this or that tool.
- First of all, the hood is opened and the terminal is removed from the battery. We remind you of this in every review. Therefore, make it a habit to de-energize the system when working with electrical equipment to prevent short circuits and electric shock.
- Further preparation depends on what engine is installed in your car, you need to provide access to the rear of the headlight housing, and for this you need to disconnect the expansion tank on the left, and the options on the right may be different. Therefore, be guided by the situation and decide for yourself. What needs to be removed and what should not be touched.
Replacement process
Replacing the low beam bulb on Kalina is as follows:
2302-18-10-02 (Copy)
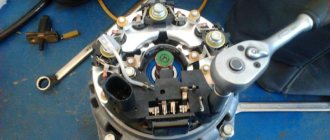
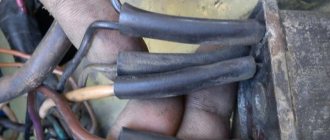
By pressing the spring clamp of the lamp, we disengage it from the hooks of the reflector and move it to the side.
By pressing the spring clamp of the lamp, we disengage it from the hooks of the reflector and move it to the side.
By pressing the spring clamp of the lamp, we disengage it from the hooks of the reflector and move it to the side.
Replacement Instructions
The procedure is performed in any convenient place - in an open street area or in a warm garage with good lighting, if we are talking about the cold season. No special tools or equipment are needed. To remove the low beam lamp, carry out a number of preparatory operations:
- Disconnect the battery from the on-board network by removing the terminal with the “—” (minus) sign.
- Clear access to the headlights from the engine compartment.
- Lighting devices are hidden in plastic headlight housings, covered with caps at the back. Once you reach the box, remove the round protective cover.
Usually, parts of the power unit - the air filter housing, pipes and coolant expansion tank, and various plastic linings - prevent you from reaching the light bulbs by hand. In some car models, access is blocked by the battery itself, so it will have to be removed.
The engine compartment of a modern car is filled extremely tightly with blocks and assemblies. When you reach the back of the headlight with your hand, you will not be able to look into the hole at the same time - you need to work by touch. Hence the recommendation: take a photograph of the light bulb mounting assembly with a smartphone equipped with a camera.
Step-by-step instructions for replacing a light bulb in most passenger cars look like this:
- After removing the rubber plug, grab the terminal block where the power wires are connected with your hand. Gently shaking it left and right, remove the connector from the lamp contacts.
- The metal base of the light bulb is pressed into the socket by a wire retainer. Press the loop (or bracket) end of it and slide it down or up to disengage the spring from engaging the lugs.
- The other end of the latch is fixed to the bracket. Move the bracket to the side and pull out the lamp, remembering the position of the housing. There is no need to rotate the base during removal.
To change the low beam bulb, wipe the new element with a rag and carefully insert it into the socket, holding it by the base. You cannot touch the glass flask with your bare hands - grease marks will remain. It is better to wear a thin fabric glove. Then return the latch to its place and snap it into the eyes, after moving it in the desired direction.
The last step is to connect the contact connector and install the plug. When finished, assemble the removed parts, connect the battery and check the functionality of the new low beam element. If it burns noticeably brighter than the other working headlight, it is worth changing the second lamp.
2302-18-10-03 (Copy)
Remove the low beam lamp from the headlight housing.
Remove the low beam lamp from the headlight housing.
Remove the low beam lamp from the headlight housing.
Attention! Low and high beam lamps are halogen. Do not touch their glass bulb , as fingerprints will cause the lamp to darken when heated. You can remove dirt from the flask with a clean rag soaked in alcohol.
We install the new H7 lamp in the reverse order.
To replace the high beam lamp, remove the rubber cover of a smaller diameter from the headlight housing.
When and why to change
The factory light is adjusted during the production process, at the time of passing technical inspection. In the new car, the modules shine with maximum power and at the peak of their capabilities. The need for replacement is determined by the following main criteria:
- Reducing light intensity.
- The appearance of yellowness and cloudy areas on the cut-off strip.
- Complete shutdown of one of the light modules.
- Increased brightness after the suspension hits a pothole or has mechanical contact with the headlight.
Kalina lamps installed on the conveyor last no more than 4 years. Cloudiness, deterioration of visibility and the appearance of unlit areas appear after the filament burns and the bulb smokes. In this case, the light does not pass through the dirt well and does not reach the desired areas of the reflector. There are yellow spots of light and darkened areas on the road.
The thickness of the light module filament is calculated by production engineers. When struck, the lamp shakes and the spiral becomes thinner. An external examination reveals a large increase in beam power. This indicates that the halogen lamp will soon fail, since the thin filament heats up above the set temperature and begins to melt. The service life of a damaged part ranges from one minute to several hours.
2302-18-10-05 (Copy)
By pressing the ends of the spring clamp of the lamp, we disengage them from the hooks of the reflector and move them to the side.
By pressing the ends of the spring clamp of the lamp, we disengage them from the hooks of the reflector and move them to the side.
By pressing the ends of the spring clamp of the lamp, we disengage them from the hooks of the reflector and move them to the side.
Tips for installing your device
The active subwoofer has two line outputs, which allows you to connect it to a car radio.
Connecting such a subwoofer is not difficult. What to do if the speaker system is passive? To connect a passive subwoofer, you need to install an additional amplifier. A special speaker cable is used with a length equal to the distance from this device to the amplifier.
In addition, for the correct and competent installation of the device necessary to determine the minus and plus outputs on the speaker.
2302-18-10-06 (Copy)
Remove the high beam lamp from the headlight housing.
Remove the high beam lamp from the headlight housing.
Remove the high beam lamp from the headlight housing.
We install the new lamp H1 in the reverse order.
To replace the turn signal lamp, press the socket and turn it counterclockwise (in the right headlight - clockwise)...
How to change the headlight glass of a Lada Kalina, headlight assembly or side turn signal
During operation, the headlight glass may become cloudy or damaged. If polishing the headlights cannot solve the problem, on Kalina you can replace the headlight glass separately if necessary. This is done without removing the headlight itself.
First, use a screwdriver to pry up and remove the 6 spring brackets that press the lens to the headlight seal. After this, you can remove the headlight glass, as well as the glass seal. After this, you can install new glass and reassemble it.
If you need to completely replace the headlight, to remove it, you need to press the latches, disconnect all the wires from the connectors on the headlight housing, as well as from the turn signal socket.
Next, you need to remove the front bumper, then use a cross-head screwdriver to unscrew the screw of the upper headlight mounting, and also use head 8 to unscrew the three bolts that secure the headlight. After removing all fasteners, the headlight can be removed.
We also recommend reading the article on how to install and connect fog lights using the example of a VAZ 2114-2115. From this article you will learn which fog lights are best to choose, what you need to consider when installing and connecting.
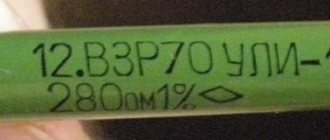
If the headlight is right-handed, for replacement you need to use an analogue with the RE marking on the body. For the left headlight the marking will be LE. Installing a new headlight on a car is done in the reverse order.
- We also add that to replace the side turn signal or its lamp, you need to move the turn signal forward and then remove it from the hole in the fender.
To change the lamp, you need to turn the socket counterclockwise. This will allow you to remove it from the side turn signal housing. To replace the turn signal housing, you should put the existing socket in the new housing, and then reassemble it, installing the side turn signal in place.
2302-18-10-07 (Copy)
...remove the lamp socket from the headlight housing.
...remove the lamp socket from the headlight housing.
...remove the lamp socket from the headlight housing.
Pressing the lamp, turn it all the way counterclockwise and remove the lamp from the socket.
The cartridge is sealed in the headlight housing with a gasket. If the gasket is torn or has lost elasticity, replace it with a new one.
Install the new PY21W lamp in the reverse order.
Tuning options
You can increase the attractiveness of your car for yourself and others by tuning the lighting system. Main options:
- tinting;
- installation of bilens;
- installation of LEDs in dimensions;
- creating angel eyes.
Many car enthusiasts choose tuning of headlights on Kalina, such as tinting - applying a special film over the entire surface of the glass of the device to give the car an original design. Another popular option is installing xenon. Almost all workshops offer this service, but only experienced craftsmen can carry out the installation efficiently.
2302-18-10-08 (Copy)
In this case, two protrusions, located asymmetrically relative to the axis of the lamp, must fit into the corresponding grooves of the socket.
In this case, two protrusions, located asymmetrically relative to the axis of the lamp, must fit into the corresponding grooves of the socket.
In this case, two protrusions, located asymmetrically relative to the axis of the lamp, must fit into the corresponding grooves of the socket.
To replace the daytime running light lamp and side light, turn the lamp socket counterclockwise...
2302-18-10-10 (Copy)
Pulling the lamp, remove it from the socket.
Pulling the lamp, remove it from the socket.
Pulling the lamp, remove it from the socket.
We install the new W21/5W lamp in the reverse order.
Replacing headlight bulbs on a car manufactured before 2013
The only difference in the procedure for replacing lamps in the headlight of a car manufactured before 2013 is that the side light lamp is located under the high beam lamp cover, and the daytime running light lamp is simply absent.
We will show you the replacement of the side light lamp on the right headlight unit.
On a note
We replace spark plugs every 30 thousand km.
Over-tightening the spark plugs can damage the threads in the spark plug holes in the cylinder head.
The Kalina and Kalina 2 models have different headlights, so replacing the lamps in them has certain differences, and we will describe which ones in this article. Replacing the lamps yourself will not cause you any problems. Therefore, there is no point in turning to the service for help.
On Kalina 2 from 2013, to replace the lamps in the left headlight unit, you need to move the air filter to the side so that it does not interfere. There will be nothing in the right headlight block that will prevent replacement.