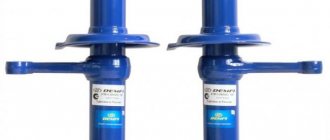
The minimum permissible thickness of a non-ventilated disk is A = 10.8 mm, ventilated - 17.8 mm. If the disk thickness is less, it must be replaced. The axial runout of the brake disc surface should not exceed 0.15 mm.
If there are burrs, deep scratches, etc. on the working surface of the disc that increase pad wear and reduce braking efficiency, replace the disc. In specialized workshops such a disc can be sharpened and ground. But at the same time, the thickness of the disk must be no less than the minimum permissible. The groove is made on both sides of the disk to the same depth.
The brake disc of a car, working in intensively stressful conditions and in unfavorable external conditions, ensures the safety of our movement. This axiom. But, while performing complex and responsible work, the disc itself, seemingly made of strong material, remains very vulnerable to damage by a part of the brake system.
Brake disc diagnostics
Disc brakes, having burst into our lives in the middle of the last century, confidently won a leading position in car design. Today, almost 90% of passenger cars leave production lines with disc brakes already installed. The reason is simple - disc brakes are more efficient and simpler in design. Which means it’s cheaper for mass production.
A not entirely good feature of disc brakes is the small contact area between the pad and the brake disc. This, in turn, requires more pressure in the brake system, and increased wear on both the brake pads and the brake disc.
What should be the minimum thickness of a brake disc to allow operation of a car? We will not give you a single figure, which varies significantly between manufacturers of both cars and brake discs. And although there are average mileage figures, it's all relative.
On forums, many novice motorists ask the question where they can find out numbers about the thickness of the brake disc. Let’s answer this: right on the disk it’s possible. The fact is that the manufacturer took care of our comfort when repairing brake discs and indicated two numbers on the end of the brake disc: the original thickness and the minimum thickness of the brake disc. After this figure, operating the car is strictly not recommended.
Numbers are numbers, but too many factors influence accelerated wear of brake discs. Among the first is your aggressive driving style within the city.
Examination
Having carried out all the above operations - first on one wheel, and then on the second, you also need to check the system for leaks. The first phase is to simply press the pedal.
The fact that everything is done normally is indicated by the fact that the pedal is pressed with force, quite tightly.
But this is not enough. Have someone else press the brake pedal while you try to rotate the parts that make up your new rear disc brakes.
If nothing moves, it means that your VAZ 2110 now has new rear disc brake systems - better and more reliable than the previous ones.
To minimize the braking distance, it is recommended to install a vacuum booster. Details: https://vazweb.ru/desyatka/tormoza/vakuumnyi-usilitel-tormozov.html
How to determine brake disc wear: acceptable standards and features
The brake disc is no less important in the braking system of a car than the pads. And if the latter are replaced when worn out, then almost no attention is paid to the former. But the efficiency of the system also depends on them. Let's find out how to determine the wear of brake discs so that they can be replaced on time.
Most of the discs that lie on the shelves of car dealerships are made of cast iron. The popularity of such products lies in their low cost and good friction characteristics. But the problem is that in the process of reducing the speed, the cast iron alloy product heats up. This leads to deformation, warping, and uneven abrasion. To reduce wear and tear from heat, manufacturers began to produce products with ventilation. Grooves are also cut on the surface of the disk. This allows you to increase the life of the disk.
Original
Factory wheels are produced by the Autoreal plant, they have article number 2112350107002 and are sold both individually and in sets. The cost of one part is 850-1000 rubles, depending on the store and city. In addition, in the assortment you can find disks with code 21123501070, they are produced by the same company, the price of such a set varies between 2.2-2.5 thousand.
The products are of good quality and can be found both in regular spare parts stores and online catalogues. Many car owners argue that it is better to purchase parts in a simple store, where you can personally check them for quality.
How to understand that the thickness of the brake disc is approaching a critical level
First of all, monitor the behavior of the car during braking, especially emergency braking. If there is a beating in the steering column, then it’s time to take a closer look at the brake discs. A visual inspection to determine the thickness of the brake disc should be carried out with the wheel removed.
The first thing to do is take a caliper and measure the thickness of the brake disc in several places. Why in different places? Because there is such a thing as uneven brake disc wear. It happens for various reasons.
When measuring brake discs, do not forget to pay attention to collars, deep scratches and other mechanical damage to the working surface of the brake disc. If they are, then it's time to think about brake disc repair.
Analogs
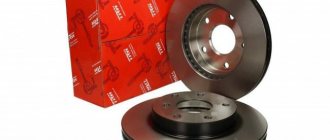
When choosing front discs, you can also pay attention to more expensive similar parts from foreign manufacturers. Information on them is collected in the table below.
| Brand | A country | vendor code | Peculiarities | Price in rubles |
| Brembo | Italy | 09.8903.75 | Corrosion-resistant products, the surface has a wear marker, the parts provide effective braking even over a short distance, do not deform upon impact, and are therefore suitable for car owners who value aggressive driving | 3000-3200 per piece |
| ATE | Germany | 24.0320-0142.1 | Improved design with a multi-functional groove, the part provides comfort when decelerating, wears out slowly | 2700 per unit |
| Allied Nippon | Japan | ADC 1712V | Lightweight, wear-resistant and corrosion-resistant products, designed for harsh operating conditions, slightly susceptible to the negative effects of high temperatures | 1800 per piece |
| Hofer | Germany | HF130218 | Inexpensive, but high-quality perforated discs with notches and grooves, have good resistance to friction and mechanical shocks | 2000-2100 per part |
What do we do with brake discs?
There aren't many answers. If the minimum thickness of the brake disc corresponds to the figure specified by the manufacturer, then do not tempt fate, just replace the brake discs. They must be changed in pairs on the same axis.
If the thickness of the brake disc corresponds to the norm, but there is some mechanical damage on it, then you need to re-groove the brake discs. Grooving the discs will allow you to bring the brake system back to normal and extend the service life of the brake disc for a certain time. You shouldn’t get carried away with grooving – it’s not a panacea.
Content
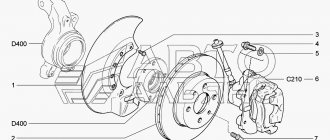
Description of front brakes
Which brake discs are best for VAZ 2110 and 2114? To answer this question, you need to decide what type of disk and where it is installed. Disc brakes on the 2110 and 2114 are installed only on the front wheels; drums are used at the rear. The design uses non-ventilated discs. There is also automatic adjustment of the gap between the disc and pads.
There is also a brake pad wear sensor. If you decide to change these parts due to increased wear, then be sure to pay attention to the caliper. It may be faulty, which leads to increased wear on the disc. Be sure to find and eliminate the cause of the problem.
Absolutely do not do this!
Some home-grown “Kulibins”, trying to save money on buying new brake discs, perform sometimes mind-boggling procedures in order to compensate for the minimum thickness of the brake discs.
For example, two brake pads are installed. To prevent the brake cylinder pistons from falling out. This ultimately leads to the fact that at speed the brake pads simply fly off to... nowhere. At the same time, the path of the car is known - into a ditch, and it’s good if there are no casualties.
Replacing worn brake discs at the wrong time can also lead to failure of the pistons of the working brake cylinders, CV joints, ball joints, etc. That is, by trying to save money and procrastinate, you can then lose more money. Remember the stingy...
Monitor the condition and thickness of the brake discs, and take measures to eliminate any defects noticed - there is too much at stake to neglect this.
Good luck determining the thickness of your brake rotors and replacing them.
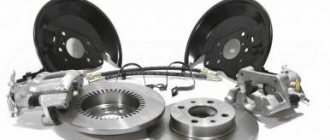
Dismantling
Before installing disc brakes, you need to dismantle the old rear brake mechanisms of the VAZ 2110.
This is done like this:
- Remove the wheel;
- Remove the brake drum;
- Remove the pads;
- Remove the hub from the wheel, having first unscrewed the brake pipe.
You should prepare for the fact that dismantling will not be easy. Not only do the brakes have the unpleasant tendency to stick during operation, but the bolts are also “welded” by corrosion. Therefore, it is advisable to treat the nuts and bolts themselves with a special agent (for example WD 40) so as not to tear off their edges.
It is important to plug the removed pipe with something so that brake fluid does not leak out and air is not sucked into the system. After that, knock down the hub. This works best if you attach a board or lath to the back of the support disk and hit it with a hammer, moving the blows: one from below, the other from above. This will prevent you from causing serious damage to the disk.
Replacing brake discs
Even with intensive use of your car, brake discs can last quite a long time. For example, judging by my personal experience, using the VAZ 2110 as an example, I can say that with a mileage of 180,000 km, it still had factory wheels.
Although, judging by one car is completely wrong. You can destroy the surfaces of a brake disc in a matter of hours if you do not promptly replace the pads that have worn down to the metal base. Also, poor-quality pads can cause grooves and uneven wear on the disc surface.
Minimum permissible residual thickness of the brake disc
- 10.8 mm for standard rims
- 17.8 mm for ventilated ones, which can be installed on later versions of VAZ 2110, 2111 and 2112 with 16-valve engines
To complete the work of replacing these parts, we will need the following tool:
- Jack and wheel wrench (to remove the wheel)
- 7 mm wrench or 7 mm socket (preferably deep)
- 17 mm head
- Ratchet and crank
- Hammer
To begin the repair, first of all, read the material on removing the front wheel caliper on a VAZ 2110. Since you will first need to take care of removing this structure.
pros
Let's look at why disc brakes are better than drum brakes:
- Braking becomes more reliable, braking distance is reduced;
- Braking forces are distributed more evenly, given that the VAZ 2110 is a front-wheel drive car;
- There is an effect of faster response after pressing the pedal;
- Unsprung masses are reduced;
- Heat dissipation occurs better, which is especially important when driving on a mountain road or during active acceleration/braking. For this reason, the brake system is cooled better;
- Disk ones are much easier to dismantle and replace;
- There is no need to adjust the handbrake after each repair of the rear brakes, although this will have to be done the first time;
- They do not freeze in winter after washing, like drum ones;
- Rear disc brakes installed on the VAZ 2110 are much more convenient to control and promptly notice pad wear.
Captain-Smollett › Blog › VAZ front drive brakes
This article will help answer all the questions about switching from one brake to another. It will also help you figure out what kind of brakes you currently have. To do this, consider the stock front brakes for front-wheel drive VAZ: 2108-21099, 2110-2112, 2113-2115, Kalina, Priora, Granta
R13 not ventilated
They were installed on the SAMAR and SAMAR-2 families, as well as on the 10th family (only with an 8-liter carburetor engine). Explosion diagram Caliper
Visually, they can be distinguished by the lack of ventilation on the brake discs, in addition to the characteristic 2108 boot.
R13 ventilated
They were placed on families 10, Kalin, Grant exclusively with 8kl. engine. Explosion diagram Caliper
Visually, it is easy to distinguish from 08 by its wider ventilated disk. Brakes from R14 can be visually distinguished by the brake disc boot ratio.
R14 ventilated
They were installed on families 10, Prior (even with 8kl. ICE), Kalin, Grant with 16kl. engine. Explosion diagram Caliper
Visually it is easily determined by the ratio of the brake disc boot. The disc will completely cover the boot. There is another option, remove the fixed bracket and 2112 should be stamped on it. In addition, it is simply impossible to install wheels of 13 radius.
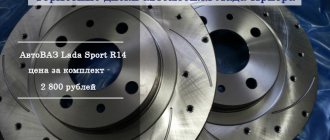
R15 ventilated
They were placed on the Kalin and Grant families from 16kl. engine in the sport version. Explosion diagram
Standard R13″ ventilated calipers are used (movable caliper 2110, fixed caliper 2110 which is machined to fit a wider brake disc).
And to extend the guide to a larger radius, the plant uses “bone” adapters
When installing them, you need to file the ears on the fist
There is another option that is almost factory-made. Install the Volga calipers using a special spacer. They have their own brake pad, which, in addition to everything, has an even larger area compared to the VAZ one.
RESULT:
1) When moving from R13 non-ventilated to R13 ventilated, you will need: - Caliper bracket 2110 movable 2110-3501017 - Caliper bracket 2110 fixed 2110-3501155 - Brake disc housing right VAZ-2110 (14 inches) 2112-3501146 - Brake disc housing left VA Z -2110 (14 inches) 2112-3501147 — Brake disc VAZ 2110 (13 inches) 2110-3501070 As you can see, we will need brackets, boots and the brake discs themselves. You can leave the old calipers.
2) When moving from R13 non-ventilated to R14 ventilated, you will need: - Caliper bracket 2110 movable 2110-3501017 - Caliper bracket 2112 fixed 2112-3501155 - Brake disc housing right VAZ-2110 (14 inches) 2112-3501146 - Brake disc housing left VA Z -2110 (14 inches) 2112-3501147 — Brake disc VAZ 2112 (14 inches) 2112-3501070 As you can see, we will need brackets, boots and the brake discs themselves. You can leave the old calipers.
3) When switching from R13 ventilated to R14 ventilated, you will need: - Caliper bracket 2112 fixed 2112-3501155 - Brake disc VAZ 2112 (14 inches) 2112-3501070 As you can see, we only need a movable bracket and the brake discs themselves. The calipers can be left as old, the boots were originally designed for R14 brakes, the movable caliper remains the same.
4) When switching to R15 ventilated ones, you will need: - Movable caliper bracket 2110 2110-3501017 (but it needs to be sharpened) - Fixed caliper bracket 2112 2112-3501155 (only if you have R13 not ventilated) - Spacer for the fixed bracket - Disc 15 inch brake
Installation
It's time to install disc brakes instead of the removed rear drum brakes.
Having knocked off the hub, we will put it back, but in a different way:
- It should be installed through the plate into which the caliper is already mounted. Carefully ensure that all holes line up. Particular attention to alignment;
- Next, use a hammer to straighten the corner of the beam so that the caliper does not rest against it;
- Now you can put the brake disc on the hub, placing spacers between these parts, and secure the disc with a bracket;
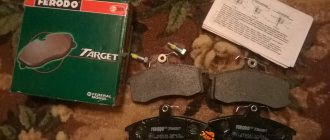
- We install brake pads from VAZ 2110;
- First, carefully and securely attach the brake hose to the caliper, and then to the tube;
- To reduce the braking force of the rear brakes compared to the front, you need to partially grind off the friction material of the pads.
Video instructions for replacing brake discs VAZ 2110-2112
The guide below was prepared by me personally for this article in particular.
Installation is carried out in reverse order and it is strongly recommended to apply copper grease to the mating parts of the brake disc and hub. The video shows this perfectly. In this case, even after a long mileage and long-term operation, there should be no problems with dismantling.
As for the price, new brake discs for the VAZ 2110-2112 can be bought from 500 to 1000 rubles apiece. The difference in price depends on the manufacturer, type (ventilated or not) and the diameter of the wheels installed (13 or 14 inches).
If you have any questions, ask in the comments and discuss together.
Bleeding and adjustment
After any manipulations with the brake system (it doesn’t matter whether you repaired the rear, front or parking), on a VAZ 2110 it is vitally important to bleed the brakes so that an air plug does not form anywhere in them, which can negate the ability to brake at the right moment.
It is convenient to do this together, but you can do it yourself, although this requires some additional equipment. Many people know how to bleed the brakes on a VAZ 2110. The main thing is not to forget to do this diagonally, always starting with the front wheels, and pump the right one first.
After bleeding, you still need to check the braking forces. This requires an outside observer. You accelerate and brake sharply, and he watches as the brakes apply. The front ones should work first, then (with a small gap) the rear ones, and the braking force should be greater for the front ones.
Replacement steps
The entire replacement process can be divided into several stages:
- Removing wheels;
- Removing the old brake pad;
- Frame disassembly;
- Cleaning the hub and checking it;
- Removing coating from new disks;
- Runout check;
- Installation of new brake system elements.
Now let's talk about this in more detail.
Removing the wheel
In fact, dismantling the wheel for subsequent replacement of the brake elements is not difficult.
But a certain sequence of actions will have to be followed.
- Place a jack under the car.
- Lift it up so that it doesn't tip over, but still allows you to easily remove the wheels.
- Unscrew the wheel fasteners.
- Remove the hubcaps and the wheels themselves.
As you can see, the procedure is really simple, but it requires attention and accuracy.
Removing the pads
- Try to move the piston as far as possible from the brake mechanism. But do not exceed the distance beyond that which will allow you to comfortably remove the brake pads.
- Take out the block.
- To make the job easier, you can disassemble the brake frame. To do this, unscrew the two bolts securing the block and disconnect the device.
Hub
It must be cleaned, since all accumulated debris, dirt, and rust will negatively affect the effectiveness of the new brakes.
Dirty
For cleaning, alcohol-based solvents and metal brushes are used. If cleaning is not performed, the operation of the brakes will be accompanied by beating - this should absolutely not be allowed.
Be sure to check the hub for runout. Normally it does not exceed 0.1 mm. There is a special tool for checking. If the indicator is within normal limits, then a full assembly is performed.
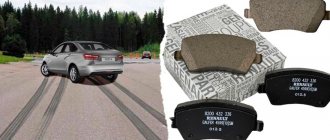
Working with new disks
Many owners of the “Ten” are interested in which brake discs are best to choose for the VAZ 2110. The question is quite logical.
Choose certified replacements from reputable manufacturers such as Bosch, or stay true to factory parts. These are the two best options in terms of quality and compliance with the car itself.
New
Some take similar discs that partially fit the “ten”, sharpen them, and adjust the design. This is a dubious undertaking, since it requires serious skills in such a matter, additional time and financial costs. At the same time, it is far from a fact that such brakes will work better than those offered by the AvtoVAZ plant.
You've already figured out how to remove the brake element, so it's time to work on a new one. It’s not enough to just buy another brake disc and put it in place. First, it is prepared and a runout check is performed. Let's talk about this in more detail.
- The coating must be removed from a new disc.
- This coating serves as a kind of preservative.
- The layer is removed using any solvent.
- Clean thoroughly and wipe the part dry after finishing work.
- Now you can put the disk in a new place and check the runout.
- The permissible runout is no more than 0.15 millimeters.
- If the value is exceeded, this can lead to an increase in the sensitivity of the brake pedal, as well as the formation of vibrations during braking.
Stories from our readers
“Fucking basin. "
Hi all! My name is Mikhail, now I’ll tell you a story about how I managed to exchange my two-wheeler for a 2010 Camry. It all started with the fact that I began to be wildly irritated by the breakdowns of the two-wheeler, it seemed like nothing serious was broken, but damn it, there were so many little things that really started to irritate me. This is where the idea arose that it was time to change the car to a foreign car. The choice fell on the melting Camry of the tenth years.
Yes, I had matured morally, but financially I just couldn’t handle it. I’ll say right away that I am against loans and taking a car, especially not a new one, on credit is unreasonable. My salary is 24k a month, so collecting 600-700 thousand is almost impossible for me. I started looking for different ways to make money on the Internet. You can’t imagine how many scams there are, what I haven’t tried: sports betting, network marketing, and even the volcano casino, where I successfully lost about 10 thousand ((The only direction in which it seemed to me that I could make money was currency trading on the stock exchange, they call it Forex. But when I started delving into it, I realized that it was very difficult for me. I continued to dig further and came across binary options. The essence is the same as in Forex, but it’s much easier to understand. I started reading forums, studying trading strategies. I tried it on a demo account, then opened a real account. To be honest, I didn’t manage to start earning money right away, until I understood all the mechanics of options, I lost about 3,000 rubles, but as it turned out, it was a precious experience. Now I earn 5-7 thousand rubles a day. I managed to get the car buy after half a year, but in my opinion this is a good result, and it’s not about the car, my life has changed, I naturally quit my job, I have more free time for myself and my family. You’ll laugh, but I work directly on the phone)) If If you want to change your life like me, then here’s what I advise you to do right now: 1. Register on the site 2. Practice on a Demo account (it’s free). 3. As soon as you get something on the Demo account, top up your REAL ACCOUNT and go to REAL MONEY! I also advise you to download the application to your phone, it’s much more convenient to work from your phone. Download here.
Minimum permissible thickness of brake discs:
- For ventilated 17.8 mm
- For non-ventilated 10.8 mm
Brake discs are distinguished:
- Ventilated discs
- With gas outlets
- With perforation or grooves (slots)
- Collapsible
Let's look at each point in more detail.
The first option is ventilated discs . They are two separate disks, fastened together in such a way that they resemble blades (like a turbine). Thanks to these blades and channels, heat is dissipated more efficiently and the weight of the disc is reduced. Example of simple ventilated brake discs .
During active braking, if the brake discs are not cooled enough, their temperature can reach 180-250 degrees. Regular pads start to smoke. The gas released when the pads rub against the heated disc serves as a layer between the disc and the pad and prevents the pads from fitting tightly to the brake disc. This is the main problem why braking disappears . To prevent such cases, there are gas outlets, perforations and grooves. An example of brake discs with gas outlets .
Another reason for brake failure can be carbon deposits on the pads, which appears during frequent braking (on a race track). This carbon deposit turns the block into a slippery ski. Gas outlets and perforations cut off this slippery layer, renewing the pad. But they make brake pads wear out faster . Example of brake discs with perforations and grooves .
In addition, perforations together with grooves help remove water, dirt, and dust, which reduces the risk of scratching the brake disc. They also increase additional braking force and reduce disc wear . An example of brake discs with gas outlets and perforations .
The fourth option is collapsible disks . As we already know, when braking, the brake discs heat up and the heat is transferred to the hub, and at high temperatures this unit is likely to fail. This is why some companies offer collapsible brake discs . They are a working disk, which is bolted to the middle part, which is attached to the hub. An example of dismountable brake discs .
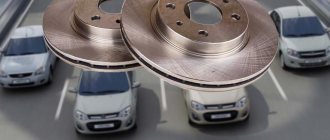
Because The majority of car owners operate their cars on city roads, and not on ring tracks and races, then the effectiveness of standard brakes will be sufficient . If you still want to improve the car's braking system , then you should not install rear disc brakes, but rather change the brake discs to a larger diameter and install perforated brake discs . You will feel the difference immediately, not only in braking, but also in the appearance of your car (for example, by illuminating perforated wheels with LEDs).