Cup holder in VAZ
I am very tired of repairing the first generation Lada Kalina car. This car is good for everyone (there should be a long list of advantages of this car, alas, not today)
, but there is one annoying moment - there is no cup holder. Those. it is not provided for in nature. Apparently, somewhere the engineers got a little greedy for their thoughts and decided not to bother themselves with thoughts about how to put it there.
Recently I got an obsession that I need a cup holder for my car. I can’t really sleep, I need a cup holder. Google suggested that there is an option to install a grant tunnel, install a bottle holder from a bicycle, or buy some Chinese product on a well-known website. Well, another option is to design (as the designer said loudly, well, well).
I won’t tell you how the design process began, because... otherwise there will be “a lot of beeches.”
These are the ideas it all started with.
Here the height is about 30mm, and at the back there are some kind of “clasps” to cling to the injectors (or whatever they are?) From below you can see how it was supposed to hold on. In any case, the idea seemed suitable.
How do you like my Photoshop skills?
Actually, that’s how I sent it to print. But .. the 3D printer said that it did not want to print such a thing, so it dropped the model somewhere at a height of 10-15mm, i.e. it didn’t even get to the “fasteners”. By that time the glue had already begun to dry out; due to my inexperience, I also put in quite a lot of filling. Therefore, it must have taken a lot of time. But it didn't go away.
Then it was decided that the part should be divided into two parts and then glued together. One part had to be 5mm high, the other, lower, about 25mm. I started typing from the top. (presented below)
It didn't work out here either. I think it’s also due to inexperience. I set the filling to 100% and RAFT, i.e. substrate on the printing table. While the printer was printing this substrate, the glue was also cooling. It turned out completely, hmm, unsuccessfully, in general it worked out.
Hmm, ok, here are the final results. I’m already tired of describing every step, this isn’t some dissertation, really.
Here the actual thickness is about 10mm (theoretical 15mm), the filling is also 100%, which is why it looks massive. Then the printer simply doesn’t want to print – it cancels. The glue no longer holds. In real life it looks something like this (plastic unprocessed in an acetone bath, sorry), and I also had to go through it with a file (after all, an experimental sample).
I immediately realized where I made mistakes and corrected the model to look like this. I made the distance between the rear “fasteners” larger and added a cutout for the air direction regulator. Printed it out.
Experienced people will notice that the model did not print completely (it’s not the printer’s fault, but the end of the working day, I had to stop printing). The filling was 50%. As you can see, the glasses stand quite high, this can be a little scary, but in fact, they sit very tightly and do not move. For this reason, in order not to frighten people in the future, I raised the section a little. Now the glasses will sit something like this:
Such things are happening, comrades Kalinovodov. And not only. I think the model can suit anyone.
SolidWorks says that at a density of 1060 kg/m3, its total weight when fully filled will be about 66 grams. I don't think anyone will need it 100% complete. In ruble equivalent this is approximately . if 15 rubles per gram, then 990 rubles from printers. But, in my opinion, you can safely bet 30-50%.
Lada Kalina Hatchback Kalino › Logbook › Installation of floor tunnel lining from grants to Kalina
Hi all!
It’s probably only the lazy who didn’t change their floor tunnel on Viburnum to a floor tunnel from Granta. Many people wonder, do I need this? What is better than a tunnel from a budget tunnel grant from Viburnum? Will there be much work to be done? Will it match the color? What else do I need to buy for everything to fit as it should?
I also asked myself these questions and gradually found answers to them! I’ll say right away that I used this description during installation:
I purchased all the necessary spare parts at the Plamya car market when I went to Tolyatti for a club test drive of the Kalina2, namely, to replace the floor tunnel we will need - the tunnel itself from Granta, the gear knob cover from Granta, rectangular heating buttons (from the Kalina they will also be installed, but the appearance will be not aesthetic) Here are the catalog numbers:
21900-5109154-00 — Floor tunnel lining assembly
21900-5109070-00 — Shift lever cover
Seat heating buttons – 2 pcs. (unfortunately there is no catalog number)
21900-8203010-00 — Ashtray assembly (for smokers, I didn’t buy it for myself)
I will briefly describe the installation process, although there is nothing complicated.
The viburnum tunnel is held on by 5 screws. In order to unscrew the rear screw, you need to lift the handbrake, remove the handbrake cover, remove the brake limit switch and you will have access to the screw.
After this, we unscrew the sidewalls, which are held on by 1 screw each.
We unscrew the last 2 screws securing the tunnel from the side, you will find them without a photo)
Then we remove the gearbox cover, the heating buttons, unscrew the fuse block and unclip the diagnostic block.
And moving the seats back as far as possible, we remove the viburnum tunnel. I also removed the ashtray.
Next, we remove the cigarette lighter from it, this is not quite as simple as it might seem at first glance, for example, I took a book on repairs and read it there.
Now you can compare what the difference is:
Now if you decide to install the cigarette lighter in the grants tunnel, you need to make a hole, I used a drill and enlarged the hole with a knife until the cigarette lighter fit, the approximate location can be seen in the photo
After this, you can install the tunnel from the grant in the reverse order, first install the tunnel, connect the heating buttons, pull out the diagnostic block and the fuse block closer to the gearbox, then mount them under the tunnel, I used double-sided tape and placed them under the cup holders, some just leaves them there without securing them with anything, the main thing is to make sure that they do not dangle, in the photo the cigarette lighter is already connected, the gearshift lever does not touch it.
In the photo below you can see how the cigarette lighter is located, in principle I had concerns that in this position it could be touched or it would get in the way, but everything is fine, it’s there like a native one!
After this, we screw in the screws, first the sides, but the photo shows that only one screw is needed here and not 2 as on the viburnum, since the tunnel from the grant is solid and the hole for the screw next to the air ducts is already located in a different place.
And we tighten the self-tapping screw at the back, assembling the handbrake and ashtray. I tied the gearbox cover from the grant with a tie
The lining of the tunnel from Granta fits and adheres remarkably well, without causing any doubts or fears) Here, for comparison, is what was and what has become.
Having checked the cup holders for capacity and ease of use, I can say that everything is excellent, indeed the main drawback of the viburnum in terms of convenience has disappeared, the new tunnel is pleasing to the eye even though it is still unusually dark) I had a desire to paint the ashtray black, especially after I installed there BC
The final look is something like this:
Decide for yourself whether or not to change the tunnel lining on your viburnum! I'm happy with the replacement, especially since it's all relatively cheap, I don't remember exactly, but about 800 rubles.
For those who are too lazy to read everything, answers to the most popular questions:
Q:
Why even change the Viburnum floor tunnel to a Granta tunnel?
A:
The most important thing is probably the presence of 2 cup holders, which the Kalina so lacks, as well as an additional niche under the handbrake for small items, a new design (by the way, the same tunnel is installed on the Kalina2) black color.
Top 5 modifications to Lada Kalina
Tuning
Hello everyone. This means that two years have passed since I owned this car, and as much as I remain satisfied with it, I have 5 life hacks for you that will help you when operating this car.
Well, I think that thanks to these life hacks, your car will also make you happy. Because the car, in this case, is mine for the sixth year, 2006, and there were some problems that it would be advisable to eliminate immediately.
Something is not a jamb, something, well, more has been done to improve it. Well, I still want to share with you, maybe this video will be useful to someone. So let's go.
Lifehack No. 1
This is Kalina's ECU, that is, almost all of Kalina's owners have probably encountered it; those who haven't, they already know about the drawback in the location of the ECU. Initially, Kalina's ECU is located here under the panel.
And there is a stove above the ECU, and Kalina’s stove tends to leak, but we’ll talk about this later, why and how. When the radiator leaks, the heater usually floods, which means the brains of the ECU.
Here's how I solved this problem? That is, immediately when I bought the car, I got it from there, screwed it on there with these covers and installed it here.
This is how I have it located here, here I have the lighting for the legs, that is, here, I placed it under the glove compartment, there it does not bother anyone, no one kicks it, as I initially thought that they would touch it with their feet, no one doesn't hurt, doesn't interfere with anything.
That is, I secured it with two bolts, the first, the second and that’s it. That is, this is enough. It stays here, nice, warm and dry. That is, I think this should be done first of all when buying Kalina.
Because if your brain is flooded, it’s a waste of money, which is unnecessary, so first of all, those who don’t know yet, be sure to do it. It literally takes 20 minutes and will save your wallet very well.
Suspension
In short, I read and realized that the Grant suspension, that is, it was better designed, the Kalinovsky jambs in the supports were removed, well, in short, without hesitation, I bought Grant struts assembled with supports, with springs, everything, both front and rear.
Here. I went to Avito, searched for Grant and found a broken Grant with 15,000 miles on it, so they were bought from it, I paid 3,000 rubles for all the racks. That is, the front, the back, everything is assembled, here.
That is, the suspension was changed about six months after the purchase, that is, a year and a half later, I did not regret at all that I installed it.
Now, since it has proven itself only from the best side, no noise, very soft, pleasant. Exactly, that is, the main thing is that there is a drain, that’s it. That is, I really liked the pendant, so I kind of recommend it.
The stove doesn't heat well
The second thing I encountered when owning this car is that the heater does not heat up enough. That is, well, sometimes it seemed like there wasn’t enough heat, that’s it. Plus airing the system and so on.
I also read it and realized that this was also done better on Grant than on Kalina. Well, as it were, Granta is the same Kalina, that is, with the jambs eliminated. That's why many people installed a Granta thermostat.
I installed it too, but you won’t be able to see it here. I installed, here, a Grant thermostat. That is, what are the advantages? It has much less, it has much less pipe of any kind.
That is, it is generally simpler. I'll leave you a link under the video to my DriveDvorra, where I have everything chewed up. So, what’s the point, that is, who is interested in Grant’s soda and in general in what I’m talking about, in general in all the alterations, that is, go in and read there.
A small cooling circuit on the Grant thermostat, it goes, that is, the engine and the heater radiator, that is, what do we get? We start the car, as soon as the engine warms up, it immediately releases heat into the interior onto the radiator.
That is, before, if I was driving to work in winter, that is, I literally had to get to work so that it would become more or less warm in the car, now, that is, it’s enough to drive, well, warm up a little and drive a couple of kilometers .
And that’s it, it’s already kind of warm in the car, that’s it. That is, this is the main advantage. There’s no airing, there’s none of that. But, that is, the point is airing, you will have air in the stove, well, the stove there is, in general, a honeycomb, but alteration will not help.
But once a year I still try to change them. Well, here the opinion of potassium growers is generally divided, that is, into two types. Some say that it’s better not to mess with your native system, it’s just that you have a handicap there, that’s not the point, there are those who seem to change and are happy.
Here. I am one of those who change and am happy and have not regretted it at all. In terms of money, it all worked out, I installed all the pipes there that were needed, well, I installed everything new in short, it came out to about 3000, I don’t regret it at all, that is, there are only advantages.
Mirrors
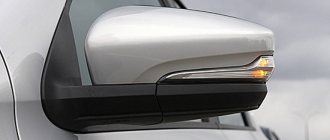
The next thing I would like to note when owning a Gran, oh Kalina, is the mirrors. That is, mirrors from 2006, I won’t even say, to be honest, at what price, they cost very small drops like this, those who have them know that after restyling they already have these.
That is, I cannot skip this point. Mirrors, they are small and uncomfortable. Here. That is, I decided to change it. Since I still didn’t have enough heating, I also bought mirrors like this from Granta.
The mirrors are very comfortable and have a good view. That is, some advantages. Plus they come with heating. Here. They fit into their standard places without any modifications. That is, when you remove the old one, this one from Granta also comes in without any problems.
Here, the plus goes here, which means heating, I just ran a wire, it connects to the heated rear window button. That is, the Internet is also full of information on this topic, heating is also very convenient.
Tunnel of shelves
So, well, that means the last thing I would like to focus on today regarding the remodeling in Kalina is the tunnel, the tunnel of Kalina shelves. This means that whoever has the standard one, they know that there are not enough cup holders, first of all.
That is, we have switches there, fuses, for access to this ECU, for someone who has not yet transferred it. So, for the sake of reliability, that means I also sawed the Grant tunnel.
Just like that, I simply assembled it with self-tapping screws, well, it doesn’t catch the eye as it seems at first glance, but on the other hand, if a fuse or relay suddenly blows out, then I can easily change it.
And so, there are only advantages, that is, it is very convenient to go somewhere with cup holders. That is, these bottles and glasses don’t fly around the cabin. Cigarette lighter, cigarette lighter, so we remove it.
I bought this splitter for 2 and simply connected it to these wires that went to the cigarette lighter. Very convenient, only one plus. This one also needs to be installed with a cover from Granta, plus I immediately installed the handle.
Remaking the handle, how to make a handle so that it fits here, I also have a recording in the drive. Here are the links again in the description. Heated seats. My seats are not original, that is, if you have original seats, just connect them this way.
My seats are not original at all, the seats are from Opel Omega. Here. I have an electric drive. These are the seats. The heating is connected, that's all. But today, as they say, that’s not what they’re talking about.
So, well, I told you everything I wanted. That is, the top 5 of your modifications to the car. This is natural, these are not all the modifications that are in this car, I did a lot of things in my free time.
The car is used every day, unlike the six. Six so, for the soul, for the project.
And Kalina is on everyday life, no, it’s all the same, she’s like before the creation of the channel, a lot has been done with her, a lot will still be done. That is, I like the car, I’m going to drive it.
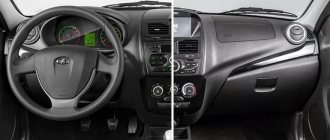
Torpedo Kalina or Granta FL
The following are instructions for cars with such a dashboard:
Required
:
1. Center console:
- instrument panel trim (21925-5325182)
- central air ducts (or intermediate air duct housing for the monitor for Lada Kalina 2) (2195-8104209/08)
- solar radiation sensor (21920-8121300)
2. Multimedia system:
- multimedia display (article 21920-7900100, make sure you have an interface cable)
- multimedia equipment (21920-7900200 or navigation 21920-7900300)
Procedure
:
- Remove the instrument cluster, glove compartment, center trim and air ducts (move back a couple of fasteners from above).
- Install the air ducts, modifying the fastenings in place (for example, use furniture corners).
As a result, the air ducts should go down a little:
- Install the screen and multimedia system on standard mounts.
- Connect the display to the multimedia unit.
- Attach the solar radiation sensor to the frame.
- Install the center console.
How to make a cup holder for a car with your own hands
For those who spend a lot of time in the car or simply value comfort in the cabin, various devices are important to create maximum comfort in various situations. Such useful accessories include holders for glasses, bottles, stands for phones, keys, etc.
Most drivers recognize cup holders as useful devices that allow you to securely secure a glass of drink and prevent liquid from getting on the seat. After all, it’s no secret that unfinished coffee, tea or cola can ruin the interior trim. And those who have to drink drinks “on the go” to save time are increasingly among both drivers and passengers.
Many modern models are equipped with cup holders from the factory, but often require mounts for glasses of different sizes or for places where passengers are located. Therefore, this accessory is sold both online and in real auto parts stores, and is represented by a large assortment of models with prices ranging from 200 to 2000 rubles.
Here are solutions for those who don't have cup holders in their car.
Have you noticed how the country's vehicle fleet is gradually changing: there are more and more modern cars on the roads every year. People are gradually getting rid of old cars, replacing them with newer ones. But, unfortunately, not everyone can afford this yet. But there are also those who do not want to exchange their old car for a new one, believing that the old automobile industry is better, of higher quality and more reliable. And partly there is some truth in this.
The only thing where many older cars fall short is the lack of many simple options and technologies that make life easier for owners of modern cars today. For example, many older cars do not have cup holders for drinks, which is very annoying for many car enthusiasts. But it doesn’t matter – there are many solutions in the world for those who have nowhere to place drinks in the cabin. We have collected various mods and hacks for you that will help solve the problem associated with the lack of cup holders. Including some methods that are quite funny.
Making a cup holder for a car
The configuration of most cars does not include a cup holder.
Therefore, you have to buy them separately if the car owner likes to drink coffee during the trip. While a cup of coffee or tea cools down, the driver’s hands are free - this is the main advantage of having a cup holder in the car. Its presence is very important if children often ride in the car with their parents. By the way, if you are interested in the idea of installing a cup holder in your car, then the author of this homemade product invites you to make it yourself! We will need:
— plastic connectors for sockets (diameter 80 mm); - sandpaper; - annular drill of suitable diameter; — PVC pipe connectors (diameter 80 mm, should taper downwards); — silicone sealant with glue; - scissors and cardboard; - wire cutters; — additionally: a thin marker.
So, first of all, the author suggests modifying the gearbox console. Simply remove it and use a hole saw on a convenient work surface to cut two slots for the cup holders.
Just before drilling, be sure to mark the locations of the holes! To do this, use a cardboard template. Leave a small gap between the holes - 1.5 centimeters will be enough. You can also make templates yourself without any problems: attach the pipe to the cardboard, trace it with a marker in the outer circle - you're done!
Use wire cutters to cut off the side edges from the socket connectors. We don't need them for this homemade project. Insert the remaining plastic circle into the back of the pipe. The parts are held together using ordinary superglue. Press the parts together, wait - the glue should set. Cut off parts of the resulting base if they protrude beyond the pipe. Be sure to sand the edges of the cuts.
Tip: in addition to pliers, you can use a file for cutting.
Lubricate the bottom of the cup holders with silicone sealant, you don’t want them to rattle while driving and distract you from the road. Also seal the gaps between the gearbox console and the cup holders with sealant. Now the cup holders in the car will be stable.
Wipe off any excess sealant immediately. After drying, sand the transition area again with sandpaper, then the cup holders will look aesthetically pleasing.
Wipe the transmission console with a damp cloth, and do the same with the cup holders to remove debris.
That's it, the cup holders for your car are ready! Everything is extremely simple, try it and improve your car! Become the author of the site, publish your own articles, descriptions of homemade products and pay for the text. Read more here.
Ready-made car cup holder lighting
For the last category of car enthusiasts, we can recommend a purchased option. Here, too, you will need to work, but without the need to use tools - you just need to install the finished element in the form of a circle at the bottom of the cup holder niche. There are options on sale with the logos of most car brands, so you will certainly find yours.
The only difficulty is to provide recharging via a USB cable - it all depends on the specific model and your ingenuity.
The battery life from the built-in battery is up to 15 days, the full charging time does not exceed 2 hours.
The backlight is adjustable, there is a switch at the back of the product. The device is intelligent - if there are no vibrations, the backlight turns off; there is also a light sensor that turns off the LEDs when it is light in the cabin.
The delivery set includes two circles and a charging cable. Such pleasure costs from 700 to 1000 rubles.
Do-it-yourself cup holder in a car
The configurations of most cars do not include cup holders. Many car owners purchase them after purchasing a car, if necessary. The advantage of cup holders is that the driver remains hands free while a cup of hot coffee or tea cools down. Children can also put their drinks in the cup holder, and the chance that the contents of the cup will spill throughout the cabin is minimal. You can not only buy cup holders, but also make them yourself.
To make a glass holder with your own hands, prepare:
- connectors for PVC pipes with a diameter of 80 mm, tapering downwards;
- plastic connectors for sockets, 80 mm in diameter;
- drill;
- annular drill of suitable diameter;
- sandpaper;
- glue;
- silicone sealant;
- cardboard;
- scissors;
- thin marker;
- wire cutters
. The first step is to modify the gearbox console. To do this, it is better to remove it and cut out two connectors for the cup holders on the working surface using an annular drill and a drill.
Before drilling, be sure to mark the hole locations with a cardboard template. Leave a small gap between the holes, about 1.5 cm. Also make templates yourself by attaching a pipe to the cardboard and tracing it in the outer circle with a marker.
. Insert the pipes into the holes and adjust the connectors to them. Sand the cut edges with sandpaper.
. Use pliers to cut off the side edges from the plastic socket connectors. They will not be needed in this work. Insert the remaining plastic circle on the back of the pipe. Fasten these parts with superglue. Press them together until the glue sets. Cut off the parts of the resulting base that protrude beyond the pipe. Be sure to sand the edges of the cuts.
If you don't have suitable wire cutters, you can use a file to trim.
. To prevent the cup holders from knocking while driving, lubricate them with silicone sealant from below. Use it to process the gaps between the cup holders and the gearbox console. Thanks to the last stage, the cup holders will be stable.
. Wipe off any excess silicone sealant immediately. After drying, sand the transition area again with sandpaper to make the cup holders look aesthetically pleasing.
. Wipe the transmission console and cup holders with a damp cloth, removing work dust and debris.
The cup holders for the car are ready.
Related posts:
Cold engine start
LED illumination of KIA badge
Car phone stand
DIY car fastening loop
Ready-made cup holders
The most popular are universal stands, which can be of very different designs. For example, you can purchase a cup holder with three compartments at once. It is mounted between the front seat and the center console. Such a product will cost about 500 – 800 rubles.
If this design seems too cumbersome, then you should pay attention to the cup holders in the car, which are attached to the air duct. There are a huge variety of such models. Some even come with a special phone holder. Such products cost about 200 - 500 rubles.
You can also find silicone products on sale today. However, they should only be used when parked, so that the glass does not move across the dashboard.
However, not only adults, but also the younger generation like to enjoy fast food in the car. For this case, special car seats with cup holders are provided. As a rule, the cost of such models ranges from 3,400 to 24,000 rubles, depending on the sophistication of the seat itself.
There are also retractable models that are installed in the armrests. If you don’t want to spend money on such an accessory, you can make it yourself.
How to make a cup holder for a car with your own hands?
Have you ever forgotten your keys? We think what happened. This is especially unpleasant when the key is forgotten, for example, at home, and you arrive at the dacha or vice versa. It's even worse if you suddenly lost or forgot your car key. How to be in this case? It's simple.
It is enough to purchase a sealed case designed for one key and secure it somewhere on the car body using a powerful magnet. By the way, this case will be useful for those who often give the car to friends or acquaintances, but do not have time to meet in person to hand over the keys and documents.
It will be enough just to leave the documents for the car in the car, and hide the case with the key somewhere in the wheel well or on the suspension arm. Such a case costs an average of 500 rubles.
Protection of door handle niches
Scratched door handle niches are not only unsightly, but over time can also lead to the door starting to rust in that area. How to protect the body in this place from the manicures of stylish ladies or the bitten nails of friends at the sports bar? There is a solution.
