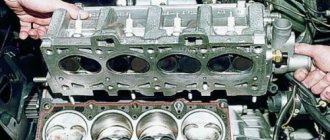
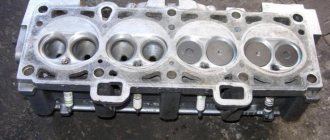
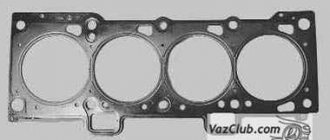
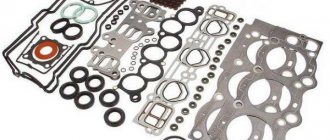
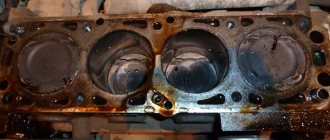
When assembling the cylinder head after replacing the gasket or repairing the cylinder head, it is important to tighten the bolts to the torque recommended by the automaker. But different instructions suggest using two different schemes for tightening the VAZ-2107 cylinder head with a torque wrench. Let's figure out what is their difference, and how the cylinder head is tightened on a VAZ 2107 , and with what force.
The table below shows both options for the cylinder head tightening torque diagram on a “classic” VAZ, depending on the type of bolt. Because classic bolts require only two passes , but modern torsion bolts , due to their properties, require four passes . In the article we will look at everything in more detail.
| Bolt type | Diagram and tightening torques of the VAZ-2107 cylinder head bolts |
| Classic bolts | During the first pass, the bolts are tightened to 4.0 kgf/m. During the second pass , tighten the bolts with a torque of 11.5 kgf/m. Bolt No. 11 size M8x45 is tightened with a torque of 3.8 kgf/m. |
| Torsion bolts with elastic deformation | On the first pass , tighten the bolts with a torque of 2.0 kgf/m. During the second pass, it is necessary to tighten with a force of 8 kgf/m. During the third pass, tighten all the bolts at an angle of 90 degrees. For the fourth, you need to tighten all the bolts 90 degrees again. Bolt No. 11 size M8x45 is tightened with a torque of 3.8 kgf/m. |
Price list
- Special offers
- KAMAZ spare parts
- Spare parts KAMAZ-5490
- Spare parts MAZ, YaMZ
- ZIL spare parts
- Spare parts ZMZ, for GAZ vehicles
- Spare parts for Volzhanki cars
- Spare parts for Gazelists
- Spare parts for trucks Lawns
- Spare parts for GAZ-71 caterpillar
- Spare parts UAZ, UMZ
- Spare parts KrAZ, BelAZ
- Spare parts URAL
- Spare parts BUSES
- AMAZ spare parts
- IKARUS spare parts
- KAVZ spare parts
- LAZ spare parts
- LIAZ spare parts
- NEFAZ spare parts
- PAZ spare parts
- Other buses
- Tractors, computer equipment, attachments
- Tractors and walk-behind tractors
- Municipal vehicles
- Attachments and trailed equipment
- Spare parts for TRACTORS and SPECIAL EQUIPMENT
- JCB - spare parts for special equipment
- Truck crane (KS-3577, KS-4517, etc.)
- AMZ (A-01, A-41, D-440, D-442, D-447, D-461, D-467)
- Amkodor (TO-18, TO-28, TO-30, etc.)
- ATZ (T-4A, TT-4M)
- VgTZ (DT-75)
- VMTZ (D-120, D-144, D-130, D-145T)
- VTZ (T-25, T30A-80, VTZ-2048)
- LTZ (T-40, LTZ-55, LTZ-60)
- MKSM, UNC, DETVAN
- MTZ - spare parts for tractors
- OTZ (TDT-55)
- PTZ (K-700/701/702/703/704)
- KhTZ (T-150, MT-LB)
- ChTZ (T-130, T-170, B-10, B-12, B-170, T-10M, DET-250)
- YuMZ - spare parts for tractors
- Other special equipment and tractors
- RVD - high pressure hoses and sleeves
- MMZ spare parts and engines
Different bolts and tightening degree of the VAZ-2107 cylinder head. What is the difference
The “classic” was originally equipped from the factory with ordinary M12x120x1.25 bolts for a 19mm head. Their original catalog number was 2101-1003271 or 21213-1003271.
The second number suggests that such bolts were also used on the VAZ-21213 Niva, which is why they are also called “Niva bolts”. Another colloquial name is “penny”. But most often they are simply identified as “cylinder head bolts for an old-style classic.” On VAZ-2108 and VAZ-2109 cars, torsion bolts of a new type began to be used, which are also suitable for the “classics” - M12x115x1.25. They were unscrewed and tightened with a 12mm hexagon. It is noteworthy that AvtoVAZ’s catalog number remained the same, 21213-1003271. And it is the bolts of the new type that are sold in the original packaging. Their difference is that they “stretch” - and if correctly, they undergo elastic deformation. Actually, this is why you need to turn it twice by 90 degrees.
Old style cylinder head bolt
New sample cylinder head torsion bolt
Pay attention to the length of these bolts, encoded in the markings. 5mm difference with regular bolts
It is by these 5 millimeters that the bolt is deformed, completely filling the internal thread.
What is the difference between these bolts, other than the first ones are not sold in the original packaging and different bolts require different torque patterns? Classic bolts can be reused many times if their condition allows it. But on the other hand, you need to remember to do preventive tightening of the cylinder head bolts. About once a year, or more often, you will have to check the tightening torque of all the head bolts of your VAZ-2107 and tighten them if necessary.
The new type bolts do not require such a procedure, because due to elastic deformation they provide constant pressure on the cylinder head cover. But such bolts are disposable. When disassembling the cylinder head, you will have to buy a set of new ones. And unscrewing such bolts can be complicated by the fact that bolts tightened without a torque wrench can break.
Judging by the reviews of car owners, very often they can be unscrewed only by welding the nuts to 19. Therefore, many try to find old-style bolts, which are less troublesome.
The nuances of replacing the gasket
Some resources advise studying the gasket to find out what kind of damage has occurred on it. This, in fact, is just a waste of time, because the specified element cannot be repaired. Just throw away the old one and install a new one.
It is necessary to stop at the last point. After removing the old sealing element, thoroughly clean the surface underneath it. If necessary, treat with fine sandpaper - only on an ideal, even base does it make sense to install the purchased gasket. The slightest bulge, even with proper tightening, will cause a leak.
Before replacing the head, make sure that all the valves of your VAZ car are in good working order.
Pay special attention to the oil seals - it is better to replace worn ones immediately. If a new type of gasket is used on the machine, then it is mounted on sealant - apply it around the perimeter on both sides
The order of tightening the block head (cylinder head)
The order and tightening torques of the cylinder head bolts on a VAZ.
This order is necessary in order to correctly connect the cylinder head and the cylinder block. To avoid distortions and excess metal tension.
Diagram and procedure for tightening the cylinder head on a VAZ 2101 - 07 (classic)
The cylinder head bolts are tightened in two steps.
First run: bolts 1 - 10 are tightened to a torque of 3.5 - 4.1 kgf*m.
Second pass: the same bolts, but tightened with a torque of 10.5 - 11.5 kgf*m
Bolt 11 is tightened last, with a torque of 3.5 - 4.0 kgf*m.
The procedure for tightening the block head of VAZ 2108 - 09, Samara.
The tightening order is similar to the classic one, also starting from the center.
But it is carried out in 4 steps.
1. Bolts are tightened to a torque of 2.0 kgf*m
2. Tighten to a torque of 7.5 - 8.5 kgf*m
3. The bolts are turned 90 degrees.
4. Once again turn 90 degrees.
The procedure for tightening the block head of 16-valve VAZ engines.
Same as everyone else, from the center.
1st dose - 2.0 kgf*m
Step 2 - tighten the bolts 90 degrees
Step 3 - tighten the bolts again by 90 degrees.
Attention! On 16-valve engines, reuse of cylinder head bolts is allowed, BUT if their length without head does not exceed 95 mm. If the bolt length is more than 95 mm, it must be replaced. The length is measured with a washer
The length is measured with a washer.
To work you need to use a torque wrench
Its cost is from 600 rubles, more professional ones from 1300 or more.
Features of the work performed using the example of some cars
To prove the proposition that each power plant has its own characteristics of tightening the cylinder head, let’s consider the nuances of performing work on specific models.
VAZ-2112 16 valves
A number of modifications of the VAZ-2112 were equipped with two types of 16-valve power plants (factory indexes - 21120 and 21124). These two motors, despite some design features, have identical head tightening technology.
These units use 93mm long tension bolts. In this case, reuse of fasteners is allowed, but under one condition - if their length does not exceed 95 mm (if it is longer, they should be replaced). 10 bolts are used to secure the head.
Tightening is carried out in three approaches:
- The bolts are tightened according to the order with a force of 2 kg/m;
- Turning 90 degrees;
- Repeated tightening to 90 degrees.
The drawing diagram is shown below.
Between the 2nd and 3rd approaches you need to take a 20-minute break.
Since these engines use tensile bolts, additional tightening is not required during vehicle operation.
VAZ-2107
On the VAZ-2107, all installed modifications of power units are 8-valve.
The block head is attached to them with 11 bolts, 10 of which are main, and 1 is an auxiliary side bolt (installed in the side protrusion).
On this car, tightening fasteners is also performed in three approaches:
- 10 main bolts are tightened in order with a force of 3.5-4.0 kg/m;
- The same bolts reach with a torque of 11.5-12.0 kg/m;
- The auxiliary is tightened with a force of 3.5-4.0 kg/m.
Additional tightening of the cylinder head is not required when operating the VAZ-2107.
"Samara", 10th family, Priora
On models of the Samara family (2108-21099), as well as VAZ 2110-2112 with 8-valve units, tightening is already performed in 4 approaches:
- Tightening with a force of 2.0 kg/m;
- Reaching with a moment of 7.5-8.5 kg/m;
- Turn 90 degrees;
- Repeated rotation by 90 degrees.
The break between points 3 and 4 is 20 minutes.
As for the VAZ of the “tenth” family, which are equipped with 16-valve engines, their tightening technology is the same as that of the VAZ-2112 (described above).
The same applies to the Lada Priora; on 8-valve units, a method with 4 approaches is used (VAZ 2108-21099), and on 16-valve units, 3 approaches are used (VAZ 2112 with a 16-valve engine).
"Volga"
On ZMZ-406 engines installed on the Volga, according to the automaker’s technical documentation, tightening the engine block head bolts is carried out in two approaches:
- With a force of 4.0-6.0 kg/m;
- With a moment of 13.0-14.5 kg/m.
But many car owners of this car note that this technology does not allow the cylinder head to be properly tightened, so they use techniques with a large number of approaches.
A common method is the cross method, performed in 4 stages and with the following efforts:
- 4.0-4.3 kg/m;
- 7.5 kg/m;
- 11.0 kg/m;
- 14.3-14.5 kg/m.
Subsequent tightening of the bolts is not required when operating on this engine.
Removing and installing the camshaft
Removal is most often necessary either during a major overhaul or for replacement in cases of failure. To carry out the work, the following tools are required:
- heads for 10, 13 and 17;
- handle with ratchet;
- knob;
- extension cord with cardan;
- socket wrench 13;
- device for mounting and dismantling the VAZ camshaft.
First, the valve cover is removed, which is bolted to the cylinder head and has a rubber gasket. Try not to damage it, otherwise oil may leak in the future. After this, the timing chain tensioner is unscrewed. It is located on the right side of the engine when viewed from the interior. The camshaft gear is turned by the head to 17.
For convenience, place the car in gear and place wheel chocks under the rear wheel. Move the gear to the side; if necessary, you can pry it off with a convenient tool. Now all the nuts that secure the camshaft housing must be unscrewed. To make the job easier, use a wrench first.
What does the cylinder head consist of?
The cylinder head is designed the same on any type of engine. It consists of:
- housing (head), in which the channels of the oil and cooling systems pass;
- intake and exhaust valves;
- one or two camshafts.
The housing is the main element of the cylinder head. It circulates lubricant and coolant and is the basis for camshafts and valves. If the cylinder head housing is correctly secured to the engine block, then all engine systems operate normally.
If the cylinder head is not tightened evenly, then there is a high probability of cracks forming in the head housing. The cylinder head is made of aluminum, and the mounting bolts are made of steel. Therefore, the thermal expansion of the head and bolts is not the same.
If any part of the cylinder head is not tightened well, this will lead to stress in it, because one part of the head will increase more than the other.
Torque Tips and Common Mistakes
- Do not jerk the cylinder head bolts. Tightening should be done smoothly.
- When installing cylinder head bolts (especially old ones), carefully examine their condition - there should be no damage to the threads. Exactly the same as inside the installation site.
- If necessary, the part must be cleaned of contamination.
- It is better to lubricate the threads with oil, but pouring them into the mounting holes is not recommended. If the wells are blind, then the lubricant must be applied very carefully. Fluids do not compress and excess lubrication will prevent you from tightening the bolt all the way.
- Failure to use a torque wrench may result in inaccurate tightening torques and incorrect gasket operation or damage to the cylinder head.
In what cases is it needed?
When the machine is used for a long time, traces of engine oil or coolant leaks sometimes appear. In this case, it is necessary to immediately tighten the cylinder head fasteners, otherwise serious engine repairs may be required. The causes of leaks may be overheating of the power unit and non-compliance with the bolt tightening order.
When the tightening force of the engine mounting screws is lower than recommended, burnout of the gasket may occur, which will entail dismantling the head and then replacing the damaged part. There have been cases where repairmen do not follow the order and tightening torque of the cylinder head, so experienced drivers check the condition of the bolts after driving 1 thousand km after repairing the engine.
Some motorists have no idea why follow the sequence and adjustment of the tightening torque of the cylinder head bolts. The motorist must understand that the use of inappropriate technology will result in problems with the operation of the engine.
This is very important and means that it should be given attention. Especially if you are used to repairing your “iron horse” yourself, and not turning to a service station for help
The numbers indicate the motor elements that need to be tightened.
Before we get to the issue of the order of tension of the cylinder head elements, we note that each engine has its own tightening torque. Accordingly, the coefficient is different for each car.
Some motorists believe that if they have repaired an engine or tightened its screws, then they have enough experience. But it should be borne in mind that this procedure must be carried out only in accordance with certain engine parameters. This information can be found in the owner's manual for your car.
Oil leakage is one of the reasons for the need to tighten engine components
Note that the tension moment is influenced by several factors. If you do this yourself, you need to know what affects:
quality and lubrication of the holes, as well as the screws themselves. If the holes are dry or practically not lubricated, then this needs to be done. For lubrication, it is advisable to use non-viscous motor fluids
Pay attention to the condition of the thread and the element that goes into it. If the motor components are deformed and the threads are clogged, then it is better not to proceed with tensioning
Sooner or later this will lead to a decrease in the compressive force coefficient of the gasket, and as a result this can turn out very badly. Up to engine overhaul. Are you using a new bolt or an old one? If it is new, then its resistance and tightening torque indicator will be incorrect. Experienced professionals recommend that when using new screws, the tightening process should be carried out after two or three tightening cycles. To do it correctly, the element needs to apply a little force and tighten the element 50% after the tightening torque.
Similar work (tightening) is done when the reverse process of assembling a car engine is carried out. And how correctly, securely and firmly the cylinder head bolts are tightened can greatly affect the operation of the combustion chamber, gas distribution mechanism and the engine as a whole.
In addition to water getting into the engine oil, engine power may sharply decrease, engine noise may sharply increase, etc. In any case, nothing good will happen after improperly tightening the cylinder head.
To tighten the cylinder head bolts with sufficient force, be sure to use a special tool, in this case a torque wrench. It has a special scale that will allow you to determine the force with which you need to tighten the cylinder head bolts. Each motor has its own tightening parameters; you will learn them from the repair manual for the motor of this machine.
Next, we will try to explain in detail and demonstrate in photos the key points on how to correctly and securely tighten the cylinder head bolts in order to ensure reliable and proper operation of the car engine for a long time.
Tightening torques for the head of the block VAZ 2108 - 21083, 2110, 2111
Screw in the bolts 4 times in the order shown in the image
For screwing, the following tool is used: adapter 67.7812-9543 for bolts of brand 2108-1003271, wrench TL-98-110 with parameters E14 for bolts of brand 2108-1003271-01, bend and extension or power tool of brand IP - 3111.
| Engine model | Cylinder head bolt number | Tightening torque of VAZ cylinder head bolts, N/m | |||
| Elementary | Second time | Third time | Final | ||
| VAZ 2108 - 21083 | from 1 to 10 | 18 ÷ 22 | 70 ÷ 85 | turn it 90o | turn 90o |
| VAZ 2110 | from 1 to 10 | 18 ÷ 22 | 70 ÷ 85 | turn it 90o | turn 90o |
| VAZ 2111 | from 1 to 10 | 18 ÷ 22 | 70 ÷ 85 | turn it 90o | turn 90o |
Rest
For other threaded connections, the tightening torques are as follows:
- M6 - 10 Nm;
- M8 - 25 Nm;
- M10 - 50 Nm;
- M12 - 105 Nm;
- M14 - 180 Nm.
Let us remind you that we previously published a collection of technological instructions for Lada Vesta. With it you can repair your car yourself.
Keywords: Lada Vesta engine | Lada Vesta clutch | gearbox Lada Vesta | front suspension of Lada Vesta | rear suspension of Lada Vesta | steering mechanism Lada Vesta | Lada Vesta brakes
5
Found an error? Select it and press Ctrl+Enter..
Coronavirus has an impact on AvtoVAZ, new details
What is the maximum speed of Lada Granta Lux
Replacing ignition coils and spark plugs on LADA cars
AvtoVAZ explained what to do if the symbols of the Lada Vesta instrument cluster flicker
Basic recommendations
First of all, it should be noted that such a procedure can be carried out after repairing the power unit or in order to check the tightening torque of the bolts during engine operation. If the cylinder head has been dismantled, you should carefully inspect the bolts, as well as the holes in the cylinder block for their installation. Screws must not have elongation or deformation of the threaded part. The holes in the block for the bolts are cleaned of any remaining engine oil, liquid, or other foreign particles. If this is not done, the cylinder block may be damaged, and the cylinder head will not be able to be tightened with the required force.
This is interesting: Causes of valve knocking on a cold engine and how to eliminate them
Work should begin only after reading the vehicle manufacturers' recommendations for operation and repair. There the driver will find all the necessary information to complete the job, including the forces and sequence of tightening the bolts.
Another feature of using such bolts is their installation at a certain angle. To do this, you will need a special key with an indicator that will show the degree of inclination.
User Igor Ivanov shows in the video the installation and tightening of the cylinder head.
Bolt tightening torque (force)
The tightening torque for the bolts is different for each car (due to design features). Each vehicle has its own table of fastener tightening torques. In the next section, we will consider the cylinder head fastening forces using the example of a VAZ head.
Table: tightening torques for connections depending on thread diameter
| Nominal thread diameter | Turnkey size of head, bolt (nut), mm | Thread pitch, mm | Strength classes according to GOST 1759–70 | ||||
| Bolt | |||||||
| 5.8 | 6.8 | 8.8 | 10.9 | 12.9 | |||
| screw | |||||||
| 6 | 10 | 1 | 0,5 | 0,8 | 1,0 | 1,25 | 1,6 |
| 8 | 12 — 14 | 1,25 | 1,6 | 1,8 | 2,5 | 3,6 | 4,0 |
| 10 | 14 — 17 | 1,25 | 3,2 | 3,6 | 5,6 | 7,0 | 9,0 |
| 12 | 17 — 19 | 1,25 | 5,6 | 6,2 | 10,0 | 12,5 | 16,0 |
| 14 | 19 — 22 | 1.5 | 8,0 | 10,0 | 16,0 | 20,0 | 25,0 |
| 16 | 22 — 24 | 1,5 | 11,0 | 14,0 | 22,0 | 32,0 | 36,0 |
| 18 | 24 — 27 | 1,5 | 16,0 | 20,0 | 32,0 | 44,0 | 50,0 |
| 20 | 27 — 30 | 1,5 | 22,0 | 28,0 | 50,0 | 62,0 | 70,0 |
| 22 | 30 — 32 | 1,5 | 28,0 | 36,0 | 62,0 | 80,0 | 90,0 |
| 24 | 32 — 36 | 1,5 | 36,0 | 44,0 | 80,0 | 100,0 | — |
Correct tightening order
There is a certain order for tightening the bolts; it is the same on almost all cars - from the center of the head to its edges, cross to cross. So, for example, the two central bolts of the right and left rows are tightened first, then the two bolts located to the left of the central ones, then the two to the right of the central ones, then the two bolts located on the left in both rows, and the bolts located on the right in both rows complete the order.
It is important to remember that fastening is always performed in three to four approaches:
- The first approach is a force of 3-4 kgf.
- The second approach is a force of 7 kgf.
- The third approach is a force of 9 kgf.
- The last approach is a force of 11.5 - 12 kgf.
Some nuances
The tightening torque is one of the main factors for the normal fit of the block head. But this criterion is influenced not only by the applied force, but also by the fasteners themselves:
- General condition of the bolts – new or used;
- Presence of lubricant on the threaded part;
- Thread condition.
The type of power plant (petrol, diesel), as well as the number of valves, does not affect the cylinder head tightening technology. But this does not mean that the force and tightening procedure are identical for all motors, and before seating the head, you should definitely study the conditions for performing the operation and all its features.
Errors when installing the head
If you do not use a torque wrench when installing the cylinder head, you may make a mistake with the force, which will lead to uneven torque. In such cases, there will be excessive or insufficient force, which will result in either deformation of the head surface or allow the breakthrough of gases, oil or coolant. In both cases, this is fraught with serious consequences for the engine.
If you follow the rules for tightening the fastening bolts, as well as the required torque, you can always count on reliable and durable operation of the installed parts. The gas distribution mechanism in the engine plays a major role, so you should not neglect the rules for installing the component elements.
Features of the work performed using the example of some cars
To prove the proposition that each power plant has its own main characteristics, let’s consider the nuances of carrying out work on specific models.
VAZ-2112 16 valves
Numerous modifications of the VAZ-2112 were equipped with 16-valve power plants of two types (factory indexes - 21120 and 21124). These two motors, despite some design differences, have the same head clamping technology.
These units use 93mm tension bolts. In this case, reuse of fasteners is allowed, but under one condition: if their length does not exceed 95 mm (if longer, they must be replaced). 10 bolts are used to secure the head.
Tightening is carried out in three approaches:
- Bolts are tightened to order with a force of 2 kg/m;
- 90 degree rotation;
- Repeated extension to 90 degrees.
The traffic pattern is shown below.
Between the 2nd and 3rd approaches you need to take a break for 20 minutes.
Since these engines use traction bolts, no additional tension is required when operating the vehicle.
VAZ-2107
On the VAZ-2107, all installed modifications of power units are 8-valve.
The block head is attached to them with 11 bolts, 10 of which are main and 1 are auxiliary side bolts (installed in the side bar).
On this machine, fastener tightening is also performed in three approaches:
- 10 main bolts are tightened to order with a force of 3.5-4.0 kg/m;
- The same bolts reach a torque of 11.5-12.0 kg/m;
- The auxiliary is tightened with a force of 3.5-4.0 kg/m.
There is no need for additional tightening of the cylinder head when operating the VAZ-2107.
"Samara", 10th family, Priora
On models of the Samara family (2108-21099), in addition to the VAZ 2110-2112 with an 8-valve unit, tightening is carried out in 4 approaches:
- Clamping force 2.0 kg/m;
- Traction with a moment of 7.5-8.5 kg/m;
- Rotate 90 degrees.;
- Return 90 degrees.
The break between points 3.4 is 20 minutes.
As for the “tenth” VAZ family, equipped with 16-valve engines, their clamping technology is the same as that of the VAZ-2112 (described above).
The same applies to Lada Priora, on 8-valve units a method with 4 approaches is used (VAZ 2108-21099), and on 16-valve units - 3 approaches (VAZ 2112 with a 16-valve engine).
"Volga"
On ZMZ-406 engines installed on the Volga, according to the automaker’s technical documentation, the cylinder block cylinder head bolts are tightened in two ways:
- With a force of 4.0-6.0 kg/m;
- With a torque of 13.0-14.5 kg/m.
But many car owners of this car note that this technology does not allow the cylinder head to be properly tightened, so they use techniques with a large number of approaches.
The most common is the crossover method, which is performed in 4 stages and requires mandatory actions:
- 4.0-4.3 kg/m2;
- 7.5 kg/sq.m;
- 11.0 kg/m2;
- 14.3-14.5 kg/m2.
When working with this engine, no subsequent tightening of the bolts is required.
When is it necessary to puff?
First, let's look at the cases in which it is necessary to tighten the bolts of the cylinder head of a VAZ 2106 car engine:
- If engine oil comes out from under the cylinder head. The problem indicates damage or natural wear to the head gasket. It is necessary to remove and replace the seal. The leak may also be due to loose cylinder head bolts. The presence of a problem is indicated by oil stains that appear at the junction of the head and the motor block.
- After repairing the power unit. If you removed the fastenings in a Niva or any other car and rebuilt the engine, then for successful assembly you should take into account the order of tightening and the diagram, as well as the tightening force of the screws.
- For prevention purposes. Experts recommend tightening the bolts on the cylinder head every 2-3 thousand kilometers. When the engine is operated under vibration conditions, this can cause the screws to loosen, so they must be periodically checked and tightened with proper force.
The Ilyich Garage channel has published a video that will help you understand the process of tightening the cylinder head bolts on the “six”.
Article: 2101-1003265
Order code: 013316
- You may need
- show more
- Passenger cars / VAZ / VAZ-21021 drawing
- » href=»/catalog/vaz-3/legkovye_avtomobili-30/vaz_2102-4/blok_cilindrov_i_golovka_bloka-77/#part6277″>Washer 12Engine / Cylinder block and cylinder head
- Passenger cars / VAZ / VAZ-21042 drawings
- » href=»/catalog/vaz-3/legkovye_avtomobili-30/vaz_2104-5/blok_cilindrov_i_golovka_bloka-54/#part13471″>Washer 12Engine / Cylinder block and cylinder head
- » href=»/catalog/vaz-3/legkovye_avtomobili-30/vaz_2104-5/blok_cilindrov_i_golovka_bloka-55/#part13495″>Washer 12Engine / Cylinder block and cylinder head
- Passenger cars / VAZ / VAZ-21061 drawing
- » href=»/catalog/vaz-3/legkovye_avtomobili-30/vaz_2106-7/blok_cilindrov_i_golovka_bloka-57/#part19715″>Washer 12 Engine assembly / Cylinder block and cylinder head
- Passenger cars / VAZ / VAZ-21211 drawing
- » href=»/catalog/vaz-3/legkovye_avtomobili-30/vaz_2121-13/blok_cilindrov_i_golovka_bloka-46/#part58453″>Washer 12Engine / Cylinder block and cylinder head
- Passenger cars / AZLK / Moskvich-21411 drawing
- » href=»/catalog/azlk-9/legkovye_avtomobili-30/moskvich_2141-53/blok_cilindrov_i_golovka_bloka-59/#part148625″>Washer 12Engine mod. 2106 / Cylinder block and head
- Passenger cars / IZH / IZH 2126 with VAZ1 engine drawing
- » href=»/catalog/ij-7/legkovye_avtomobili-30/ij_2126_s_dvigatelem_vaz-307/blok_cilindrov_i_golovka_bloka-9/#part945826″>WasherEngine / Cylinder block and cylinder head
- Passenger cars / IZH / IZH 27171 drawing
- » href=»/catalog/ij-7/legkovye_avtomobili-30/ij_2717-607/blok_cilindrov_i_golovka_bloka-33/#part1693573″>Washer VAZ-2106 engine / Cylinder block and cylinder head
- Passenger cars / VAZ / VAZ-21011 drawing
- » href=»/catalog/vaz-3/legkovye_avtomobili-30/vaz_2101-3/blok_cilindrov_i_golovka_bloka-77/#part1793″>Washer 12Engine / Cylinder block and cylinder head
- Passenger cars / VAZ / VAZ-21031 drawing
- » href=»/catalog/vaz-3/legkovye_avtomobili-30/vaz_2103-106/blok_cilindrov_i_golovka_bloka-52/#part10144″>Washer 12Engine / Cylinder block and cylinder head
- Passenger cars / VAZ / VAZ-21052 drawings
- » href=»/catalog/vaz-3/legkovye_avtomobili-30/vaz_2105-6/blok_cilindrov_i_golovka_bloka-54/#part16577″>Washer 12Engine / Cylinder block and cylinder head
- » href=»/catalog/vaz-3/legkovye_avtomobili-30/vaz_2105-6/blok_cilindrov_i_golovka_bloka-55/#part16601″>Washer 12Engine / Cylinder block and cylinder head
- Passenger cars / VAZ / VAZ-21072 drawings
- » href=»/catalog/vaz-3/legkovye_avtomobili-30/vaz_2107-8/blok_cilindrov_i_golovka_bloka-59/#part23085″>Washer 12Engine / Cylinder block and cylinder head
- » href=»/catalog/vaz-3/legkovye_avtomobili-30/vaz_2107-8/golovka_bloka-58/#part23056″>Washer 12Engine / Block head
- Passenger cars / VAZ / VAZ-212131 drawing
- » href=»/catalog/vaz-3/legkovye_avtomobili-30/vaz_21213-731/golovka_bloka-51/#part2008903″>Washer 12Engine / Block head
- Passenger cars / AZLK / Moskvich-23351 drawing
- » href=»/catalog/azlk-9/legkovye_avtomobili-30/moskvich_2335-688/blok_cilindrov_i_golovka_bloka-6/#part1902846″>Washer 12Engine / Cylinder block and cylinder head
- Passenger cars / IZH / IZH 21261 drawing
- » href=»/catalog/ij-7/legkovye_avtomobili-30/ij_2126-606/blok_cilindrov_i_golovka_bloka-35/#part1690459″>Washer VAZ-2106 Engine / Cylinder block and cylinder head There are no reviews for this product yet.
Today, the next article in the series “Crystal VAZs or typical breakdowns of domestic cars” is dedicated to the “classics”: VAZ-2101, 2103, 2104, 2104, 2105, 2106 and 2107. These cars have been driving along our roads for decades and, despite Despite all the shortcomings that we will talk about, their popularity is still high.
Niva rear axle shank tightening torque
Rear axle section
1 – bearing lock ring; 2 – brake pad; 3 – brake drum; 4 – wheel mounting stud; 5 – wheel cap; 6 – brake cylinder; 7 – brake shield; 8 – axle bearing; 9 – axle shaft seal; 10 – spring support cup; 11 – differential box bearing; 12 – breather; 13 – differential box; 14 – driven gear of the main gear; 15 – satellite;
16 – semi-axial gear; 17 – bolts securing the gearbox to the rear axle beam; 18 – drive gear bearings; 19 – drive gear oil seal; 20 – flange; 21 – drive gear nut; 22 – dirt-reflecting ring; 23 – spacer sleeve; 24 – adjusting ring; 25 – drive gear; 26 – satellite axis; 27 – gearbox housing; 28 – rear axle beam; 29 – axle shaft.
View of the rear axle from the gearbox side (rear axle drive shaft removed): 1 beam; 2 — gearbox flange; 3 — flange fastening nut; 4 — gear housing; 5 screw for fastening the gearbox housing; 6 - drain plug
The rear axle consists of a beam, a gearbox with a differential and two axle shafts. The main gear is hypoid, its gears are selected for noise and contact, so they can only be replaced as an assembly (the pair is marked 2106). The main gear drive gear is integral with the shaft (shank) and is installed in the neck of the gearbox on two tapered bearings. The outer rings of the bearings are pressed into the neck seats, and the inner rings are put on the shank. A spacer is installed between the inner rings; When the shank nut is tightened, the bushing is deformed, providing constant preload to the bearings.
The bearing preload is controlled by the moment the drive gear rotates (other parts are not installed). For new bearings, the turning torque should be in the range of 157–197 N.cm, for bearings after a run of 30 km or more – 39.2–59.0 N.cm. In this case, the shank nut is tightened to a torque of 118–255 N.m, periodically checking the rotation of the drive gear. If the specified turning torque has already been reached and the nut tightening force is less than 118 N.m, it is necessary to replace the spacer sleeve with a new one, since the old one is too deformed. Replacement of the bushing is also necessary in the case when the turning torque is higher than permissible (due to inattention during tightening).
If the main pair or pinion bearings are replaced, the shim thickness must be re-selected. It is mounted on the shaft between the drive gear and the inner race of the large bearing. The method for selecting a ring is described in the section Disassembling the rear axle gearbox.
Some of the rear axle malfunctions
The driven gear of the main gear is attached to the differential box flange with special bolts without washers. These bolts must not be replaced with any others. The differential box rotates in two tapered bearings. Their preload, as well as the gap between the teeth of the main gear gears, is adjusted by nuts screwed into split bearing beds. The side gears are installed in cylindrical sockets of the differential box and rest on it through support washers. These washers are selected in thickness so that the gap between the teeth of the satellites and semi-axial gears is in the range of 0–0.1 mm. The satellites are installed on an axle with constant engagement with the semi-axial gears. The axis has spiral grooves for supplying lubricant to the rubbing surfaces.
Consequences of incorrect cylinder head installation
Correct tightening of the cylinder head is very important, since the performance of the motor directly depends on it. The cylinder head acts as a cylinder cover, and any violations in its fit affect the processes occurring inside the power unit.
Insufficient tightening of the head leads to a drop in compression due to loss of tightness at the junction of the cylinder head with the cylinder block, burnout of the gasket, breakthrough of working gases from the cylinders and their entry into the channels of the lubrication or cooling systems, penetration of technical fluids into the combustion chambers, which in turn is negative affects the functioning of the power unit and can cause very serious damage.
Excessive tightening also does not bring anything good; in this case, damage to the head often occurs - cracks appear, or fasteners are destroyed - bolts break, threads break, etc.
Uneven or incorrect tightening often causes warping of the head, due to which gaps appear at the junction of it with the block, which leads to the same consequences as insufficient tightening.
When Bolts Need Replacement
Before you begin tightening the bolts, you should inspect them. A visual assessment of the condition is not enough; it is necessary to check the fastener parameters. He must:
- have dimensions 12/120 mm;
- be with intact thread;
- have no curvature along the entire length.
Some mechanics recommend regularly screwing new bolts into the cylinder head. Others adhere to the rule that replacement should only be carried out if the fastener is screwed into the socket tightly. It is best not to skimp on bolts, since using a component that is obviously stretched increases the risk of its metal breaking. The consequences of this are almost unpredictable; in most cases, it will be possible to restore the operation of the power plant only with the help of specialists.
Replacing valve seats
If the seats burn out and are destroyed, as well as if the heads are strongly recessed into the body (“sucked”) or have been subjected to repeated countersinking, they need to be replaced. The seats are replaced on a milling machine. The defective seat is bored with a milling cutter and removed from the socket. Then, according to the technology, the head is placed in a thermal oven and heated to 120-150 degrees. Saddle blanks in the form of rings are placed in liquid nitrogen to reduce their temperature to minus 40 degrees. Using tongs, place the cooled rings of future saddles into the sockets and lightly tap them into the body of the head. Further operations for processing seat chamfers are performed on a special milling machine or manually with a set of cutters.
Tightening procedure for cylinder head bolts
The standard tightening pattern starts from the central screws to the edges. This rule must be strictly adhered to in order to avoid distortion or cracking of the aluminum “motor head”.
Typically the sequence of actions for a four-cylinder model looks like this:
The following motors can be classified as standard row engines:
Since these units are similar in design, the general system is applicable to them. This category includes the Lada Priora with 8/16 valves Chery Tiggo, and the VAZ 2108. Only Japanese engines of Mazda cars, some Toyotas, Hondas and Mitsubishi raise doubts. Due to the high-tech, complex design, the sequence of actions may vary.
Working with a torque wrench
Extreme caution should be exercised when using DMC. The tool is sensitive to mechanical damage - it’s easy to lose the calibration and the tool will become unusable
Depending on the type of key, the principle and sequence of operation differs.
Torque wrench and its types
It is needed to tighten the cylinder head bolts. In 2022, devices are divided into three main types.
Snap key
A fairly popular type of device, widely used due to its moderate cost and ease of operation.
The principle of operation is based on setting the required torque on the main and auxiliary scales. When the set force is reached, the ratchet and key are activated and slip with a characteristic sound.
Arrow key
The very first and simplest variety, preserved from USSR times in many workshops. The operating principle is based on the resistance of the torsion bar when the torque increases.
Digital key
Digital devices are characterized by increased measurement accuracy, which allows them to be used on advanced internal combustion engines that require careful calibration.
Such keys are still rare in 2022 and are found mainly in workshops, due to their high cost.
Other devices
In the absence of a special tool, you can use improvised materials such as a long lever and a regular cantor. The point is to calculate the standard formula.
For example, to obtain a tightening torque of 10 Nm, you should use a 1 meter long lever and apply a force of 1 kg to its end.
When is it necessary to puff?
First, let's look at the cases in which it is necessary to tighten the bolts of the cylinder head of a VAZ 2106 car engine:
- If engine oil comes out from under the cylinder head. The problem indicates damage or natural wear to the head gasket. It is necessary to remove and replace the seal. The leak may also be due to loose cylinder head bolts. The presence of a problem is indicated by oil stains that appear at the junction of the head and the motor block.
- After repairing the power unit. If you removed the fastenings in a Niva or any other car and rebuilt the engine, then for successful assembly you should take into account the order of tightening and the diagram, as well as the tightening force of the screws.
- For prevention purposes. Experts recommend tightening the bolts on the cylinder head every 2-3 thousand kilometers. When the engine is operated under vibration conditions, this can cause the screws to loosen, so they must be periodically checked and tightened with proper force.
The Ilyich Garage channel has published a video that will help you understand the process of tightening the cylinder head bolts on the “six”.
Head inspection
Before installing the KamAZ cylinder head in place after repairs, they must be inspected. The following reasons.
Compression ring condition
The gas compression ring may sag. Or there will be play and the ring will move in its place. As a result of the broken seat
You definitely need to pay attention to this. The ring should protrude above the level of the head 0.122-0.230 mm and the difference in measurement readings along the length of the ring should not exceed 0.08 mm
Otherwise, the ring must be changed. To remove it, grooves are provided with which the ring can be removed from its seat.
Valve seats
The second thing you definitely need to pay attention to is the condition of the valve seats. cracks may form on the seats
Or the saddle may sag in its seat and become loose. To verify this, you need to unharness the valves. It is also possible that wear may form in the valve guides. This is more difficult to deal with. Replacing guides on the heads of a Kamaz vehicle is a difficult task. They are very difficult to press out. I don't recommend doing this yourself. Specialists are not willing to undertake repairs of KAMAZ heads. Exactly because of this reason. And they set a price a little less than the cost of a new head. Therefore, there is no need to get excited here. If the play is small, then it is better not to touch the guides. Try installing new valves. If the play is still large, try finding other heads. It will be cheaper and more reliable.
Video: tightening the cylinder head
VAZ cars of the 2112 family were produced from. These engines have different cylinder head intake ports. In theory, there are no other differences. And therefore it will be the same if we talk about any 16-valve internal combustion engine. Tightening is performed in three steps, although repair books give another option (it is for 8-valve engines).
The part called the cylinder head is attached to the cylinder block with 10 screws. They are unscrewed with a 10mm socket wrench. shown in the first photo.
Reversal sequence (1-10)
The standard screw length is 9 3 mm.
If the screw has been pulled out to at least 95 mm, it is replaced with a new one (AvtoVAZ requirement).
During installation, a different scheme is used (photo 2). Each screw is lubricated with machine oil, otherwise the efforts will be reduced to nothing.
The order of tightening the head is indicated in this photo
Tightening torque for cylinder head cover bolts
For VAZ-2112, the cylinder head tightening torque is standardized:
- First pass – the force is 20 N*m;
- Each screw is turned 90 degrees to the right;
- Wait 20 minutes, then turn the screws another 90 degrees.
At first the effort is very small.
But at “step 3” it will be difficult to cope with the work. Use the lever.
Why are guide bushings needed?
Before installing the cylinder head, perform the following steps: clean the threaded holes, as well as all holes for the bushings (photo 1). , and only then.
Everything is ready to install the cylinder head
Metal parts adjacent to the gasket must be degreased. We looked at the cylinder head tightening diagram, but the cylinder head itself must be installed correctly:
- We place the cylinder head on the cylinder block;
- By moving the part in different directions, we ensure that the bushings fit into the recesses.
After “step 2” the screws can be tightened.
Sealant
No sealing compounds are used when installing the gasket! Solidol, CIATIM and other lubricants are not even needed. The main thing is that the metal must be degreased. A .
Let's start replacing
DIY cylinder head tightening torque for Lada Priora 8 and 16 valves
We will need: a special wrench for 36 and a universal pulley clamp.
This car is carburetor, but if an injector is installed, the replacement procedure is not much different.
View under the hood.
Remove the air filter housing from the carburetor. Unscrew the three 10mm and four 8mm nuts securing the housing to the carburetor.
Be careful not to drop anything into the carburetor, otherwise you will have to remove it, and maybe the intake manifold too. Because if, with the car running, they get under the intake valve, then you can go straight to repair the head. Remove the fuel line and distributor cap
Unscrew the eight nuts 10 securing the valve cover and remove the washers with the plates
Remove the fuel line and distributor cap. Unscrew the eight nuts 10 securing the valve cover and remove the washers with the plates.
Remove the choke cable and throttle valve drive. Then remove the valve cover along with the gasket; it is also better to replace it.
Remove the protection from below.
Drain the antifreeze.
Loosen the nut 19 securing the generator.
Unscrew the clamps on the pipes and remove the latter.
Loosen the clamp on the lower pipe of the pump and remove it with a slight movement of your hand.
Disconnect the power wires for the cooling fan and the temperature sensor on the radiator. We remove the radiator along with the pipes and thermostat.
Loosen the generator tensioner nut and use a pry bar to move it forward. Remove the generator belt.
Now we rotate the crankshaft by the pulley with a magic wrench of 36 and ensure that the marks on the pulley and the cover match, as well as on the camshaft sprocket and the ebb of the latter bed.
Now comes the fun part. Unscrew the nut 36 holding the crankshaft pulley. We lock the pulley with a special key and unscrew it. If there is no such thing, you can turn on the fifth speed, ask a friend to press the brake and lightly turn the key to unscrew it.
We remove the pulley. We unscrew the six bolts and three nuts 10 on the side, three bolts from the bottom of the camshaft drive cover. Let's take the last one.
- Unscrew the two nuts securing the chain tensioner and remove it.
This machine was equipped with an automatic tensioner. Finally someone got it!
- We unscrew the bolt securing the camshaft sprocket and, having removed it, remember or mark the hole for alignment.
- An amazing picture appeared before us.
- 1 – fuse that prevents the circuit from jumping.
- 2 – fastening the timing chain tensioner shoe.
- 3 – crankshaft sprocket.
- We unscrew the fuse using a 10mm wrench and the tensioner fastening, as well as the bolt securing the auxiliary drive sprocket (pig).
We remove all the sprockets and the old chain. We check the matches of the marks. The crankshaft key should be opposite the ebb on the cylinder block.
We install new sprockets on the crankshaft and the drive of auxiliary units. Lubricate the new timing chain and install it in place.
- We place any tool under the chain on top so that it does not fall down.
We install the camshaft sprocket in the chain in such a way that when installed on the camshaft, the descending branch of the chain is tensioned and all marks coincide.
We turn the camshaft counterclockwise at a small angle and return it back by the crankshaft, this way the chain is tensioned and you can evaluate the correct installation of the marks.
If the marks do not match, transfer the chain to the tooth and repeat the procedure again.
We install the chain tensioner in place and activate it. Tighten all the sprocket mounting bolts and lock them. We turn the crankshaft two turns and if the valves do not meet the pistons and all the marks fall into place, we congratulate ourselves on completing the most important operation.
Lubricate the crankshaft cover gasket with sealant and install it in place.
We install the pulley, tighten it and turn the crankshaft again and check all the marks. It’s better to play it safe than to tear your hair out all over the place and look for the mechanic’s phone number.
We unscrew the nut 13 of the distributor and, having taken it out, turn the slider so that it faces the contact of the fourth cylinder. We put the distributor in place, but remember that after final assembly we will have to turn on the ignition. We will not dwell on this, since this procedure can easily be found on the Internet. If you are interested, there is a video about installing the ignition at the end of the article.
We put back everything that was removed, in the reverse order of removal. Fill with antifreeze, start, adjust the ignition. Your first timing chain replacement has come to an end.
How to tighten correctly?
You can tighten the bolts with the help of specialists or yourself. If you have never encountered the need to perform this task before, then below we will look at how tightly you should tighten the screws and in what sequence you should do it.
Be sure to strictly observe the tightening torque, since if the head bolts are overtightened, this will lead to cracks and damage to the cylinder head. If this happens, the car owner will have to carry out major repairs to the unit. The working surface of the hole, as well as the threaded connection of the screw, must be as clean as possible. A wire brush can be used to clean the cylinders.
If during the task you find “blind” holes for the head screws, use a cleaning lubricant carefully. If the volume of the substance is greater than required, it will be difficult to install the pin all the way
It is recommended to lubricate the threads of new bolts with a small amount of engine oil or another type of lubricant.
Tools and materials
To tighten the cylinder head, prepare only one tool - a torque wrench, which will allow you to determine the tightening force of the screws. It is best to purchase a key in a specialized store or rent it at a service station, since this tool can only be used for tightening and tightening. Using a regular wrench will not allow you to determine how many kilograms the tightening force is.
When purchasing bolts, it is recommended to give preference to branded parts. Be sure to look at the threaded part - it must be intact, without damage or defects; if any, the fasteners are replaced.
Channel “Engine Repair! And interesting!” published a video that describes all the nuances of the stretching process.
Algorithm of actions
The order and strength required when pulling the cylinder head bolts is as follows:
- In accordance with the diagram below, tighten all bolts using a torque wrench. The tightening torque on the first round of tightening the fasteners will be about 3.5 - 4.1 kgf/m. First, the bolts are tightened, which are located in the center of the block head - top and bottom. After this, the two upper and lower fasteners are screwed in, installed on the side of the screws located in the center. Then the two outer bolts are tightened. Please note that you need to tighten the left pins first, and then the right ones. Screw number 11, located at the bottom left, does not need to be touched.
- This is the first stretch circle. At the second stage, the bolts are tightened in a similar order. Only the force with which the fastening elements are tensioned by the tool will be 10.5 - 11.5 kgf/m.
- At the third stage, the bolt is tensioned, which is marked with number 11 in the diagram. The tightening force of this screw should be 3.5 - 4.0 kgf/m.
Loading …
Units of force applied
In European and CIS countries, it is customary to use Newtons multiplied by a meter. A universal unit of measurement is present on all instruments and torque wrenches. In Western Europe, the USA and Australia, Pounds*inch are used.
The “domestic” unit of measurement is more accurate, which confirms its spread.
Table of tightening torques for threaded connections
Among the most common cars, the following group stands out:
- KAMAZ;
- 8 valve Daewoo Nexia;
- Lada Granta;
- Hyundai Accent;
- Chevrolet Niva;
- Hino Ranger;
- UAZ Patriot;
- Toyota Rav-4.
These cars are considered the most popular guests of service stations, therefore, it is logical to make a list specifically based on the power units of the cars.
The following is a table of torques for pulling cylinder head bolts of the most popular car models in Russia.
| Motor | Pulling torque N*m |
| GW 491 QE | 20,0 |
| UAZ 409 | 13-14,5 |
| 3SFE | 49 |
| 2AZFE | 7,8 |
| S2 Diesel | 24.0 |
| Daewoo Nexia 8th grade. | 25.0 |
| 405 | 40-50 + 90° turn |
| Granta all engines | 75,0+90° |
| WL-T | 9,0+180° |
| Kamaz 740 | 20,0+180° |
| J07C | 21,0+90° |
| 4A FE | 29,0/60,0 |
| D20DT | 85,0 |
| 5S FE | 49,0+90° |
| 1MZFE | 18,0+180° |
| YaMZ 536 | 10,0+180° |
| TagAZ | 10,0+90° |
| Chevrolet NIVA | 77,0 |
| X18XE | 25,0+270° |
| 1ZZFE | 40,0+90° |
| UMZ 4216 | 11,0+180° |
The correct tightening torque for the cylinder head on a VAZ-2114
Any, even the most reliable car can fail over time. Unfortunately, no unit or unit installed on it can work forever. Sometimes breakdowns occur in the cylinder block. The least difficult of them is the wear of the cylinder head gasket. A leaky sealing element ceases to provide a tight seal, resulting in lubricant or antifreeze leaks, power drops, or the stability of the engine’s functioning is lost. When replacing a gasket, not only the correct choice of a new one and its proper installation are important, but also such an aspect as the tightening torque. We will describe in detail below what indicators are optimal specifically for the cylinder head installed on the VAZ model 2114, equipped with an 8-valve power plant.
What is a torque wrench used for?
A certain tightening torque on the mating parts is necessary for uniform contact of the planes. In addition, if a gasket is installed along the contour, the uneven force of the bolted connections can destroy it.
A torque wrench allows you to tighten bolts with an accuracy of hundredths of a millimeter. In addition, it is often necessary to perform torque tightening of the bearing seat with high precision.
The manufacturer calculates torque values based on the type of material and design features of the unit. When building a car at a factory, all fasteners are tightened according to specifications: as a rule, this work is performed by assembly robots.
And when servicing, repairing, replacing parts, the required force is provided by a hand tool: a torque wrench.
Its main advantage is the ability to work in a wide range of settings. You simply set the operating limit with your own hands, or visually control the dynamometer needle.
That is, a universal torque wrench does not allow you to equally accurately tighten the nuts with a force of 2 N.m. and 100 N.m.
Tool manufacturers produce torque wrenches in several ranges:
- the most popular “size”: 40 – 210 N.m. It allows you to perform most repair work on the vehicle chassis;
- A precise torque wrench (from 2 N.m. to 50 N.m.) is intended for engine repair and maintenance. Setting up the carburetor, tightening the spark plugs, assembling the crankshaft and connecting rods. Work on replacing the intake or exhaust systems is also carried out with a small range torque wrench;
- tightening limit from 200 N.m. and higher is intended for power elements of powerful structures. In relation to cars - perhaps only wheel nuts.
Cylinder head VAZ 2107
The S7 engine has a displacement of 1500 cm3, which provides the car with good technical characteristics. Intensive and long-term use of the VAZ 2107 car leads to wear of the cylinder-piston group and gas distribution mechanism. Medium and major repairs involve removing the faulty head and dismantling many parts from the cylinder block. Many parts will also need to be replaced, including the gasket, valve stem seals and valve guides.
To carry out repair work on the VAZ 2107 engine, you will need the following tools and accessories:
- Micrometer for performing measurements and defect detection of parts.
- Mandrels for dismantling and installing new valve guides and oil seals.
- Torque wrench.
- Tile with closed spiral.
- Device for compressing valve springs.
Repair work on the cylinder head is preceded by removing it from the cylinder block, cleaning it from contaminants and then replacing faulty elements.
A set of tools required for work
In order to avoid wasting time looking for this or that tool at the critical moments of replacing the gasket on a VAZ (or actually tightening it), it is better to prepare everything in advance.
You will definitely need:
- wrench with heads and extension;
- Screwdriver Set;
- torque wrench;
- new gasket;
- sealant.
It is better to park the car on a level surface, turn on the handbrake, and additionally secure it with stops.
