The vehicle's fuel system is designed to store, clean, supply fuel to the engine, create a fuel-air mixture and deliver it directly to the engine cylinders for combustion. Since the most important component in this process is the fuel-air mixture, the vehicle’s fuel system also includes an air purification system, which is supplied to the injectors through the intake pipe.
Measuring pressure in the VAZ fuel rail
Signs of fuel system (TS) malfunction
Low or excessive pressure in the ramp leads to the following consequences:
- unstable engine operation;
- rough idle;
- engine tripping;
- increased consumption;
- power drop;
- the engine stalls at idle;
- increased CO content in exhaust gases.
If you encounter one of these problems, and ECU diagnostics do not give any results, then you need to measure the pressure in the vehicle.
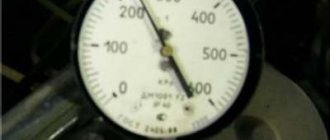
It is measured according to the same principle as in tires.
Operating principle and typical failures
Structurally, the pump and electric motor are a single unit. Its electrical part is washed with fuel, which provides cooling, plus lubricates the surfaces that come into contact with each other.
Fuel pump VAZ 2114
There are many signs of breakdowns, which indicate a failure or malfunction in the fuel system, or more precisely the fuel pump. Almost every person is able to detect some of them:
- The engine does not start;
- When you try to start the engine, you cannot hear the electric motor;
- The engine runs intermittently;
- Jerking occurs when moving at low speed.
As for the reasons why the fuel pump fails, they may be:
- Fuse on the pump is broken;
- Failed relay;
- Failure of the pump electric drive;
- Poorly secured block masses;
- Damage to the pump itself;
- Missing or poor contacts at the motor terminals.
In fact, it is extremely rare for an electric motor to break down. This is due to the active cooling of the element by fuel, which not only cools, but also flushes all its components.
Shidron blower and mesh
But the centrifugal gate hydraulic supercharger suffers more often than others. The reason is small contaminants in the fuel, which end up inside the mechanism, rub against the structure and wear them out. The performance of the unit drops, the pressure decreases. This leads to the formation of the first signs of pump wear, operation noise increases, and the engine refuses to start. It is impractical to repair a broken pump; it must be completely replaced.
Taking a measurement in the fuel rail
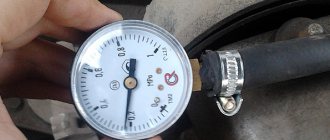
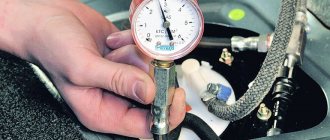
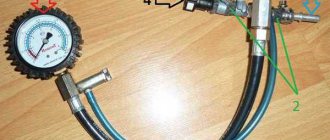
To work we need a “pressure gauge”. But not every device is suitable, it all depends on the pressure limit that it can measure. In our case, we need a pressure gauge with a limit of up to 7 atmospheres. If you have a device measuring up to 17 atmospheres, it will show incorrect data, because it has too large an error at low pressure.
In addition to the pressure gauge itself, we will need “plumbing flax”. We wind it under the pressure gauge pipe and put a hose with an internal diameter of 9 mm on it. Next, we tighten the whole thing with a clamp. Our device is ready for use.
In a store, such a device with a hose and drain will cost you about 1,200 rubles. Measuring a vehicle at a service center will cost you about 200-300 rubles.
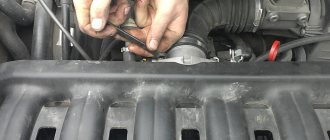
- Open the hood, turn off the ignition, find the fuel injector rail.
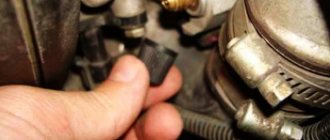
- We unscrew the plug of the fitting for fuel pressure, then use a spool to unscrew the nipple that appears, carefully placing a container or rag, as gasoline may splash out.
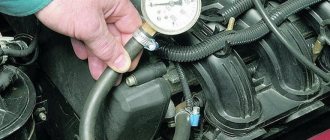
- Place the pressure gauge hose over the fitting and secure it with a clamp.
Measuring pressure in the fuel rail
You need to check the pressure in 4 operating modes:
- when the ignition is turned on;
- idling;
- with the tube removed from the pressure regulator;
- with a pinched return pipe.
Checking individual elements
When measuring the pressure in the fuel rail shows a deviation from the norm, the following reasons must be considered:
- the electric fuel pump is unable to develop the required performance;
- the regulator has failed, causing the gasoline pressure in the circuit to decrease or increase above normal;
- the fine filter is completely clogged, preventing the normal passage of fuel;
- Worn injector valves leak – the engine “floods” with fuel.
One way to check the fuel pump is to press the return hose located in the engine compartment with pliers. When the return line is blocked, the pressure gauge should show at least 5 Bar, with a new pump - 6 Bar. A pressure of 4 bar is critically low.
Since the above method does not give an absolutely accurate result and is not applicable to all car models, it is advisable to check the fuel pump by directly connecting a pressure gauge. Other elements of the system should be excluded - pipelines, fine filter and regulator. Remove the back seat of the car, get to the unit and connect the meter directly to the outlet fitting.
If the readings on the ramp and on the pump fitting are equally low, change the pumping unit. Otherwise, the problem needs to be looked for elsewhere, following the algorithm:
- Purge the fuel line and change the filter, then test again.
- Reconnect the pressure gauge to the ramp, start the engine and remove the vacuum pipe (coming from the suction manifold) from the RTD fitting. If the pressure does not change, install a new regulator.
- To make sure that the injectors are working properly, you need to measure and compare two indicators: the pressure on the manifold with the return hose pinched and the maximum pressure created by the pump when connected directly. If the second value is much higher, part of the pressure is lost at the injectors.
If you find problems with loss of pressure on the manifold itself, remove the ramp and check each injector separately. Faulty parts cannot be replaced one by one - you will have to buy and install a complete set.
The easiest way to check injectors for leakage is to test them in operation together with the manifold. Remove the ramp without disconnecting the fuel line, place a rag and turn on the ignition. If the injector valves are worn out and lose their tightness, gasoline will begin to drip from them. The working elements should be checked again - with the return hose crushed.
What pressure should the fuel system have?
A normal vehicle should have the following indicators:
- at idle 2.5 atm;
- ignition - not lower than 3 atm;
- when removing the vacuum tube 3.3 atm;
- when squeezing the drain tube 7 atm;
- when accelerating, it jumps to 3, then drops to 2.5 atm.
Important! Make sure that the fuel line does not contain holes: if there are leaks, the measurement results will be false.
- After we have pumped fuel into the system, turn off the ignition and look at the behavior of the pressure gauge. The pressure in the ramp should drop to 0.7 bar and remain at this level, but if it immediately drops to 0, then the problem is in the fuel pressure regulator (how to remove and replace the RTD), or the check valve of the fuel pump motor.
- We raise the engine speed to 3000 and look at the pressure gauge readings; if in this mode the needle drops, the problem is a dying fuel pump.
- If the fuel pump takes a long time to build up pressure, the fuel filter or strainer in the tank may be clogged.
If after replacing the fuel cells the problem remains, then check other systems: IAC, TPS, MAF, compression in the cylinders.
Diagnostic instructions
The first step is to free access to the ramp and fitting installed at the end of the manifold. Remove elements that interfere with measurements - air duct, filter housing, crankcase ventilation pipe, etc. (the list of parts depends on the car model). Proceed to measuring, following the instructions:
- Unscrew the protective plastic cap from the diagnostic fitting on the ramp.
- Place a cut-off plastic container and use a cap to unscrew the spool valves to release the pressure previously pumped up by the pump. You can press the valve or turn the spool 2-3 turns.
- Place one end of the gasoline hose onto the pressure gauge fitting and secure with a clamp. Unscrew the spool from the manifold, pull the second end of the hose onto the pipe.
- Turn on the ignition, and the electric fuel pump will pump fuel into the system. Make sure there are no leaks at the joints of the diagnostic tool.
- Start the engine and record the fuel pressure in the rail using the pressure gauge.
Advice. It is better to take readings from the device twice - after turning on the ignition and starting the engine. If you notice a difference, you need to additionally check the regulator and fuel pump.
The pressure level in the fuel supply circuit depends on the design of the system. In cars where the RTD and the discharge tube - “return” - are located in the engine compartment, the pressure gauge should show 2.7 Bar. The upper and lower permissible limit is 2.7–3.0 Bar. If the measured values are outside the specified range, you should continue the diagnosis and find the cause of the problem.
On many cars, including VAZ, the pressure regulator and the fuel return hose are located next to the fuel pump. The normal manifold pressure for such machines is 3.8 Bar, the maximum value is 4 Bar.
If during the measurement process periodic pressure surges within 0.2 bar are observed, the primary strainer needs to be cleaned or replaced. Typically, it is installed in the gas tank along with an electric pump.
How to determine the condition of the fuel pump?
In order to determine a fuel pump malfunction, you need to check the fuel pump “at the wall” (zero supply pressure or “at the plug”). In simple terms, this is the pressure that the fuel pump develops.
It is by this parameter that the service life of the fuel pump can be determined. As the pump wears out, this parameter gradually decreases. When the pressure is “into the wall”:
- about 3 atm - the car stalls
- 4 atm - the pump will still serve
- 5-7 atm – the state of the new pump (the Czech gas pump produces 7 atm)
Checking the fuel pump “for a plug” is quite simple; you need to pinch the return line with pliers (for 2-3 seconds) with the car running and watch the pressure gauge readings. Another way to check the fuel pump: smoothly raise the engine speed to 3000 rpm. If the pressure gradually drops, then this is a sign of a “dead” pump.
Features of the 2111 (1.5i) engine power system
Location of elements of the 2111 (1.5i) engine power supply system in the engine compartment:
1 - receiver; 2 — vacuum supply hose to the fuel pressure regulator; 3 — throttle assembly; 4 - fuel rail; 5 — fuel pressure regulator; 6 — air supply hose to the throttle valve; 7 - adsorber; 8 — air filter; 9, 10 and 11 — hoses of the crankcase ventilation system; 12 — throttle valve drive cable; 13 — diagnostic fitting
Fuel pump
combined with the fuel level indicator sensor into a single unit -
a fuel module
(often called an electric fuel pump). The pressure pump delivers fuel from the tank through the fuel filter to the fuel rail.
Engine Fuel Module 2111 (1.5i):
1 — fuel level indicator sensor; 2 — connecting block; 3 — inlet pipe; 4 - outlet (discharge) pipe; 5 — module cover; 6 — module cover guide; 7 - electric fuel pump in a plastic casing; 8 - intake chamber
Fuel rail for engine 2111 (1.5i) complete with injectors:
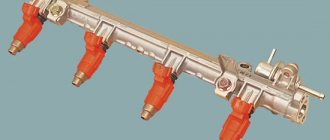
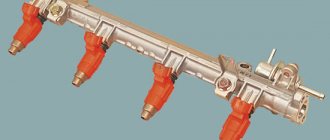
1 — diagnostic fitting; 2 - fuel rail; 3 — fuel supply tube to the fuel rail; 4 — fuel pressure regulator; 5 — tube for draining (draining) fuel into the tank; 6, 7, 8 and 9 - injectors
Fuel pressure control
installed on the fuel rail. Excess fuel is returned to the tank through the fuel return line.
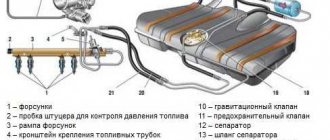
Engine power supply system diagram 2111 (1.5i):
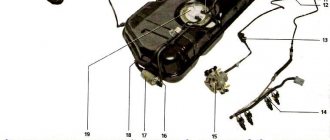
1 - nozzle; 2 - fuel rail; 3 — diagnostic fitting; 4 - adsorber; 5 - check valve; 6 — throttle assembly; 7 - gravity valve; 8 — safety (two-way) valve; 9 - separator; 10 - filler pipe; 11 — fuel filter; 12 — fuel drain line; 13 — fuel line hose connecting the outlet pipe of the fuel module to the fuel filter; 14 — fuel module; 15 — fuel tank; 16 — fuel line connecting the fuel filter to the fuel rail; 17 - fuel pressure regulator
Characteristics of the Bosch fuel pump 0580453453
Especially for my readers, I got confused and measured the fuel pump that is on my display case. In fact, the characteristics of Bosch gasoline pumps differ in the length and very rarely in the diameter of the body. Why? The diameter of the body can be adjusted using a gasket made of petrol-resistant rubber.
Most often, the characteristics of fuel pumps (not only Bosch, but also from other manufacturers) may differ in length, pressure, location of terminal chips and that’s it :). The fuel pump mesh does not differ in seating, but it may differ in shape. The chip for the terminal can be remade or supplied from the same VAZ. The length of the fuel pump is important, since its operation depends on this when the fuel level in the tank is low, and if it is in the module, then you need a match to install it.
Fuel pump length:
- Bosch fuel pump 0580453453 - 105 mm
- Bosch fuel pump 0580453449 - 65 mm
- Bosch fuel pump 0580453465 - 90 mm
Features of the engine power system 11183 (1.6i)
Receiver
engine 11183 (1.6i) is made of plastic.
Engine Intake Module 11183 (1.6i):
1 — flange with an o-ring for fastening the throttle pipe; 2 - receiver with o-rings for connection to the inlet pipeline
Engine Fuel Module 11183 (1.6i):
1 — inlet pipe (for supplying fuel to the pressure regulator); 2 - outlet (discharge) pipe; 3 — module cover; 4 — fuel level indicator sensor; 5 - intake chamber; 6 — module cover guide
Fuel pump
combined with a fuel level indicator sensor and a fuel pressure regulator into a single unit -
a fuel module
(often called an electric fuel pump). Fuel from the pump (through the outlet pipe of the fuel module) enters the fuel filter. Purified gasoline is again supplied through the fuel line and through a tee to the inlet pipe of the fuel module, and then supplied to the fuel rail.
