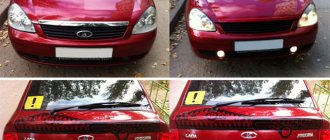
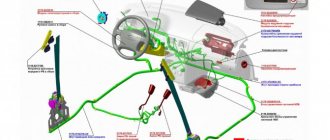
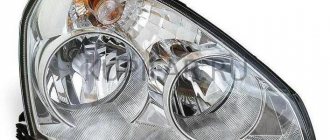
Depending on the configuration, Lada Priora cars are equipped with an airbag system (hereinafter referred to as SNAP). This configuration is designed to ensure the safety of the driver and front passenger (in cases where both front seats are equipped) by deploying airbags in the event of frontal collisions of the vehicle.
The passenger airbag of a Priora car, and its triggering moment, depends on a certain force of the collision and occurs regardless of whether the drivers or passengers are wearing seat belts or not.
LADA Priora cars are equipped with 2 types of systems:
- Single-channel (airbag for driver only).
- Four-channel (airbags for driver and passenger).
Reinstalling the cable
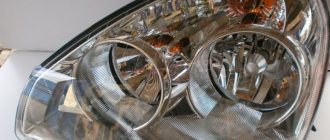
If, when Megan is driving a car, a cracking or crunching sound is heard when turning the steering wheel, or the Check AirBag indicator is on, this may indicate that the electronic unit has broken down. The electronic unit consists of a contact coil with a ribbon cable. And most often the cable itself fails.
- Before the main work, it is imperative that the wire from the negative terminal of the battery is disconnected and insulated. Only in about five minutes will it be possible to start working.
- The block on the Megan model is located on the steering wheel under the cover. Therefore, the module is initially removed, followed by the steering wheel itself. The car's wheels must be in a straight position.
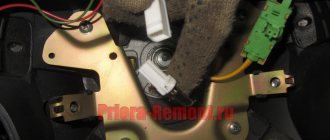
- The steering wheel cover is removed from the inner ring of the radio control unit assembly by loosening the mounting screws. To remove the steering column itself, the fasteners are unscrewed and the electrical connector is disconnected. The block can now be removed. The contact coil consists of two plastic parts fastened together with latches.
- On Megan, the length of the train is approximately 51-56cm. If the length does not match, and the cable deformation is also noticeable, it needs to be replaced. When choosing a new cable, the most important thing is to take into account the number of cores on the cable (there should be 7) and its length. The sealed cable is laid spirally into the coil. The contact block must be centered. Installation of the electronic unit is carried out in the reverse order.
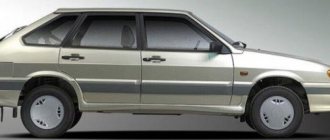
Technical characteristics of Lada Priora
sedan
- width 1,680mm
- length 4 210mm
- height 1,420mm
- ground clearance 165mm
- seats 5
| Engine | Name | Price | Fuel | Drive unit | Consumption | Up to a hundred | Max. speed |
| 1.6 MT (90 hp) | Standard | ≈ 389,000 rub. | AI-95 | Front | 12.5 s | 176 km/h | |
| 1.6 MT (98 hp) | Norm | ≈ 437,700 rub. | AI-95 | Front | 5,6 / 8,9 | 11.5 s | 183 km/h |
| 1.6 MT (98 hp) | Norma2 | ≈ 474,000 rub. | AI-95 | Front | 5,6 / 8,9 | 11.4 s | 183 km/h |
How to Remove the Passenger Airbag on a Priora
The driver's airbag to inflate in exceptional cases, and some of them will be listed below:
- removing the steering wheel
- changing the pillow after use
- steering wheel replacement
If under any circumstances the airbag takes off
Priore driver, this will help you repair the following tool.
- 5mm hex
- Narrow flathead screwdriver
The procedure for replacing the driver's airbag on Priorat
Depending on the vehicle configuration, the Priorat was equipped with either one or two airbags. The AIRBAG driver example will be discussed here.
And we move the block away from the pillow, carefully lifting it up, as shown in the photo below.
airbag discharge
priority
in a Lada car .
Kalina 2
eradicating the front panel of crickets.
Now turn it over so you can turn it off conveniently. Then carefully rotate the locking block on both sides using a thin screwdriver.
We are now starting renovations. First, on the back of the steering wheel, you need to unscrew two 5mm hex head screws from one or more:
Carefully, without sudden movements, we distract the Priora pillow and put it aside. If necessary, install a new one in the same location. If it works for you, you will need to "reset" its control unit or purchase a new one. Only then can you put the airbag in place.
You should also be careful during installation. Connect the battery terminal in place. When you first turn on the ignition, you must do so so that there is no person (that is, you) in front of the airbag. This is necessary in order not to injure yourself if it works.
Source: https://vivauto.ru/kak-snjat-podushku-bezopasnosti-passazhira-na/
Fundamental differences between car models
They mainly consist of fastening elements.
Above, for example, we discussed the removal of the steering cushion on the Lada Priora. There is a difference on the Toyota Corolla - screws are not used for fastening. Fixation is made with a spring mechanism and two latches. You need to press the spring mechanism by inserting a screwdriver into the small hole. Then the pillow will immediately release on both sides.
And on the Smart model you will need to completely remove the steering wheel.
Let me move on to the main question.
After changing the steering wheel and making the error light on the dash come on again, I saw the following when I unscrewed the BP:
Under the steering wheel trim, I found the airbag connector that was missing from the steering wheel, which was twisted into the PB lead:
I drove with this kind of art for 5 years, for some reason I never thought about why in a car with PB I don’t have a PB indicator on the panel, but I just didn’t even come across such information to think about it. And all this time I really hoped, that my pillow is working...
Chronology of events according to the previous owners (as I see it): This unfortunate owner was driving along the road and then boom, the “pregnant man” on the panel caught fire. He was very surprised, cursed the VAZ, mocked him for having purchased this car and went to look at “A WHAT IS THERE?” I saw that everything was connected, tugged at the pillow, did not get a reaction. Ay ah ah.
Here, his friend the armchair warrior, not understanding the intricacies of wiring specifically the airbag control units and the contact groups themselves, says: “HEY, LET’S CUT OFF THE CHIP AND PUT IT HERE TO THE LOAD, SO CAN WE CHECK IT?” Without hesitation, they They cut off the connector of the pillow and connect (as in the photo with the inset) the pillow there and, without understanding the principle of operation, again and oh, they get an error.
Then, either because they wanted to sell the car to the next person, or because of the lack of a spare part in the village of Zalupino, or out of complete drunken ignorance, they extinguish the airbag light by breaking off the diode in the instrument panel, twist the pillow like a plug, and wrap all the wires together with inserts in madeline, as is.
(And this is all on a fully working unfired airbag, control unit and almost complete wiring, before their intervention).
Operating principle of the throttle position sensor
At the AVTOVAZ dealer, a local specialist refused to delve into the problem and, throwing in a diagnostic tool, said that I had an airbag error, that’s all, no more, no less, just an airbag error, thanks to him, he really helped me figure out that the airbag error icon is an error pillows. So, the most common problem of airbag failure is the steering column cable, which comes with assembly number 1118-3709315-02 and 1118-3709305 as a separate housing for the old-style airbag, as suggested by Evgeny1117.
Installing the cable is quite simple, but I will describe:
— We put the steering wheel level with the wheels facing straight forward. — We remove the battery terminal, wait a couple of minutes so that there is no residual charge left in the PB coil. — We take out the airbag by unscrewing the two hexagons at the back with a 5-point wrench — We disconnect the connector, having first pulled out the lock with a minus screwdriver small size and remove the pillow— Remove the steering wheel, having previously noted the position.
But this is where the problems lurk, and they are in the little things: — CHECK THE CABLES WITH A MULTIMETER RIGHT IN THE STORE (check the integrity of the wires on the horn and on the airbag contacts, do not hesitate to do this).
To do this, grab thin wires to close the contacts on one side. My first installed cable turned out to be non-functional right out of the box. Of the 4 checked in the store, two also turned out to be defective (either the horn or the airbag did not ring).
But it didn’t end here, I put in a pillow with a whole cable and nothing - the light was still on. The Internet was silent. I was at a loss, I drove to the store and poked other pillows - the malfunction light was on.
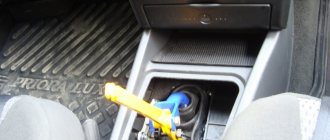
Hmm, a VAZ worker told me that the airbag control unit (it is located to the right of the gas pedal, behind the plastic shield under the beard) communicates and is working, which made me think about wiring problems. I went in and took out this orange 50-pin plug, in which, with one pad, only 6 contacts are involved.
I started calling, and there was a short circuit on 4 contacts. Well, how is that, I thought then, I tormented the wiring, disassembled the AMP connector and saw that it was made so that the contacts were closed. What kind of garbage again. On the Internet with such a question about the short circuit of the standard connector block on the forums I found two more potassium growers, the answer to them was silence.
In order to deal with the airbag, I naturally wanted to diagnose the block myself, for this I took a K-Line adapter from VAG KKL 409 and armed myself with OpenDiag 1.4 Free, which can work with Autoliv blocks. I connect and see “Airbag system is missing.”
We arrived, again Google in which a bunch of people have questions such that the block is there, but its OpenDiag diagnostics does not see all versions. Where these questions were stubbornly asked about this utility with a K-Line connector, many advised changing the version, wire, buying a program, changing car or didn't say anything.
I didn’t find any other free (FREE) programs that work with airbag blocks, so things are a little busy. The solution turned out to be simple and the OpenDiag developers suggested it to me in correspondence with support, and also advised me to read the manuals for the program, which I advise everyone who asks in the future. So the problem was in the adapter connection method.