Internal locks "Priora".
Good afternoon) When I assembled the doors for the first time, I installed the usual standard locks, and even replaced some with new ones. It was advised to introduce priors, but then there was little point in them. Then I started driving and started gluing the inside of the doors with Madeleine and other materials. Everything was done to eliminate knocks and squeaks as much as possible. During the process, I really didn’t like the layout of the rods; everything touched and rubbed against each other (especially parts of the drives fa.d-cd.net/97f5c64s-960.jpg example photo from the assembly). Then I remembered about the locks from the VAZ 2170-72.
In the same way, there are rear/front locks, the main cardinal difference is that the drive mount-bracket is now part of the lock.
Tractions.
I bought the parts used from several advertisements. Some are almost new (2013), others are from an older car. They differed in detail No. 2 (diagram above), namely the bend:
Subsequently, it rested against an additional glass guide and underwent alteration:
The height is the same as the tenth rod, I bent it because it’s easier (no corners)! New lock assembly, rod with a smooth bend:
Guide.
The glass guide is original. Fasteners are misaligned (applies to rear doors only).
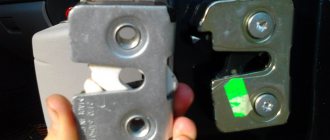
I had one from a VAZ 2110 and one from a 2170. The difference is in the photo. Since the activator has a bracket, the old rod with fastening from the bottom will no longer work.
I couldn’t buy a new one, they are not available in stores. Pens.
The previous ones were attached directly to the metal rod through a bend, and the new ones through a plastic latch.
Conclusion: - Based on the holes in the door, everything fits 1 to 1. - If the door handles are of the oldest design, then the hole needs to be replaced or modified. — Rear window guides with relocated fasteners. — Own connectors on activators (re-soldering).
On the driver's door lock there is an actuator with 4 wires, not 5 as before. To implement the central locking function, you need to add one more wire. It turned out that everything else was provided for. Disassembly.
The body is assembled very tightly, the joints are glued.
We need this button.
There are three contacts on it, one is not used, and it is needed for the fifth missing wire. We throw the wire.
Surprisingly, there is even a hole in the elastic band for it =)
Assembly.
The body was glued with liquid nails, gluing and sealing at the same time.
I soldered back the single pins and connected:
That's probably all) I'm happy with the installation, the central locking functions as before, nothing breaks when driving over uneven surfaces, there is no contact with metal. I would like to note that the drive data buzzes very loudly, you definitely need to get used to it: D Have a good weekend!
Source
What you should know
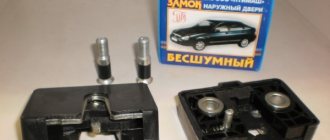
Domestic cars mainly have locks of the so-called figure-eight design. Actually, Priora is no exception. The above-mentioned products have one distinctive feature - in the mating part of the device, the diameter of the screws is smaller than on the original mechanism.
Each bolt is provided with a silicone gasket. Unfortunately, it is impossible to choose their color, since the manufacturer did not provide such an option. As practice shows, the most popular option is transparent seals. However, this is an insignificant problem that only pathological perfectionists will not be able to come to terms with.
Do purchased locks need to be modified? As a rule, no. But some car enthusiasts replace the springs in the mechanism because they believe that the original ones are not tight enough. In addition, the bolt is often equipped with an additional noise-absorbing pad made from a heat-shrinkable tube of suitable diameter. However, many admit that such an improvement is not particularly effective.
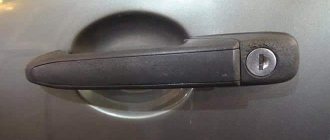
Removing the interior lock, lock cylinder and outer front door handle
We carry out the work when replacing the lock, its cylinder mechanism and the outer door handle. Remove the front door trim (see “Removing the front door trim”).
Use a slotted screwdriver to disconnect the rod from the cylinder mechanism of the lock.
Use a slotted screwdriver to pry up the mounting bracket for the cylinder lock mechanism...
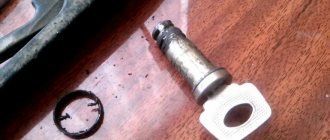
We take out the cylinder lock mechanism along with the rubber sealing ring. Disconnect the lock rod from the outside door handle.
Using a 10mm socket, unscrew the two nuts securing the outer door handle...
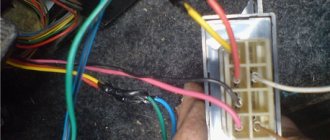
Using a slotted screwdriver, unfasten the clamp securing the wiring harness of the electric locking drive.
those same doors kotlas telephone
By pressing the latch... ...we disconnect the wiring harness blocks of the electric locking drive.
Using a Phillips screwdriver, unscrew the three screws securing the base of the inner handle...
...and the screw for securing the internal lock. We remove the external lock (see “Removing the external door lock”).
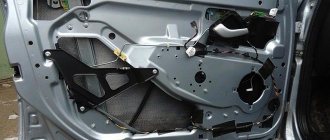
We remove the internal lock of the front door with rods and an electric drive for locking the lock through the technological opening of the internal door panel.
Front door lock with electric locking, external and internal door handles
Use a slotted screwdriver to disconnect the rod end of the outer handle from the lock lever.
In the same way we disconnect the rod of the cylinder mechanism of the lock.
Using a slotted screwdriver, we open the spring bracket that secures the rod of the inner handle...
...and remove the bracket. There is a spring washer under the bracket; remove it, and then the rod.
Using a slotted screwdriver, press out the plastic locking rod lock of the lock button, turning the lock around its axis.
In the same way we remove the locking electric drive rod.
Using a Phillips screwdriver, unscrew the two self-tapping screws securing the electric drive to the lock bracket and remove the electric drive.
We remove the rod from the hole in the electric drive rod of the lock.
Front door internal lock mechanism
We install the internal door lock, the lock cylinder mechanism and the external door handle in the reverse order.
Before installing the door trim, we check the functionality of the door lock mechanism. If the outer door handle or lock cylinder mechanism does not work correctly, the length of the rod should be adjusted by rotating the plastic tip of the rod.
Removing and installing rear door lock of Lada Priora
Lock, drive rods and rear door .
You will need: an “8” wrench, flat-blade and Phillips-blade screwdrivers, and pliers.
3. Squeeze the pad retainer...
4. ...and disconnect the wiring harness block of the door lock gearmotor.
5. The lock closer on the car door stopped working. Priora from tens replacement. Unscrew the three screws securing the inner handle.
6. Move the handle away from the interior door panel of the Lada Priora.
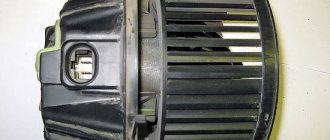
Lada Priora rear door activator replacement without removing rods and lock
This video shows that if you fixed something in a Russian car, it does not mean that everything is fine. Love yours.
7. Tighten the drive rod end clamp...
8. ...and disconnect the rod end from the inner handle of the VAZ 2171 lock.
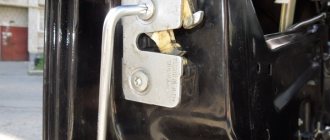
9. Replacement of the driver's door lock electric drive. Using a screwdriver, remove the lock lock intermediate rod holder from the door.
10. Unscrew the screw securing the intermediate locking lever.
11. Lower the intermediate lever down and remove the lock lock from the bracket hole.
13. ...and remove the guide
14. The electric door lock drive does not work. The electric lock motor is to blame. Use a screwdriver to pry the end of the rod of the outer handle of the VAZ 2172 and disconnect the rod.
15. Lada Priora hatchback Rock and Roll Antares › Logbook › Repair of electric door lock drive. Remove the cover.
16. Replacing the side glass of the front door of a VAZ 2110-2112, Priora. The procedure for removing and installing front door glass on VAZ 2110-2112 and Lada Priora cars. Remove the two mounting screws...
17. ...and pull out the lock.
18. screw securing the internal lock.
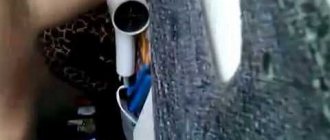
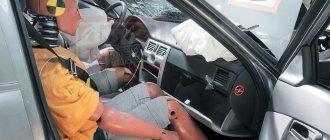
Slight frosts came and a little trouble happened, the lock of the passenger door jammed and no manipulations helped me with this problem, the car has central locking. There was nothing to do and had to disassemble the door trim. At first it seemed that this was almost impossible to do with the door closed, but with patience it is quite possible, everything is the same as with the door open, you just needed a little imagination on how to rip off the clips (I did it using an ordinary flat-head screwdriver with a wound rag and some mother ). Having opened the door trim I saw this picture, I apologize in advance for the quality of the photo, I had no time to bother
knock on any door 1949
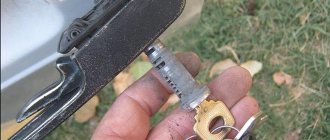
I opened the door with pliers and removed the lock, by the way, immediately stock up on a TORX 40 key, if I’m not mistaken, if you have factory bolts. He's a pest
If I'm not mistaken, use a 3mm drill to drill out the rivets.
Source
Other nuances
Knowledgeable people answer the question “Which are the best locks to take?” They answer that the quality of the purchased ones is not much better than the original ones, and they advise installing mechanisms from the Gazelle. True, here you will need to sharpen your tongue a little. But reviews indicate that the result in this case is simply wonderful.
To modify your original castle, you will need:
- install a foam rubber gasket between its mechanism and the door;
- cover the drive pin that opens the lock with heat-shrinkable tubing;
- fill the voids on the back of the mechanism - any sealant will do;
- the lower edge of the door is equipped with a seal (ideal option - RKI-19).
Cheap replacement for a jammed lock on a Priora.
The old lock on the Priora is jammed
The door lock is stuck in the open position (the door will not close). I had to disassemble the door and get the internal door closing mechanism:
After a light wash in alkali and acid, it is clear that the lock is heavily corroded and the movement of the main levers is difficult. The main release lever was jammed, which was the reason why the door would not close. The advantage of the design is that the lock is more likely to jam from corrosion in the open position than in the closed position. I think there is no need to explain the advantages: if the lock is jammed in the closed state, then it is very difficult to disassemble the door
Based on the design, it is difficult to give advice on what to do if the lock on the Priora is jammed; you definitely cannot use increased effort to open the lock!
. When experimenting with the above rusty lock, the best results when using the lever to open are obtained by repeated, small, rhythmic blows on the opening mechanisms. That is, instead of forcefully pulling the inner opening handle, it’s better to easily pull it 10 times without applying significant force. You can try to unscrew the lock button inside the cabin and blow WD40 into the indicated hole so that at least a little gets on the internal lock and at least somehow lubricates the mechanism.
If the lock is jammed in the closed position without disassembling the door, you can try: 1) unlock the door as much as possible using the button, key, and key fob (it’s better to have more attempts with a little effort than one attempt with a lot of effort, when it will cut the cravings to hell), 2) try open the door using a mechanism inside the door (several light and sharp efforts), which IMHO provides greater travel and pressure on the internal unlocking lever. Or from the handle on the outside of the door. If it doesn’t work out, there’s no need to panic or be nervous. Try this a couple of times.
If this does not help, then, on the contrary, you need to block the door as much as possible; it is organoleptically better to block it by the button (pip) and press it in conveniently, then make several light and rhythmic efforts to open the door using the internal door opening handle, then pull the internal opening handle door and at the same time with the other hand pull up the lock button, the combination of these actions on an old worn-out internal lock provides a slightly greater stroke of the opening lever. You can try this several times. If all else fails, then remove the seat and disassemble the door in an awkward position.
—————————————————————— Repair of the Priory castle
It is economically unjustified to repair an old lock and buy a 2170 lock, because there is a cheap lock with a 2108, the installation of which was previously described www.drive2.ru/l/5487127/ I even found records about modifications to the lock www.drive2.ru/l/465001060646257535/ for blocking it if necessary.
Now 06/04/2021 the price tags for internal locks (right - left) in my city are as follows: LADA 21080610501210 (21080610501310) - 272 rubles LADA 21700610501200 (21700610501300) - on average 1,337 rubles, the cheapest 881 rub. The main difference in the locks is that the lock from the Priora has a slightly different shape of the lever and an electric locking drive with a separate rod and bar. Lock 2108 is successfully upgraded to 2170, welding, drill and grinder to help. Profit in (1337 - 272 =) 1065 rub.
the guy foamed everything except the door
The new one looks like this:
A very important feature of modifying the lock 2108 to 2170 = you need to drill out and very accurately attach the bar for the locking gear motor to the new lock. First, the bar from the old lock is drilled out:
Then drill and tighten with one bolt, try it on in place on the car, bend/turn as required under your door, mark, double-check and only then tightly weld/rivet/screw it with bolts
. Rivets are a more stable and reliable solution (the mechanical characteristics are more stable, they will not unwind or burst from vibration). The part is welded very poorly; you must first clean the galvanized layer and only then will it work out more or less.
The old 2170 lock had lasted over 10 years in harsh conditions and failed due to corrosion. The factory mechanism is galvanized, but this was not enough for a long period of operation. The simplest solution is to additionally coat the lock levers with any film-forming compound. I cleaned the lock (gasoline, alkaline degreaser), sandblasted the welding area of the strip and painted it with cheap NTs 132 gray. All costs for additional materials are covered by the difference in the cost of lock 2108 and 2170 (
1065 rub. difference) I painted in violation of technology: it is supposed to be matted first, then primed, and only then NTs132. But it’s just a Priora, more primer... still better than it was:
Source