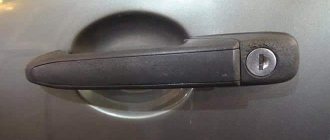
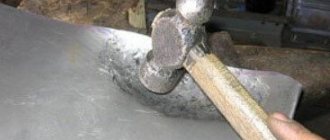
The driver's door lock rod is loose
Good day to all!
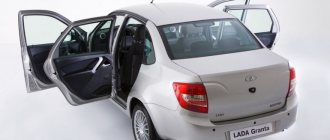
A friend bought a used grant. And various pandemoniums began. But they sorted it out and eliminated it in order and with patience. There was a desire to install a signaling system the same as mine (starline a93)… Actually, because of this, I quickly registered for D2, so that good people could help with advice.
We took the signal with an additional activator and flew to a familiar electrician. The PTF installed by the former owner did not work - they repaired it, the passenger window did not go down - they did it, the handbrake limit switch did not work - they changed it. We connected the alarm - it works from autostart, the trunk opens with the remote control, the doors close and opens with the remote control, the siren howls from a foot strike on the rubber))) And a problem was discovered: when opening the doors using the remote control and then slamming the driver's door, the other three doors began to close. And so on every other time. We close it using the remote control, open it using the remote control, close it with our hand, and the rest are closed through the central locking system. We unscrewed the pin (soldier) of the driver's door - the rod dangles and there is a feeling of free movement up and down. You press the rod a little with your finger and all the doors are blocked. We started the car, drove along our roads with bumps - when the body shook while driving, the doors closed and opened. Very funny and unpleasant. Since the time later came quickly, they postponed it until the weekend. I have to go to work tomorrow. I drove home in my car and decided to unscrew the little soldier at home. The thrust sits dead, it doesn’t move up and down. Please, prepare some tips so that on your only day off you don’t have to sit in the garage all day.
What are the nuances... The activators are all normal (although they are not the problem), the central locking is working, before installing the new activator on the driver's door, there was no such problem with spontaneous opening and closing of doors, which means that the thought of crooked traction disappears.
Just for the first time in my life I took up locks, activators, and rods. I haven’t really figured it out yet.
Thank you all very much for the necessary and unnecessary information!
Source
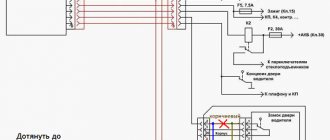
Repairing partial failures of the vacuum central locking system
Most often, malfunctions occur that are accompanied by prolonged operation of the compressor (for 15–20 s or longer until its protection is triggered):
- The central locking opens and closes the car doors (and vice versa) until the pump turns off.
- All the doors opened/closed or the lock did not work on some (possibly uneven operation of the locks), and the compressor continues to hum until the protection turns it off.
The reason for the 1st case may be: a malfunction or “floating” due to condensation or other reasons; the contact of the driver’s door actuator switch - voltage is supplied from the drive via both control wires to the pump board (“plus” for both opening and closing - in As a result, the compressor either pumps air or pumps it out). It is necessary to inspect the switch and, if necessary, repair or replace it.
In the 2nd case it could be:
- Leakage of vacuum line tubes.
- From the limit switch of the actuator of one (or several) of the doors, the signal that the lock has closed/opened does not reach the compressor operation control board, and the pump continues to circulate air.
- Signals about locking/unlocking the locks come to the compressor board, but it “ignores” them.
In the first case, first check the line to the door with a non-operating drive. The damaged area can be identified by the hissing of air. Broken tubes are replaced. If all the hoses are intact, then one of the drives is leaking - usually the membrane in them is torn or cracked. If there is no suitable membrane or used actuator, you will have to purchase an assembled door lock.
In the second case, the repair begins with checking the electrical circuits from the door actuators to the control board for the presence of voltage on the corresponding wire. You can simply compare the state of all circuits from all drives. Most likely, the incorrect signal is coming from only one drive, and the voltage measurements on the wires of the bundle coming from it will be different from the readings on the wires from all the others. Then you should find the open circuit and repair it. Most often, damage occurs in the door corrugations. If the wires are intact, then the reason lies in a faulty limit switch, which is being repaired or replaced.
In the latter case, it is necessary to disassemble the compressor unit and clean the contacts of the opening/closing alarm pneumatic sensor terminals - most likely, they have oxidized. If this does not help, then you need to check the control board circuit - it needs repairs.
And again adjusting the rear door locks
The topic of poor rear door opening is a very painful one for Grant/Kalina owners. It did not bypass almost any owner of the above-mentioned cars.
And so we will try for the hundredth time to understand the causes of this disease. You can find a lot of information on the Internet about how to make the rear doors work. We will try to list the main operations that are recommended to be performed for better opening of doors: 1) Adjusting the lock, or rather the response “ear”. This needs to be done first, but it will not give a strong result, although it is very important. 2) Bending the door in one way or another. Many people achieve very good results, but some consider this method too barbaric or are simply afraid to do it, and there are no known masters. 3) Grinding the tooth in the lock. There is an effect, but not great. And if you overdo it, the locks will unlock spontaneously.
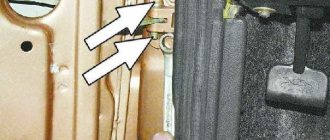
However, I almost never came across any information about why this actually happens. The front doors have exactly the same locks and they open perfectly, so why is it not so with the rear ones? It’s enough just to understand the design of the front and rear door opening mechanisms and understand what their differences are. It turns out that these differences exist and the whole “root of evil” is found in them. I came across this video. In it, the author describes well the design of the rear locks and makes a VERY important remark that easily explains what the difference is and why the rear doors are so difficult to open.
And so the whole essence of the problem is that in the rear doors, behind the place of traction, they simply made a bracket on which the handle lever rubs. And at this moment the main effort arises, because The silumin hook of the handle moves very tightly on the metal platform of the lock bracket. At first I didn’t even believe it, but when I removed the handle and pressed the lock lever with my finger on the closed door, I was very surprised at how easily the door opened. As I found out later, AVTOVAZ also knew very well about this and supposedly even corrected this ailment with new grants, this is written about in detail here. And so we see: a rod has finally been installed on the rear doors
thermal insulation of external walls price
By the way, I wonder when they started installing them? This is my understanding since the launch of the liftback. But what to do if there is no traction? Here folk craftsmen offer different options, in general, who is good at what. For example, you can do this or even install an electric drive for opening locks, although this is of course too cool in my opinion, but I really liked the video of how this electric drive works. Unfortunately, I don’t know the details of the work, because... The pictures in the link above are not displayed for me.
I haven’t yet figured out how best to remake the mechanism, so I just sanded the surfaces of the bracket and handle hook, and then lubricated everything well. By the way, the handle itself had a very tight movement, i.e. when it is already removed from the door it is still not easy to open. Accordingly, I cleaned it and lubricated it in the same way, and it became much better. The effect of what was done turned out to be higher than expected, so my doors have not opened even once in 3 years of operation. But it turned out to be so simple.
Unfortunately, I didn’t take any photos or videos during the work, but I think the materials presented are quite sufficient.
Source
Replacing an internal part
Replacing the internal handles on the rear door of a Granta is slightly different from dismantling the external part. The internal element has more fastenings and is partially hidden by decorative trim. Algorithm of actions:
- The cladding is dismantled. To pull it out, you need to pry up the edge. To do this, use the thin edge of a screwdriver or a sharp knife.
- The rear door card unwinds. There is a rod inside that is important to disconnect.
- To remove the remains of the broken opening device, the fasteners are unscrewed. The handle is removed and a new part is mounted.
Before installation, the internal niche is cleaned. This can be done with alcohol infusion or detergent.
Sources
- https://remont-avtovaz.ru/zamena-ruchki-perednej-dveri-na-lade-grante/
- https://neauto.ru/class-single__title-itemprop-headline-osobennosti-zameny-vnutrenney-i-naruzhnoy-ruchki-dveri-v-lada-granta/
- https://InfoKuzov.ru/remont/zadnyaya-ruchka-granta
- https://vgrante.ru/?cat=60&pcat=29
- https://o-ladagranta.ru/kak-pomenjat-ruchku-na-dveri-lada-granta/
About the rear doors. Adjusting locks. Soldier repair.
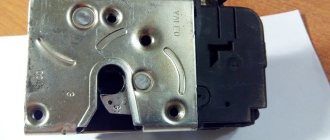
When I bought it, the rear doors were difficult to open; it took a lot of effort to open them. I drove like this for half a year, when suddenly, at some point, the “soldier” on one of the rear doors stopped rising. The lock works, he gives a command to the “soldier”, but he doesn’t rise all the way, he had to lift him with his hands. I took the time and started working on the rear doors, removed the trim and off we went. 1. “Soldier” Visually inspected the rods, they walk freely, nothing interferes with them. I decided to remove the lock to see what was there, I thought the reason lay in the lazy “soldier”. The lock turns out to be non-demountable, there is nothing to adjust there. I smeared the lock as best I could with lithol and put it back, and became depressed. I sat, thought, pulled the rods in different directions, it turns out that the bolt was not fully screwed in from the factory (marked with a red arrow in the picture), during operation it became loose and was held on by snot. I screwed it on and the problem with the “soldier” was solved.
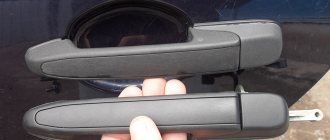
2. Adjustment of locks. I read on the Internet that one of the reasons for poor opening of the rear doors is a flag on the door handle. I also read that the flag has already been replaced with rods. I wrote above that I removed the castle. I also removed the handle, attaching a photo.
There is craving, which means it’s not 100% about it. I didn’t start sawing the tongue as a matter of principle, because this is not an option. The lock opens easily, the problem is due to poor adjustment of the lock mate, in the bracket.
I picked up a screwdriver and a Torx and set out to find the optimal position for this bracket. I didn’t bend the door, I didn’t saw the tongue, I lubricated the bushing with lithol. Summary on video.
Source
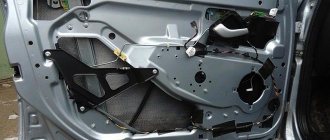
Electric door drive. Replacement.
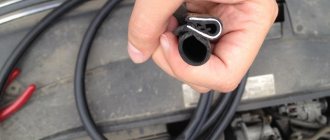
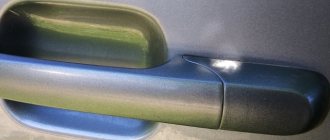
About a month ago, the electric door drive stopped working, or rather it worked - when you pressed the buttons, it worked, but the lock did not open. At the same time, when the door slammed, it rattled, dangled, and by all indications seemed to have fallen off. I waited for the weekend, removed the trim, but it actually unscrewed and was dangling - the self-tapping screw on which it was screwed was practically completely unscrewed. And I decided, when tightening this self-tapping screw, to lubricate it with a thread locker so that it would not unwind in the future. I lubricated it, screwed everything back, assembled the door, gave it a few final clicks - everything worked like clockwork, and went home satisfied. And on Monday morning I go out, I press - and in response there is silence, I open the key, and I immediately realized that it had fallen off - it was hanging there again, you could hear it. Then the frost hit, the car was in the yard under a canopy, I didn’t feel like poking around in the cold, I drove all this the time is like this. And today it’s a little warmer, I decided to get busy. I’m taking it apart, and I saw this picture
Now I understand that plastic parts
Do not lubricate with clamps! I installed a new electric drive, assembled it, checked it, everything works as expected.
My immediate plans are to adjust the trunk, it has stopped lifting completely, only the lock clicks - it rises a couple of centimeters and that’s it, I don’t know, I’ll either rearrange the torsion bars, or install springs, as some Grant owners do. Well, otherwise everything seems to be normal, consumption is 9.4 now, only in city mode, warming up, sometimes slipping, I think this is normal consumption. Good luck to everyone on the roads!
Source
Sequence of actions when replacing the rear right (left) door handle
We carry out the work modularly, since initially it is necessary to dismantle the casing, the internal filling, and unscrew the handle latches.
Stage No. 1: dismantling the card.
Stage No. 2: disconnect the door lock rod and remove it from the door cavity.
This completes the process of dismantling the unlocking element. Next, we carry out preventive maintenance, install new parts, and assemble the structure in the reverse order.
Replacing the outer handle
To understand how to remove the door handle on a Grant, just study our instructions. From the inventory you will need: a Phillips screwdriver, a socket wrench and a knife. Step-by-step work:
- Decorative trims are dismantled. The plastic latches are removed, then the edge of the casing is picked up using a knife.
- The handle is secured with a nut and bolt on the inside and outside. First, the fastening element is unscrewed in front, then in the back.
- The thrust rods and seals are removed from the closing mechanism.
- The product is removed. To do this you will have to pull the handle a little.
- Before installation, the mounting location is inspected and dirt and dust are removed.
Review of Manufacturer Prices
| Name/article | Price, rub.) |
| External handle 11180-6205151-00 | From 425 |
| RENAULT/LADA 11180-6205151-00 | From 385 |
| 11180-6205150-00 | From 420 |
| Internal handle 21900-6205181-00 | From 135 |
| 21900-6205180-00 | —/— |
| Bolt M5x10 00001-0038331-21 | From 10 |
| Nut M5 00001-0038318-01 | From 10 |
| Screw M6x10 00001-0032759-01 | —/— |
| Lock washer 00001-0026053-71 | —/— |
*prices are current as of November 28, 2018.
Recommendations for selection
Without a doubt, when choosing, give preference to parts with factory catalog numbers. Purchase consumables exclusively from official representative offices, service stations, and auto stores.
Before purchasing, check the catalog numbers of parts with the actual data specified in the operating instructions. If such a book is not available, seek advice from service center specialists, download recommendations from the Internet.
Step-by-step instructions for dismantling the rear right (left) door lock on a Lada Grant
We carry out the work modularly: dismantling the card, removing the internal filling, handle, lock.
We lubricate the moving mechanisms, install a new lock, and assemble the parts in the reverse order.
The rear door lock cannot be repaired if it shows signs of deformation of the housing.
Rear door lock device
Review of Manufacturer Prices
| Name/article | Price, rub.) |
| Rear door lock 21900-6205013-10 | From 2000 |
| 21900-6205012-10 | —/— |
| 21900-6205013-00 | From 650 |
| Locking pin 11180-6105228-00 | From 150 |
| Screw 21080-6105268-00 | —/— |
| Bushing 11180-6105276-00 | From 100 |
scream half the night stay awake cry lips bleed bite song
*prices are current as of November 28, 2018.
Adjusting the rear door lock
The doors are difficult to open, the lock is jammed, an extraneous squeak appears when unlocking - the first signs of the need to adjust the door lock. The problem is common among domestic transport.
The left side wears out prematurely due to frequent use.
Inexperienced owners practice eliminating damage by lubricating the mechanism. However, the effectiveness of such a solution is low. Service station technicians recommend the following adjustment:
This completes the adjustment of the rear door locks.
The above algorithm is effective provided the lock is in good condition. What to do if there is a curvature or deformation on the door frame? In this case, the experts advise making improvements:
Along with adjusting the lock, you have to adjust the door. The reason is the increase in the radius of curvature of the frame. The defect is common and can be corrected by straightening the curvature.
No special tool is needed, the strength of the hands of the master (repairman) is enough.
Since 2015, AvtoVAZ has launched mass production of rear door locks of a new type on the Lada Grant. This is a modernized version of the previous locking mechanism.
The main difference is not only in cost, but also in the change in design and the use of durable polymer. This made it possible to significantly reduce the knocking sound when hitting a metal loop.
External handle replacement process
The outer door handle of a Lada Granta car is removed not only for replacement, but also if it is necessary to repair the lock cylinder, lubricate or correct the operation of the locking mechanism. Work order step by step:
- Open the front door.
- Remove the casing.
When working on reinstalling trim elements, it is recommended to purchase additional clips; the cost of one clip is up to 3 rubles. During the repair process, fasteners may
break, the parts are consumer goods, have a bad fixing clip or a hard skirt.
- Using a screwdriver, unscrew the three screws that secure the mirror frame to the car body.
- Remove the retaining clip using pliers.
- Remove the mirror and remove the hinges through the diagnostic hole.
- Remove the bolt that secures the outside handle to the end of the door. To do this, you need to use a 8-mm head. If the screw is tight or acidified from rust, it is recommended to spray the fasteners with anti-corrosion lubricant.
- Remove the bolt holding the lever. It is located in the inner tunnel.
- Disconnect the rods from the lock using a screwdriver.
- Moving forward as you move, slightly rocking, remove the outer handle.
All work with lock mechanisms, dismantling handles outside and inside, and reinstalling casings is carried out only with the battery disconnected.
Reviews
| № | Positive |
| 1. | Vasily: after two years of active use of the car, there are no complaints about the body or its elements. The doors close easily and the locks are also in good working order. I try to treat equipment with care and carry out diagnostics in a timely manner. |
| 2. | Kirill: at 65,000 km I adjusted the hinge once on the right side. Obviously there was a bad fixation from the factory. There are no more complaints, I am satisfied with the build quality of the domestic car. |
| 3. | Ivan: for the first time, a Russian car turned out great. Of course, there are complaints about the technology, but they are insignificant. Those who are familiar with a screwdriver can easily eliminate defects on their own. |
| 4. | Gennady: I haven’t noticed anything like this in a year and a half of driving. All mechanisms are operating normally, lubricated and secured. |
| 5. | Dmitry: after buying the car, I immediately re-tightened all the moving elements myself, lubricated them additionally, and adjusted the gaps. I haven't had any worries for more than a year. |
| 6. | Alexander: I bought the car two years ago from a dealership, drove more than 80,000 km, no comments. There were minor breakdowns, but I fixed them myself. There were no major breakdowns. |
| 7. | Ignat: in a year and a half of active operation of the machine, I adjusted the hinges twice and lubricated them additionally. In general, there were no serious breakdowns. |
| Negative | |
| 1. | Kirill: I’ve only driven 75,000 km, but I’ve already adjusted the hinges, changed the seals, and ordered soundproofing for the interior. |
| 2. | Gennady: the dashboard is systematically fastened on the paving stones, I can’t do anything. I contacted specialists and repaired it myself, but it didn’t help. |
| 3. | Vladlen: there are more shortcomings in Grant than advantages; the manufacturer is in no hurry to eliminate defects. |
Conclusion The door lock is replaced only if it is damaged, deformed, or defective. The design of the mechanism is not complicated, and the operating principle is intuitive.
We replace the body element ourselves. At the preparatory stage, we check the availability of tools, lubricants, and rags.
The average service life of the locking mechanism is 120–150 thousand km.
Source
How to adjust door locks on Lada Granta
Often, after time has elapsed on a Lada Granta car, the doors begin to open and close with some effort.
To fix the problem in question with this car produced by AvtoVAZ, you have to contact a service station. In this case, you need to purchase door closers and door stops for Lada Granta. But you can eliminate this kind of defect yourself. This must be done quickly, especially if the problem occurs on the front door. It is better to eliminate it as soon as it appears, in order to avoid side effects and more serious damage. In order to make opening doors more comfortable, it is necessary to perform certain actions. The main one is adjusting the door locks.
Sometimes the owners of the Lada Granta Liftback, produced by the famous AvtoVAZ company, have to deal with various modifications after purchasing the vehicle. This happens for the reason that after even a short mileage, minor breakdowns or problems often appear at first, and if they are not eliminated in time, they develop into more serious ones. Many owners consider the most common defect to be the fact that the front door locks do not function well and open with great difficulty.
Tools and Supplies
Reinstallation and repair of the part can be done in the garage; for the work you will need the following tools and consumables:
- Set of car keys.
- Set of heads, ratchets and cranks.
- Set of special plastic tools.
- Ruler for opening the door of a Lada Granta car.
- Phillips and flat head screwdrivers.
- Anti-corrosion lubricant WD-40.
- Litol lubricant.
- Rags.
The work does not require special skills; the driver only needs to carefully dismantle and install new parts according to our instructions.
Possible problems and ways to solve them
You can, of course, buy Lada door closers and door stops and make repairs in accordance with the instructions. But this operation can be performed in a more productive way. To carry it out you need:
A common symptom of a broken lock is that a loud sound appears before the door opens/closes. The design of the front door lock is made in such a way that the metal can sometimes rattle. In order to eliminate this problem, you need to remove the lock itself and put rubber tubes of the required size on the levers. Immediately all sounds coming from ahead will disappear. When closing the doors, only a bang will be heard, and all sharp and loud sounds will be a thing of the past.
If the car has a universal body, then you should also adjust the lock on the trunk door. The locking tongue itself fits into the bracket. You need to find it and check the tightening of the screws. Then the lock must be lubricated with silicone grease, and then the door must be checked by opening it. If the lock does not work properly, you need to screw on the rubber stops, but they should not be over-tightened. Then check the drive rod of the Lada Granta door lock.
wood cuts on the wall photo
If jamming and play are observed, they should be eliminated. Moreover, all this must be done at once. You can also buy limiters for the trunk lock. Before purchasing Lada door closers or door stops, you should first consult with a specialist. Having received the necessary and important information, you can choose the highest quality limiters. Problems with the operation of the lock can be solved by making a quality adjustment. To do this, certain actions must be taken.
You should pay attention to the gap between the drain and the top edge of the door. The optimal size of the gap is considered to be a hole into which a plastic card can fit. In this position, the aerodynamic sounds and the tightness of the fit to the drain will be balanced.
Most often, the reason for poor lock performance is the difference in the radius of curvature of the upper door frame. If you look at it in detail, you can see that when simultaneously adjusting the locks at the rear of the car, they always touch the top of the sealing rubber differently. Tight opening compresses it much more in the closed position. To adjust the locks, you can use the following method.
You need to twist a thick paper tube and insert it into the upper part of the window frame, while slightly lowering the glass. Then press in. This procedure must be done several times, using your hands to bend the frame when closed. By following these tips, you can handle the repair yourself. The only thing is that you need to have Lada Granta door stops in stock. But you should not refuse help or advice from a specialist, since sometimes the repair scheme can be very complex.
Is it possible to install central locking on Lada Granta
There are Grants configurations (below Norma), where central locking is completely absent. Car owners who are accustomed to comfort are probably wondering whether it is possible to install a central locking system with a remote control on this equipment?
It is possible, but doing this with original kits is time-consuming, expensive and impractical.
The best solution is considered to be the immediate installation of an alarm system or a universal central locking system. Regardless of the path chosen, the steps will be the same. First, let's figure out what you need for basic installation:
- Control block.
- Drives for door locking.
- Limit switches.
Lada Grana is equipped with limit switches mounted in the body. Therefore, there will be no problems with their installation and there will be no need to buy an assembled lock, as on foreign cars.
After purchasing everything you need, all that remains is to do the following:
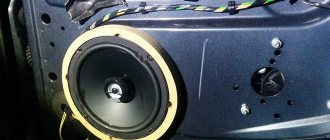
- Disassemble all the doors and install in each of them an electric drive connected to the lock rod.
- Lay the wires in the rubber corrugation of the door and connect them in parallel at one point in the cabin - where the control unit will be.
- Do the same with the door stops. Connect the wires to the central locking system according to the diagram, connect the control unit to power and test the operation of the door locks and limit switches. If everything is ok, move on to the next step.
- Connect the alarm part of the central locking system to the standard horn.
- Hide the control unit far inside the car. Preferably, under the dashboard - as much as possible, where only you can reach.
- Assemble the doors and all other parts of the interior.
Such a central locking system will differ from the standard one, but may have a lot of additional functions. For example, the Start-Stop button, which is very popular, as well as its own original control panel.