When creating new car models, special attention is paid to environmental protection. Thus, the crankcase ventilation system (Priora, Kalina) has been modernized, which meets modern environmental safety requirements. It ensures the removal of combustion products of the fuel-air mixture, which collect in the oil pan as a result of exiting through the not very tightly fitting piston rings to the cylinder walls.
What is a check valve
The check valve in the fuel system should only allow fuel to flow in one direction. This is the main purpose of OKDT. When the fuel pump is not working, the device automatically closes the return fuel line to prevent unused fuel from flowing into the tank.
When the valves are working properly, the pressure in the main pipes does not drop for a long time after the engine stops. The small part is calibrated. The design consists of several elements:
- housing with outputs;
- ball-type valve with a seat made of soft metal;
- membrane;
- spring.
Improving the starting characteristics of the internal combustion engine is the main function of the exhaust valve. A working part installed in a certain location in the fuel line maintains the optimal value of the residual pressure.
It is not difficult to understand how a valve installed on a ramp works:
- When the fuel injection pump is running, OKDT does not interfere with the movement of fuel in the forward direction.
- When the fuel pump turns off (when the engine stops), a reverse flow of working fluid occurs in the line.
- The reverse flow of fuel creates pressure, which closes the valve.
- The fuel remains in the line, creating residual pressure.
The operation of the entire fuel system of the vehicle depends on the small device. If there is no residual pressure in the line, it must be created every time the engine is started. The driver is forced to spend extra time cranking the starter.
How to find your device
There are models in which the valve is mounted in the fuel rail housing. A common installation location is the section of the fuel line located between the injectors and the tank.
There are vehicles in which the part is mounted directly into the fuel pump housing. In modern cars equipped with a fuel preheating system, the OKDT housing is located before the preheater. The installation location depends on the make of the machine:
In between the fuel pumps
Before the heating system
VAZ 2110 (16-valve model)
In older cars, the fuel pump was installed on the cylinder block. It was equipped with a sealed exhaust valve to prevent unused fuel from flowing back into the tank.
Why is OKDT confused with RDT?
Many car enthusiasts consider the fuel pressure regulator (FPR) to be a check valve. In fact, these are parts of different design and purpose. RTD valves come in two types:
- modulated by atmospheric pressure;
- vacuum-modulated.
The purpose of the RTD is to maintain a certain level of pressure in the pipes. It is installed in the fuel lines of two types of engines - diesel and injection. The pressure regulator valve always operates in parallel with the OKDT.
In vehicles with “return”, the mounting area of the pressure control valve is located on the fuel rail. It is located between the fuel rail and the return line. If the return line is not included in the circuit, the part is installed in the fuel tank housing. The performance of the injectors and the stable operation of the engine depend on the proper operation of the device.
Design and general diagram of the EVAP gasoline vapor recovery system
The design and operating principle of the device in question is quite simple. Below is a diagram.
To understand this, you need to know that the system consists of a number of the following parts:
- The separator is needed to capture gasoline vapors and then return it in liquid form back to the tank. On Priora it is located in the left rear wheel niche. It is important not to confuse it with an adsorber. The separator (top) has a built-in gravity valve.
- The gravity valve is needed to eliminate the possibility of fuel leaking from the tank if the vehicle rolls over in the event of an accident. It is also called a safety or safety valve, which is triggered when the vertical deviates by an angle of more than 90 degrees.
- The pressure relief valve is a device that eliminates the possibility of deformation of the metal tank when gasoline is used up. To put it simply, as fuel is consumed, a vacuum forms inside the sealed tank, which can cause deformation of its walls. To prevent this, a pressure sensor is used, which is also called a breather. With its help, the pressure inside the tank is equalized with atmospheric pressure. Its role is played by the atmospheric channel on the adsorber. When a vacuum is created in the tank, air is sucked in through the air channel, thereby equalizing the pressure in the tank. If the channel is faulty (contaminated), then the risk of tank deformation increases. That is why the Priora uses a gas tank cap with a valve for air intake as a safety net. This valve does not release air from the tank, but lets it in to stabilize the pressure.
- Absorbent - as mentioned above, it is activated carbon that temporarily absorbs and retains gasoline vapors that enter the engine during purging.
- The filter prevents the possibility of activated carbon granules entering the purge valve, as well as contaminants entering the adsorber through the air channel.
- Electromagnetic valve (canister purge valve)—its role in the system is key, since it is responsible for opening the channel for sucking gasoline vapors from the canister.
- Connecting tubes - needed to connect the adsorber to the gas tank, separator and other structural elements.
The operation of the system is controlled by an electronic control unit, so its malfunction is necessarily accompanied by the display of the corresponding error codes on the BC screen.
Symptoms of a problem
The following characteristic signs indicate a malfunction of the fuel system:
- after idle time the engine starts unstably;
- more fuel is consumed;
- smoke comes out of the exhaust pipe during acceleration;
- During maintenance, an increased content of CH and CO was recorded.
Signs of a faulty check valve in the fuel pump:
- the motor is unstable at minimum speed;
- to start the engine, you have to rotate the starter several times while simultaneously pressing the gas pedal;
- fuel hoses are leaking, tightening the clamps does not solve the problem;
- In idle mode the speed changes sharply.
Operating principle of hydraulic compensators
The main purpose of using HA in the Priora engine is to simplify the engine maintenance procedure. If previously it was necessary to adjust each valve separately, now this procedure is carried out automatically.
Structurally, the hydraulic compensator is a cylindrical part, which consists of a plunger pair located inside its body, as well as a check valve.
The operating principle of this mechanism is simple. During operation of the power unit, the camshaft cam presses the bottom of the cylinder. In this case, the hydraulic compensator moves, as a result of which the plunger presses on the valve and, accordingly, it opens.
The clearance mentioned above is regulated by the oil pressure entering the cavity under the plunger. The greater the oil pressure, the stronger it acts on the plunger and, accordingly, the valve opens with a larger gap.
Methods for diagnosing a malfunction
To independently check the return valve, measure the fuel pressure in different parts of the fuel system. To carry out diagnostics you need a pressure gauge. The measuring tool is connected to a specific section of the fuel line.
The measurement helps determine whether the RTD or check valve is faulty. If, when you turn off the ignition, the pressure value on the pressure gauge screen does not correspond to the reference value, then replacing the check valve of the fuel pump will help restore normal operation of the power unit.
Reference values in different sections of the fuel system: 3.2 bar is the norm for the fuel pump, for the fuel rail - 2-3 atm. A sharp drop in pressure is a sign of a malfunction.
Experienced car enthusiasts take measurements in the following sequence:
- connect the pressure gauge in the evening;
- The car is first started, then turned off;
- In the morning they check the pressure, compare it with the minimum value indicated in the book. If the pressure gauge shows less than normal, the check valve requires repair or replacement.
The second diagnostic method does not require measurements. It is used in case of unstable operation of the internal combustion engine, if the line through which the fuel is supplied is made of soft material.
During diagnostics, a hose is found through which the fuel moves in the opposite direction. They clamp the tube and at this moment evaluate how the motor works. If the operating mode of the cylinders corresponds to the norm, and the speed increases, it means that the valve does not hold pressure, it can be safely changed.
Why OKDT doesn't work
There are several reasons for the appearance of characteristic signs of a check valve malfunction. According to statistics, low-quality products most often fail. Counterfeits of well-known brands made in China do not work for a long time. Factory defects are a common cause of breakdown.
Bad gasoline harms all components of the fuel system: filters, pressure regulators, and check valves become unusable.
Wear of a part (depletion of its resource) is the second reason for the malfunction of the automobile fuel system. If the part is of high quality, then the first signs of OKDT malfunction occur when the mileage exceeds 100 thousand km. Quite often, mechanical structures break down due to low quality gasoline. Low-quality fuel may contain water and other impurities.
How to measure fuel rail pressure
You need a hose, a tee (plumbing), a pressure gauge up to 6 bar, several clamps. The pressure in the fuel rail is measured if, during acceleration, the engine operates with dips and unevenly.
In preparation for measurement, the hose is placed on the outlet fitting of the measuring device. To reduce the error and reduce pressure loss, the connection is fixed with a clamp. Carefully unscrew the plug and nipple from the fuel rail. Connect the second end of the hose and also secure it with a clamp. Blood pressure is measured in several modes.
The backstory was this: at some moments the car stalled when accelerating, but this happened so rarely that I didn’t even think that it was a problem with the fuel pump, especially since they measured the pressure earlier, it was 3.6 bar, which is not enough to the norm of 3.8 , but +- 0.2 bar is allowed (yes, 3.8 bar - this is exactly the pressure in all domestic cars (“tenth” family, Samara, Kalina), where there is no return from the ramp. And 2114 is no exception! But I repeatedly misled, assuring that it should be 3.2 bar) For those who do not believe, I will say that “RDT-380” was carved on the fuel pressure regulator, where I think 380 is kilopascals. I digress, let's talk about the problem further. The car has become difficult to start in light frosts - it grabs and immediately stalls, and so on 2-4 times, then it starts. I had already sinned on the IAC, but before that I decided to measure the fuel pressure in the rail at my brother’s garage. We measure and see that at the moment the fuel pump is turned on, the needle reaches 3.6 bar and then drops to almost 0 in a couple of seconds. It became clear that the check valve does not hold. Here I will tell you that I could not find on the Internet for 2 hours, digging from my phone on the street, namely, where this check valve is located. Everywhere they write briefly and clearly - in the fuel pump. Well, I took off the fuel pump and looked for this damn valve myself - I blew into all the holes, but it didn’t blow through any of them. I took off the RTD, without it it won’t blow through again. Again I went to the Internet, there I found a fuel pump motor in a section from a Priora, it’s there in the lower part, I began to flare it
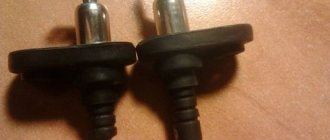
and there’s nothing there either, just the impeller. Well, the stump is clear, I flared it in vain, I’m looking at the top on the fitting, and the valve is located right there. Flare it out and pull it out
The reason, it seems to me, is clear - for some reason the spring sits completely loose, the valve does not even press. Probably, it was tightened by time. I take it, stretch it slightly so that it presses the valve, roll it back with a soldering iron, assemble the fuel pump and go check it. We install it, turn it on and with bated breath we look at the pressure gauge - and there it is at zero! We pull the hoses off the fuel pump, turn it on and see a barely flowing trickle. Now it is clear that the fuel pump needs to be changed. Here I had to choose: should I take the assembled one or just the electric motor? After all, my RTD works normally, the FLS works normally (by the way, so that the resistive layer of the FLS wears out less and more evenly, the fuel tank should be filled full). Well, I decided to first look for Bocsh or Siemens motors, and if I can’t find them, then the fuel pump assembly. In one store they gave me a motor supposedly from Siemens, but on the box there was something like Sizhsmens, and there were no holograms or markings on the motor. We go to another store and there we find it in a yellow Bosch branded box.
here you can see that for some reason I wrapped it with tape. It turned out that it was a little smaller than what was standing, and the latch also didn’t really lock it, but with tape it stays in place just fine. Bosch, by the way, is pleasant to hold even in your hands, not even like the one that was standing. The whole thing sparkles like a Christmas tree, although the appearance does not affect the quality.
We assemble, install and check. The needle on the pressure gauge rises to 3.8 bar in less than a split second, freezes there for a few seconds and begins to slowly fall. I'm happy and disappointed at the same time. What else is this? The consolation is that the pressure drops slowly, about 5 minutes to 1 bar, it will be enough time to start it. In the morning, by the way, I checked it - the fuel pump worked and switched off, the car started up with half a kick. The noise level of the fuel pumps is the same. Although I remember that before the first one worked louder, there was no need to even listen, in the last days of his life one could hardly hear him, he worked quietly.
After replacing the fuel pump motor due to a faulty check valve, I drove safely and did not know any grief for 2 weeks. And here again similar symptoms in the morning - the fuel pump pumps gasoline, the car starts the second time, stalls the first time. We urgently purchased a tire pressure gauge and a vacuum booster hose with two clamps to measure the fuel pressure in the rail
Measurements showed that the pressure was instantly reset to zero again. And since the motor is new, it began to blame the RTD and the hose inside the fuel pump. Here they are bought
A malfunction of the fuel pump check valve is indirectly confirmed under the following conditions:
1) It takes a long time to start when the engine is hot and idle for more than 5 minutes, and the longer it sits, the longer it takes to turn the starter. If idle for less than 5 minutes, it can start immediately. 2) no deviations in acceleration dynamics (as long as the pump is running, the check valve is essentially not needed at all). 3) If the car has not been running for a long time and the engine has completely cooled down, for example, it has stood overnight, it starts at half a turn. 4) When the engine is running, forced shutdown of the fuel pump leads to an immediate stop of the internal combustion engine, that is, an instant drop in pressure in the fuel system after the fuel pump is turned off. (If the valve is faulty, the internal combustion engine runs for more than 5 seconds.)
One hundred percent confirmation of a malfunction of the fuel pump check valve will only be provided by connecting a pressure gauge directly to the fuel pump (or to the fuel filter), that is, the system must be shut off with the pressure gauge, turning on the fuel pump, and visually observing the pressure created by the fuel pump during its operation and the residual pressure after stopping.
Read more about the operation of the fuel system, fuel pump and the check valve in particular here https://enc.drom.ru/3397/
Quote from the article: “The exhaust check valve, located in the exhaust port, maintains residual fuel pressure in the fuel system when the engine is turned off. This improves starting performance and reduces vapor lock. Without residual fuel pressure in the system, pressure would need to be built up every time the engine was started, which would increase the cranking time. When a hot engine is turned off, the temperature of the fuel in the line around the engine increases. Keeping the system pressurized increases the boiling point of the fuel and prevents fuel evaporation.
The pressure bypass valve opens if the pressure in the fuel system increases. This is a safety device to prevent the fuel line from rupturing and damaging the pump.”
The diagnostician pointed to the lambda, as if he had no other complaints. Well, as usual, there are no guarantees that everything will be OK with the new lambda. He says that we have to start somewhere)))))) I’ll clean the contacts and then order a new one.
Consumption of the 98th is 10-10.5/100, city/highway in half. Maybe not to worry?
How about around the city? I'm happy with the consumption; in the summer I went to Altai with 90-110 - the consumption was 6/100. Why is it a bad breeder?
Well, if the problem is in the lambda, then if I turn it off, should the car start?
How about around the city? I'm happy with the consumption; in the summer I went to Altai with 90-110 - the consumption was 6/100. Why is it a bad breeder?
Well, if the problem is in the lambda, then if I turn it off, should the car start?
I measured it with a pressure gauge, at xx the pressure is 2.1 (according to the book 2.35), with the vacuum hose of the ramp check valve removed 2.8 (according to the book 2.87-2.93). Like if is higher
, then “replace the check valve.” Pressure drop after turning it off: the book says that within 5 minutes the pressure should drop to at least 1.5. It turns out that it drops to 1.5 in 15-20 minutes, after half an hour on pressure gauge 1. You start to start - the starter just whacks and whacks, the pressure immediately rises to 2, i.e. rises quickly.
What else could be done?
Ovod19 › Blog › Fuel pressure regulator
Today we’ll talk about the fuel pressure regulator, a mechanical device that is undeservedly deprived of attention.
It is popularly called a check valve or bypass valve. Usually, when there are problems with the engine such as: insufficient power, unstable idle, poor starting, engine jerking, they either pay attention to it last or simply ignore it. And in vain, because this is one of the most important elements in engine operation.
So we’ll talk about the “check valve”. The fuel pressure regulator (in everyday life, we all probably call it a “check valve” or “bypass valve”, because it transfers fuel back to the tank, in an amount depending on the engine operating mode), is installed on the fuel “rail” and is designed to maintain constant fuel pressure at the injector inlet at different engine operating modes and at different vacuum in the intake manifold. The regulator is a diaphragm valve. On one side, the membrane is acted upon by fuel pressure, and on the other, by spring force and air pressure from the intake manifold, to which the regulator is connected by a hose. The greater the absolute pressure (i.e., the lower the vacuum) of air in the intake manifold (i.e., the greater the load on the engine), the greater the fuel pressure. When the load on the engine decreases, when the fuel pressure exceeds the total force from the spring and air pressure, the regulator valve opens by a larger amount and excess fuel is returned through the drain line to the fuel tank. Figuratively speaking, the “check valve” serves only to maintain the same difference in pressure applied to the injector from the side of the intake manifold and from the side of the fuel line. ECU. “Does not hold”, which means its complete “openness”, that is, the fuel pumped by the fuel pump passes through the valve and fuel rail freely, almost nowhere and without being delayed by anything, and is quietly drained through the “return” line into the fuel tank. This condition causes low pressure in the fuel system. “Wedges”, “wedges” - in this case the valve works like a “drunk doorman in a restaurant”: “I want to let it in, but if I want to, I won’t let it in!” In this case, the fuel that gets into the fuel rail “sticks” into the valve, and since it has nowhere to go (and the pump at the back continues to create pressure), it begins to look for a way out... And sometimes, when the valve “wants”, it flows briskly into the tank along a completely open highway and no one can predict when all this will happen. “Dead” - of course, means: the valve in this state is like armored doors in a bank - it stands in the way of fuel and does not let it into the tank at all, under any circumstances. As a result, with the described malfunction, the pressure in the fuel system increases significantly. When the valve “does not hold,” the fuel pumped by the fuel pump circulates almost freely throughout the car. Fuel pump - fuel filter - fuel rail - and back to the tank. Let's imagine what is happening: there is low fuel pressure in the fuel rail, despite the fact that the fuel pump is working properly.
During acceleration of the car, when the check valve should slightly “close” due to the fact that there has been an increase in the volume of air flow and, consequently, a decrease in the vacuum in the intake manifold, the valve does not increase the fuel pressure. And when accelerating, the engine “wants” more fuel, but it doesn’t get it. What's the result? Only that in this state of the valve and during acceleration the car “begins to pull worse.” But that's not all. When “the valve doesn’t hold,” then it still “does a trick on us” after we have turned off the car and try to start it after, for example, two hours. What happens in this case? With a normally operating fuel system and all its elements, the fuel pressure in the fuel system after stopping the engine should remain unchanged for quite a long time, say, all night. But this is with a normally working system! But our valve “doesn’t hold.” What will happen? And the fact is that after stopping the engine and stopping the operation of the fuel pump, we simply will not maintain pressure in the fuel system. That is, there will be no pressure in the fuel rail some time after the fuel pump stops. And when we start to start the engine again in an hour or two, we will “drive” it for a long, long time until it begins to “grab” and only then starts. In addition, “low pressure in the system is expressed in unstable engine operation at idle. Now let’s summarize what a valve that “doesn’t hold” can affect: - poor throttle response, “jerking” of the car during acceleration; — unstable XX; — after stopping the engine and starting it after some time, the engine starts with difficulty, you have to “drive” it for a long time to start it. Let's analyze the state of a “dead” valve that does not allow fuel to pass through. What happens in this case? The fuel pump “drives” fuel, but it “sticks” into this valve and does not go any further. Excessive fuel pressure occurs in the “fuel rail”, not 2.5 kg/cm2, but 3...5 or more. Electromagnetic injectors receive pulses and open for a certain time. The fuel, which is under pressure in the fuel “rail”, is “injected” into the cylinders. But the volume of “injected” fuel at a pressure of 4 kg/cm2 will be greater than the volume of “injected” fuel at a pressure of 2.5 kg/cm2. What happens? The manuals say that for normal engine operation a mixture consisting of one part fuel and 14.7 parts air is required. And here it turns out that with a constant amount of incoming air, there is significantly more fuel in the engine cylinders than is required for normal operation. And it cannot ignite and burn everything completely. We will see black smoke from the exhaust pipe - the fuel that has not burned. Of course, the ECU, by analyzing the output voltage of the oxygen sensor, tries to reduce the opening time of the injectors, but its possibilities are not endless!
Fuel pressure regulator device and principle of operation (non-aspirated) The fuel pressure regulator consists of two chambers: fuel and diaphragm. Fuel enters the fuel chamber through the inlet fitting. The diaphragm chamber is connected to the inlet pipeline. If the pressure in the lower chamber exceeds the total pressure created on the diaphragm by the spring and the vacuum in the pipeline, the diaphragm moves so that excess fuel can be returned back to the gas tank through the return line. The regulator maintains a constant pressure drop in the system at a level of about 2.5 bar.
Well, lastly, I’ll say that I had similar symptoms on the H22a7, I just changed the regulator, installed it with F20b and the car literally flew. It is similar in design and pressure. Tuned versions of this device with a pressure gauge and a regulator are also sold; you can adjust the pressure in the ramp at your discretion. Accordingly, the discharge pressure is higher, more fuel enters the cylinders at the same opening of the injectors.
Source
We take a pressure gauge and wrap a piece of foam (plumbing flax) under the pipe and put on an oxygen hose with an internal diameter of 9 mm. Secure with clamps. Place a rag on the generator (so as not to start a fire under the hood). Unscrew the plastic cap on the fuel rail.
If desired, you can relieve the pressure in the vehicle's fuel system. To do this, you need to remove the fuel pump fuse and wait until the running car stalls.
We put the second end of the hose on the ramp hole and secure it with a clamp. We remove the rag from the generator and start the engine. Don’t forget to cover the generator with a rag again before removing the hose from the ramp. That's it, now you know how to check the pressure in the fuel system in the field.
It is measured at the outlet fitting of the fuel pump module - this is the one with one tube. You will need a flexible gas-resistant hose with an internal diameter of about 8 mm and a pressure gauge (you need to remove the tube and put on a hose with a pressure gauge instead). The pressure should be 5-7 atm. Close the return line, as is done on an internal combustion engine with a drain ramp, but you must turn it off again at the fuel pump itself. We pull off the second hose (double) and insert a plug into the removed hose, made, for example, from an old fuel filter (saw off the nipple from it and plug it). A single hose must be put on the pump fitting, and now the measurement must be made at the fuel rail. According to the power system diagram, everything will be clear.
Car diagnostics using fuel pressure
Problems in the operation of the car's fuel system are expressed by failures at high speeds, jerking of the car, or the car does not move when you need to accelerate sharply, and sometimes it simply stalls. Now knowing how to check the pressure in the fuel system of a car, we can diagnose the car ourselves. We can determine which component of the fuel system has failed (fuel pump, fuel pressure regulator (FPR), injectors, filters, etc.), but first we need to understand how the fuel system works: The fuel pump continuously pumps fuel while the engine is running. Excess gasoline is stupidly dumped through the RTD into the return line. The pressure in the ramp changes (increases) not so much with the speed, but at the moment of accelerating (this is clearly visible in the video), because at this moment, the vacuum (vacuum) in the receiver drops and the RTD adds pressure to the ramp. If you turn off the engine, the pressure in the ramp will slowly begin to decrease exponentially. The rate of decline (from several minutes to several hours) depends on the quality of the check valve, which is located on the back of the fuel pump motor.
When diagnosing, pressure measurements in the system are made in different ways:
Measurement with the ignition on, how much the needle jumps Measurement at XX Measurement with the tube off the RTD Measurement with the return line pinched
checking the fuel pump in the wall about 3 atm - the car stalls 4 atm - the pump will still serve 5-7 atm - the condition of the new pump (the Czech gasoline pump produces 7 atm)
Checking the fuel pump “for a plug” is quite simple; you need to pinch the return line with pliers (for 2-3 seconds) with the car running and watch the pressure gauge readings.
Another way to check the fuel pump: smoothly raise the engine speed to 3000 rpm. If the pressure gradually drops, then this is a sign of a “dead” pump.
If, when checking the pump “into the wall”, the pressure rises slowly, then this is a sign of a clogged fuel or fuel pump filter. We start the engine. The pressure gauge needle should tremble slightly, if it “walks” within 0.3 atm, then this may be a consequence of a clogged fuel pump mesh.
Source
Same problem
A malfunction of the fuel pump check valve is indirectly confirmed under the following conditions:
1) It takes a long time to start when the engine is hot and idle for more than 5 minutes, and the longer it sits, the longer it takes to turn the starter. If idle for less than 5 minutes, it can start immediately. 2) no deviations in acceleration dynamics (as long as the pump is running, the check valve is essentially not needed at all). 3) If the car has not been running for a long time and the engine has completely cooled down, for example, it has stood overnight, it starts at half a turn. 4) When the engine is running, forced shutdown of the fuel pump leads to an immediate stop of the internal combustion engine, that is, an instant drop in pressure in the fuel system after the fuel pump is turned off. (If the valve is faulty, the internal combustion engine runs for more than 5 seconds.)
One hundred percent confirmation of a malfunction of the fuel pump check valve will only be provided by connecting a pressure gauge directly to the fuel pump (or to the fuel filter), that is, the system must be shut off with the pressure gauge, turning on the fuel pump, and visually observing the pressure created by the fuel pump during its operation and the residual pressure after stopping.
Read more about the operation of the fuel system, fuel pump and the check valve in particular here https://enc.drom.ru/3397/
Quote from the article: “The exhaust check valve, located in the exhaust port, maintains residual fuel pressure in the fuel system when the engine is turned off. This improves starting performance and reduces vapor lock. Without residual fuel pressure in the system, pressure would need to be built up every time the engine was started, which would increase the cranking time. When a hot engine is turned off, the temperature of the fuel in the line around the engine increases. Keeping the system pressurized increases the boiling point of the fuel and prevents fuel evaporation.
The pressure bypass valve opens if the pressure in the fuel system increases. This is a safety device to prevent the fuel line from rupturing and damaging the pump.”
The fuel pump of the Lada Priora is responsible for supplying fuel to the fuel rail, which in turn distributes fuel to the injectors.
Before starting the car, the fuel pump pumps sufficient fuel pressure into the system, and then the engine starts. A certain pressure necessary for normal operation of the internal combustion engine is pumped up and this pressure is maintained throughout the entire period of operation of the internal combustion engine, until it stops completely.
A malfunction of the fuel pump will lead to a decrease in pressure or no pressure at all, which will undoubtedly affect the operation of the engine and its functions.
In this article we will talk about the fuel pump of the Lada Priora, namely about its possible malfunctions and how to remove and check it.
Automotive gasoline vapor trap: adsorber and its purpose
You should immediately understand the question of what an adsorber is and why it is needed on a car. Initially, it is worth noting that the correct name of this device is an adsorber, that is, it is written with the letter “d,” although many call it an absorber, which is not entirely correct. The difference between an adsorber and an absorber is that the first one accumulates vapors (in this case, gasoline) and holds them, while the second one completely absorbs the substance (that is, with the impossibility of their subsequent release).
We will find out why cars use an adsorber and not an absorber after understanding the purpose of this device.
A gasoline vapor collector is a kind of filter that prevents direct contact of gasoline with the atmosphere, which reduces the level of pollution. Such devices were invented after the introduction of the Euro-2 environmental standard, which prohibits atmospheric pollution with gasoline vapors.
The main purpose of the device is to temporarily absorb the vapors that form in the gas tank and use them for selfish purposes, that is, not just suppress, but transport them to the engine, where they will be supplied to the cylinders for combustion along with the fuel assembly.
Returning to the name of the device, we can safely say that the Priora and other modern cars use an adsorber that only temporarily accumulates gasoline vapor (which occurs while the engine is not running). The use of absorbers would not allow vapors to be directed into the combustion chambers of the engine due to their complete absorption by the sorbent.
This is interesting! Activated carbon is used as a sorbent in automobile adsorbers.
Gasoline pump
The Priora fuel pump is a kind of electric DC motor in the form of a cylinder. Inside the pump there is a shaft on which an impeller is rigidly mounted that pumps fuel into the system and a check valve that does not allow the fuel to lose pressure in the system after the pump stops.
The operating pressure in the system that the pump must maintain is in the range of 3.6-4.0 bar. If there is a loss of pressure in the system, the engine will operate unstably, losing speed and detonating.
The fuel pump cannot work alone, so it is part of the fuel cup of the fuel pump. This glass contains all the necessary elements for pressurizing the fuel system.
The fuel pump capacity according to the manufacturer’s requests is from 60 l/h.
How to check on foreign cars and VAZs
To determine a breakdown, the following procedures are performed:
- The fitting plug is unscrewed - the element that controls the fuel pressure.
- The sealing ring is inspected; if the ring is damaged, this component must be replaced.
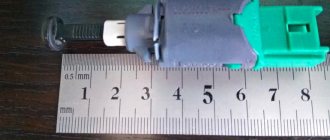
- The spool is removed from the fitting.
- The engine is started using a pressure gauge and the pressure in the regulator is measured.
- The information obtained is compared with that specified by the manufacturer.
operability You can check the RTD yourself, and without even tools. To do this, it is enough to either pinch, disconnect the valve and examine the intensity of the pressure gauge. jet will give a more accurate result. It should be connected between the fitting and the fuel hose, having first disconnected the vacuum hose. The measurement is performed at idle speed. The obtained model information depends on the car - for example, in a VAZ 2110, the pressure indicator should start at 0.3 and gradually increase to 0.7 Regulator.
Fuel pressure bar with connected pressure gauge
has it changed? not Pressure You may have connected the pressure gauge incorrectly. connection Check. If everything is correct, it means the regulator has become unusable.
Where is the fuel pump located
The cover under which the fuel pump is located
The Priora fuel pump is located in the fuel tank. It is accessible under the rear seat of the car. When you remove the seat, you can find a hatch underneath it, which is secured with two screws. After unscrewing the screws and dismantling the cover, you can see the upper part of the fuel pump glass. The glass is attached to the tank with nuts through a metal ring and a rubber gasket, on 8 studs.
The fuel pump glass has:
- Fuel pressure control;
- Fuel pump;
- Fuel level sensor;
- Coarse fuel filter;
- Sump (bucket);
How to clean the injectors of a VAZ 2107
Methods for cleaning sprayers may vary; the use of one method or another depends on the level of contamination of the holes and the nature of the deposits. If you carry out preventive cleaning or remove light contamination, you can use special chemicals, the use of which does not involve removing the injectors.
If the injectors are in a neglected state and cleaning with additives does not make sense, then you will have to dismantle the injector and replace the VAZ 2107 injectors.
Cleaning injectors with additives
Additives can not only remove deposits from fuel nozzles, but also clean the fuel system as a whole. This method is effective only with the systematic use of cleaning chemicals. Additives need to be used every 17-20 thousand kilometers. To clean, the standard fuel pump is turned off, and the fuel injection line is connected to a container through which the cleaning liquid is supplied under pressure.
The engine is started and idles for a quarter of an hour, after which it is turned off for the same amount of time. During this time, the deposits become soft. The engine is then started again, but this time the speed is gradually increased to maximum to remove sludge fragments. In this mode, the internal combustion engine should operate for about half an hour.
Price
Below are the prices and part numbers for the fuel pump, depending on the manufacturer.
| Manufacturer | vendor code | Price, (rubles) |
| Bosch | 2112-1139009 | 2000 |
| SOATE | 60.1139-01 | 1100 |
| RES | 0588455055 | 900 |
The table below shows the elements of the fuel cup and their prices, taking into account the manufacturer.
| Detail | vendor code | Price, (rubles) |
| RTD | 11180-1160010-00 | 480 |
| Hose | 21083-113902200 | 30 |
| Mesh | 21101-113920000 | 30 |
| The cost of a complete fuel pump glass starts from 2,400 rubles. Article: 21101-1139009 |
Priora fuel pump fuse
The Priora fuel pump fuse is not located in the standard location for all fuses. It is located at the front passenger's feet, under the footwell air duct cover.
The red oval shows the fuel pump fuse
Rated current of this fuse = 15A, number F3;
It is strictly prohibited to install fuses with a rating higher than specified.
Reasons for the fuel pump not pumping
Quite often it happens that the Priora fuel pump simply stops pumping fuel. There are many reasons for this problem, but in order to find them you need to understand what can affect the performance of the fuel pump. Below are all the reasons why the pump may stop pumping fuel into the system.
Fuse
It often happens that the fuse blows under load and breaks the power supply circuit to the fuel pump. As a result, the fuel pump cannot work. The fuse needs to be checked.
The relay is directly responsible for the operation of the fuel pump, thereby turning off the operation of the pump if it fails. It happens that the contacts on the relay oxidize or the coil burns out, which leads to the pump stopping and the inability to pump pressure into the system.
Filter
Fuel filters, fine and coarse filters are clogged. They need to be checked, or at best replaced.
Gasoline pump
It is also possible that the fuel pump itself may fail. Due to aging or poor quality fuel. You can read how to check the fuel pump in our article.
Frequency of replacement of fuel filters
The operating instructions for all front-wheel drive VAZ models indicate the service life of the fuel filter corresponding to 30 thousand kilometers. However, the manufacturer does not take into account the poor quality of gasoline, dusty, broken roads and difficult operating conditions of the car. For these reasons, the frequency of filter replacement is noticeably reduced.
According to the recommendations of professionals:
- The electric fuel pump grid should be changed at least every 70 thousand kilometers;
- the maximum mileage for a fine filter is 20 thousand km;
- When operating a car in the north or when constantly driving on dirt roads, the service life of the FTO compared to factory recommendations is halved and amounts to no more than 15 thousand kilometers.
Severely clogged mesh impairs the supply of gasoline to the injectors
Filters are also replaced when signs of premature clogging are detected in the form of lack of fuel during acceleration, driving under load or on an incline. The car begins to “stupid”, and when you press the accelerator pedal, popping noises may be heard from the muffler.
With such symptoms, you need to listen to the operation of the fuel pump before starting the engine. The pump takes more time to create pressure in the fuel lines, so its hum can be heard for quite a long time after the ignition is turned on. This means it's time to change the fuel filters.
Thus, the technology for replacing fuel filters is quite simple. The work can be done by almost any car owner with a couple of hours of free time and a standard set of tools. .
Signs of a fuel pump malfunction
There are several signs of a fuel pump that predict its imminent failure. If you notice such symptoms in your car, it is recommended not to delay replacing the pump, but to carry it out immediately.
Symptoms:
- The car engine did not start the first time;
- It is necessary to turn the starter much longer than usual;
- Dips when moving at a constant speed;
- Jerks when moving;
- The former dynamics have disappeared;
- A strong squeak of the pump is heard when the internal combustion engine is running;
Replacing the fuel pump
The process of replacing the fuel pump is a simple task if you follow the instructions below. To complete the job faster and easier, you need to prepare a tool for the job.
Tool:
- Open-end wrench 10mm;
- Ratchet with 10mm head;
- Phillips screwdriver;
- Rags;
You should also prepare consumables that need to be replaced along with the fuel pump.
Consumables:
- Fuel pump mesh;
- Fuel filter;
- Corrugated fuel hose;
- Rubber sealing ring (according to condition);
Step-by-step instruction:
- We remove the rear sofa in cars with a sedan body, in hatchback and station wagon bodies, just fold back the right side of the sofa.
- Unscrew the two screws securing the cover and remove it. Blow or sweep away the dust that has formed around the glass. Necessary to protect against dirt getting into the fuel tank.
- Remove the fuel pump fuse and start the car. This will relieve residual pressure in the fuel rail. We wait until the car stalls.
- We disconnect the negative mark from the battery, since the work is carried out with flammable substances (gasoline) and electrical appliances of the car.
- Remove the connector from the fuel pump housing. Remove the plastic fittings. A little fuel may spill, there is nothing to worry about.
- Unscrew the 8 nuts using a ratchet with a 10mm socket.
- We take out the ring and take out the glass along with the fuel pump.
- Let's start disassembling the pump
- Remove the stoppers securing the glass sump. And disconnect the sump from the glass.
- We remove the fuel pump from its seat, disconnecting the fuel corrugated hose (if necessary, the hose must be replaced).
- We install a new fuel pump with a new fuel pump strainer installed in the reverse order.
Important nuances
There are a few things to keep in mind when cleaning your injectors. Here they are:
- You cannot save on flushing fluid. The injector is a very important part of the engine. And it is extremely sensitive to the quality of the flushing fluid. The optimal choice for washing Priora injectors is a product from Wynns, developed specifically for injection engines. The cost of a liter bottle is 700 rubles; The plastic bottle must be removed carefully after washing the Priora injectors.
Replacing injectors is a long procedure. Nevertheless, it is quite within the power of a novice driver if he has at least a vague understanding of the structure of an injection engine. When cleaning the injectors, the situation is much simpler: you just need to be able to use a drill and know where the main fuel hose is located.
Carburetor cars are slowly but surely becoming a thing of history. Float chambers and diffusers have been replaced by injectors and distributed fuel injection, the quality of which is controlled by the car’s on-board computer. On the one hand, injectors have made life much easier for motorists. On the other hand, even these reliable devices periodically fail. Fortunately, the driver can replace them with his own hands. The main thing is to know how it's done.
Video on replacing the fuel pump on a Priora
AvtoVAZ offers an original fuel pump for 4,000 rubles. The original catalog number is 2112-1139009. But many car enthusiasts buy and install cheaper analogues instead of the original.
Analogs
A non-original part is often no different in quality from the original. So, if the vehicle owner wants to save money, then you can install a non-original part. Let's consider the main offers of analogue companies:
- Fenox EFM33006O7 - the cost of such a part will be about 3,000 rubles.
- Bosch 0 560 454 035 - as they say, I took BOSCH, and ... (go ahead).
- Ween 192-0262 – the price on the spare parts market will be approximately 3,000 rubles.
- Pekar 2112-1139009 - will cost a little more than the previous two, the average price is 3,500 rubles.
- ATS 53453 - praised, but the price tag is good. We know they put one like this as a replacement for expensive originals on Peugeot.
Important nuances
There are a few things to keep in mind when cleaning your injectors. Here they are:
- You cannot save on flushing fluid. The injector is a very important part of the engine. And it is extremely sensitive to the quality of the flushing fluid. The optimal choice for washing Priora injectors is a product from Wynns, developed specifically for injection engines. The cost of a liter bottle is 700 rubles; The plastic bottle must be removed carefully after washing the Priora injectors.
Replacing injectors is a long procedure. Nevertheless, it is quite within the power of a novice driver if he has at least a vague understanding of the structure of an injection engine. When cleaning the injectors, the situation is much simpler: you just need to be able to use a drill and know where the main fuel hose is located.
Removing and disassembling the fuel pump
The fuel supply mechanism in the Priora is located in the gas tank, so to get it you need to:
- Remove the rear passenger seat. The latches holding it in place are on the sides.
As a rule, the entire mesh looks quite dirty, and its central part is literally clogged with various debris. To remove the old mesh, you just need to grab it on all sides with your fingers and pull it towards you, or pry it with a flat-head screwdriver.
It comes out of its seat relatively easily. After this we install a new mesh. A mesh for the Lada Priora fuel pump can be bought in a specialized store or on the market. It costs about 50 rubles.
Modifications of the VAZ-2112 car
VAZ-21120. Modification with a 16-valve injection engine with a volume of 1.5 liters and a power of 93 horsepower. 14-inch wheels were installed on the car. This modification has a problem with valves bending when the timing belt breaks. The problem can be solved by increasing the depth of the grooves in the piston bottoms.
VAZ-21121. The car was equipped with a VAZ-21114 8-valve injection engine with a volume of 1.6 liters and a power of 81 horsepower.
VAZ-21122. Budget modification with an 8-valve injection engine VAZ-2111. The car was produced without electric windows, the wheels were 13 inches in size, and the brakes were unventilated from a VAZ-2108 car.
VAZ-21123 Coupe. Three-door, five-seater hatchback. The only two doors for entering the car are 200 millimeters wider than those of the five-door hatchback, and they are mounted on new, durable hinges. The rear arches of the car have become wider. The engine was installed with a 16-valve injection engine with a volume of 1.6 liters and a power of 90 horsepower. The car was produced from 2002 to 2006 in small quantities, the reason for this was the high cost of the car.
VAZ-21124. Modification with a 16-valve injection engine VAZ-21124 with a volume of 1.6 liters. Produced from 2004 to 2008. For this type of engine, the problem with valve bending was solved. To do this, the depth of the grooves in the piston heads was increased (up to 6.5 mm). In addition, the design of the cylinder block was changed to achieve a working volume of 1.6 liters, for which its height was increased by 2.3 mm, and the radius of the crankshaft was increased by 2.3 mm accordingly. There were also a number of other minor changes.
VAZ-21128. The luxury version of the car, produced by Super-auto JSC, was equipped with a 16-valve VAZ-21128 engine with a volume of 1.8 liters and a power of 105 horsepower.
VAZ-2112-37. A racing modification of the VAZ-2112, prepared for the “ring” in the Lada Cup qualifying group. The car was equipped with a 1.5-liter VAZ-2112 engine with a power of 100 horsepower. The racing car was equipped with a safety cage, an external aerodynamic kit and a front extension of the strut support cups.
VAZ-2112-90 Tarzan. All-wheel drive modification with a VAZ-2112 body on a frame chassis with transmission and suspension parts from a VAZ-21213 Niva. It was also equipped with a 1.7 or 1.8 liter engine from the Niva.
Signs and causes of malfunction
In order to understand that it is the fuel pump that has failed, there are some signs of a malfunction. Let's look at the main indicators by which you can determine that the fuel pump is not working:
VAZ-2110 fuel system diagram.
- There is no characteristic sound (hum) in the rear of the car when the key is turned to the first position. In this case, you should first check the fuse and the power supply to the fuel pump.
- Incorrect fuel pump noise. We check whether there is gasoline in the tank and whether the fuel filter mesh is clogged.
- The (low) pressure inside the fuel line has weakened.
Cleaning Priora injectors
There are two options for washing injectors: with and without removing them from the car. The removed injectors are washed on special stands using ultrasound, under the influence of which even the oldest contaminants disappear. Ordinary drivers do not have such stands, so below we will consider a more popular option for washing injectors without removing them from the Priora. Here's what you'll need for this:
- liter of special flushing fluid;
- two automobile nipples;
- automobile fuel filter;
- a pair of metal clamps;
- a meter piece of rubber hose with a diameter of 12 mm;
- drill with 13 mm drill bit;
- electric pump;
- two liter plastic bottle.
Flushing sequence
- The bottom and cap are drilled into the plastic bottle. This is done with a “13” drill. Automotive nipples are inserted into the holes.
The procedure for dismantling and installing a fuel pump on a Priora with your own hands
Using a Phillips screwdriver, unscrew the two screws securing the cover, and the pump will be located under it. Next, we need to disconnect the two fuel hoses by first pressing the clamps that secure them to the fittings of the top cover. One hose is secured with one metal clamp, which you need to press on and pull the hose to the side.
The second hose fits more tightly and in order to remove it, you need to press the “buttons” on both sides, which are shown in green in the photo below.
After this, disconnect the power plug with wires from the module by lifting the latch slightly upward.
Next, unscrew all the pump mounting nuts using a 10 mm socket.
Remove the ring as shown in the photo below.
And the second plastic ring also needs to be removed from the studs.
After this, it will be possible to remove the entire fuel pump module from the tank assembly, since nothing else holds it.
To pull it out completely, you need to tilt it slightly to the side so that the fuel level sensor does not interfere with removal.
Please note that when removed, there may be a lot of gasoline in the container, so it must be drained immediately. Then you can take further actions, either replacing the pump, or the grid, or the fuel level sensor.
After completing all the necessary procedures, you can begin installing the pump in its original place and connecting all hoses and power wires. It is worth noting that the fuel pump on the Priora is from a new VAZ 2110 model, that is, for 1.6 liter engines. The price of such a pump assembly ranges from 2,200 rubles to 3,000 rubles.
Symptoms: whining and whistling in the fuel tank area, the engine does not develop full power, the engine is unstable / often stalls / runs intermittently.
Possible cause: Fuel pump is faulty.
Tools: socket set, wrench set, flathead screwdriver, Phillips screwdriver.
Note. In the engine power supply system, the pressure reaches 380 kPa, so it is strictly forbidden to loosen or remove fuel lines while the engine is running or immediately after stopping it. Carrying out work on dismantling and repairing the power system is permitted only after pressure release procedures. After working to reduce the pressure in the power system, you should wait 4–5 hours, since after this time the pressure in the system will become almost zero.
1. Engage neutral, and then brake the vehicle using the parking brake system.
2. Remove the rear seat cushion.
3. Lift the cut out part of the mat located above the hatch.
4. Unscrew and remove the two mounting screws of the hatch cover above the fuel pump using a Phillips-blade screwdriver.
Operating principle of SVKG
Car engines have a ring gas exhaust system. The resulting gases as a result of the combustion of diesel fuel, gasoline or liquefied gas are not released into the environment, but are returned to the engine, where they are re-burned. The second end of the crankcase ventilation hose is attached to the intake manifold, with the help of which gases again enter the cylinder chamber for combustion. A significant part of the gases, when re-entered, ignite at the moment the fuel ignites, and the remaining ones are released into the atmosphere using the exhaust system. A small percentage of the gases are sent back into the cylinder chamber for re-combustion. This process is ongoing.
Replacing the fuel pump and fuel pump mesh for Lada Priora
The content of the article:
Replacing the mesh in the fuel pump of Lada Priora
Today I decided to change the strainer on the fuel pump. First, I removed the back seat and unscrewed two bolts on the cover that leads to the fuel pump.
We disconnect the wires going to the fuel pump and get behind the wheel. We start the car and let it idle until it stalls, thereby releasing the pressure inside the pipelines. Be sure to bleed.
Disconnect the wiring harness.
We disconnect the two pipelines that are attached to the fuel pump. Removed by pressing on the iron bracket and, pushing away from you, disconnect the pipeline from the fuel pump
Disconnect two pipelines
Unscrew the eight nuts by 10.
Next, remove the fuel pump holder ring and put it away so that it does not interfere with us.
Then, carefully removing the pipeline hoses, holding them with your hand, we pull the fuel pump itself out of its seat, most importantly, without excessive effort, and carefully so as not to damage the float on the fuel pump.
After removing the fuel pump, disconnect the plastic pipe. Without removing it we will not be able to disassemble the fuel pump
Remove the two small retaining rings on either side of these guides.
Then we disconnect the plastic fasteners (there are three of them) by detaching them, we can get to the mesh itself.
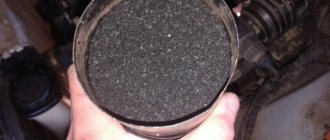
We got to the mesh, as we see, there are some shavings on it - this means the filter is working well. Next we will remove it to exchange it for a new one.
Using a screwdriver, pry up the mesh and remove it from the fuel pump seat.
Side view of the mesh here you need to insert a screwdriver
So we removed the strainer from the fuel pump to replace the old one with a new one.
Removed mesh from fuel pump
Installing a new mesh on the fuel pump and reassembling in reverse order.
Modifications of the VAZ-2112 car
VAZ-21120. Modification with a 16-valve injection engine with a volume of 1.5 liters and a power of 93 horsepower. 14-inch wheels were installed on the car. This modification has a problem with valves bending when the timing belt breaks. The problem can be solved by increasing the depth of the grooves in the piston bottoms.
VAZ-21121. The car was equipped with a VAZ-21114 8-valve injection engine with a volume of 1.6 liters and a power of 81 horsepower.
VAZ-21122. Budget modification with an 8-valve injection engine VAZ-2111. The car was produced without electric windows, the wheels were 13 inches in size, and the brakes were unventilated from a VAZ-2108 car.
VAZ-21123 Coupe. Three-door, five-seater hatchback. The only two doors for entering the car are 200 millimeters wider than those of the five-door hatchback, and they are mounted on new, durable hinges. The rear arches of the car have become wider. The engine was installed with a 16-valve injection engine with a volume of 1.6 liters and a power of 90 horsepower. The car was produced from 2002 to 2006 in small quantities, the reason for this was the high cost of the car.
VAZ-21124. Modification with a 16-valve injection engine VAZ-21124 with a volume of 1.6 liters. Produced from 2004 to 2008. For this type of engine, the problem with valve bending was solved. To do this, the depth of the grooves in the piston heads was increased (up to 6.5 mm). In addition, the design of the cylinder block was changed to achieve a working volume of 1.6 liters, for which its height was increased by 2.3 mm, and the radius of the crankshaft was increased by 2.3 mm accordingly. There were also a number of other minor changes.
VAZ-21128. The luxury version of the car, produced by Super-auto JSC, was equipped with a 16-valve VAZ-21128 engine with a volume of 1.8 liters and a power of 105 horsepower.
VAZ-2112-37. A racing modification of the VAZ-2112, prepared for the “ring” in the Lada Cup qualifying group. The car was equipped with a 1.5-liter VAZ-2112 engine with a power of 100 horsepower. The racing car was equipped with a safety cage, an external aerodynamic kit and a front extension of the strut support cups.
VAZ-2112-90 Tarzan. All-wheel drive modification with a VAZ-2112 body on a frame chassis with transmission and suspension parts from a VAZ-21213 Niva. It was also equipped with a 1.7 or 1.8 liter engine from the Niva.