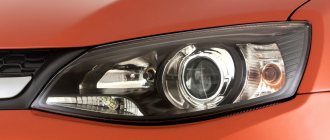
With the development of electronics, exterior mirrors are becoming multifunctional elements of the car. In a modern car, the side mirror may additionally contain: a camera, a vehicle recognition system in the “dead spot” and a lighting lamp that illuminates the space next to the car in the dark. Do you know that the last option can be installed on LADA cars with your own hands?
Required
: LED, waterproof flashlights (in this example, 23 mm LED Eagle Eye, can be found in popular products from Aliexpress, price 50 rubles.)
The installation process is shown using the example of side mirrors of a Lada Priora. On other modern LADA cars (Vesta, XRAY, Largus, Granta, Kalina, Lada 4×4) all actions are performed similarly. You will find photo reports of these modifications on other LADA models in the comments to the article.
How to make lights in the rear view mirrors on a LADA
With the development of electronics, exterior mirrors are becoming multifunctional elements of the car.
In a modern car, the side mirror may additionally contain: a camera, a vehicle recognition system in the “dead spot” and a lighting lamp that illuminates the space next to the car in the dark. Do you know that the last option can be installed on LADA cars with your own hands? Required
: LED, waterproof flashlights (in this example, 23 mm LED Eagle Eye, can be found in popular products from Aliexpress, price 50 rubles.)
The installation process is shown using the example of side mirrors of a Lada Priora. On other modern LADA cars (Vesta, XRAY, Largus, Granta, Kalina, Lada 4×4) all actions are performed similarly. You will find photo reports of these modifications on other LADA models in the comments to the article.
Installation
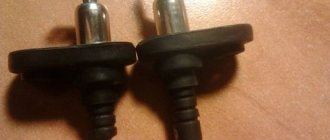
We sharpen the lens of the LED flashlight a little and polish the lens so that the light is better diffused.
We remove and disassemble the mirrors (instructions for Vesta/XRAY and Priora/Kalina/Granta). We make a hole in the mirror body with a suitable diameter (use a drill). Install the LED lights and secure with the nut included in the kit. We fill the wires that go into the flashlight body with hot glue.
We extend the wires for the lighting in the mirrors first into the doors, and then into the car interior, next to the standard wiring.
Connection
The lights in the car's exterior mirrors should light up and work for about 20-30 seconds:
- after disarming the car (when getting into the car)
- after turning off the ignition (when leaving the car).
And go out after turning on the ignition.
For this implementation, you can use one of the connection diagrams:
1. To an additional signaling channel (ground control). The connection is made via a 4-pin relay:
2. To the standard wiring responsible for the interior lighting.
Connection to the ERA-GLONASS lamp (for Lada Vesta and XRAY):
- 11 and 14 (white and pink) - +12V appears after turning on the main relay (turning on the ignition, opening the doors). The power goes out 2-5 minutes after removing the ignition key.
- 15 (black or blue-black) - “mass”.
- 17 (white) - “ground” (door switches), which appears for a while when the doors are opened.
Connection to a ceiling lamp (for Priora/Granta/Kalina):
- the extreme ones are the total “mass” and the “mass” from the door limit switches.
- medium - constant +12V.
Depending on the vehicle configuration, wire colors may vary. Before connecting, check the contacts with a multimeter or test lamp.
Now the lighting in the mirrors will prevent you from stepping into a puddle or dirt at night. See also other similar improvements:
- Installation of lighting in doors for entry and exit points (for Vesta/XRAY and Priora/Kalina/Granta).
- Installation of floor (foot) lighting in the car interior (for Vesta/XRAY and Priora/Kalina/Granta).
Source
Luggage compartment
Since the luggage compartment can be considered part of the car interior, it is necessary to clarify that there is also a flashlight here. It can be used to illuminate the contents of the trunk. In some situations, his work is irreplaceable. To access this mechanism, you must perform the following actions:
- The exterior lighting in the car is completely turned off.
- To release the lantern from its location, you must use a tool. For this purpose, you can use a simple screwdriver. She needs to remove the flashlight from the interior trim.
Note: To dismantle the lampshade, it is necessary to disconnect it from the two power wires. In order to eliminate the possibility of a short circuit when using this lighting device, it is necessary to insulate its connections with special adhesive tape or other sealant.
- The lamp is removed by pressing on the connecting elements. It occurs by analogy with the previous description of removing lamps from the socket.
- To turn on a new lamp, it is necessary to install it. It is pressed into the cartridge mount until it stops.
- To install the flashlight in its original place, you need to insert one end of the lampshade into the connector of the casing, and apply slight pressure on the other. A slight click will indicate that the light is fully connected to the connector in the luggage compartment.
Installation
We sharpen the lens of the LED flashlight a little and polish the lens so that the light is better diffused.
We remove and disassemble the mirrors (instructions for Vesta/XRAY and Priora/Kalina/Granta). We make a hole in the mirror body with a suitable diameter (use a drill). Install the LED lights and secure with the nut included in the kit. We fill the wires that go into the flashlight body with hot glue.
We extend the wires for the lighting in the mirrors first into the doors, and then into the car interior, next to the standard wiring.
We make polite car interior lighting with our own hands »
One of the acceptable modifications available to the car enthusiast is polite interior lighting with your own hands
. This term was not born suddenly or out of nowhere; the key word in it is “polite.” In this context, the adjective “polite” denotes non-interference with the underlying structure. Do-it-yourself polite interior lighting, why is it needed, if even the basic equipment of almost all modern cars involves a huge number of delights aimed at the different tastes of drivers?
There are always people who are not satisfied with some pre-determined creative potential - frankly speaking, additional options. They need additional tuning.
Achieving this effect is quite simple - you need to make minor changes to the electrical lighting circuit.
To do this, you need resistors of a certain resistance - from 1 to 220 K (this is an imported standard, choosing domestic analogues is not difficult), a capacitor
(capacitance ranging from 50 to 100 microfarads, voltage 16V), stranded wire no more than a meter
; diode conforming to SR5100 standard. In addition, of course, you will need the usual tools - an electric soldering iron, tin and rosin.
The parts are connected in a certain order - you can see the electrical diagram at the examples at the bottom of this article.
Such a scheme is not presented here due to its availability - only the achieved effect is important
. It consists of the above-described gradual “fading” of lighting. Moreover, the delay time is directly related to the capacitance of the capacitor used (the higher the capacitance, the longer the effect).
Every car owner wants his car to be beautiful and pleasing not only to his own eyes, but also to the eyes of others
There are many ways to refine a car by providing it with exclusive accessories and thereby making it unique.
Moreover, the original design features will not be violated at all - only supplemented. Positive reviews indicate the demand for the proposed delicacy. To a large extent, this is facilitated by the practical component.
However, it is up to the car owner to judge this.
The proposed addition is that the built-in lamps (for interior lighting) do not immediately respond to the closing of the doors. As you know, the interior lighting is supposed to automatically turn off immediately after closing the doors. But – some delay (i.e. the lamps do not go out immediately, but after a few seconds) creates additional opportunities:
- in the dark
, you can use the “delay” to insert the ignition key into the slot; - do not have problems finding seat belts;
- (press the desired button accurately);
- have time to put things in the glove compartment, etc.
INSTALLATION OF NEW EQUIPMENT
Now let’s figure out how to install an LED lamp on a car; for this we will definitely need a VAZ 2114 interior lighting circuit. This is done in the following sequence:
- Remove the lampshade;
- Unscrew the base of the case;
- We connect the new lampshade;
- Screw the LED lamp into place.
First we need to remove the original lampshade and disconnect the wires from it, all the contacts, we also need to remove the diffuser. The housing is screwed to the roof sheathing with four self-tapping screws; they are simply unscrewed and the housing is removed. Next, you need to take a new case and connect all the plugs in accordance with the diagram to the contacts that go to the battery. The new housing is screwed in exactly the same way onto the same four self-tapping screws, and the lens is snapped into place.
In this simple way you can update your car interior and make the interior lighting of the VAZ 2114 more comfortable and convenient.
Dear friends, we present to your attention a diagram and description of the capabilities, as well as a drawing of a finished board for assembling a block of the so-called “polite backlight”. The thing is very convenient, the circuit is universal and is suitable for any VAZ model and not only. Many cars and car models are deprived of this useful function from the factory. But how convenient it is to sit in the cabin, close the door and calmly, without resorting to unnecessary actions, see where to put what and how to get into the ignition with the key in the dark. The advantage of this circuit is that it can work without problems with both conventional incandescent lamps and LEDs. The maximum power of lamps that are allowed to be connected to the circuit is 10 watts. Description of the operation of the “polite lighting” unit: – When the doors are opened, the interior light smoothly lights up in 1-2 seconds and burns at full intensity. – After closing the doors, the light remains on for another 7 seconds at full brightness and gradually fades out within 4-5 seconds. – If the ignition is on and the door is open, the light is on, but after closing the door it goes out smoothly without a 7-second delay in 2-2.5 seconds – If the door is opened with the ignition on, the light comes on smoothly in 1-2 seconds and after closing the doors smoothly, without a 7-second delay, fades out within 2-2.5 seconds. The time intervals for light-emitting diodes to fade out are slightly different from the time intervals for light-emitting diodes to fade out.
Connection
The lights in the car's exterior mirrors should light up and work for about 20-30 seconds:
- after disarming the car (when getting into the car)
- after turning off the ignition (when leaving the car).
And go out after turning on the ignition.
For this implementation, you can use one of the connection diagrams:
1. To an additional signaling channel (ground control). The connection is made via a 4-pin relay:
2. To the standard wiring responsible for the interior lighting.
Connection to the ERA-GLONASS lamp (for Lada Vesta and XRAY):
- 11 and 14 (white and pink) - +12V appears after turning on the main relay (turning on the ignition, opening the doors). The power goes out 2-5 minutes after removing the ignition key.
- 15 (black or blue-black) - “mass”.
- 17 (white) - “ground” (door switches), which appears for a while when the doors are opened.
Connection to a ceiling lamp (for Priora/Granta/Kalina):
- the extreme ones are the total “mass” and the “mass” from the door limit switches.
- medium - constant +12V.
Depending on the vehicle configuration, wire colors may vary. Before connecting, check the contacts with a multimeter or test lamp.
Now the lighting in the mirrors will prevent you from stepping into a puddle or dirt at night. See also other similar improvements:
- Installation of lighting in doors for entry and exit points (for Vesta/XRAY and Priora/Kalina/Granta).
- Installation of floor (foot) lighting in the car interior (for Vesta/XRAY and Priora/Kalina/Granta).
Photo: in-flight magazine Anatolii775
Keywords: external lighting for Lada Vesta | external lighting for Lada Kalina | external lighting for Lada Granta | external lighting Lada XRAY | external lighting for Lada Priora | external lighting 4x4 | external lighting for Lada Largus | side mirrors of Lada Vesta | side mirrors lada xray | side mirrors Lada Kalina | side mirrors of Lada Granta | side mirrors of Lada Priora | side mirrors Lada Largus | side mirrors 4x4 | external lighting Niva | Niva side mirrors | universal article
Share on social networks:
Found an error? Select it and press Ctrl+Enter..
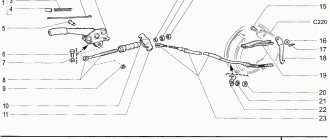
Panel device
Note: the full operating instructions for the VAZ 2110 car indicate the need to completely disassemble the dashboard in order to remove it. After the dashboard is disassembled, you can replace the faulty elements yourself.
- To carry out work with electrical wiring, you should be safe and disconnect the negative terminal from the battery.
- The steering column covers are decorative. They need to be separated from the dashboard.
- The car steering wheel is removed. The horn plate remains unchanged.
- The switches that are located under the steering wheel must be separated from the vehicle.
- When disconnecting them, you will need to disconnect the wires and their connection element.
- The headlight range control has a regulator (a specific position switch). It needs to be dismantled.
- The next step is to unscrew the nut, which is located under this regulator.
- The mounting block is opened.
- This opens access to the location of the fuses (they can blow out, and therefore it is necessary to check their serviceability) and the relay block. It may be enough to replace them. Here you need to unscrew the screw securing the bracket. It is located on the left side.
- The wiring block is disconnected from the ignition system. It is also necessary to unscrew the screw that secures the bracket.
- The tips, two in number, are disconnected from the brake signal switch.
- The console trim has two screws. You need to remove them from the car.
- The console bracket is released.
- The screw securing the instrument panel and air duct must be unscrewed.
Note: All wires located under the instrument panel must be disconnected. For the convenience of the upcoming assembly of these mechanisms, it is necessary to mark them, since their number is large.
- The panel wire mount is disconnected from the rest of the power supply system.
- The immobilizer sensor must be disconnected, namely its wires.
- Similar actions occur on the right side of the panel.
- The nut securing the bracket is removed.
- The wires coming from the cigarette lighter are disconnected.
- The same operation must be done with the fog lamp wires.
- The glove box has a bolt at the top. It must be removed from the connector.
- Both screws of the lower fastening of the instrument panel are unscrewed.
- The seal is removed from the front left pillar.
- Plastic holders are dismantled.
- The same technology is applied to the right pillar.
- The ventilation grilles are removed.
- There are two bolts underneath that need to be unscrewed and removed.
- The dashboard extends slightly, about 10 centimeters, into the interior.
- Once the instrument panel remains in the cabin, you need to disconnect the remaining wires near the left door pillar and next to the steering column.
“Polite light” in a car - what is it for, installation rules
In modern cars that have on-board computers, smart electronics can not only monitor the health of all systems, but also provide adaptive control of lighting in the cabin. In such a car, the light can turn off and on not abruptly, but smoothly. This feature has several advantages. For example, a driver who gets into a car may not feel the button to turn on the backlight by touch. All worries are completely taken care of by electronics. It smoothly turns off the light after starting the engine.
This type of lighting does not have smooth switching on and off.
If we consider cars that have not been touched by smart electronics, they have switches located at the ends of all doors that control the interior lighting. When the door is opened, the lamp comes on, and when closed, it goes out. Motorists know that in any vehicle there is a switch located a little above the door, so you can turn on the lights yourself. But first of all you need to find the button, then press it - all this takes time from the driver. In addition, such lighting does not have smooth switching on and off. Imagine that you sat down in the car in the dark, pressed the switch and a bright light hit your eyes. Then you have to sit for some time and get used to the spot in your eyes. Obviously, it was this shortcoming that prompted manufacturers to create smart lighting.
INTERIOR OF THE CAR
The interior lighting is worth a separate discussion. The interior of the VAZ 2114 is illuminated using the following devices:
- Interior lighting;
- Individual light lamps;
- Instrument lighting on the control panel;
- Light in the glove compartment, cigarette lighter and separate bulbs for some buttons and switches.
The general light in the VAZ 2114 is located in the car interior and illuminates it. The engineers decided that it would be optimal to place it above the heads of the driver and front passenger, so it is simply built into the headliner and bolted there. Usually this lamp lights up when one of the doors is open, and goes out when it is closed. This is familiar to us from the classics, where a similar system was organized with light bulbs on the door pillars.
Source
What kind of lamps are there?
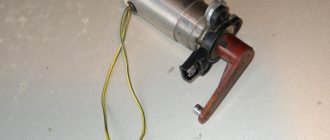
The interior lighting on the VAZ 2110 is provided by a ceiling lamp, which uses a C5W (AC12-5-1) incandescent lamp with a power of 5 W.
Lamp used in main interior light
On some modifications of VAZ cars, a so-called navigation lamp (individual lighting lamp) is installed. It is turned on by a separate switch and independently of the main ceiling lamp.
Navigation lamp for VAZ car
If we have it, then it will require a T4W lamp (A12-4-1) with a power of 4 W.
Individual lighting lamp
Healthy! You can find out which bulbs are in other VAZ 2110 lighting fixtures in the article “Which bulbs are in the VAZ 2110 headlights and which is better to choose.”