Causes of failure
If the gear motor fails, then you will not be able to regulate the temperature inside your car by controlling the heating system.
To check the operation of the element, you can supply electricity from the battery directly to the gear motor in the middle position. The functionality of the controller is checked in a similar way. If it breaks, then it also becomes impossible to regulate the temperature.
Failure of a gearmotor (MR) may be due to the following reasons:
- The integrity of the electrical circuit has been compromised. This means that there is no voltage supplied to the motor, and therefore the gearmotor is not able to work properly;
- A defect has occurred in the autonomous control unit of the stove. Because of this, the gearbox does not provide air at the temperature required by the driver.
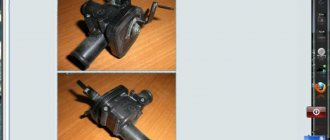
Old sample
Main Culprits
Let's try to find the culprit that may be causing the stove to not work.
temperature sensor
Key to 19
If the sensor works well, the damper will move depending on the value set on the regulator. You can check this by removing the deflectors and observing the movement of the damper.
Checking the operation of the coolant sensor at home with a multimeter
Stove controller
To check the operation of this element, you need to pull it out of its socket. Next, you need to turn on the ignition and turn the temperature switch knob. In this case, you should measure what voltage is on the wires in different positions of the regulator (these are brown and pink wires).
Disassembled stove controller
If everything works properly, then voltage on the wires will appear depending on the position of the switch itself. This voltage should subside on its own within 10-15 seconds after turning the regulator knob. If this does not happen, then the controller is acting up. It can only be completely replaced.
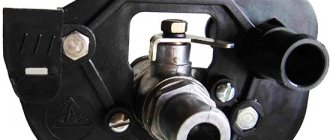
Gearmotor
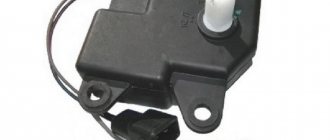
Gear motor diagram with explanation
Due to the fact that it is out of order, the stove on the VAZ-2112 can also malfunction. It is quite difficult to check the operation of this unit. To do this you need to get into the engine compartment. After removing the sound insulation and frill, you will need to remove the wiper drive. There will be two connectors. The connector to which the brown and pink wires fit will be the connector of the gearmotor.
Initially, you need to check if the wires themselves are broken. To do this, you will also have to check the voltage at the gearmotor connector. If the wires are not broken, then there will be voltage.
To check the condition of the gearbox itself, you need to apply a voltage of 12 V to the connector. When it starts to spin, then everything is in order. If this does not happen, the part will have to be completely changed. If the gearbox spins, but the stove does not work, then the reason must be looked for in the wires and connectors. They may be oxidized.
The heater only works in one position
There are several options here. We'll have to check them all.
- Test the wires in the controller. They may break or burn out.
- The wires in the relay may have come loose. You need to look for the relay block in the engine compartment.
- An additional resistor on the heater housing may burn out. It is he who regulates the speed of the fan.
Functionality check
If you do not want to spend a lot of money on repairing and replacing the device, you need to first check whether such manipulations are required. To do this, you can try to return the displaced damper to its rightful place.
Traction
For this:
- Turn on the ignition;
- Switch the regulator to different positions;
- Manually move the flap;
- This way it can be returned to its original position.
Of course, you first have to dismantle the deflector to gain access to the damper. If this method works, the damper will be able to work again as before, which means it will respond to the regulator.
But this cannot be considered a full-fledged measure for restoring the functionality of the damper, since if the socket is already loosened, the unit will no longer be able to work normally. At first, you will apply the half-measures described above over and over again, but over time you will still have to replace the heater damper on the VAZ 2110.
Pay attention to the conditions under which the damper can be operated. If this happens only manually with the ignition on and the regulator turned to the extreme position, then the cause of the breakdown lies in the micromotor gearbox. Other suspects are the microfan with temperature sensor and the control unit.
If any of these components stops working normally or is completely out of order, then the heater damper will not work on the VAZ 2110. Only its replacement is required. Ignoring the problem will result in even greater repair costs in the future.
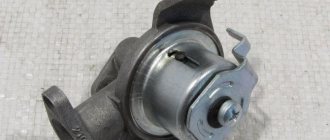
Replacement of micromotor gearbox
To replace an element, you will need to perform several not particularly complex activities. Therefore, it is not at all necessary to go to a service station and pay a lot of money for their services.
- First of all, remove the frill.
- Next, the vacuum brake booster is dismantled.
- After this, you still need to remove the pedal assembly.
- Now we begin to dismantle the old micro-gearbox along with the plastic component.
- A new micromotor gearbox should be installed in place of the damper sector. There you will see a similar square.
Location of the device
Practice shows that replacing a micro-gearbox does not require special skills, a lot of time or excessive effort. However, never forget to be careful.
But in order to install the damper of your micro-geared motor, you will need to invite an assistant.
- First, the contacts are connected to the new micro-gearbox, that is, the motor.
- By turning the damper counterclockwise, you turn on the cold air supply.
- Turn on the ignition and turn the heater control system (SAUO) sensor to the position directly opposite the blue dot of the regulator.
- Or you can do the opposite, that is, check the micro-gear motor by installing the sensor opposite the red dot, and turn the damper all the way clockwise.
- The micro-gearbox rotates slightly more than required, so for proper installation it is recommended to use a special lubricant for the square.
- Install the motor so that the holes for the screws match.
- Now you need the help of your friend, since his task will be to turn the temperature regulator and at the same time press the motor inward.
- If the squares match, the replacement of the micromotor reducer can be considered successful. Now the air should flow to the desired temperature inside the cabin.
- Don't worry if the square doesn't go the full length of the flap you're using. This is normal when the gear motor goes about a third of the way. This installation will not affect the performance of the system in any way.
- Now all that remains is to return the screws to their place and twist the micro-gearbox several times - from the blue mark to the red one, and in the reverse order.
- These manipulations will allow the stove to remember what operating range the new gearbox has. Therefore, there will be no problems with its performance in the future.
If everything is done carefully and in accordance with the instructions, when you turn the damper, the micromotor reducer of your stove will not move to the required position. By turning on the device in mode with the “A” icon, control and adjustment will be carried out automatically - with an error of no more than 2 degrees.
Installation
To install the gearmotor, you will need a certain set of tools, which include:
- Open-end wrench 10 millimeters;
- Crosshead screwdriver;
- Spanners.
Don't worry if you're new to doing car repairs yourself. There is nothing complicated about replacing a gearmotor.
- Remove the windshield wipers from the fuse to gain access to the device. To do this, you need to dismantle the contact nut and then release the frill.
- You will have access to the screws.
- Two nuts are unscrewed on the sides of the frill, and then the rubber seal is removed from the electric motor compartment of the gearbox.
- Disconnect the damper jabot pipeline by disconnecting it.
- Remove the screws that hold the gearbox thermal radiators.
- The motor is located on the left in the damper gear box, right next to the brake booster.
- Next, you need to unscrew the lower mounting screw and remove the electric motor.
- The damper assembly should be carried out strictly in the reverse order. Moreover, do this only after the gearmotor has been installed.
Functionality check
Checking the element consists of the following activities:
- First, set the left knob to the blue dot position;
- Wait about 15 seconds;
- Start the engine;
- Disconnect the controller from connector X1 and measure the resistance on two contacts - X1.4 and X1.1.
Depending on the type of controller, the indicators must be appropriate.
| Test point | Controllers | Resistance indicators |
| Position on the blue dot | 1303.3854, 1313.3854, 1333.3854 | 800-1200 Ohm |
| 1323.3854 | 3600-500 Ohm | |
| Position on the red dot | 1303.3854, 1313.3854, 1333.3854 | 3200-5000 Ohm |
| 1323.3854 | 1200-1600 Ohm |
If checking the micromotor gearbox shows no resistance or it does not change during testing, the shaft position sensor has most likely failed. Alas, you won’t be able to purchase it separately, so you will need to completely change the gearbox. And this is a significant expense.
How to change a fan
If you decide to change the motor or the entire assembly, then you should follow the instructions:
- Remove the negative terminal from the battery, remove the windshield wipers by unscrewing the nuts with a 10 mm wrench.
- Pry off the decorative cap with a flat-head screwdriver. Unscrew the nuts of the frill and remove it.
- The cover is held in place from the engine compartment with self-tapping screws; remove them.
- Remove the washer fluid supply hose to the injectors.
- Using a 10 mm socket wrench, unscrew the nuts holding the shield.
- Remove the clamps from the hose leading to the vacuum brake booster.
- Remove the cabin filter by unscrewing the screws.
- Disconnect the wire connectors from the heater motor and resistor.
- Remove the left side of the stove along with the motor.
Now all you have to do is install a new one in place of the old fan, and then reassemble it. You have two options: for the tenth VAZ model they produce old-style parts or new ones. It is best to mount a more modern version.
0 0 votes
Article rating
Sequence of actions when installing the VAZ-2112 heater micromotor gearbox
Replacing a faulty element is within the capabilities of every car owner. The sequence of all stages of work is quite simple; the necessary tools for this are included in the standard set of the machine’s first aid kit, so there is absolutely no need to contact a service workshop. So let's get started:
- dismantle the frill;
- to get to the micromotor gearbox, you need to remove the pedal block and the vacuum brake booster;
- remove the faulty micromotor gearbox and its plastic block;
- a serviceable element is installed in the damper sector socket.
General information about the heater damper and gearmotor
Replacing a gearmotor in a VAZ 2110
As you know, a car interior heater is capable of filling the interior not only with warm, but also with cold air. The heater damper regulates the speed at which the desired temperature in the car interior is established.
Note. Before turning on the heater, all doors and windows of the car must be properly closed to create a high degree of internal tightness. Otherwise, the heater will be ineffective during its operation.
List of main functions of the heating damper gearmotor:
- maintaining optimal temperature conditions;
- The heater damper gear motor is also responsible for the speed of creating the proper temperature regime;
- determines the operating efficiency of the heater itself.
Objective reasons that directly indicate the presence of a malfunction of the heating damper and gear motor:
- the heater has stopped filling the car interior with cold or hot air;
- after 15-20 minutes of operation of the heater, no change in temperature is observed;
Replacement of gear motor VAZ 2110
- the rate at which the car interior is filled with appropriate air is too low and the practical effect of the heater’s operation is almost unnoticeable.
Note. The degree of sound insulation of a car interior is an objective indicator of the degree of insulation. Sometimes the problem of inefficient functioning of the heater lies precisely in the low degree of insulation.
Heating device design
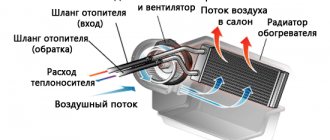
The heating of the VAZ-2110, through which a motorist can feel comfortable in his movable property at any time of the year, consists of several separate devices working in close conjunction. The central device of the unit is the radiator, with the help of which the air flows going into the cabin are heated. In order to be able to repair or replace the radiator, you will have to look for ways to it under the hood.
The second most important device is the air distributor, which has several pipes running throughout the cabin of the “tens”. Compared to the old-style models that preceded the release of the VAZ-2110, the new car has an evaporator, which has found a place in the air conditioning system
The operation of the stove is controlled through a special control unit. In the VAZ-2110 operating manual, this device has a different name (controller). The unit operates together with a temperature sensor located in the cabin. The sensor transmits information regarding temperature to the unit, after which the data is compared (the information displayed on the handle is taken into account). As soon as the system detects a temperature difference of 2°, warm or cooled air immediately begins to flow into the cabin.
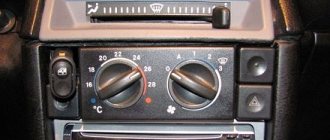
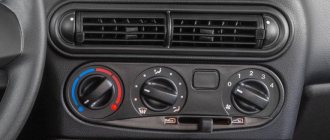
To understand how the heater works, you need to pay attention to the handle of the device; two extreme positions deserve special attention - MAX and MIN. The fact is that when the handle is set to one of these indicators, the system begins to supply heat, not taking into account the data from the temperature sensor
The VAZ-2110 stove provides for the presence of such a device as a gearmotor. The task of this device is to open and close the damper. A small-sized electric motor is extremely important in the operation of the heater. Even with a minor breakdown of the gearmotor, the system will be able to provide the car owner with only cold or only hot air. If this device breaks while the damper is closed, then the entire system will cease to perform its function. The main components of the heating device:
- radiator;
- a device that distributes air flows;
- SUAO block;
- ceiling sensor;
- lever;
- flap;
- gearmotor.
Purpose of the radiator
The VAZ-2110 stove of the new model has a radiator, through which the air flowing into the vehicle is heated. Quite often on the global network you can find diagrams in which the radiator is designated as a heat exchanger. The heating process in the device occurs due to the supply of warm antifreeze. The radiator is connected to the cooling system of the power unit through several pipes and hoses. Coolant circulates inside the heat exchanger all the time. The volume of incoming air and its direction depend on the location of the damper. When the heater damper is in an intermediate position, part of the air flows through the heat exchanger, and the remaining volume bypasses the radiator. In the diagram you can see that the radiator of the new model differs from other models in several useful modifications.
Operating principle of the control system and ceiling sensor
The operating principle of the VAZ-2110 stove can be understood by studying components such as the control system and the ceiling sensor.
The function of the ceiling sensor is to determine the temperature inside the vehicle. Then all the information will go to the SUAO block, where the incoming value will be equal to the temperature that is reflected on the handle of the VAZ-2110 heating device. As a result of the verification, the position of the damper will be changed or remain the same. Everything will depend on the difference between the values being compared. Through this simple manipulation, the temperature inside the car is controlled.
When setting the device to any of the extreme values, the information from the ceiling sensor will not be taken into account. The SUAO block is a set of microcircuits on which the functioning of the heater directly depends. If malfunctions occur, both the sensor and the control system can be replaced without much labor.
The device of the damper and gear motor
Due to the gearmotor, the position of the damper that regulates the air supply changes. This component of the system is controlled by the control system block. If a functioning device fails, the damper stops moving. The device itself looks like a small electric motor. Most often, a broken device must be completely replaced, since repairs are quite problematic. The same principle applies to the operation of the damper.
How to replace the gear motor of a new VAZ 2110 stove
Procedure:
- It is more convenient to work with the windshield wiper removed, but it is not necessary to dismantle it.
- Disconnect the two connectors from the gear motor, which is located on the right side of the brake booster.
- Remove the three mounting screws.
- Remove the gear motor from the heater housing; the heater damper will fall to the “cold” position.
- To install a new gearmotor, turn the shaft slightly toward “warm”; to do this, with the ignition off, set the temperature to “hot” and turn on the ignition for one second.
- Check whether the shaft fits and whether the gearmotor can be secured into the slot in the damper drive handle. If necessary, turn the shaft again by briefly turning on the ignition.
- If you overdid it, turn the shaft to the “cold” position and repeat the operation from the beginning.
Additional relays and fuses
Additional relays and fuses are located in the passenger compartment on the right side of the instrument panel behind the side trim attached with two screws.
All fuses are rated 15A
- ignition module, controller
- canister purge valve, vehicle speed sensor, oxygen concentration sensor (heating), air flow sensor
- fuel pump relay, fuel pump fuse, injectors.
- electric fan relay
- fuel pump relay
- main relay (ignition relay)
VAZ 2110: heater damper gearmotor and replacing it yourself
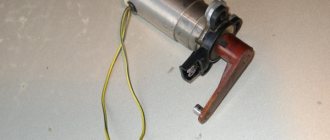
Gearmotor on a car
The climate of the car is important for every motorist, since this circumstance directly affects the degree of comfort of both passengers and the driver himself. On the VAZ 2110, the heater damper motor regulates the temperature inside the cabin. Of course, the optimal temperature also depends on the time of year. In this regard, there is a practical need to artificially maintain the required temperature inside the car. Often the gear motor deteriorates and there are reasons for this. On a VAZ 2110, replacing the gear motor can be done on your own, and this will be discussed in the article.
Assembly of the unit
Interchangeability of gearmotors
When the work to restore the functionality of the MMR is completed, install it in place. For this:
- Insert the pin of the micromotor-reducer lever into the slot of the lever. It is located on the damper drive;
- If the lever is not turned properly, apply 12V voltage to the motor connector pins using two wires. We are talking about yellow wires here. This way you can return the lever to the correct position;
- Having installed the micromotor-reducer, check it for operability, plus watch how the damper drive of your heater moves, whether the heater control lever “plows” properly to regulate the temperature.
We will repair or replace the damper and heater drive, you will be able to return the heater to its previous functionality and independently determine what temperature regime will be set inside the cabin of your VAZ 2110.
Vehicles of the VAZ concern have one global disadvantage - the car's stove. Despite the fact that VAZ-2110 cars have already taken into account some shortcomings in the heating system, the situation with air distribution remains at an insufficient level.
Often, with the onset of cold weather, drivers are faced with the problem of poor-quality operation of the car’s heating system or its complete failure. An unforeseen situation must be resolved urgently, since improper functioning of the heater causes significant discomfort for the driver and passengers and reduces safe driving.
The temperature in the vehicle interior is adjusted by using the VAZ-2110 heater damper, which often fails. Let's take a closer look at how to repair and replace the VAZ-2110 heater damper with your own hands.
How to repair or replace the gear motor of a VAZ-2110 stove
Normal operation of the VAZ-2110 stove is impossible without the correct functioning of the gearmotor, which is responsible for opening/closing the damper.
As a result of this interaction, the air that enters the car interior is heated/cooled depending on the situation. Therefore, when a stove gear motor needs to be replaced or repaired, you cannot hesitate.
This work can be done with your own hands, without the help of specialists.
How to detect and determine a malfunction
First of all, the car owner notes the impossibility of changing the temperature of the air supplied through the heating system.
To check the condition of the micro-gearbox, it is necessary to supply electricity from the battery to its motor in the middle position.
The functionality of the controller is checked in the same way, which also affects the ability to regulate the air temperature.
The most obvious sign of a non-working gearmotor is a significant decrease in the rate of heating of the interior. If there is no ventilation regulation at all, then we can talk about problems with the heater wiring.
Problems with the operation of the stove are not always caused by the heater damper motor of the VAZ-2110. You need to know about other reasons so as not to attribute them to a non-working gearbox:
- inability of the electrical circuit to transmit voltage to the engine;
- malfunction in the autonomous control unit of the heating system.
Replacing the gearmotor
In the case when it is necessary to replace the micro-gearbox, it is necessary to follow the work plan given below, for the implementation of which you will need two Phillips screwdrivers (long and short), and a ten-point open-end wrench.
- We remove the windshield wipers from the special fuse, which is presented in the form of a rubber cap. But first you need to unscrew the contact nut using a ten key.
- We dismantle the frill, which is located in four plugs, which mostly serve a decorative function.
- On the side planes of the frill you can see a couple of nuts that will need to be unscrewed.
- We look at the electric motor compartment and find a rubber seal that needs to be removed.
- To disconnect the pipeline, you will need to unscrew the screws that hold the thermal radiators from the electric motor.
- Next to the brake vacuum booster there is a damper motor, which is mounted on three mounting screws.
- At this stage, you can dismantle the electric motor by first removing the smallest block. The larger block has a wire fastening.
- We install a new gear motor in place of the damper sector.
- To assemble the heating damper, we strictly follow the described plan, but all steps are performed in reverse order.
Important practical points
Some difficulties may be associated with the installation of the micro-gear damper. For this work you need to hire an assistant. First you need to connect the contacts to the new motor.
If the heater damper is turned against the clock, cold air is supplied. This means that you need to turn on the car’s ignition and switch the sensor on the heater control system so that it is located opposite the blue dot.
Checking the micromotor gear can be carried out according to the opposite scheme, which involves turning the damper along the clock mechanism and installing the sensor near the red mark. The micromotor gearbox must turn more than it normally does.
The square can be treated with a special lubricant, which will facilitate installation.
When installing the motor, you need to pay attention to the alignment of the holes for the screws. The invited assistant must turn the temperature regulator and press on the electric motor. If the squares coincide, we can talk about a successful replacement of the gearbox, the operation of which will be carried out at a high level.
In some cases, you can observe incomplete insertion of the square along the length of the damper. You shouldn’t get upset ahead of time, because even if the micromotor reducer is only a third of the way in, its functioning will still be at a high level. The gearbox will need to be turned several more times from one mark to another so that the heating system fixes the operating range.
Gearmotor repair
If, however, you still have a desire to repair the gearmotor, and not just replace it with a new one, then the next part of our article will be of interest to you. It’s worth mentioning right away that the details of the new model are significantly different from their predecessors.
Old style part
First of all, let's look at the principle of repairing gear motors on an old-style VAZ-2110. Such a part may have a plastic or metal body. The first option is much easier to work with, but a gear motor in a metal case will be difficult to remove without denting it.
We already know how to dismantle such an element, so let’s proceed directly to disassembling it and identifying faults. We remove the adapter from the shaft, which is inserted into the damper and serves to transmit rotational energy. You can safely pull it towards yourself, since there is no glue or stoppers here.
Advice
There are latches along the entire perimeter of the case. To deal with them, you need to use flat screwdrivers, which need to be driven between the latch tongue and the body. Raise the eyelet quite a bit and insert a second screwdriver next to the latch. The halves will open due to the turning movement. Similar actions will need to be performed several times throughout the entire body.
You need to make sure that small parts that may get lost do not fall out. We completely remove the second half of the housing, pull it up from the axle and remove the three gears. On the second half of the housing there should be an electric motor with a gear and shaft.
When removing the electric motor, you need to pay attention to the worm gear, at the end of which there is a segment responsible for centering the shaft and holding the pair of gears in mesh. The part is small and can easily get lost. The motor housing has a locking screw that prevents the motor from turning inside the housing.
We remove the motor, remove the gears and segment from the shaft. We carefully inspect all parts for breakage and defects. If nothing like this is found, then we will examine the gearmotor further. In the place where the wires are connected, the motor parts are secured. We unbend it with available tools and release the bottom part.
Again, we act carefully and carefully so as not to break or lose anything. Inside there is a permanent magnet, which, due to the magnetic field, holds the motor armature in its place. In order not to cause trouble, you need to take the unit in your hand and press it with your finger on the shaft.
Using the fingers of the other hand, we grab the anchor and separate the motor into parts. Do not grab the windings as they are easily damaged. We see two brushes that are attached to the bottom part. Using a screwdriver, pull the brushes by their holders.
At the end of the armature there is a washer that prevents the brushes from being easily removed. There is no reason to remove the washer.
The armature has three windings, which are subject to careful inspection and ringing with a tester. We also inspect all dismantled elements for critical abrasions, melting, and soot deposits. Reassembling the gearmotor is carried out in the reverse order, carefully and with extreme caution.
New sample part
Dismantling of the new type gearmotor is carried out according to a similar scheme as described above. When the part is in your hands, you need to disassemble the body, which is held in place by clamps. They need to be carefully pryed off with a flat screwdriver.
First of all, you need to examine the motor for any malfunctions. To do this, you need to connect it to the connector located in the engine compartment. The micromotor must be disassembled, for which it will be necessary to bend the pressed side. It is important to note the position in which the cover is located relative to the body.
This will help maintain the correct polarity of the electric motor during assembly.
If you find a fault in the motor, you will need to look for a break. When the part is running, it is necessary to lubricate it and the gears on the gearbox.
note
A silicone-based lubricant is ideal and can be used over a wide temperature range. It may be necessary to replace the damper position sensor; it is worth paying attention to.
Assembly of the part is carried out in strictly reverse order.
Repairing and replacing a heater gear motor is not the easiest job a car owner may encounter. But there is nothing super complicated about this either. If you have the desire, minimal experience and imagination, you can successfully fix the problem with the car heating system and create a comfortable climate in the cabin of your car.
Principles of interior ventilation
Before you figure out the causes of the malfunction, you should know the principle of the device and the rules by which ventilation is carried out. So:
- Air is supplied to the passenger compartment through the holes in the trim on the windshield: when the car is moving voluntarily, or forcibly with the help of a heater fan.
- Air escapes through the gaps between the inner door panels and between the upholstery, then through the holes located at the ends of the doors. The thermal insulation of the interior is improved by valves built into the openings, which allow air to pass out and prevent it from entering the inside of the car.
- The main part of the air is directed to the windshield; flows are directed to the central part and side windows through deflectors blocked by flaps.
- Air is supplied to the driver’s feet and the passenger sitting next to him through two pairs of deflectors: one pair is located near the floor, the other at knee level.
- Through a lining located on the floor tunnel and two air ducts built under the front seats, air is supplied to the feet of passengers in the rear.
- To prevent the entry of outside air, especially if the road section is polluted, smoky or very dusty, there is an air recirculation system. When the recirculation button is recessed on the instrument panel, the electro-pneumatic valve opens. In this case, under the influence of the vacuum that occurs in the intake pipe, the access of outside air is blocked by the recirculation system flap into the vehicle interior.
- The air temperature is regulated by the controller handle from 16°C to 30°C.
- Information about the temperature is read from its sensor by a unit with a microfan located on the ceiling. The unit turns on the micromotor when a temperature difference occurs, which controls the heater dampers. When the damper reaches the desired position, a signal is sent from the sensor to the control unit, which turns off the micromotor.
Dismantling
Disassembled stove
To replace the device, you will have to perform a series of sequential actions. The work is not particularly simple, but doing it yourself is more than possible:
- Drain all coolant from the heating system;
- Disconnect the battery. To do this, simply remove the negative terminal;
- Remove the trim, windshield trim and sound insulation;
- Remove the fan from the stove;
- Disconnect the vacuum pipe clamps from the heater housing;
- Remove the front heater air intake housing. There's definitely no need to rush here. To facilitate dismantling, we recommend removing the dashboard. Inside the cabin, the fasteners that hold the heater are unscrewed, and then raised;
- Remove the spring clips, mounting nuts, and front housing;
- Disconnect all hoses from the radiator;
- Disconnect the rear casing from the heater;
- Remove the radiator from the stove.
After these manipulations, you can finally replace the damper.
How to drain antifreeze
Now all that remains is to drain the antifreeze into a container. I used a 5L bottle and only drained from the block. See how to drain antifreeze here.
A piece of garden hose (about 1.5m) worked very well for draining.
That's all. After draining the coolant, I unscrewed the two clamps of the torn pipe and replaced it with a new one. That's where the pipe broke.
I didn’t encounter any particular difficulties in my work, even though I was doing it for the first time. As a result, I gained invaluable experience and money savings. The service would charge from 600 to 800 rubles. In addition, I wiped all the hidden cavities and removed debris from them. It's unlikely that a service station would do this to you. Video to help))) (replacing the stove)
Good luck to everyone on the road and in the repairs!
Repair/replacement of the micro motor of the VAZ 2110 heater damper gearbox
One of the most common problems with the VAZ 2110, we would even say a “standard” malfunction, is the stove of this car. In our case, the air flow was constantly hot (perhaps constantly cold), and there was no reaction to changes in the position of the stove lever. This is due to the specific design of the heating in the VAZ 2110. It is designed in such a way that there is no tap for supplying coolant to the radiator, and the flow temperature is regulated by operating an air damper (outdoor/radiator). That is, coolant is constantly supplied to the heater radiator.
The entire DIY repair process is described in this photo instruction. And if you are interested in other reasons why the VAZ 2110 stove does not work, read our article.
The first step is to determine the cause of the problem. In almost 90% of cases, the culprit of a “not working stove” or a “constantly working” stove is the air duct damper, or rather its micro gearbox, due to the specific design of the heating on the VAZ 2110.
Therefore, we disassemble the nozzles on the central console, i.e. we take them off.
Next, use the lever to regulate the air supply (we move it to the extreme left and extreme right positions), you need to see if the damper moves.
In our case, the damper really does not respond to the movement of the lever, and it is stuck in one extreme right position.
The image shows the correct operation of the damper. If the damper reacts to the movement of the damper, and if warm or cold air is blowing, then you need to look for a fault in the radiator area.
You can very simply analyze how the automatic control system unit works. Is the control voltage supplied to the gear motor from the automatic control system? Here's the diagram
We connect the tester to terminals x1.2 (pink) and x1.8 (brown). Turn on the ignition. When you move the temperature knob to the highest position, a control voltage of 10 Volts should appear for 10-15 seconds. Further, with each change in the position of the temperature handle to the side position, the polarity of the control voltage should change. In cases where there is no voltage at all, then the automatic control system is not working.
In cases where the stove operates only in extreme positions or there is a suspicion that the gearbox is working properly and its shaft rotates in the damper seat, it is easy to check the serviceability of the damper position sensor. When moving the temperature knob to its extreme positions, the resistance between contacts x1.1 (green) and x1.4 (blue with a purple stripe) should change.
Result: the automatic control system is working properly, it supplies the micro-geared motor with voltage, but the damper does not respond to it.
We dismantle the wipers, unscrew the bolts shown by the arrows. We also unscrew the 2 nuts that are located on the sides. Carefully remove the plastic hook from the hole in the body and remove the frill.
Next, to make it more convenient to remove and install the frill, we cut the tube that serves to supply the washer and insert into it a tube from a cylinder with foam.
Gearbox location.
The gearbox can be removed from this position. It is secured with 3 bolts.
The gearbox has been removed from the vehicle.
Next we proceed to disassemble it.
Using a flat-head screwdriver, carefully bend the latches and separate the two halves.
We connect power from the automatic control system to the motor connector and test whether the motor is working?
In any case, remove the motor and disassemble it.
Trouble-shooting
Checking the cabin air temperature sensor
You can check the serviceability yourself; special skills are not required. Carefully remove the sensor from its original place. We find the contacts on the back side. Using a multimeter, apply a voltage of 1.2V. We set the regulators of the automatic heater control system to the “Min”, “Max” positions. The motor should not be activated.
The second method is to turn off the cabin air sensor. Check fan speed settings. The first speed (“A”) should be inactive.
Video: Heater VAZ 2110, 11, 12. Design and principle of operation.
Checking the proper operation of the automatic control system
The proper operation is checked with a multimeter. The voltage at the terminals of the pink and brown wires is measured, the ignition is activated. Smoothly turn the temperature regulator; the arrow on the multimeter display should show an increase in voltage.
On old-style heaters, at maximum voltage, the controller value remains unchanged. Take this into account so as not to make hasty conclusions about the malfunction of a particular unit.
The cause of controller malfunction may also be deformed dampers. To verify this and eliminate the breakdown, we disassemble the heater.
Prevention of the damper of the heating system of VAZ 2112
To be precise, two dampers are subject to inspection; this is the number of them present in the VAZ 2112. The cold air intake is regulated in the upper part. In the lower part, warm (hot) air is supplied to the car interior. Due to wear on the drive mechanism, the damper opens halfway or partially, the air flow is reduced, and the interior is not heated sufficiently.
Reasons for failure:
- biting, jamming during operation, due to the lack of a sufficient amount of lubricant;
- a lot of debris, moisture, sand, dirt, which contributed to jamming;
- failure of the gear motor damper cable;
- numerous layers, rust, corrosion.
The old and new dampers differ only in the type of sealing ring. In the old ones it is plastic with foam rubber, in the new ones it is a metal seal with rubber. If you can’t hear the movement of the “curtain”, move it, set it in motion, after first removing the deflectors from the central part of the dashboard with a flat-tip screwdriver. Be careful, as the plastic casing of the console is damaged.
Metal ones are better and more practical, but they are afraid of moisture, rust, and deposits. Plastic ones, on the contrary, are deformed from heat and elevated temperatures.
The second way to check the performance of the damper: if the windshield heats hot air, but the sides or legs are warm, there is a malfunction. There is no air flow - the microdetector has failed. This is the drive mechanism.
Defective damper micro-reducer
Diagnostics is permissible if you have a special device - an ohmmeter. It is designed to measure resistance in an electrical circuit. In old-style controllers, the indicators are in the range of 750 - 1250 Ohms, in new ones - 3400 - 5100 Ohms.
Troubleshooting occurs as follows: we start the power unit, set the temperature to o, wait 15 - 20 seconds, turn it off. We disconnect the controllers, measure the resistance with the ignition on between contacts X1.4 and X1.1.
At maximum temperature, the ohmmeter shows up to 5.0 Ohms on the new one or 1.6 Ohms on the old one. The absence of resistance indicates a malfunction: failure of the micro-gear sensor. More often, the tracks wear out, the wiring becomes damaged, and the fuse blows. To replace the micro-reducer, the stove is disassembled.
If the motor rotates only in the first two speed modes, then look for the reason in the resistor. It's faulty. Activation only at the third speed indicates “direct” operation, bypassing resistors. The reason is worn tracks on the switch, temperature controller.
Diagnostics, repair and replacement
You can check the gearmotor immediately after dismantling. You need to apply 12 volts to the contacts of the power connector. The easiest way is to take this voltage from the battery. We put two wires on the battery and connect them to the connector contacts. The gearmotor shaft should begin to rotate. When the polarity changes, the shaft movement must be reversed.
If this does not happen, disassemble the gear motor. If the servo drive operates, then the problem is in the control unit or wiring.
You can only disassemble the micromotor gearbox of a new type on your own. The plastic case is held on by clamps and can be easily separated into two halves with little effort.
After disassembly, we try to rotate the worm of the electric motor shaft with our fingers. If it rotates easily, then the mechanical part is working properly. Inspect the gear teeth. The recesses in the top cover for the gear shafts must be intact, without chips or ellipsoidal wear.
We try to apply voltage to the motor directly, past the chip. In some cases, a break is observed precisely in this area. If even after applying voltage directly nothing happens, the repair of the gear motor of the VAZ-2110 stove can be stopped at this point. The motor is faulty. It will be necessary to install a new motor or completely replace the gear motor, which is usually done due to the lack of suitable electric motors on sale.
Video: The stove on the VAZ 2110 does not heat up? Replacing the heater damper gearmotor
Replacing the gear motor of the VAZ 2110 stove of the new model, like the old one, is carried out in the reverse order of dismantling.
The only recommendation at the installation stage is to check the functionality of the new part. There are cases where even new spare parts had defects. And if you purchased a used servo drive, checking is required.
The test scheme is the same as at the diagnostic stage: we simply apply voltage to the windings of the gearmotor and change the polarity. The motor spins, the rod turns - we install the gear motor in its place.
Popular problems
Most often, owners of the domestic “ten” are faced with situations regarding the stove when the regulator does not respond to user manipulations. That is, the regulator does not work. Whatever position you choose, either cold or only hot air comes from the air ducts.
Scheme
There are different reasons for damper failure.
| Causes of failure | Characteristic |
| Micromotor gearbox jammed | This element is responsible for controlling the damper drive |
| Problem in the control unit | It should be checked in order to understand whether the micromotor gearbox, the damper, or the control unit is at fault |
| The plastic dampers have moved from their seat and are jammed, making it impossible to control the stove. | This is typical for the old-style VAZ 2110 heater damper, when plastic was still used for this component. |
When the gearbox is functioning, but the damper still does not turn, you can hear characteristic sounds - clicks . This indicates that a square shaft rotates inside the socket.
There is only one way to cure such a malfunction - remove the old damper made of plastic with foam insulation, and replace it with a new, modern one. The new type of damper is made of metal, and the seal for it is made of rubber.
Important practical points
Some difficulties may be associated with the installation of the micro-gear damper. For this work you need to hire an assistant. First you need to connect the contacts to the new motor. If the heater damper is turned against the clock, cold air is supplied. This means that you need to turn on the car’s ignition and switch the sensor on the heater control system so that it is located opposite the blue dot. Checking the micromotor gear can be carried out according to the opposite scheme, which involves turning the damper along the clock mechanism and installing the sensor near the red mark. The micromotor gearbox must turn more than it normally does. The square can be treated with a special lubricant, which will facilitate installation.
When installing the motor, you need to pay attention to the alignment of the holes for the screws. The invited assistant must turn the temperature regulator and press on the electric motor. If the squares coincide, we can talk about a successful replacement of the gearbox, the operation of which will be carried out at a high level.
In some cases, you can observe incomplete insertion of the square along the length of the damper. You shouldn’t get upset ahead of time, because even if the micromotor reducer is only a third of the way in, its functioning will still be at a high level. The gearbox will need to be turned several more times from one mark to another so that the heating system fixes the operating range.
Damper adjustment
Adjusting the Nissan Qashqai heater flaps is also a fairly simple procedure and can be done on your own:
- The bolt securing the rod to the drive is slightly loosened.
- The damper lever is installed in a position where it is completely open.
Damper position at maximum set temperature
Damper position at minimum set temperature
- The rod is pulled out of the casing, the mounting bolt is tightened.
- The damper drive handle is pulled out to the maximum, which can be determined by the fact that the damper itself has completely closed.
- If the damper does not close, the rod shell bolt is unscrewed.
- When moving the shell you need to look at the damper. If it is closed, the mounting bolt can be fully tightened. This completes the adjustment.
Photo report of the work completed
Now information for those who are used to looking at everything in pictures. This is what our heater damper control motor looks like:
After access to the gear motor of the VAZ 2110 stove is gained, it is necessary to disconnect the two plugs with the power wires. This is clearly shown in the photo below.
After this, you need to unscrew the three screws securing the heater damper motor, which are shown in the picture with arrows:
Unscrew everything using a short screwdriver:
And after that, take the gear motor out, pulling it gently to the side:
Installation proceeds in reverse order. As for the cost of this part, for the old-style VAZ 2110 the heater damper gearmotor can be purchased at a price of 1,500 rubles, but the new model is much cheaper - about 800 rubles.
Let's sum it up
Malfunction of the VAZ-2110 heater damper is a common malfunction, especially in vehicles with old-style heaters. Breakage in most cases is due to the quality of plastic dampers, which are very often subject to deformation. It is possible to repair and replace the VAZ-2110 stove valve yourself without the help of professionals. Before starting work, you need to understand that in order to carry out high-quality repairs and restore the previous functionality of the heating system, the stove will have to be completely dismantled.
Despite the complexity of the work ahead, the result will please the driver and passengers with warmth and comfort in the vehicle interior. A high-quality repair of the heater damper and its drive guarantees stable operation of the vehicle’s heating system at any time of the year.
Assembly
When installing a new damper, be sure to make sure that the fork located on its axis is clearly engaged with the lever. If the flap is in the raised position, you did everything right. Otherwise, it will be impossible to control the device, so you can forget about restoring the functionality of the stove.
Damper location
After this, reverse the assembly procedure according to the dismantling steps. Refill the system with coolant and check that the new damper is in place. It is important to ensure that there are no leaks and that the hose connections are not tight.
Turn on the stove and check how the heater behaves. If everything is normal, you have carried out competent and successful work, for which we congratulate you.
We are engaged in the drive
Simultaneously with replacing the damper, we check its drive, and if the MMR does not work, it is necessary to either replace the motor or repair it. After removing the trim and lining of the windshield behind the vacuum amplifier of the VAZ 2110, we find the MMR, disconnect two connectors - the MMR and the micromotor.
MMR new sample MMR old sample
Next, unscrew the screws and take out the MMR, from which we remove the motor. Its operation is checked by connecting to the automatic control system.
If you find that it is not working, you can replace it, but repair is also possible. The stages are:
- Partially bending the pressed side, remove the lid;
- Check the condition of the bearings, brushes and commutator;
- Replace or fix them. If the gear teeth of the gearbox are worn out, it needs replacement;
- Bearings require silicone grease.
If after repair the operation of the motor is restored, you can assemble the MMR and install it in place. In the VAZ 2110 this is done like this:
- The MMR lever pin must be inserted into the slot of the lever, which is located on the heater damper drive;
- If the indicated lever is turned incorrectly, you need to apply 12 V voltage with two wires to the contacts of the motor connector (yellow wires fit here), and the lever will move to the desired position;
- After installing the MMR, check how it works, at the same time, how the heater damper drive moves and the heater control lever works to set the temperature in the VAZ 2110 cabin.
https://youtube.com/watch?v=CuGGXakB5Ew
By properly repairing the heater damper and its drive, you will ensure that the operation of the stove becomes stable, providing you and your passengers with the proper level of comfort in cold weather.
Detection and causes of malfunction
The main indicator of gearmotor failure is the inability to regulate the air temperature of the car heater. You can check the performance of the micromotor gearbox by supplying electricity from the battery to its motor in the middle position. In the same way, you can check the functionality of the controller, the failure of which also leads to the impossibility of temperature control.
The following defects may be the cause of gearmotor failure:
- violation of the integrity of the electrical circuit, that is, the supplied voltage does not flow to the engine, the gearmotor cannot function correctly;
- a defect in the autonomous heater control unit, as a result of which the reducer does not supply air at the required temperature.
The following material will help to identify the causes of malfunctions of the VAZ 2110 stove: https://vazweb.ru/desyatka/otoplenie/neispravnosti-pechki.html
Heater diagram VAZ 2110
The main reasons for poor operation of an electric furnace
VAZ 2110 stove diagram
Before you can directly begin to find a solution to a problem, you need to be able to identify it quickly and effectively. First, it is advisable to consider the general structure of the furnace. So, the heater furnace consists of the following components:
- mounting block fuse;
- incendiary lock;
- ignition switch together with its unloading relay;
- a special switch that regulates the operating mode of the furnace electric motor;
- additionally built-in resistor;
- stove motor;
- heated rear window of the car, which contains a heater adjustment button with a light indicator;
- a special functional element for heating glass.
VAZ 2110 stove wiring diagram
One of the reasons for the malfunction of the electronic circuit of the furnace may be the lack of functional activity of the heater electric motor at both low and high speeds. In this situation, you must proceed as follows:
- First you should make sure that the fuse has not accidentally blown;
- If a blown fuse is detected, it will urgently need to be replaced with a new one.