Note: when removing both drives at the same time, a suitable mandrel should be installed in their place.
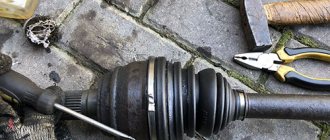
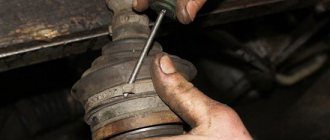
How to change the “grenade” with the drive removed? To do this, clamp the shaft in a vice, loosen the clamps and remove the boot. After this, the hinge is knocked off the splines with hammer blows.
The new CV joint should be hammered by applying light blows to its end with a hammer. For this it is better to use a wooden mallet. The “grenade” is first filled with a special lubricant.
Before installing a new constant velocity joint, it is necessary to clean its seat from old grease and install a new boot. Assembly is carried out in reverse order.
The repair is considered complete after successful sea trials. In this case, there should be no extraneous sounds from the drive side in all modes of vehicle movement.
Replacing the inner CV joint
Owners of front-wheel drive cars claim that replacing the internal grenade is easier than replacing the external one. Perhaps this is indeed easier for an experienced motorist, but what about amateur beginners?
For those who have experience and skills, replacing the right inner CV joint (as well as the left one) will not be difficult. The procedure requires the same tools - a hammer, screwdriver, vice, pliers. Do not forget about the jack and that the replacement should be carried out either using a lift or an inspection hole.
Having examined the structure of the inner CV joint from below, it is easy to guess how it is removed. Experts advise removing it together with the external one - it will be more convenient. We start by removing and discarding the old boot (when reinstalling it, it is better to use a new one), the housing, the rollers (there should be three of them), as well as the locking ring (it secures the 3-spoke fork to the shaft). The grenade will be recorded at the checkpoint. After removing the pre-fixed fasteners, turn the wheels left or right until they stop. The CV joint can be removed without problems, since nothing will interfere with this.
What is needed to install a new CV joint
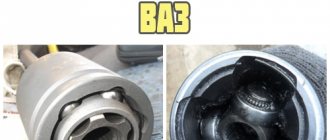
The CV joint, despite its strength, has parts that can wear out over time or if used incorrectly. Often, CV joint replacement occurs due to damage to the boots - during driving, cracks and holes appear that become clogged with dirt, water and dust. This way you can drive hundreds, or even thousands of kilometers, which will finally finish off the mechanism. Boot problems are expressed in a crackling sound when turning the wheels (when turning to the right, the left wheel cracks, when turning to the left, the right wheel cracks). Sometimes the CV joint has to be replaced due to incorrect actions by the driver. Acceleration of the engine with slipping, starting on the wheels turned out, braking by the transmission - often the cause of the malfunction lies in this.
Play in the ball joint has a negative effect on the CV joint. It occurs when the support itself is already severely worn out. If this problem is not identified in time, it will have a very negative impact on the CV joint. Thus, driving at high speed can tear out the support pin, which can cause the grenade to break.
It is extremely rare that CV joint failures are caused by factory defects in the mechanism parts or initially incorrect installation. Coupled with a worn boot, the problem can reach unimaginable proportions. Many reviews on automotive forums mentioned the poor quality of some parts - both basic functional elements and additional little things, like clamps.
Regardless of the source of the problem, a grenade that is not working properly will require replacement. Machine manufacturers claim that when parts wear out, the entire mechanism must be replaced, even those elements that were not damaged by failure. Considering the high quality of materials, the repair will cost quite a lot. In this regard, the car owner tries to replace the CV joint with his own hands. What will the driver need?
- pit or lift;
- hammer, screwdriver, pliers, jack;
- a set of keys or heads;
- bench vice;
- new clamps, lubricant (CV joint-4, for example), hub nut with stopper.
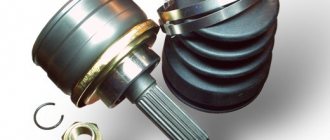
The latter (consumables) are often provided with a new grenade. All of the above are suitable for replacing outer and inner CV joints.
Boot replacement and repair
The boot can be changed without removing the grenade if you have special equipment. His work is demonstrated on video. » alt=»»> If you do not have such a device, to remove and replace it, you must perform the above-described procedure for removing the drive and dismantling the hinge. The procedure is necessary if there is even minor through damage on the boot.
Temporary repairs to the CV joint boot can be made without removing it from the vehicle. To do this, you need to thoroughly clean and degrease the damage, then seal it with a piece of rubber and cyanoacrylate-based glue (superglue).
An alternative repair method is to seal the holes with silicone caulk. It should be remembered that it takes a day to completely polymerize.
Note: express repair is a temporary measure. Replacing the inner joint boot may be delayed for a short time, but not completely cancelled. Typically, these types of repair methods are used to get to the point of repair.
How to repair
Replacing the CV joint on a UAZ Patriot
If the boot still fails, but you don’t want to buy a new one (we strongly recommend that you change your mind) or are waiting for it to arrive, it is possible to seal the CV boot.
The first option is to use rubber patches, which are typically used for car tires. In principle, the method should justify itself, because the boot and the wheel are operated under approximately the same conditions. Take care of your purchase in advance:
- patches for car tires;
- external CV joint lubrication;
- sealant;
- kerosene for cleaning.
So, first, clean the surface and apply the patch according to the instructions. It will look something like this:
For greater reliability, fill the patch with sealant. After this, theoretically, you can move on. That is, this replacement method, in principle, allows you to seal the CV joint boot without removing it. However, such carelessness can be costly if dust or water gets into the hinge itself. Therefore, it would be better to remove the boot. Clean both it and the hinge. Refill it with grease and secure it securely with clamps.
Important! This method is suitable for repairing only rubber boots, not plastic ones!
The second option looks more like a repair in the field than a planned sealing. Nevertheless, those who have used it speak of its reliability, and most importantly, the speed of implementation and extreme low cost. For this repair you will need:
- plastic bag (stronger);
- scotch;
- CV joint lubricant.
Of course, you first need to jack up the car, remove the wheel and remove dirt from the surface. Then, using a syringe or any other similar tool, fill the boot with lubricant. It’s better, of course, to remove it, wash it and stuff it, but you can also do this through the hole that has formed in it. Next, take a plastic bag and wrap it around the boot and part of the shaft. Don't forget to push the bag into the grooves. Spin the wheel (always in the direction of travel!) to make sure that your structure can move freely. Now all that remains is to rewind it all with tape. Try to purchase not ordinary stationery tape, but special automotive tape (with the addition of metals for greater durability).
If you still have questions about repairing the CV joint boot yourself, watch this video. It presents the second repair method in sufficient detail and clearly:
- How to change injectors on a Priora
- How to change the fuel filter on a Priora
- How to change the cabin filter of Lada-Vesta
- How to change spark plugs on a Priora
Choosing an outer CV joint for the Lada Granta
There are enough hinges from different manufacturers on sale, it’s bad that sellers treat them like all Zhiguli spare parts - everything is the same. In practice, for the first generation Grants there are two types of external (and internal) CV joints - for cars with manual transmission and for Grants with automatic transmission. In a word, grenade 2215012-00 (21 teeth) .
For Lada Granta with a manual transmission there is a CV joint with catalog number 2215012-86 . In order not to be confused with numbers, let’s look at the differences between CV joints for Grants with automatic transmission and manual transmission:
- The spline connection in the outer hinge has changed in size, the number of teeth is 21 . A CV joint with 22 splines is suitable for a manual transmission.
The geometric dimensions of the body have also been changed.
- The length of the outer spline part for manual transmission is 76.5 mm , for automatic transmission - 77 mm .
- height (without spline) 55 mm for automatic and 52.2 mm for manual .
- The number of teeth for the ABS ring does not change and remains 43.
Therefore, before purchasing an outer CV joint, we first look at the number of splines on the inside of the joint body. Among the manufacturers on the market, AvtoVAZ, Belmag and Triall dominate. The price of an outer CV joint on a Lada Granta is around $20.
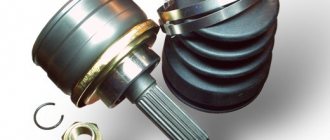
It is important that the kit includes a locking ring, molybdenum disulfide-based lubricant and a neoprene boot. It should not be too hard, but a boot that is too thin will not last long.
CV joint Lada Granta | transmission gearbox clutch Lada Granta
1. Replacement of the outer CV joint for the Lada Granta
2. Video: “Replacing the boot of the outer and inner CV joint (grenade)
Replacement of outer CV joint for Lada Granta
Still, I decided to change the CV joint today. because then there will be no time. I made a photo report, as detailed as I could.
sit down and remove the wheel
While the car is still with the wheel, loosen the hub nut using a 30mm socket and use a metal pipe for reinforcement.
Next, unscrew the caliper assembly. Some will say that there is no need to do this, because you can change the grenade anyway, but it’s convenient for me so that he doesn’t interfere with me.
then unscrew the two bolts from the ball joint
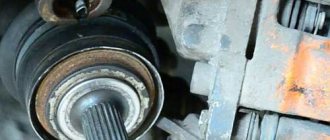
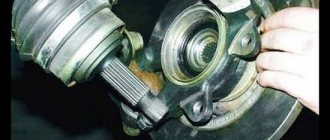
then unscrew the loose hub nut completely, and using a mounting tool (a small pull) remove the hub from the ball and at the same time from the CV joint
remove the boot from the CV joint and remove all possible lubricant so that there is less dirt
and start trying to knock out the grenade with a hammer. And she gave in quite easily, not like last time, we beat her for almost 2 hours.
remove the old retaining ring.
This is a comparison of CV joints from two manufacturers, on the right is BELMAG, and on the left is produced by AVTOVAZ. The difference is immediately visible, AVTOVAZ has a deeper CV joint calcination than BELMAG, which already gives AVTOVAZ a big plus. Let's hope that the new CV joint lasts at least 30 thousand km, and not like BELMAG only 3000 km went before it cracked. The cost of the AVTOVAZ CV joint is 1500 rubles, and the BELMAG CV joint is 1000 rubles, and the kit includes CV joint grease.
Fill the entire CV joint bearing with grease.
see also
Comments 20
The same garbage, 60,000 km, I looked at the cracks, changed them to red polyurethane.
I installed polyurethane, transparent ones, by the way, they also fit from the fields and fit very tightly, all rubber and colored ones, frankly speaking, are like a threshing floor, by the way, I have these ones
Thank you. How much do they cost you already?
The first one is a little over a year old, and the second one is almost two years old, but they have survived frosts of 45 for 2 times already, there are no cracks due to the frosts, the factory ones were torn.
Thank you. How much do they cost you already?
By the way, the same horses are also good, I don’t know about your prices, but both cost me about 900, they come with clamps and lubricant. I’ll check with those that I took, it was.
On ekziste 424 rubles per pair included
I installed anthers on a former VAZ 2109 car, and they were there for more than three years. There are no comments or complaints about them, the best for their price www.drive2.ru/l/484865387469472415/
I looked, the price tag certainly impressed me, the only question is - have you used such a duster yourself, otherwise it costs 900 rubles. I don’t really want to buy anything just to try it out.
I just looked too, who knows what kind of polyurethane shit it is? Maybe someone will write something.
I looked, the price tag certainly impressed me, the only question is - have you used such a duster yourself, otherwise it costs 900 rubles. I don’t really want to buy anything just to try it out.
I bought myself a panapak here, stinger-shop.ru/catalog/poliuretan/ I haven’t installed it yet, but in winter I threw it out in the cold, the soft ones don’t tan, I’ll write about changing them while my family is spinning.
I looked, the price tag certainly impressed me, the only question is - have you used such a duster yourself, otherwise it costs 900 rubles. I don’t really want to buy anything just to try it out.
Before writing this cry for help in choosing, I also looked at these cs20, but there are no particular reviews on the Internet, as I understand it, they appeared relatively recently
Read more: DIY wax polish for cars
I drove with such “cracks” for another 3 years...
Not everything is visible in the photo. The main cracks on the small clamp are along the entire diameter, but not yet through.
Believe me, changing them if you do it yourself: that’s another task, especially installing the grenade back and tightening the clamps, so go ahead, but check once a month so that the grease doesn’t come out, that’s how it comes out, then replace it. This is practical advice for economy. This happened to me when I was 5 years old, while I was struggling with one, from which the grease came out, the second, which had the same abrasions, my brain sentenced me to long trips until it finally broke!
A good friend of mine will replace the anthers for almost nothing. But he cannot recommend the company, because he deals with foreign cars.
Yes, take now the standard AvtoVAZ one, average quality, but still more reliable than China.
How to change the outer CV joint of a Lada Granta
Depending on the manufacturer and quality of the CV joint, its service life ranges from 30 to 60 thousand kilometers. Replacement of the external grenade is usually done more often, especially on the right side. It is more susceptible to stress from bad roads. How to replace the outer CV joint in Grante and which one is better to buy, we will figure it out now.
When to change the CV joint, signs of malfunction
As was said, the external grenade fails after about 40 thousand mileage. This is evidenced by crunching, creaking and knocking sounds in the area of the drive shafts. To determine which side of the CV joint requires replacement, you need to turn the steering wheel all the way and drive off. In 90% of cases, a worn drive will manifest itself as a crunching sound. For control, you can turn it first in one direction, and then in the other direction, and turn it back. If the CV joint is worn out, a crunching sound will be heard immediately.
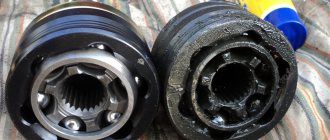
New and worn CV joint
This is the case when there are no visual signs of wear:
- Lubricant leaks near the outer joint.
- Cracks, tears on the boot.
- Lost or misaligned clamps.
- There is obvious play when turning the suspended wheel.
If there are visual signs of wear, we replace the CV joint on the Grant as soon as possible.
Checking the condition of the CV joint
- External (external) CV joints - two pieces, located on the hubs, transmit torque to the wheels. The steering angle is significantly higher than that of an internal CV joint. They also take on more load. Accordingly, they break down more often and require regular inspection and replacement if necessary. They have a smaller size.
- There are two internal CV joints that make the axle shaft move; they are located in the gearbox, one on each side. They are larger in size. They are less subject to stress and, accordingly, can work longer.
You can assess the condition of the CV joint yourself. The easiest way to inspect the external one is to turn the steering wheel all the way (to the right or left) and quietly move away. If there is a problem, a cracking or crunching sound will appear. The more damage is done to the CV joint parts, the louder the sound will be.
If problems with the external grenade are accompanied by a crash when turning, then problems with the internal grenade are accompanied by a crack when moving straight. The sound will intensify if you drive off-road - every bump, hole or ditch will clearly remind you of the problem. If you notice a crunching sound, carry out repairs immediately - problems with the internal CV joint are very dangerous. It's a little more difficult to inspect:
- We put the car on the lift.
- We turn on first gear, the wheels should rotate slowly (the car should be slightly raised).
- The presence of a distinct crunching sound is evidence of problems.
If you hear a cracking sound while driving - when turning, when overcoming off-road obstacles, or sudden acceleration - immediately fix the problem. Timely inspection and repair will help the car owner remain a driver and not a pedestrian. In addition, a problem detected in time will help to avoid critical situations on the road.
Choosing an outer CV joint for the Lada Granta
There are enough hinges from different manufacturers on sale, it’s bad that sellers treat them like all Zhiguli spare parts - everything is the same. In practice, for the first generation Grants there are two types of external (and internal) CV joints - for cars with manual transmission and for Grants with automatic transmission. In a word, grenade 2215012-00 (21 teeth) .
For Lada Granta with a manual transmission there is a CV joint with catalog number 2215012-86 . In order not to be confused with numbers, let’s look at the differences between CV joints for Grants with automatic transmission and manual transmission:
- The spline connection in the outer hinge has changed in size, the number of teeth is 21 . A CV joint with 22 splines is suitable for a manual transmission.
- The geometric dimensions of the body have also been changed.
- The length of the outer spline part for manual transmission is 76.5 mm , for automatic transmission - 77 mm .
- height (without spline) 55 mm for automatic and 52.2 mm for manual .
- The number of teeth for the ABS ring does not change and remains 43.
Therefore, before purchasing an outer CV joint, we first look at the number of splines on the inside of the joint body. Among the manufacturers on the market, AvtoVAZ, Belmag and Triall dominate. The price of an outer CV joint on a Lada Granta is around $20.
It is important that the kit includes a locking ring, molybdenum disulfide-based lubricant and a neoprene boot. It should not be too hard, but a boot that is too thin will not last long.
We change the outer CV joint of the Lada Granta with our own hands
There shouldn’t be any difficulties when replacing the CV joint yourself if you use simple instructions and have a basic set of tools. It’s also a good idea to have a puller on hand for side dishes of equal angular velocities. It doesn't seem to have an article number, but that's what it looks like.
Alternatively, you can use a simple impact puller with a welded hub nut, but any extra shock loads on the transmission will not be very useful for it.
- While the car is on the ground, unscrew the hub nut using a 30mm socket with a long wrench.
- Raise the car, remove the wheel and unscrew the hub nut.
- We unscrew the caliper without disassembling it.
- Unscrew the ball joint bolts.
- We remove the hub from the CV joint and at the same time from the ball joint, and move it to the side.
- We loosen the clamps and move the boot further along the drive, closer to the gearbox.
- Using a puller or hammer, we ask the CV joint to leave its location.
- Remove the retaining ring.
- We fill the internal cavity of the CV joint with the lubricant that comes with the kit.
- We put the remaining grease into a new boot and put it in place.
- Screw the nut onto the new CV joint and install it in place.
- With light blows of a hammer on the nut, we move the hinge all the way until the stopper snaps into place.
- We install the boot, check that it is without distortions and tighten the clamps.
We put everything back together in reverse order, core the hub nut and do a test drive.
Signs of failure of the outer grenade (CV joint).
There are two options here:
- signs that your grenade has already broken
- signs that the grenade will soon come out and break .
How to understand that a grenade will soon break.
Of course, the first sign of a malfunction of the external grenade is a crackling sound . If you hear a crackling noise while driving with the steering wheel turned, it is definitely a CV joint. The greater the angle of rotation of the wheel and the harder you press on the gas, the louder the clicks. Another sign that does not always appear is vibration on the steering wheel at speeds greater than 80 km/h. The vibration is only slightly similar to the vibration from an unbalanced wheel. It usually manifests itself as a slight twitching of the steering wheel.
How to understand that the outer CV joint has broken.
If the CV joint breaks, the car will stop moving. In any gear engaged, press the gas, the speed increases, but the car does not move.
How to understand that it is the outer CV joint that has broken, and not the internal one or the clutch in general (the first signs of failure are similar to the signs of a clutch failure)? First of all, start the car and put it in any gear. Next, open the hood and look in turn at each of the shafts going from the box to the wheels (one short, the other long). If any shaft is spinning, it means that the CV joint has broken on this side.
I recommend not just visually looking at the shaft, but touching it with some long, hard object, such as a stick. The main thing is that there is nothing on it that can wrap around the shaft !!! When you touch the shaft with a stick, if it is spinning, you will feel a slight vibration. This is usually done in the dark, because it is difficult to understand whether a cylindrical object is spinning, especially in the dark.
Replacing the outer CV joint and CV boot
In order to change the CV joint or CV boot , you need to hang the front axle. This means that both front wheels should not touch the ground. To do this, use two jacks or lift the car on a lift.
We move under the car and drain the oil from the gearbox. You can learn in detail about how to do this in the article “ Changing the oil in the Gearbox ”.
Now unscrew the central nut of the wheel bearing. Let's first unlock it.
And unscrew it with head No. 30.
Then, using head No. 17, unscrew the two bolts securing the ball joint to the steering knuckle.
We move the shock absorber strut with the steering knuckle to the side and remove the outer CV joint from the hub.
Now you need to remove the axle shaft from the gearbox. The inner CV joint is inserted into the gearbox differential and secured with a retaining ring. We insert a pry bar or crowbar between the gearbox housing and the CV joint and, with emphasis on the gearbox housing, pull it out.
Removing the CV joint can be a challenging task. Therefore, if it doesn’t work out the first time, we turn the CV joint and repeat the steps.
To replace any of the CV joints - internal or external, or its boot, clamp the axle shaft in a vice. We will change the outer CV joint and its boot.
We knock down the boot clamps with a screwdriver or cut them off with pliers. And cut off the torn boot.
Remove old grease with a rag. The CV joint is secured with a retaining ring through a spline connection. Through the attachment, with several blows on the inner race, we knock the CV joint off the axle shaft.
Now we install new parts. First, we put a new boot on the axle shaft.
We install the retaining ring.
Then we take a new CV joint. And, if there is no lubricant in it, we put a special lubricant inside for the CV joint.
We install the CV joint on the axle shaft, aligning it with the splines. We hammer the CV joint through the wooden guide until it stops.
Thanks for subscribing!
We pull the boot over it. We clamp the boot with new clamps. Ready.
Exactly the same actions are necessary to replace the inner CV joint or its boot. We insert the repaired axle shaft into place into the gearbox.
Carefully align with the splines inside the differential, turning the inner CV joint.
The new CV joint should be the same as the old one.
If there is excess metal boot, you need to remove it.
We insert the outer CV joint with the axle shaft into the steering knuckle. And we push it all the way: on one side into the gearbox, on the other into the hub. We tighten the bolts securing the ball joint to the steering knuckle. And we clamp. Tighten the central nut of the wheel bearing. And we squeeze it with force. Now all that remains is to fill the gearbox with oil. You can learn in detail about how to do this in the article “ Changing the oil in the Gearbox ”. Install the wheel. And we clamp it. Ready.
Assembly procedure step by step
We carry out the entire list of assembly operations in a Lada Kalina car in strictly reverse order. During the procedure, it is necessary to take into account some nuances.
- First, we put the boot on the axle shaft. If this is difficult, then its surface can be lubricated with the grease supplied with the new hinge kit.
- Now we fill the same grease into the CV joint bearing, and the remainder into the internal cavity of the boot.
- We install the hinge on the axle shaft. We also use a hammer, applying a shock load to the body. The retaining ring should be replaced.
- When the “grenade” “sits” in its place, we push the boot, after squeezing it with our hands to remove excess air. We install clamps.
- We do the same when replacing the internal hinge.
- Now we install the axle shaft into the transmission housing until the shaft engages with the side gear. Don’t forget to fill the unit with oil afterwards.
- We insert the outer joint into the steering knuckle until it fully engages with the splined race of the hub. Screw on the central nut (do not tighten it).
- We return the ball joint to its place.
- We hang the wheel and do not tighten its fasteners too much.
- We lower the car (we do not unload the jack completely). Tighten all fasteners to the required torques. We remove the jack and stops. Replacement of the outer CV joint is complete.
The owner of LADA Kalina will spend no more than 3 hours of his time to complete the full list of replacement actions. We check the correct installation of the hinges. To do this, we start driving the car with the wheels turned out as far as possible. We observe the absence of crunching and other characteristic sounds from the axle shaft. Now you know how to change a faulty CV joint.
Replacing CV joints (constant velocity joints) on a Lada Granta VAZ 2190
Tools:
- Pliers
- Large flat screwdriver
- Small hammer
- Soft metal drift
- Vice with soft metal jaws
- Jack
Parts and consumables:
- CV joint grease-4
- Wood spacer
- Constant velocity joints
- Front wheel drive shaft valve
- Rags
- Gloves
Notes:
Replacing a CV joint or repairing it is a fairly common occurrence, the harbingers of which are knocking, crunching and crackling noises when turning the car’s wheels.
Work order:
1. Remove the front wheel drive from the vehicle as described here or here.
2. Clamp the drive shaft in a vice with soft metal jaws.
3. Using pliers, squeeze the bent antennae of the inner clamp of the boot of the inner CV joint.
4. Use pliers to compress the clamp lock of the inner CV joint boot.
5. Remove the clamp.
6. Similarly, remove the outer clamp of the CV joint boot.
7. Slide the dirt boot over the shaft and turn it inside out.
8. Using a drift, knock the inner CV joint off the front wheel drive shaft, applying force to the CV cage.
9. Please note: there is a plastic buffer installed at the inner end of the front wheel drive shaft.
10. Check the presence of lubricant in the new CV joint. The CV joint should contain 80 cm3. SHRUS-4 lubricants.
11. When installing the CV joint, place it on the front wheel drive shaft with gentle blows of a hammer through a wooden spacer along the outer end of the shank along its axis until the hinge is fixed on the shaft. When installing the CV joint, make sure that no dirt gets into it.
12. Install the boot on the CV joint housing.
13. Install the outer and inner CV joint boot mounting clamps in the reverse order of removal.
14. If it is necessary to replace the boots, remove the CV joint from the front wheel drive shaft and remove the air release valve assembled with the casing from the boot by sliding the valve along the shaft. Remove the boot from the front wheel drive shaft.
15. To replace the valve, unscrew its casing and, having removed the valve from the casing, remove the valve from the front wheel drive shaft.
16. Then remove the valve cover from the front wheel drive shaft.
17. Install the valve and new CV boot in the reverse order of removal.
18. After installing the CV joint, secure the boot with clamps.
19. To replace the outer CV joint, remove its outer and inner boot clamps in the same way as you did for the inner CV joint.
20. Slide the boot along the front wheel drive shaft and turn it inside out.
21. Using a drift, knock the outer CV joint off the front wheel drive shaft, applying force to the CV joint cage.
22. Install an external CV joint on a Lada Granta VAZ 2190 car in the same way as installing an internal CV joint. The difference is that the outer CV joint needs to be filled with half as much (40 cm3) CV joint-4 lubricant as the inner CV joint.
The article is missing:
- High-quality photos of repairs
- Photo of the instrument
- Photos of parts and consumables
