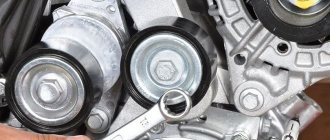
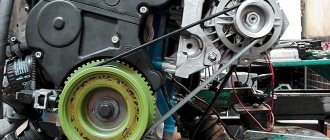
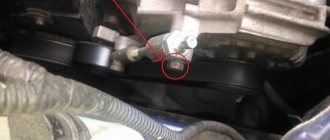
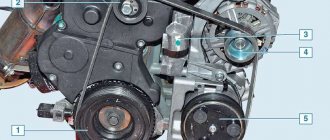
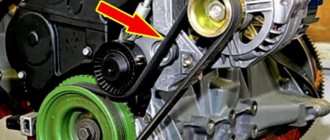
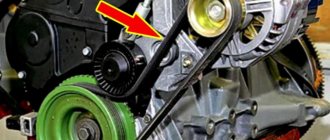
Most components in modern cars, including the Lada Granta, have a complex design. It is not recommended to disassemble and repair such parts and assemblies yourself. Many tips are aimed at the need to contact a professional service in order to eliminate one or another malfunction that has arisen.
However, the owner will be able to independently dismantle some elements present in the car’s structure, perform repairs on them and subsequently install them in their original place, without the need for deep knowledge of the material part and in the absence of special tools. These components can easily include the generator belt tensioner; many are interested in the question of how to install it. In this article we will tell you how to tighten the alternator belt.
When developing the promising Lada Granta model, AvtoVAZ took into account many of the shortcomings that occurred on previous cars of its own family. Many components of the Lada Granta have received useful and practical modifications. However, there is only one negative point here, indicating the fact that the designers were too lazy to equip the generator drive unit with the ability to provide the proper level of belt tension. This remark is true for 8-valve versions of VAZ engines:
- «11183»;
- «21116»;
- «11186».
Why the developer refused to integrate a conventional alternator belt tensioner into this unit remains an intriguing mystery. This obvious fact brings owners a lot of inconvenience, forcing them to resort to service calls.
Drive belt replacement process
The process of replacing the Granta drive belt is quite complicated. To correctly perform this procedure, you must strictly follow the sequence of actions in the step-by-step instructions.
Step-by-step instructions for replacing the drive belt on a Lada Granta:
- First of all, before starting work, it is best to park the car on an overpass, or drive it into a garage with an inspection hole.
- Then you need to open the hood of the car, unscrew the top bolts securing the protective cover if it is installed in your car.
- Then you need to remove the front right wheel. Then remove the fender liner. To remove it, you need to carefully unscrew the 12 bolts around the perimeter of the fender liner.
fender liner mounting bolts
- After the fender liner is unscrewed, it can be hung onto the brake disc.
Before further disassembly, you need to install a jack under the right side of the engine:
- The next step is to remove the right engine mount. To do this you need to unscrew 3 bolts.
right engine mount bolts
view of the working area after removing the fender liner and right engine mount
Now that the work area is free, the car owner can proceed to the second stage of replacing the drive belt:
- First of all, you need to loosen the belt tension.
- Then remove it from the pulleys.
- After removing the belt, you need to wipe the pulleys from dirt. Usually, after replacement, dust, rubber particles, and a particle of copper wire remain on the pulleys.
- After cleaning the pulleys, you need to replace the belt, and then reassemble the removed components in the reverse order.
After all the work has been done, you need to start the engine and look at the operation of this unit. If everything works correctly and no errors are displayed on the dashboard, then all the work was done correctly.
General questions about working with the Grant generator
Let's consider general questions: everything except replacement.
Tension check
There are two approaches: visual assessment and physical.
Visual assessment of condition:
- the car is on a flat surface, the gear is in neutral, the handbrake is off, the hood is open;
- We don’t start the car - we put it in 5th gear;
- We opened the hood and found a generator: we push the car back, resting against the bumper;
- We inspect the required part along its entire length: are there any breaks or cracks? It needs to be changed.
Poor quality will lead to unexpected problems on the way.
Physical assessment:
- if you have a tool that measures pressure force: press the belt with a force of 10 kg*s - the deflection should be no more than 10 mm;
- there is no special tool: we try to turn it across - it should turn no more than 90 degrees.
How to tighten the alternator belt on a Grant
This section applies only to machines with a tensioner. No - change the part or see above how to install it.
Subsequence:
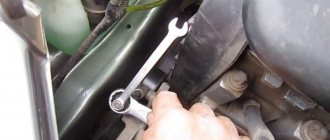
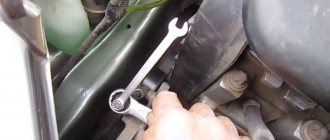
- we use ring wrenches 8, 19;
- Throw key 19 onto the lead screw;
- wrench 8 for locknut;
- we touch;
- Now you can turn the lead screw: clockwise to loosen, counterclockwise to tighten;
- got the desired result - tighten the locknut.
It is better to take ring wrenches, since a head with a ratchet or a wrench will not work.
When to change: technical regulations for replacing a VAZ 2190 belt
AvtoVAZ requires checking the condition of this part every 15,000 kilometers.
Replacement is required every 30,000 kilometers, regardless of condition.
How to remove a generator on a Grant
It needs to be removed for repairs, replacement of bearings or rollers.
The step-by-step process involves:
- remove the negative terminal from the battery;
- working with the generator: disconnect the wiring harness from it;
- remove the cover of the power wire nut, remove the nut and remove the wire from the bolt;
- unscrew and pull out the upper and lower fastening bolts - to work with the lower one, you may need to climb into a hole, throw off the tin protection of the internal combustion engine and dismantle it from below;
- move the part to the right mudguard, remove the belt, and remove it.
You can do without a hole. Example:
Let's summarize
To work with the generator and to replace the belt you need:
- set of spanners, Torx t20 and 27, ratchet with heads or wrench, knife;
- if there is no tensioner, you can assemble and install it;
- if there is no air conditioner, replacement is easiest;
- is there air conditioning? To work, you need a pit or a lift with dismantling the engine support;
- They change consumables every 30 thousand mileage according to regulations.
Write comments and share your experience.
Lada Granta is positioned by the manufacturer as one of the cheapest cars. The car entered the top 10 cars with the lowest cost, but not because of its outstanding qualities, but rather because of savings on parts. The absence of a generator belt tensioner leads to rapid wear of the latter. When is it necessary to replace it on a car with or without air conditioning?
We check the condition of the alternator belt ourselves
Before replacing the Lada Granta alternator belt, car enthusiasts usually check its condition to make sure whether this is really necessary. To diagnose, you need to follow simple steps. First, you need to engage fifth gear and get out of the car, and then try to push your Grant back, working on the front bumper or side pillar, if an assistant does this. In this case, the hood must be open and while pushing it is necessary to see how the RG behaves.
Worn and damaged RG, unsuitable for use
There should be no signs of damage on the strap when pushing the car. We are talking about cracks, delamination or breaks, even the most minimal ones, although this is quite possible, especially if the vehicle is used frequently. If during the diagnostics you notice traces of damage on the RG, this indicates that it will not be possible to tighten the belt - it needs to be replaced. The timing belt is diagnosed in a similar way.
If you don’t need to tighten the RG and adjust the tension on an 8-valve engine, you can also check the condition of the generator itself. After all, if you have any suspicions about the quality of the work of the DG, it makes sense to check the device itself. In addition, during diagnostics, you can also check the generator belt tensioner pulley, with which the belt can be tensioned. If there are chips on the roller or other signs of deformation and damage, including changes in geometry, the element must also be replaced. The video below provides detailed instructions for replacing the bracket, as well as the alternator strap on a Lada Granta car (the author of the video is Igor Semenishin).
We recommend: Car repair. When should you replace your car's brake pads?
Signs of wear on the RPM
Before you start replacing the RPM, conduct your own diagnostics and evaluate the actual condition of the parts and mechanisms. Perhaps the cause of the malfunction is in another unit adjacent to the generator.
- We open the hood, the engine must cool down so as not to damage the skin of the hand and fingers.
- We put the gear in neutral and turn the alternator belt. Rotation occurs quite easily, by hand, without special equipment.
- We inspect each area one by one.
Signs of wear on the RPM
The following will indicate the need to replace the RPM:
- fraying, side abrasions;
- peeling of rubber, thread fiber;
- other mechanical damage;
- teeth tears;
- the presence of oily traces and streaks on the surface of the belt.
If there are no comments on the RPM, we proceed to inspect the tensioner roller. Often the reason for the appearance of third-party noise is precisely this, worn-out roller bearings. We loosen the structure with our hands and check that it is working properly.
If the belt breaks on the way, it is allowed to travel on the battery's reserve energy, but not more than one hour. In practice, experts recommend no more than half an hour of free movement.
DIY replacement instructions
A Lada Granta 8-valve car requires replacement of the alternator belt in the same way as a 16-valve car after identifying defects or according to the regulations. The procedure can be performed by a driver who does not have much experience in repair work. It is enough to have the necessary tools and basic knowledge of where the components that require replacement are located.
Tools and materials
Before replacing, you need to purchase a new alternator belt. In order not to make a mistake with your choice, you should look at the catalog number in the operating instructions. It should be 1118-1041020-07. The size should be 823 mm.
You should buy originals so as not to buy a fake or low-quality product. The packaging should be marked 6РК 823. You should not save money by buying a cheaper product. A low-quality belt will not last long, and the consumables will have to be changed earlier than required by regulations. High-quality belts are produced by Bosch and Gates.
You should also buy a tensioner pulley if you decide to change it too.
In addition to consumables, you need to prepare the following tools:
- a set of keys;
- TORX E-14 head;
- long screwdriver;
- jack;
- emphasis
Stages
The procedure for replacing the generator set belt on a Lada Granta with air conditioning is complicated by the fact that the belt passes through the support of the power unit. Therefore, before putting on a new strap, it will have to be dismantled.
Replacement consists of the following steps:
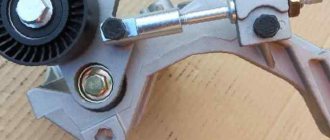
- First, using a “19” wrench, you need to loosen the lock nut of the strap tensioner lead screw. While unscrewing the locknut, hold the screw with the head at “8”.
- To loosen the belt tension, rotate the lead screw in the direction of movement clockwise. By following these steps, you can adjust the tension of the accessory drive belt.
- To replace the strap, you need to remove the right engine mount.
- Having moved under the car, you need to dismantle the right and middle protective shields of the engine compartment.
- Then unscrew the fastenings in the middle and front part of the right front wheel arch liner. Next, bend the fender liner behind the wheel brake disc.
- Using a jack, we hang the right front wheel and dismantle it. The fender liner fastenings can now be released.
- At the next stage, we place a stop under the oil pan of the power unit so that it holds the weight of the engine.
- Using a TORX E-14 head, unscrew the screws that secure the support to the cylinder block bracket of the power unit. Using the “17” socket, unscrew the two nuts and the support bolt that secures it to the body side member.
- We dismantle the engine mount with the cushion.
- Now, through the resulting opening, you can remove the strap from the pulleys of the auxiliary units and pull it out of the engine compartment.
- We install a new consumable in place of the worn-out product. In this case, its tension should be adjusted using the tensioner screw. The deflection of the belt in the gap between the air conditioner compressor and the power unit pulley with a force of 10 kilograms should be within 7-8 mm.
- We perform assembly in the reverse order of removal.
This completes the replacement. Now you know how to replace and tighten the generator set belt on a Lada Granta.
Car with air conditioning: the differences are not only in the presence of a tensioner
Owners of cars with air conditioning will have to stock up on WD-40 or similar lubricant, a “10” key, and also a cylinder one, since the right front wheel will need to be removed.
We do not change the procedure, otherwise the lubricant will not have time to act.
- We wet the bolts securing the cushion and bracket.
- We support the front part of the car on the right with a jack.
- We remove the wheel.
- While lowering the car, unscrew the tension roller.
We work carefully because we only need a little engine lift.
Note that to work you will have to lower the car without the wheel.
An attempt to reduce the cost of cheap Grant configurations led to the absence of a tensioner on the alternator belt, which is why the latter can be over-tensioned and, as a result, fail.
Characteristics of the Lada Granta alternator belt
VAZ 2190 was launched on sale in 2011. The car is an economical version of the Lada Kalina with a larger trunk and a more modern generator mechanism. The mechanism for adjusting the alternator belt tensioner that is missing in the Lada Granta is its feature, unlike other models. The economy class model was designed to replace its own outdated predecessors, the creation of which had already been completed at AvtoVAZ.
Granta generally appealed to its own motivated audience. The low cost of the car helped her receive leniency towards complaints regarding the properties that accompany AvtoVAZ products. Just like no matter what kind of car produced by this concern, it has a number of shortcomings. alternator belt is also accompanied by measured problems . The supplier of belts for it is Gates. In relation to Grants, their recommended service life is equal to the warranty period of the car.
But, as the experience of the car’s owners has shown, closer to 5,000 km, a corresponding sound is heard, signaling that the alternator belt , unable to withstand a very strong tension. Despite the fact that the alternator belt is equipped with an automatic tensioner, in practice it is often overtightened, which leads to rapid rupture. A case without any problems is considered under warranty; the alternator belt is replaced, but with a significant time investment.
Those for whom it is not important to replace a consumable under warranty conditions create a replacement without the help of others. This is naturally faster, but you still need to spend time buying a belt and installing it.
We check the condition of the alternator belt ourselves
Before replacing the Lada Granta alternator belt, car enthusiasts usually check its condition to make sure whether this is really necessary. To diagnose, you need to follow simple steps. First, you need to engage fifth gear and get out of the car, and then try to push your Grant back, working on the front bumper or side pillar, if an assistant does this. In this case, the hood must be open and while pushing it is necessary to see how the RG behaves.
There should be no signs of damage on the strap when pushing the car. We are talking about cracks, delamination or breaks, even the most minimal ones, although this is quite possible, especially if the vehicle is used frequently. If during the diagnostics you notice traces of damage on the RG, this indicates that it will not be possible to tighten the belt - it needs to be replaced. The timing belt is diagnosed in a similar way.
If you don’t need to tighten the RG and adjust the tension on an 8-valve engine, you can also check the condition of the generator itself. After all, if you have any suspicions about the quality of the work of the DG, it makes sense to check the device itself. In addition, during diagnostics, you can also check the generator belt tensioner pulley, with which the belt can be tensioned. If there are chips on the roller or other signs of deformation and damage, including changes in geometry, the element must also be replaced. The video below provides detailed instructions for replacing the bracket, as well as the alternator strap on a Lada Granta car (the author of the video is Igor Semenishin).
Solution
You can avoid regular contact with the described problem. There are several ways out for this.
- Generator replacement. Suitable for those who purchased a car with a ZiT generator. Since 2013, new Grants began to be equipped with a generator from Bosch.
- Replacing the bearing on the generator. This option, like the next two, threatens to void the warranty.
- Reduce belt tension by thinner fastening.
- Install the tensioner from Kalina.
Read:
Regarding the third point, some masters are not puzzled by finding a suitable option. They fix the standard fastening themselves, using a grinder and a sharpener to make it thinner. To implement the fourth option, contact a service station (also with loss of warranty) or perform all the manipulations yourself.
The alternator belt tensioner from Kalina installed in the Lada Granta will not relieve the car owner from worries. In the new design, the bracket requires close attention. Its service life is limited. It is subject to deformation during operation and cannot be restored, only completely replaced.
Review of manufacturer prices for Lada Granta alternator belt
Belt technical parameters:
- Length: 823 mm.
- Thickness: 3.0 mm.
- Material: ethylene propylene rubber.
- number of ribs: 6.
| vendor code | Price, rub.) | vendor code | Price, rub.) |
| Original | |||
| Alternator belt for Granta with air conditioner Gates MICRO-V 6PK995 | From 500 | Without air conditioning 1118-1041020-07 | From 500 |
| Analogs | |||
| GATES 6PK1113 | From 400 – 450 | LYNXAUTO 6PK0823EL | From 400 – 450 |
| GATES 6PK1123 | —/— | LYNXAUTO 6PK0995 | —/— |
| GATES 6PK745 | —/— | AYWIPARTS AW2120354 | —/— |
| LYNXauto 13X1050LX | —/— | AYWIPARTS AW2120037 | —/— |
| LYNXauto 10X938LX | —/— | LYNXauto 10X825LX | —/— |
| LYNXauto 10X750LX | —/— | CONTITECH AVX13X1050 | —/— |
| CONTITECH AVX10X750 | —/— | CONTITECH AVX10X825 | —/— |
| JP GROUP 1118005100 | —/— | FLENNOR A5361 | —/— |
*prices are current as of October 26, 2018.
We check the condition of the alternator belt ourselves
To make sure that the belt is in good condition, you need to perform simple steps. Initially, fifth gear is engaged. On it, leaning on the front bumper, we try to push the car back. At the same time, we are trying to conduct a visual inspection of the belt along its entire length.
All the grooves have been cut off, the belt is on the verge of breaking
There, according to the general rule, there should be no cracks, even the smallest ones, as well as ruptures and peelings that occur due to long-term use of rubber products.
This belt is no longer any good.
If such problems are found, the belt must be replaced. The timing belt is checked in the same way.
It is also a good idea to check the external condition of the generator itself, since its quality raises questions. Don't forget to inspect the generator roller.
The belt is already bad, but the generator pulley is still good
Alternator belt replacement process
To carry out the replacement work, we will need the alternator belt itself, which can be purchased from official dealer representatives at a price of approximately 800 rubles.
Standard article number for alternator belt: 1118-1041020-07
- The length of this belt is 823 millimeters.
- You can find it in the catalog by name or by your own unique number 1118-1041020-07.
- The marking on the box will indicate the index 6РК 823.
In addition, prepare in advance a sufficiently long screwdriver, as well as a “13” key. You may also need a knife to remove the old belt.
- To begin with, we remove the old belt, or what is left of it. As we have already said, this needs to be done every thirty thousand kilometers, even if the condition of the belt appears to be completely satisfactory. The belt can be removed with a simple knife.
We remove the belt by simply cutting it off, most conveniently with a stationery knife
- Now we find the bolt for the lower mounting of the generator. Try to unscrew it literally a few turns, which will help with the “13” key.
- Use the same key to unscrew the nut, after which the bolt for the upper mounting of the generator is completely pulled out.
- Now you need to be very careful. You must try to rotate the generator so that the upper eye exactly goes beyond the surface of the protrusion located on the bracket. We confidently press the generator to this bracket and fix it there with ordinary wire. It is best to tie it to the cylinder head cover mounting nut.
- Now carefully put the belt on the generator pulley, as well as on the surface part of the generator drive pulley.
- We engage fifth gear again, while simultaneously pressing the belt against the pulley. In this position, we try to push the car back until the belt is completely in place.
- Now you can untie the wire and start squeezing the generator with a screwdriver in the place where it came into contact with the bracket. Don't forget to insert the top bolt that mounts the generator.
After this, all that remains is to take care of tightening the lower bolt and the nut of the upper generator mounting bolt. This will be enough to set everything in place.
Alternative options
Of course, many car enthusiasts are well aware of the consequences of not having a belt tensioner. The fact is that the belt, quite often, is overtightened, which leads to too rapid wear of the generator bearing. You can recognize this problem by a characteristic sound reminiscent of a howl. This design flaw can be eliminated by installing a generator belt tensioner. The most common option is to install a tensioner from the Lada Kalina.
Installing the alternator belt tensioner
The reason for abandoning the tensioner is simple. The manufacturer tried to save additional money by making the car one of the most affordable in the world. And this is typical only for the cheapest trim levels (standard and norm), which are supplied with eight-valve power units.
To make it easier to control the belt tension, you can simply replace the generator bracket by pre-modifying it.
On the left is a bracket with a tensioner from Kalina, on the right is the standard version from Granta
In the standard bracket you will not find holes for the tensioner pulley. Instead, you can assemble a new bracket, which will be based on the base of the first generation Lada Kalina. As we already said, we will need:
- the bracket itself is from the specified car,
- tension roller,
- tensioner pulley bracket,
- as well as the alternator belt itself, all from the same Lada Kalina of the first generation.
- In addition, do not forget about purchasing a screw tensioner, the corresponding bushing and bolt.
The price of this entire set reaches two thousand rubles, for which you can significantly improve the design of the car and extend the service life of individual parts.
The replacement process itself is similar to replacing standard Lada Granta parts. However, if you do not have the appropriate technical knowledge, then you should contact a service center to assemble the structure.
Possible breakdowns and their causes
In some cases, after carrying out technical work on the drive belt, a number of malfunctions may occur in the car. As a rule, most car owners panic and call a tow truck and send their car to the nearest service center for diagnostics.
Don't panic! In most cases, the car owner can easily fix all the faults on his own, without resorting to expensive diagnostics at car repair shops.
Typical faults and solutions:
Failure 1: The battery charge indicator on the dashboard flashes. Typically, this problem occurs when the drive belt is not tensioned. In this case, when it is running, the battery does not charge properly, due to which an error message is displayed on the dashboard.
Remedy: You need to adjust the belt tension. Then you need to disconnect the battery terminals for 30 seconds, and then return them to their place. After this procedure, start the engine. If everything is done correctly, the error will not be displayed.
Failure 2: generator pulley whistling. Typically occurs as a result of failure to clean during maintenance work.
Remedy:
- Clean the pulley by re-disassembling this unit, or apply a cleaning agent to the inner surface of the belt. Then you need to turn on the starter 2-3 times for short intervals of 10-15 seconds. Upon completion of this procedure, the malfunction should disappear.
- It is worth considering that if you leave this problem unattended, you will soon have to replace the belt. Contamination on the pulley serves as a sandblast, which destroys the inner surface of the drive belt, rendering it unusable.
Despite the rather complex design of the power plant, this car can boast of its driving performance and efficiency. It is precisely because of its driving characteristics and savings during operation that this car is widely in demand among citizens of the CIS.
Reviews
| № | Positive |
| 1. | Victor: The factory RPM served me for 35,000 km, after which it was replaced by LYNXauto 13X1050LX. Both are good quality at an affordable price. |
| 2. | Ivan: after 30,000 km the RPM whistle appeared, tightened it a little, disappeared. It served for another two thousand, after which it broke off. I am satisfied with the quality of the original belts, there are no complaints. |
| 3. | Vladlen: I’ve heard negative reviews about RPM, I can’t confirm. Every 15,000 km I carry out diagnostics, moderate driving style, do not exceed 3500 rpm. |
| 4. | Ignat: at the first maintenance after purchase, the master tightened up the RPM a little, after which it served for more than 35,000 km. This is very good for the domestic auto industry. |
| 5. | Gennady: at the third maintenance, he did not change the “traditions”; he bought the original RPM, since there were no problems with the previous one, and served over 30,000 km. |
| 6. | Vasily: my recommendations to motorists, install the original RPM. Mine worked 33,000 km. I'm happy with the quality, no complaints. |
| 7. | Georgy: Every maintenance in a row I carry out RPM prevention, keep the engine compartment clean. There are no complaints about the quality of the belt, my recommendations are to buy the original one. |
| Negative | |
| 1. | Victor: My RPM has already flown 15,000 km. A whistle appeared and after 50 km it was torn into pieces, fortunately the speed was 90 km/h. |
| 2. | Gennady: despite the manufacturer’s specified service life of 30,000 km, my strap only lasted 20,000 km. I don’t recommend domestic ones; I think it’s better to pay extra for imported ones, but in good quality. |
| 3. | Vladimir: I join the negative reviews addressed to RPM, since domestic ones do not last more than 20,000 km. |
How to replace the Grant alternator belt
The replacement process is not simple and depends on the equipment of the car: whether there is a tensioner, air conditioning. In the latter case, you cannot do without a lift and dismantling the engine mount due to the air conditioning compressor clutch pulley.
For a Granta with air conditioning, for installation you will need to hang the wheel and remove one engine mount.
How to change a belt on a Grant 8 and 16 valve without air conditioning and tensioner
What you will need for work:
- a knife, if you just need to cut off an old part;
- crank or ratchet with head 13;
- long strong wire;
- flat screwdriver;
- partner – you can replace it yourself, but it’s easier with an assistant.
Step 1. Dismantling
The car is on a flat surface, neutral is engaged without the handbrake. Battery is disconnected.
If the old belt is not needed, we cut it in an accessible place and take it out.
If you need to save the old one, do everything up to step 3.
A replacement is needed with a length of 8223mm, six-wedge. Called 6RK 823. PHOTO: www.zr.ru
Step 2. Remove the generator mount
We approach the generator mount with head 13:
- we remove the lower bolt by 2-3 turns;
- Use it to completely unscrew the top bolt.
In this situation, we proceed to installation. PHOTO: www.zr.ru
Step 3. Raise the part
Scroll the generator up. The top mount becomes higher than the bracket to which it is screwed.
We press the part to the engine. We fix it with strong wire. For example, we hang it from the cylinder head bolt.
In this situation, we proceed to installation. PHOTO: www.zr.ru At this stage, you can remove the old part if you did not cut it. We engage fifth gear and push the car back, squeezing the belt with a screwdriver from the generator drive pulley.
Step 4. Install a new one
We pull the new one onto the pulleys.
The installation takes place in the position of the generator when it is pressed against the engine. PHOTO: www.zr.ru
We engage fifth gear, push the car back, pressing the belt against pulley 1 in the picture. This is where a helper will come in handy.
As soon as we put it on, we work in reverse order:
- unplug the generator;
- press it into working position;
- return the upper mounting bolt and tighten the lower one.
Replacing the alternator belt on a Grant with air conditioning
It's more difficult here. Step by step:
- we drive the car onto a lift or overpass;
- remove the tensioner;
- take off the front right wheel;
- we support the internal combustion engine and dismantle the pillow;
- change the required part.
The whole problem is in points 5 (air conditioning compressor clutch) and 7 (right engine mount) - our belt passes through them (number 6). The rest: 1-drive of auxiliary devices, 2/3-tensioner, 4-generator. PHOTO: www.zr.ru
What you need
- new belt marked 6РК 995;
- spanners 8, 19;
- socket wrenches 8, 10;
- Torx keys T20, T27;
- ratchet with extension and heads E14, 17.
Step 1. Tensioner
The car is on a lift or overpass.
The front right wheel studs are loose.
Open the hood. Remove the terminals from the battery.
We find the tensioner, take out the spanners 19 and 8:
- 19 we put on the lead screw;
- 8 hold the locknut;
- we touch;
- Turn the lead screw clockwise to loosen the tension.
We remove the lock nut and loosen the tension. PHOTO taken from: www.zr.ru
Step 2. Get under the car
We need keys 8, 10. Remove:
- central shield (numbers 1, 5, 7);
- right shield (number 2).
Step 3. Wheel
Remove the front right wheel. Using keys 8, Torx t20, t27, we dismantle the fender liner according to the diagram.
To work with the fender liner you need three different keys. Having removed it, we gain access to the engine support. PHOTO: www.zr.ru
Step 4: Engine Mount
Getting ready to remove the engine mount.
We securely support the engine under the crankcase - the support should take the weight of the internal combustion engine.
Using a wrench or ratchet with an E14 head, unscrew the screws securing the support to the engine.
Use head 17 to unscrew the screws securing the support to the body.
We remove the support. Make sure the weight of the engine is securely supported in the crankcase!!! PHOTO: www.zr.ru
Step 5. Dismantling and installation
We remove the belt from the pulleys and rollers and pull it out.
We install the new one in the reverse order.
Do not mix up the screws that secure the mount to the engine. The top one (included in the triangular part) is shorter than the bottom one!
The final tension can be adjusted by adjusting the tensioner.
We check the condition of the alternator belt ourselves
To make sure that the belt is in good condition, you need to perform simple steps. Initially, fifth gear is engaged. On it, leaning on the front bumper, we try to push the car back. At the same time, we are trying to conduct a visual inspection of the belt along its entire length.
There, according to the general rule, there should be no cracks, even the smallest ones, as well as ruptures and peelings that occur due to long-term use of rubber products.
If such problems are found, the belt must be replaced. The timing belt is checked in the same way.
It is also a good idea to check the external condition of the generator itself, since its quality raises questions. Don't forget to inspect the generator roller.
Alternator belt replacement process
To carry out the replacement work, we will need the alternator belt itself, which can be purchased from official dealer representatives at a price of approximately 800 rubles.
- The length of this belt is 823 millimeters.
- You can find it in the catalog by name or by your own unique number 1118-1041020-07.
- The marking on the box will indicate the index 6РК 823.
In addition, prepare in advance a sufficiently long screwdriver, as well as a “13” key. You may also need a knife to remove the old belt.
- To begin with, we remove the old belt, or what is left of it. As we have already said, this needs to be done every thirty thousand kilometers, even if the condition of the belt appears to be completely satisfactory. The belt can be removed with a simple knife.
- Now we find the bolt for the lower mounting of the generator. Try to unscrew it literally a few turns, which will help with the “13” key.
- Use the same key to unscrew the nut, after which the bolt for the upper mounting of the generator is completely pulled out.
- Now you need to be very careful. You must try to rotate the generator so that the upper eye exactly goes beyond the surface of the protrusion located on the bracket. We confidently press the generator to this bracket and fix it there with ordinary wire. It is best to tie it to the cylinder head cover mounting nut.
- Now carefully put the belt on the generator pulley, as well as on the surface part of the generator drive pulley.
- We engage fifth gear again, while simultaneously pressing the belt against the pulley. In this position, we try to push the car back until the belt is completely in place.
- Now you can untie the wire and start squeezing the generator with a screwdriver in the place where it came into contact with the bracket. Don't forget to insert the top bolt that mounts the generator.
After this, all that remains is to take care of tightening the lower bolt and the nut of the upper generator mounting bolt. This will be enough to set everything in place.
Alternative options
Of course, many car enthusiasts are well aware of the consequences of not having a belt tensioner. The fact is that the belt, quite often, is overtightened, which leads to too rapid wear of the generator bearing. You can recognize this problem by a characteristic sound reminiscent of a howl. This design flaw can be eliminated by installing a generator belt tensioner. The most common option is to install a tensioner from the Lada Kalina.
Installing the alternator belt tensioner
The reason for abandoning the tensioner is simple. The manufacturer tried to save additional money by making the car one of the most affordable in the world. And this is typical only for the cheapest trim levels (standard and norm), which are supplied with eight-valve power units.
To make it easier to control the belt tension, you can simply replace the generator bracket by pre-modifying it.
In the standard bracket you will not find holes for the tensioner pulley. Instead, you can assemble a new bracket, which will be based on the base of the first generation Lada Kalina. As we already said, we will need:
- the bracket itself is from the specified car,
- tension roller,
- tensioner pulley bracket,
- as well as the alternator belt itself, all from the same Lada Kalina of the first generation.
- In addition, do not forget about purchasing a screw tensioner, the corresponding bushing and bolt.
The price of this entire set reaches two thousand rubles, for which you can significantly improve the design of the car and extend the service life of individual parts.
The replacement process itself is similar to replacing standard Lada Granta parts. However, if you do not have the appropriate technical knowledge, then you should contact a service center to assemble the structure.
conclusions
This technical “mistake” did not happen by accident. The fact is that the Lada Granta was developed with a low retail price in mind. And, given the depreciation of the ruble, this car managed to enter the top ten cheapest cars in the world. At the same time, the equipment of the Lada Grant is much higher than that of its competitors on the list.
And some problems, like the alternator belt tensioner, can be solved yourself. Only consider warranty issues that may be violated during installation.
Source
