Owners of cars from the domestic automobile industry have a kind of hobby for repairing, minor modernization, and tuning their combat vehicle. Such work as: removing a headlight, replacing optics with a new one, failure of lighting devices - on Priora deserve a separate discussion.
The headlights on the Priora are equipped with bulbs that burn out once a season. Lada Priora cars also have a problem: sometimes the headlights sweat, which means you need to remove them and glue them. Adjusting the headlights is not the least important in traffic safety; for this purpose, an electronic and manual corrector is provided. The factory headlight of the Priora car (Bosch and Kirzhach) underwent changes during restyling; in addition, there are many Chinese analogues, for example, black headlights. Tuning is also problematic without removing them from the mount. The price of headlights varies - starts from 5,000 rubles for a factory headlight. Read the article to the end and find out the subtleties in this matter!
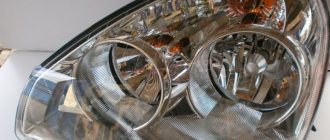
Bosch headlight from Priora - looks like this
Priora car headlight: Bosch and Kirzhach - what is the difference
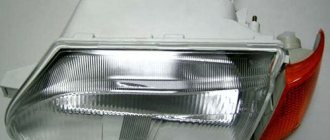
Let's highlight two manufacturers (not taking into account the copies of Chinese origin) that have a number of differences. Popularly known as kirzhach, bosh. There is a significant difference between them: Kirzhach - a corrugated inner surface of the well, a cast low-beam lamp reflector without a cutout, glass (plastic) attached with a refractory sealant. The marker lamp is located at the bottom of the reflector well. Two separate plugs for the rear of the optical device. The device from the Bocsh brand has a smooth inner surface of the well, a low-beam lamp reflector with a cutout, and a low-melting sealant is used to fix the glass (plastic). The size lamp is placed in the upper part of the well; one plug from the rear of the lighting unit is used. Minor differences in design, quality of parts, presence of a chrome-plated rim of the signal amplifier of the rotary element. The number of taillight design variations available to the buyer is numerous.
Replacing lamps
Below we describe in detail the entire process of replacing lamps on cars, depending on the year of manufacture.
To replace the lamps on the left headlight of a car, it is recommended to remove the battery for convenience.
The lamps installed in the Priora headlights are halogen; when replacing, be careful and do not touch the lamp base with your bare hands.
Replacement in the headlight until 2013.
Turn signal
We start the process with the car's turn signal. To do this, turn the socket counterclockwise and remove it along with the lamp.
To remove the lamp from the socket, you need to press on it and turn it counterclockwise until it stops, then remove it.
Install a new lamp in the reverse order.
Low beam
Remove the rubber cover, which is located near the fender of the car. Then remove the connector from the lamp.
Next, you need to dismantle the lamp itself. To do this, press on the metal spring and disengage it as shown in the picture. Then remove the H7 low beam lamp from its seat.
Install the new lamp in reverse order.
High beam
Remove the rubber protective cover of the headlight. Then disconnect the black connector from the lamp.
Then remove lamp H1 by bending the metal spring to the sides.
Install the new lamp in reverse order.
Dimensions
To replace the headlight bulb, you must remove the bulb socket from the headlight reflector. To do this, pull it towards you and remove the W5W lamps from the socket.
Installing a new lamp is done in the reverse order.
Replacement in the headlight after 2013.
Turn signal
To replace the bulb, turn the turn signal socket counterclockwise and remove it from the headlight.
Then remove the lamp from the socket by pressing on it and turning it counterclockwise until it stops.
Install the new PY21W lamp in the reverse order.
Low beam
Remove the plastic protective cover of the headlight and disconnect the two chips from the H7 lamp.
We release the lamp from the spring and remove it.
Install the new lamp in reverse order.
High beam and DRL
Remove the cover from the headlight unit. Turn the H15 lamp counterclockwise and remove it.
The new H15 lamp must be installed in reverse order.
Dimensions
Pull the side light socket towards you and remove it from the headlight reflector.
We remove the W5W type lamp from the socket and install a new one.
Insert the cartridge in reverse order.
We hope our article was useful to you.
Why film
The main reason is failure, failure to perform the direct functions of the device. There may be a lot of reasons for replacing the headlights on a Prior. Broken outer glass, loss of tightness, fogging of lenses from the inside, deterioration of the reflector itself, breakdown of fixing elements. Replacement, repair of old contacts, installation of a new type of light bulbs. To solve them, you will have to unscrew the entire module from the car body, which will make it more convenient to repair and modernize optical devices. The block is not completely dismountable: to separate the glass from the body, it is better to heat the joint with a hair dryer until the sealant softens. Next, remove the melted sealant as much as possible using improvised means. We try to separate the glass with a screwdriver, clean all the separated parts from the old glue with a knife and sandpaper. The glass is seated back onto the sealant.
Signs and causes of headlight malfunctions, ways to eliminate them
The main reason for replacing optics is the cessation of performing its functions - reliable road lighting - or failure:
- the headlight fogs up, ventilation is impaired;
- deep cracks or chips in the glass;
- reflectors are faulty;
- electrical connectors are faulty;
- fastening elements are broken.
Replacing faulty elements allows you to restore the original properties of the lighting device, increasing the degree of driving safety for both the driver and other road users.
The headlights on the Lada Priora have a non-separable design. To change glass, a faulty element, or carry out tuning, you have to either replace the headlight with a new one, or, showing ingenuity, disassemble the standard one. Tools for dismantling and repair:
- cross-head screwdriver;
- key to “10”;
- industrial dryer;
- mounting knife;
- fine-grain sandpaper;
- scotch;
- polyethylene film;
- sealant.
Headlights play a significant role in car design. In case of repair, tuning or replacement with an identical analogue, it is necessary to indicate the procedure for dismantling and subsequent installation. To replace the headlights, you will need a 10mm wrench and a Phillips screwdriver. Step-by-step instruction:
- Disconnect the negative terminal from the battery.
- Remove the front bumper.
- Disconnect the connector with the wires from the headlight by releasing the latch.
- Unscrew the lower front bolt and the side screw of the headlight.
- Unscrew the screws and remove the casing.
- Unscrew the upper mounting bolt.
- We remove the headlight.
Installation of the lamp is carried out in the reverse order. Replacing taillights is slightly different:
- Disconnect the negative terminal of the battery.
- Unfold the trunk trim covering the canopy.
- We press out the clamps.
- Disconnect the connector with wires from the rear light.
- After unscrewing the fastening screw, bend the trunk trim.
- Unscrew the three wing nuts.
- We remove the headlight.
Install the rear light in the reverse order.
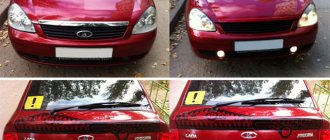
Polishing headlights on Priora
As their service life increases, sand, small stones, dirty water, and road chemicals negatively affect the light conductivity of the outer glass of lighting fixtures, and overall efficiency decreases. The solution will be restoration and polishing of the glass surface. When you decide to polish glass, thoroughly study the technical side of the process, materials, stages of work - everything affects the result. If you are not confident in your abilities, it is better to entrust the work to professionals, otherwise the result of the work done may be worse than the original result. If, nevertheless, you decide to polish the optical devices of your car, first remove the entire module, remove dirt, and protect surfaces that cannot be treated.
For polishing use:
- Abrasives;
- Sandpaper (1000 - 4000 units);
- Circles: felt, fabric, foam rubber;
- Polishing pastes.
First, a rough layer of plastic is removed with a depth equal to the depth of chips and scratches. As a result, the protective layer of varnish applied by the manufacturer will be erased, which must be restored after polishing. Applying a special varnish is a rather technically complex process. Another option is to stick a protective film, otherwise the result of your work will disappear in a couple of months. Change the sandpaper to finer sandpaper every 2 - 3 minutes. We monitor the removal of traces left by the previous number of abrasives. After each change of sandpaper, you must thoroughly wash the surface. The dried surface is ready for polishing.
Important: polish the tool used at low speeds to avoid overheating and clouding of the plastic; it will be impossible to restore this.
Using polishing wheels, we bring the glass surface to the desired shine. Polishing is often carried out due to varying degrees of wear on the vehicle's optical devices, for example, one headlight was damaged in an accident and was replaced with a new one.
Why do Priora headlights sweat?
The most common problem with the optics of domestic cars is moisture getting inside. The headlight sweats due to loss of sealing of the unit. The back cover has lost its tight fit relative to the surface of the case. To fix the problem, it is better to remove it entirely. Open all existing plugs and dry thoroughly in a warm, dry room. Seal the gaps between the covers and the body (use different types of seals, silicones, sealants). Some car enthusiasts advise spraying a small amount of alcohol inside. After drying, reassemble and install on board your car.
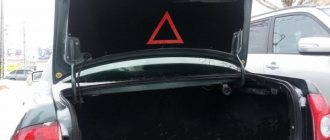
How to remove a taillight on a Priora and glue vinyl
Car enthusiasts often have a desire to highlight the uniqueness of the vehicle on the road in every possible way. To achieve the goal, the owners are upgrading the taillights on the Priora. They change the color of the vinyl film glued on top and install additional LEDs. Additional modifications to the design of the light signaling system must comply with safety standards.
It will be easier to work by removing the rear light. What is not difficult:
- You need to disconnect the wiring connector going to the light on the trunk side;
- unscrew the three plastic wing nuts;
- remove the lantern;
- pull out the wires along with the rubber seal through the mounting hole.
That's it, the lantern is removed, you can put the lantern in the reverse order. Before dismantling or installing the lamp, it is recommended to disconnect the wire from the terminal. Pasting vinyl is a procedure somewhat similar to the process of tinting car windows. You need to remove dirt, wash the glass of the lantern, remove greasy stains and stains using window cleaners. Cut a piece of vinyl of the required size (with a small margin), moisten the surface of the lantern with a soap solution (without fanaticism). Glue the prepared piece of vinyl, removing the protective layer, remove air bubbles, and remove excess moisture. The remaining vinyl around the edges of the tail light can be cut off with a sharp utility knife.
Types of front and rear headlights for Lada Priora
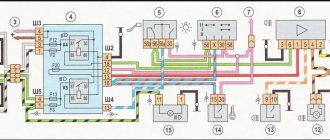
Low and high beams, as well as turn signals and side lights on Lada Priora cars are structurally combined into block headlights. The built-in electric corrector allows the driver to adjust the height of the light beams from his seat, depending on the degree of loading of the vehicle. The main manufacturers of Priora headlights are Bosch and JSC Avtosvet Plant in Kirzhach. At first glance, one gets the impression that the models are absolutely identical, but there are a number of differences - the location of the side lamps, the design and shape of the reflectors, the presence of a chrome cut on the turn signal magnifier. The shape and number of plugs differ. The headlight units are equipped with:
- low beam lamp - H7;
- high beam lamp - AKG12–55–2 (H1);
- high beam lamp and DRL – H15;
- turn signal lamp – A12–21–4 (PY21W);
- side light lamp – A12–5–2 (W5W).
All types of conventional automotive single-filament and double-filament incandescent lamps are currently available in halogen versions. Lamps H1, H3, H4, H7 have good lighting characteristics and low cost, which allows you to create optimal lighting. Bosch xenon lamps are in high demand due to their long service life and high-quality light. The rear lights structurally combine parking lights, fog lights, turn indicators, brake lights and reversing lights. They have lamps installed:
- direction indicator – А12-21-3 (P21W);
- side and fog light – P21/4W;
- brake light – A12-21-3 (P21W);
- reversing light – A12-21-3 (P21W).
The color of the wires corresponding to each socket is indicated on the flashlight body.
Since 2013, new LED lights have been installed as taillights on Priora 2. The manufacturer has established a warranty period of 24 months for all lighting and electrical equipment, provided the client complies with the rules of their operation and performs scheduled maintenance.
How to remove a headlight on a Priora without unscrewing the bumper
When carrying out any kind of tuning, installation, or dismantling of the main lighting fixtures, you will inevitably have to remove the entire light fixtures. Before installing the front and rear lighting devices, be sure to disconnect the wire from the terminal and the wiring harness going to the lighting unit itself. Dismantling the front bumper completely is not necessary; it will be enough to disconnect the upper part of one side from the car body. Thus, installation of front optical modules will be simpler and less labor-intensive. What tools will you need?
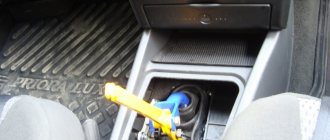
Adjusting Priora headlights using a corrector
Adjusting the light beam is extremely important for safe, comfortable driving. If you have a suitable place and desire, you can carry out the procedure yourself at home. You will need to place the car on a flat horizontal surface at a distance of five meters from the wall to the car. Check the operation of the manual corrector located directly on the back of the block (small movable wheel). At the level of the middle of the headlights, draw a horizontal line on the wall (L. 1), approximately 65-75mm. Below we draw a line (l. 2). Two vertical lines in the middle of each headlight (l. A) (l. B), another vertical line strictly in the middle between them. There should be 1 person in the car, the tire pressure should be within normal limits and be the same everywhere. The low beam turns on, we try to adjust the light. Close one headlight tightly. We turn the corrector wheel until the horizontal and oblique beams of light intersect at the point of intersection of lines A. and B. with line L. 2. Electronic adjustment in the car interior should be zero.
Adjusting the lights
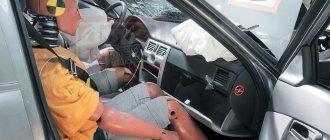
Properly adjusted headlights are the key to safe driving at night. Good road lighting helps you avoid an obstacle, a pothole, or an open hatch in time, notice a pedestrian in a timely manner, and avoid a collision with a vehicle parked incorrectly on the side of the road. Factory adjustment minimizes the harm caused by bright lights to oncoming drivers. After replacing lighting fixtures or body repairs, situations arise when they need to be adjusted. If you have the tools and a suitable place, it is not difficult to do it yourself. For adjustment you will need:
- flat surface (opposite a wall, garage or gate);
- five-meter tape measure;
- a sheet of thick paper that does not allow light to pass through;
- hex wrench.
A diagram is drawn on a vertical surface that acts as a screen. At the level of the center of the headlights, draw a horizontal line. We lay the parallel line 65 mm lower. We apply vertical marks opposite the centers of the right and left lamps, as well as in the middle, at an equal distance from them. We bring the car into equipped condition (there is no excess cargo, the tank is filled). We bring the tire pressure level to the nominal value. Further:
- We place the car 5 meters from the screen, the centers of the headlights are located opposite the corresponding vertical marks.
- We set the electric corrector drive for the lights to “0”, which corresponds to the minimum vehicle load.
- We load the driver's seat with a load of 75 kg and rock the car to install the suspension.
- Open the hood, turn on the low beam, and use paper to block the light from the right light fixture.
- Using the left headlight adjustment screw, using a hex wrench, adjust the horizontal border of the light to the bottom mark.
- We bring the bend of the light border to a vertical mark corresponding to the center of the lantern.
- We set the right headlight in the same way.
This completes the adjustment process.