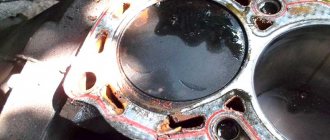
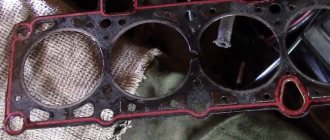
From time to time, the cylinder head gasket may fail due to wear and tear of its material or burnout. The main signs that it is time to replace the gasket with a new one are the appearance of local leaks of oil and coolant at the point of contact between the cylinder head and the engine. Tightening torque of the cylinder head VAZ 2114 8 valves: consider the subtleties of the process.
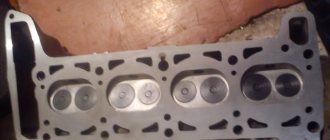
Cylinder head gaskets
It should be remembered that when replacing a gasket, not only the tightening torque of the VAZ 2114 cylinder head is important, but also the entire sequence of operations - after all, the replacement itself is a very important and serious procedure, errors during which can lead to engine malfunction.
Engine tightening torques for VAZ 2113, 2114, 2115
Tightening torque of the cylinder head of the VAZ 2113, 2114, 2115 engine:
- We tighten the M12XI.25 bolts for the cylinder head connection 4 times:
- tighten the dowels with a force of 2 kgf/m;
- tighten the hardware with a tension of 7-8.6 kgf/m;
- tighten the hardware by 90°;
- Tighten the bolts again by 90°.
- M10 bolts fastening the engine cylinder head tire with a force of 6.7-8.3 kgf/m
- M6 dowel for connecting a cylinder head tire with a voltage of 0.2-0.5 kgf/m
Tightening torque of the camshaft of the VAZ 2114, 2113, 2115 engine:
- Nut M8 fastening the camshaft bearing housing with a force of 1.9-2.3 kgf/m
- M10 bolt for connecting the camshaft pulley with a voltage of 6.7–8.3 kgf/m
Tightening torque for main vases 2114:
- Dowel for connecting the main bearing tires of the crankshaft MlOxl.25 with an impulse of 6.8-8.4 kgf/m
- hardware connecting the oil receiver to the main bearing tire MB with a force of 0.8-1 kgf/m
VAZ engine crankshaft tightening torque:
- hardware fastening the crankshaft pulley M12x1.25 with a force of 9.8-10.8 kgf/m
Tightening torque for VAZ 2114, 2113, 2115 engine connecting rods:
- Nuts of bolts for attaching connecting rod caps M9xl with voltage 4.3 - 5.4 kgf/m
VAZ 2114 flywheel tightening torque:
- Hardware connection for handwheel M10x1.25 with voltage 6.1-8.7 kgf/m
Tightening torque for VAZ 2114 engine pump 8 valves
- Bolt fastening the cooling antifreeze pump MB with a force of 0.8 kgf/m
| VAZ engine tightening torque table | ||
| Name of propulsion devices and parts | Thread | VAZ 2114 engine tightening torques, kgf/m |
| Oil pump connection bolt | MB | 0,8-1 |
| Oil pump pressure reducing valve screw plug | M16x1.5 | 4,6—7,4 |
| Oil pump housing attachment pin | MB | 0,7-0,9 |
| Hardware attaching an oil receiver to an oil pump | MB | 0,7-0,8 |
| Bolt securing the oil pan | MB | 0,5—0,8 |
| Oil filter fitting | M20x1.5 | 3,8-8,8 |
| Catastrophic oil pressure sensor | М14Х1.5 | 2,4-2,7 |
| Nuts attaching the thermostat pipe | MS | 1,6-2,3 |
| Bolt fastening the cooling structure tube flange to the cylinder block | MB | 0,4-0,5 |
| Hardware attaching spare engine parts | MB | 0,7—0,8 |
| Bolt lock nut connecting the front engine support to the spar bracket | M10x1.25 | 4,2—5,2 |
| Hardware fastening the front propulsion support to the engine cylinder block | MlOxl.25 | 3,4-5,2 |
| Dowel nut attaching the left motor bracket to the spar | M10x1.25 | 4,2—5,2 |
| Wing for attaching the left engine bracket to the gearbox housing | M10x1.25 | 3,2-5,2 |
| Hardware nut fastening the bracket to the rear base of the power unit to the propulsion unit | M12 | 6,1—9,8 |
| Nut attaching the rear engine bracket to the body | M10x1.25 | 2,8-3,4 |
Healthy ! Fuse box VAZ 2114
When should you change?
It is necessary to check the performance of the seal if the first signs of malfunction appear.
Symptoms that the cylinder head gasket has burned out:
- Bubbles appear in the antifreeze in the radiator unit, as well as in the expansion tank of the cooling system. This indicates a lack of tightness. The seal is checked first.
- Exhaust gases exit through the sealing product of the cylinder head 2114. This usually happens after repairing the cylinder head, if the car owner has tightly tightened the bolts securing the device.
- The appearance of white smoke from the muffler, resembling steam. Its presence indicates that coolant has entered the cylinders of the power unit, penetrating the lubrication system through a breakdown in the head gasket.
- The appearance of a white foamy emulsion on the dipstick for monitoring the engine fluid level. This is due to a lack of tightness in the lubrication system and refrigerant getting into the oil. This problem may indicate the presence of cracks in the cylinder block of the power unit.
- Decrease in car engine power, increase in fuel consumption. When pressing the gas pedal, the driver may feel dips; the engine takes more time to gain speed. When driving uphill, the engine will randomly stall, and the speed of the power unit may fluctuate. If the gasket is severely damaged, the power unit stops spontaneously at traffic lights or when neutral gear is activated.
- Presence of traces of motor fluid in antifreeze. If you open the expansion tank cap, you will see oil stains in the refrigerant.
- Spark plugs filled with coolant. If you disconnect the high-voltage wires from the devices one by one and unscrew them from their seats, you will see that they are filled with coolant. It is difficult to determine visually. Touch the liquid remaining on the candles with your finger, then taste one drop of the substance, but do not swallow it. If a sweetish taste remains on the tongue, then the candles are filled with antifreeze.
You can learn how to correctly determine the need to repair the power unit in the “four” from the video filmed by the “Engine Repair” channel! And interesting!”
Tightening torques for threaded connections of the cooling system of VAZ 2114, 2113, 2115
| Name of devices and motor parts | Thread | Tightening torque of VAZ 2114 parts, kgf/m |
| Cooling antifreeze temperature indicator sensor | M 14×1.5 | 2,4-2,7 |
| Bolt securing the cooling antifreeze pump | MB | 0,8 |
| Lamb attaching thermostat tube | M8 | 1,6-2,3 |
| Dowel connecting the cooling structure tube flange to the cylinder block | MB | 0,4-0,5 |
| Pins for attaching additional engine parts | MB | 0,7-0,8 |
Healthy ! DMRV VAZ 2114
Consequences of untimely replacement
If the replacement is not done on time, it will lead to serious problems. Due to a broken gasket, engine oil will begin to enter the cooling system, which will disrupt its overall operation. Antifreeze will not be able to properly cool the power unit. The stove will work poorly, the engine power will decrease, and problems will arise in its operation. The engine will stall, in some cases it will be impossible to start it, and dips may be felt when you press the gas pedal.
Due to antifreeze entering the lubrication system, the oil will lose its properties. Lubrication of rubbing components and parts will be less effective, which will lead to their accelerated wear and damage. The engine will run rough and may overheat due to the loss of antifreeze properties. In the winter season, difficulties will arise with starting the engine. If you do not change the gasket and continue to use the car this way, this may lead to breakdown of the power unit and the need for major repairs.
Tightening torques for threaded connections of the power supply system of VAZ 2114, 2113, 2115
| List of devices and motor parts | Tightening torque of VAZ 2114 parts, kgf/m |
| Gasoline unit attachment locknuts | 0,1-0,2 |
| Fittings and nuts for hose ends and fuel pipes | 2-3,4 |
| Bolts attaching a gasoline ramp | 0,9-1,3 |
| Pins fastening the gasoline pressure regulator for propulsion 2111 (l.5i) | 0,8-1,1 |
| Throttle block connection | 1,5-2,3 |
| Nut attaching the receiver to the intake manifold | 2,0-2,4 |
Healthy ! Electrical circuits VAZ 2114
Tightening torques for threaded connections of sensors of the engine control system of VAZ 2113, 2114, 2115
Tightening torque for spark plugs VAZ 2114:
- Spark plug with a force of 3.0-3.9 kgf/m
VAZ knock sensor tightening torque
- Locknut for attaching the knock sensor with a tension of 1.1-2.4 kgf/m
| Name of devices and propulsion elements | Tightening torque of VAZ 2114 parts, kgf/m |
| DPKV attachment bolt | 0,8-1,2 |
| Dowel fastening DPRV | 0,8-1,2 |
| Hardware attaching DMRV | 0,3-0,5 |
| DTOZH | 0,9-1,5 |
| Lambda probe | 2,5-4,5 |
| Nuts for connecting the ignition module (coil) | 0,4-0,8 |
Healthy ! Ignition coil VAZ 2114
Is it necessary to broach the cylinder head?
Welcome, friends, to the DIY auto repair website. The cylinder head (cylinder head) is an important element of the power unit, which only at first glance seems simple.
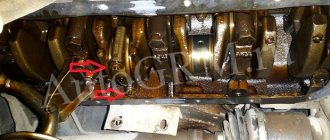
Cylinder head broaching
The mechanism includes spark plugs, gas distribution valves, combustion chamber blocks, and so on.
In this case, the cylinder block itself and its head are separated by a special gasket made of a special material (usually steel asbestos).
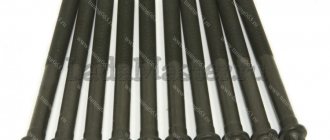
The head and block are fixed using special bolts, which are always tightened with a certain force.
Tightening torques for threaded connections of the exhaust gas system
| List of devices and engine parts | Thread | Tightening torque of VAZ 2114 parts, kgf/m |
| Locknuts for attaching the intake manifold and exhaust manifold | M8 | 2,1-2,6 |
| Wing fastening the intake pipe of the silencer to the exhaust manifold* | M8x1.25 | 2,1-2,6 |
| Nut of clamp bolts, attaching the flanges of the main and auxiliary plugs | M8x1.25 | 1,6-2,3 |
| Pins of the neutralizer flange and the receiving tube of the silencer | M8x1.25 | 1,6-2,3 |
Healthy ! Ignition module VAZ 2114
Gasket selection
The product must meet the following properties:
- elastic deformation, which will not allow the gasket to wear out quickly;
- impermeability of liquids - water and engine oil;
- resistance to gases;
- maintaining its characteristics over time;
- resistance to various chemical influences.
In case of burnout, in accordance with the technical manual, to ensure the working condition of the mechanism, only original gaskets must be used.
The article number for this product is 21083-1003020. The dimensions of this gasket are optimally designed for installation in the seats on the VAZ 2114 head. The product is manufactured at the AvtoVAZ plant. You can use analogues from manufacturers Patron, Rains, Master-Sport, Trialli, etc. The cost of some similar products can be 2-3 times higher than the original.
An overview of the faulty gasket and the procedure for solving the problem is shown in the video published by the KV Avtoservis channel.
Clutch tightening torques for VAZ 2114, 2113, 2115
VAZ clutch basket tightening torque
- Bolt for attaching the clutch basket to the M8 flywheel with a force of 19.1-30.9 N.m
| List of devices and parts of the propulsion device | Thread | Tightening torque of clutch parts VAZ 2114, kgf/m |
| Lamb attaching the clutch cable to the bracket | M12 | 1,5-2 |
| Bolt attaching the clutch housing to the engine cylinder block | М12Х1.25 | 5,4-8,8 |
| Locknut securing the clutch housing to the engine cylinder block | M 12×1.25 | 5,4-8,8 |
| Nut attaching the gearbox to the clutch housing | M8 | 1,6-2,6 |
| Hardware connecting the release bearing bushing | MB | 0,4-0,6 |
| Dowel for fastening the lower tire to the clutch housing | MB | 0,4-0,6 |
Healthy ! DTOZH VAZ 2114
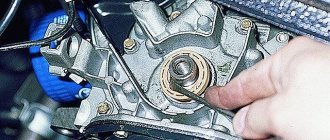
Work order
To pull the cylinder head, we need to get to it, and this is not so easy: We disconnect the pads going to the oil level and coolant temperature control sensor. Then you need to drain the antifreeze from the car. This is done through a plug on the radiator or by removing the lower pipe.
- Remove the thermostat and air filter housing.
- Disconnect the exhaust pipe from the manifold.
- We remove the camshaft bearing protective housing and also disconnect the timing belt.
- Remove all cables and tubes going to the cylinder head.
After this, the further procedure can be carried out. If you decide to carry out repairs due to a broken gasket, you will need to remove the cylinder head, clean the contact areas from the remnants of the old sealant and install a new gasket.
VAZ 2114 gearbox tightening torques
| List of devices and parts of the motor | Thread | Tightening torque of VAZ 2114 gearbox parts, Nm |
| Screw plug for drain hole | M22x1.5 | 2,9-4,6 |
| Rear light switch | M14x1.5 | 2,9-4,5 |
| Clutch attaching the speed sensor drive housing | MB | 0,5-0,7 |
| Gearbox fastening wing to clutch housing | M8 | 1,6-2,6 |
| Bolt with a conical part of the speed deactivation drive rod joint | M8 | 1,6-2 |
| Dowel for attaching the gear handle housing | M8 | 1,6-2,6 |
| Hardware attaching the gear deactivation mechanism | M6 | 0,6-1 |
| Nut for speed drive rod clamps | M8 | 1,6-2,6 |
| Bolt connecting the gear shift lever axis | M6 | 1,2-1,9 |
Healthy ! DPKV VAZ 2114
Required Tools and Process
In order to do it correctly, you will need:
- set of socket heads;
- extension;
- ratchet/wrench;
- torque wrench.
cylinder head vaz 2114
The replacement process itself should be performed according to the following scheme:
- Disconnect the wires leading to the emergency oil level and coolant temperature sensors.
- Drain the coolant.
- Remove the thermostat.
- Remove the air filter housing.
- Disconnect the exhaust pipe inlet from the manifold.
- Remove the casing, as well as the camshaft belt itself.
- Disconnect the drive rods of both dampers from the carburetor.
- Disconnect the wires going to the cylinder head.
- Disconnect the hoses suitable for the cylinder head by loosening their clamps.
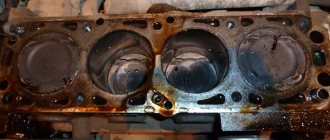
- Remove the cylinder head.
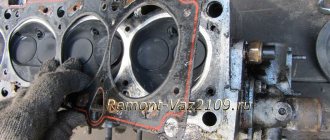
- Remove the worn gasket.
- Clean the contact surface of the cylinder head from any remaining gasket material.
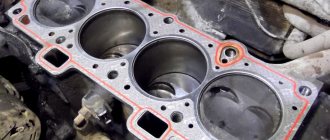
Replacing the cylinder head gasket of a VAZ 2114
Installing the gasket and mounting the cylinder head in place is carried out in exactly the same sequence, but in reverse order. At the same time, it is worth paying close attention to such a factor as the tightening torque of the cylinder head of the VAZ 2114 8 valves - we will talk about it below.
Tightening torques for threaded connections of the front wheel drive 2114
Tightening torque of wheel bolts VAZ 2114, 2113, 2115:
- Wheel fastening pin M12x1.25 with a force of 6.7-9.5 kgf/m
VAZ 2114 hub nut tightening torque:
- Front wheel hub bearing wing M20x1.5 with a force of 23-25.2 kgf/m
| List of devices and engine parts | Thread | Tightening torque of threaded connections, kgf/m |
| Clutch attaching the upper support of the front suspension strut to the body | M8 | 2,0-2,5 |
| Bolt connecting the ball joint to the steering knuckle | M10x1.25 | 5,0-6,3 |
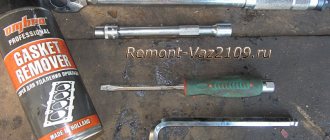
How to use a torque wrench
To obtain the correct tightening torque, you need to understand how to use such a specific tool as a torque wrench.
Before starting work, it must be set to zero. After this, the tool is put on the bolt (or nut) and begins to rotate slowly, tracking the dynamics on the scale. When the force reaches the required torque, the key is removed.
Sometimes it happens that the tool does not show anything at first. In this case, continue rotating. The fact is that over time, its internal mechanisms stretch, but this practically does not affect the accuracy of determining the tightening torque.
Tightening torques for threaded connections of wheels, tires and hubs of VAZ 2114, 2113, 2115
Wheel tightening torque for VAZ 2114 (2113, 2115)
- Hardware for attaching the M12x|.25 wheel with a force of 65.2-9.3 kgf/m
Wheel bearing tightening torque for VAZ 2114, 2113, 2115:
- Front wheel hub nut M20x|.5 with a force of 22.6-24.7 kgf/m
| list of devices and motor parts | Thread | Tightening torque of threaded connections, kgf/m |
| Bolt attaching the ball joint to the steering knuckle | M10x1.25 | 4,9-6,2 |
| Locknut for fastening the upper support of the front suspension strut to the body | M8 | 2-2,4 |
| Hardware attaching the front wheel brake caliper to the steering knuckle | M10xl,25 | 2,9 -3,6 |
| Rear wheel hub bearing wing | M20x1.5 | 18,6-22,6 |
Opening hours and prices at the AvtoVAZ Prototype Museum
Opening hours coincide with the schedule of the entire Technical Park named after. Sakharov. The museum is open daily, seven days a week, from 08:00 to 20:00.
Since the hangar with the prototypes is located on the territory of the park, you must pay a general admission ticket + a ticket to the museum.
- Entrance ticket to the park: adults - 200 rubles, children, students, disabled people - 100 rubles.
- Entrance ticket to the Museum of Prototypes - 50 rubles.
VAZ-1121 (Oka-2), Igor Butyrskii
Excursion services (at park sites):
- group of up to 15 people: adults - 250 rubles, children - 150 rubles.
- individual: entrance ticket + 1000 rubles.
Preferential groups have free access days. For detailed information, please visit the museum's website or call.
The museum has rules of conduct. It is strictly forbidden to touch, climb or sit in cars, or open doors. You cannot cross the fence line, litter, come to the museum with animals, etc. Amateur photo and video shooting is free.
Full price list of Park complex services on the official website
Lada 21109 “Consul”, Igor Butyrskii
Tightening torques for threaded connections of the front suspension of VAZ 2114 (2113, 2114)
VAZ 2114 wheel tightening torque:
- Wheel attachment bolt M12x1.25 with a force of 6.7-9.5 kgf/m
VAZ 2114 hub tightening torque:
- Front wheel hub bearing nut M20x1.5 with a force of 23-25.2 kgf/m
| Name of devices and parts of the motor | Thread | Tightening torque of threaded connections, kgf/m |
| Hardware for fastening the ball joint to the steering knuckle | MIOxl.25 | 5,0-6,3 |
| Nut connecting the ball pin to the lever | M12XI.25 | 6,8-8,4 |
| Adjusting hardware thumb (with eccentric) for front suspension strut | М12Х1.25 | 7,9-9,8 |
| Bolt lock nut attaching the front suspension strut to the steering knuckle | M!2xl,25 | 7,9-9,8 |
| Nut connecting the front suspension strut rod to the upper support | Ml 4x1.5 | 6,7-8,3 |
| Wing for attaching the upper bracket of the front suspension strut to the body | M8 | 2-2,5 |
| Bolt nut attaching the front suspension arm to the body | M12xl,25 | 7,9-9,8 |
| Coupling connection for front suspension extension | М16Х1.25 | 16,3-18 |
| Fastening hardware for the brace bracket | M10x1.25 | 4,3-5,3 |
| Nut for the bolt attaching the stabilizer bar to the front suspension arm | M10x1.25 | 4,3-5,3 |
| Nut connecting the stabilizer bar to the body | M8 | 2-2,5 |
| Lower bolt wing for attaching the shock absorber to the rear suspension arm | M12xl,25 | 6,8-8,4 |
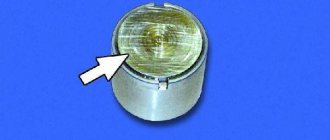
What is he like?
The phase sensor operates on the principle of an elementary Hall sensor. Installed only in the camshaft area on both 8 and 16 valve engines. The device reads data from the engine camshaft using a gear mounted on the shaft with two missing teeth. These two teeth are positioned so that every time the device is hit, the first piston of the engine is at top or bottom dead center. Information signals about the location of the camshaft are sent to the engine control unit, which, in turn, monitors and changes the ignition angle. It began to be used at VAZ factories on the first cars with distributed fuel injection.
It is worth noting that carburetor engines do not have this unit, because their ignition timing system is vacuum-mechanical.
The main function of the camshaft position DF or phase sensor is to constantly adjust the ignition angle while the engine is running. Thanks to its use, VAZ family engines began to transmit power more efficiently with reduced fuel consumption. The main indispensable use of the phase sensor remains for two camshaft, 16-valve engines, which without it cannot operate evenly and economically according to the folded factory design.
Tightening torques for rear suspension threaded connections
| Name of devices and propulsion parts | Thread | Tightening torque of threaded connections, kgf/m |
| Wheel attachment hardware | M12x1.25 | 6.7-9,5 |
| Rear Wheel Bearing Clutch | M20x1.5 | 19,0-23,0 |
| Lower bolt nut connecting the shock absorber to the rear suspension arm | M12x1.25 | 6,8-8,4 |
| Wing for fastening the rear suspension shock absorber rod to the body | M10x1.25 | 5,1-6,3 |
| Locknuts for hardware attaching the rear suspension arm to the bracket | M12x1.25 | 6,8-8,4 |
| Clutch connecting the rear suspension arm bracket to the body | MKM.25 | 2,8-3,5 |
Steering torques
| List of mechanisms and parts of the propulsion device | Thread | Tightening torque of threaded connections, kgf/m |
| Steering coupling | M8 | 1,5-1,9 |
| Steering column bracket attachment bolt | M8 | 1,5-1,9 |
| Bolt connecting the steering column bracket | M6 | Twist until the head comes off |
| Fastening hardware for fastening the lower flange of the steering shaft coupling | M8 | 2,2-2,7 |
| Steering wheel attachment knob | M16x1.5 | 3,1-5,1 |
| Rod coupling lock nut | M18x1.5 | 12,1-14,9 |
| Nut attaching ball pin | M12x1.25 | 2,7-3,3 |
| Bolt connecting the steering linkage to the rack | MIOxl | 7,0-8,6 |
| Steering gear bearing coupling | M38x1.5 | 4,5-5,5 |
Tightening torques for brake system connections
| list of mechanisms and engine parts | Thread | Tightening torque of threaded connections, kgf/m |
| Wheel connection pins | Ml 2×1.25 | 6,5-9,3 |
| Wing for attaching the brake booster bracket to the body | M8 | 3,1-3,8 |
| Nuts securing the vacuum brake booster to the bracket | M10 | 2,7-3,2 |
| Clutch connecting the brake master cylinder to the vacuum booster | M10 | 2,7-3,2 |
| Front wheel brake hose end | M10xl,25 | 2,9-3,3 |
| Bolt for attaching the front wheel brake to the steering knuckle | M10xl,25 | 2,9 — 3 ,6 |
| Hardware for fastening the front brake working cylinder to the guide pins | M8 | 3,1-3,8 |
| Bolt connecting the front brake working cylinder to the caliper | M12xl,25 | 9,6-11,8 |
| Brake pipe fittings | M10 | 1,5-1,8 |
| Rear brake working cylinder fastening pin | M6 | 0,3-0,8 |
| Pressure regulator bracket attachment knob | M8 | 1-2,4 |
| Bolt connecting the pressure regulator to the bracket | M8 | 1-2,4 |
Tightening torques for threaded connections in electrical equipment
| Name of devices and engine parts | Thread | Tightening torque of threaded connections, kgf/m |
| Nut of the bolt of the lower fastening of the generator | M10x1.25 | 6.0-7.4 |
| Hardware connecting the generator bracket | M10x1.25 | 2,3-5,3 |
| Lock nut for generator attachment bar | M 10×1.25 | 2.9-4.6 |
| Starter bolt | M8 | 0.7-1.6 |
| Battery connection coupling | M8 | 0.7-1.6 |
| Temperature indicator sensor | M14x1.5 | 0.9-1.5 |
| Emergency oil pressure sensor | M14x1.5 | 2,5-2,8 |