Tightening torque table for Chevrolet Niva 2123. If you don’t have the book, you can look it up here. Tightening torques for cylinder head, engine, gearbox, transfer case, axles and brake system.
Why do you need a wide torque range?
Because all dynamo keys have an error. It is better to take the moment in the middle of the range. Minimum permissible - maximum tightening torque. For example: 100-110 Nm.
Reminder:
In places where there are many tightening points, for example, the intake manifold. It is better to go through the final moment several times. The dots in the middle “sag.”
List of tightening torques (table):
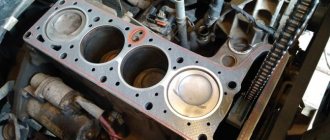
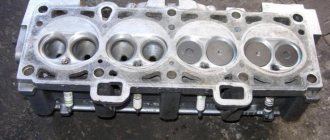
— Cylinder head bolt (cylinder head). M12×1.25.
Clean the threaded holes from oil.
Degrease surfaces.
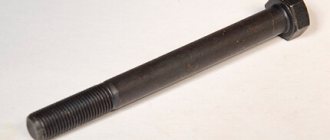
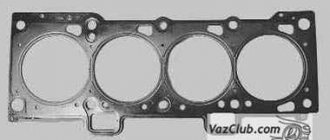
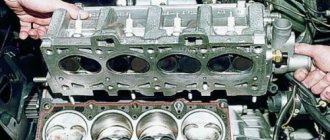
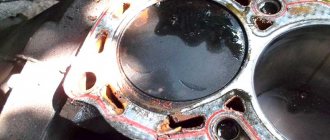
If the length of the bolt shaft exceeds 117 mm, it should be replaced with a new one. A non-shrinkable metal-reinforced gasket is installed between the block and the head. Reuse of the gasket is not permitted.
To ensure a reliable seal and avoid tightening the bolts during vehicle maintenance, we tighten them in four steps:
1st step - tighten bolts 1–10 to a torque of 20 Nm; 2nd step - tighten bolts 1–10 to a torque of 70–86 Nm, and bolt 11 to a torque of 31–39 Nm. 3rd step - then turn bolts 1–10 by 90°; 4th move - and another 90°;
It is advisable to use a rotation scale.
— Hydraulic support of the valve lever. (Hydraulic compensator) М24×1.5 15–20 Nm — Camshaft sprocket mounting bolt. M10×1.25. 41–51 Nm — Nut securing the camshaft bearing housing. M8. 18–23 Nm
Apply a thin layer of engine oil to the camshaft cams and journals, bearing housing beds and working surfaces of the valve drive levers. When installing the bearing housing, make sure that the installation sleeves (on the outer mounting studs of the cylinder head on the left side) fit into the housing housings without distortion.
— Bolt securing the main bearing cover. M10×1.25. 68–84 Nm — Oil pump mounting bolt. M8. 22–27 Nm - Oil pan mounting bolt. M6. 5–8 Nm — Oil separator cover stud. M8. 13–21 Nm — Oil separator cover mounting nut. M8. 13–21 Nm - Cylinder head bolt. M8. 31–39 Nm — Nut securing the intake pipe and exhaust manifold. M8. 21–26 Nm — Connecting rod cover bolt nut. М9×1 43–54 Nm — Flywheel mounting bolt. M10×1.25. 61–87 Nm — Chain tensioner shoe mounting bolt. M10×1.25. 41–51 Nm
— Nut securing the cylinder head cover. M6. 2–5 Nm — Oil pump drive shaft sprocket bolt. M10×1.25. 41–51 N·m — Coolant pump (pump) mounting bolt. M8. 22–27 Nm — Nut of the stud securing the outlet pipe of the cooling jacket. M8. 16–23 Nm — Nut securing the auxiliary drive pulley. М20×1.5 101–126 Nm — Bolt for securing the generator bracket. M8. 22–27 N·m — Oil filter bracket mounting bolt. M8. 22–27 Nm — Nut of the bolt securing the generator to the bracket. M8. 22–27 Nm — Nut for fastening the bracket for the side support of the power unit. M8. 18–23 Nm — Nut securing the side support to the cross member bracket. M10×1.25. 27–34 Nm — Nut securing the cross member of the rear support of the power unit to the body. M8. 15–19 Nm — Nut securing the rear support of the power unit to the gearbox. M8. 28–29 Nm — Nut of the bolt securing the rear support of the power unit to the cross member. M8. 18–23 Nm - Bolt securing the clutch housing to the flywheel. M8. 19–31 Nm — Nut securing the clutch master cylinder to the pedal assembly bracket. M8. 10–16 N·m — Clutch hydraulic connecting tube fitting. M12×1.25. 25–31 Nm — Bolt securing the clutch slave cylinder to the clutch housing. M8. 15–19 Nm - Spark plug. М14×1.25 31–39 Nm (cylinder head made of aluminum, better 25-30 Nm)
Transmission
— Reversing light switch. М14×1.5 28–45 Nm — Bolt of the clamp securing the tip to the gearbox control drive rod. M8. 23–27 Nm - Bolt securing the clutch housing to the engine cylinder block. M12×1.25. 54–87 Nm — Nut securing the clutch housing to the gearbox. M10×1.25. 32–51 Nm — Nut securing the clutch housing to the gearbox. M8. 16–26 Nm — Bolt securing the rod clamp cover. M8. 16–26 Nm — Rear cover fastening nut. M8. 16–26 Nm — Nut securing the gear selection mechanism housing. M6. 12–19 Nm — Bottom cover fastening nut. M6. 12–19 Nm - Nut securing the elastic coupling flange to the secondary shaft. М20×1.0 67–82 Nm — Bolt securing the clamping washer of the front bearing of the intermediate shaft. M12×1.25. 79–98 Nm - Bolt securing the gear block of 5th gear and reverse gear to the intermediate shaft. M10×1.25. 67–82 Nm — Bolt securing the fork to the gear shift rod. M6. 12–19 Nm
Intermediate shaft
— Nut of the bolt securing the elastic coupling to the flange. M12×1.25. 57.8–71.5 Nm - Nut securing the hinge housing to the flange of the transfer case drive shaft. M8. 27–34 Nm
Transfer case
— Nut securing the suspension bracket to the transfer case. M10×1.25. 27–32 Nm — Nut securing the suspension bracket to the body. M8. 15–19 Nm — Nut securing the rear support cross member to the body. M8. 15–19 Nm — Nut securing the rear support bracket to the transfer case. M8. 28–29 Nm — Nut of the bolt securing the rear support to the cross member. M8. 16–26 Nm - Nuts securing the transfer case housing cover, front axle drive housing, speed sensor drive housing, control lever bracket. M8. 15–25 Nm — Differential lock warning lamp switch. М16×1.5 28–45 Nm — Bolt securing the fork to the gear shift rod. M6. 12–19 Nm — Bolt securing the fork to the differential lock rod. M6. 12–19 Nm — Driven gear mounting bolt. M10×1.25. 67–82 Nm - Nuts for securing the rear bearing of the drive shaft and the rear bearing of the intermediate shaft. М18×1.5 96–118 Nm — Nuts for fastening the flanges to the drive shaft and to the drive shafts of the front and rear axles. М16×1.5 96–118 Nm
Wheel nut Niva Chevrolet size
For the Niva model, the wheel is attached to the hub using wheel nuts. The number of fasteners depends on the year of manufacture of the model and is presented in the table below.
General fastener dimensions:
- number of fasteners: 5 (pcs);
- fastener size: M12x1.25 (mm);
- diameter between fasteners (PCD): 139.7 (mm).
Important: the data presented above are the limits for all vehicle modifications. Specific numbers depend on the year of manufacture.
Rules for selecting wheel fasteners:
It should be taken into account that different wheel fasteners are often used for cast and stamped wheels.
First of all, this concerns the length of the bolts, because... The thickness of different types of discs can vary significantly.
When selecting any fastener, special attention should be paid to the thread pitch. This parameter is always indicated in the marking after the x sign.
For example: the designation M12x1.5 corresponds to a thread with a nominal diameter of 12 (mm) and a thread pitch of 1.5 (mm).
| General parameters of Chevrolet Niva wheel nuts | |||
| Drawing />General view of fasteners | Quantity (pcs) /> Number of fasteners per hub for Chevrolet Niva. | ||
Thread M14 x 1.5 means:
To fasten wheels or disks, 2 main types of fasteners are used:
- wheel bolts; -wheel nuts.
| Size (mm) Metric Fastener Size: | Type Wheel mounting type: | ||
| (drawing of nuts) | 5 pieces) | M12x1.25 (mm) | screw |
| Chevrolet Niva wheel nut size tables | ||||
| Year Model year | Quantity (pcs) Number of fasteners per hub for Chevrolet Niva. | |||
Thread M14 x 1.5 means:
The diameter of the circle on which the mounting holes for Chevrolet Niva are located.
1. The distance between the vertical plane of symmetry of the wheel and the plane of application of the disk to the hub.
Caution: the above data are the official figures of the manufacturer, however, please note that the information is for reference only and does not guarantee absolute accuracy.
A motorist may often be faced with a situation where he needs to install new Niva nuts, the thread size of which is designated as M12x1.25. It would seem that the task is simplest. But wheel nuts are to a great extent responsible for the safety of the driver and passengers, so you can’t just throw them away and put in anything.
Why is it important to know the Niva Chevrolet bolt pattern?
To replace disks, take into account their parameters:
If the last two indicators have established tolerances, then the first ones have very specific indicators.
Wheel rims are attached to the hubs using bolts. The number and distance between them depends on :
- models;
- wheel loads;
- other factors.
The wheels on the car are secured with 5 five bolts located at an equal distance from the center . Bolt pattern is the marking of holes for mounting mounting bolts. Characterized by the diameter of the circle and the number of bolts.
The mounting holes are made with an allowance selected when tightening the bolts . The center of the wheel and the hub are aligned, and if you install disks with distances between the holes that differ by 1-2 mm, this will not be noticeable. However, the wheel will be skewed, and this will cause vibration and wear of the rubber.
Notes by malykh
A short continuation about wheel nuts (see about the difference between nuts for casting and stamping).
A budget option for M12x1.25 wheel nuts are nuts from Niva. Here are two options:
On the left in the photo is a nut from a classic Niva. This is a stamping nut only, not recommended for use with alloy wheels. But on the right is a nut from a Chevrolet Niva. This nut can be used with alloy wheels.
These nuts will also fit the Jimny. Comparison with the original Dzhimnikov nut:
If you suddenly need nuts urgently, and there is an option only for the Sh. Niva, then you can take that too.
3 comments:
I saw the shiny one in the store, the one on the left in the last photo. At least it looks similar. The price is 45 rubles, if I'm not mistaken. Turnkey “for 17” and “for 19”. Actually, this is what I use (both casting and stamping). I have never used the one on the left in the first photo, although it could have happened.
Original Japanese nuts are good, but expensive. And cheap Chinese ones look beautiful, but they can be made from wild “raw meat”. I myself saw how chips were easily removed from such nuts when tightened with stamping (Dotz). :-/ “Shnivovskie” are not ideal, but, in principle, they will do as a last resort at their low price (I recently bought them for 35 rubles apiece). But, of course, you need to take into account the thread (M12x1.25 is not used everywhere).
“The shavings were removed” is, of course, complete chaos. These will go straight to the ferrous metal (if accepted ;-)). But the thread of the studs will not be damaged by the “silumin”. In normal operation I try to adhere to a couple of rules: don’t be lazy to clean the dirt - lubricate the external threads with graphite and do not exceed the tightening torque. Otherwise, ordinary “Russian” nuts (such as “Shniv” ones) will eventually begin to crack when twisted with a wrench. By the way, I like that the “Japanese” type has closed ends. Less negativity on the thread, less fuss.
Replacing front wheel bearings
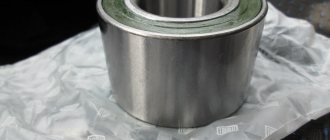
For reference: Applicable bearings
We carry out the work on an inspection ditch or a lift. We hang up the front of the car and remove the wheel. Disconnect the caliper from the pad guide (see here)
| Size (mm) Metric Fastener Size: | PCD (mm) Diameter between fasteners: | ET (mm) Disc offset: | ||
| 1.8i | ||||
| 2008 | 5 | M12x1.25 | 139.7 | 98.50 |
| 2007 | 5 | M12x1.25 | 139.7 | 98.50 |
| 2006 | 5 | M12x1.25 | 139.7 | 98.50 |
| 1.7i | ||||
| 2017 | 5 | M12x1.25 | 139.7 | 98.50 |
| 2016 | 5 | M12x1.25 | 139.7 | 98.50 |
| 2015 | 5 | M12x1.25 | 139.7 | 98.50 |
| 2014 | 5 | M12x1.25 | 139.7 | 98.50 |
| 2013 | 5 | M12x1.25 | 139.7 | 98.50 |
| 2012 | 5 | M12x1.25 | 139.7 | 98.50 |
| 2011 | 5 | M12x1.25 | 139.7 | 98.50 |
| 2010 | 5 | M12x1.25 | 139.7 | 98.50 |
| 2009 | 5 | M12x1.25 | 139.7 | 98.50 |
| 2008 | 5 | M12x1.25 | 139.7 | 98.50 |
| 2007 | 5 | M12x1.25 | 139.7 | 98.50 |
| 2006 | 5 | M12x1.25 | 139.7 | 98.50 |
| 2005 | 5 | M12x1.25 | 139.7 | 98.50 |
| 2004 | 5 | M12x1.25 | 139.7 | 98.50 |
| 2003 | 5 | M12x1.25 | 139.7 | 98.50 |
| 2002 | 5 | M12x1.25 | 139.7 | 98.50 |
| ...and tie them with wire to the upper arm. |
Unscrew the adjusting nut of the hub bearings (see here)
| We take out the conical bushing. |
| Using a chisel, we straighten the edge of the locking plate of the nut for the front attachment of the lever to the steering knuckle. |
Similarly, loosen the rear fastening nut.
| Using a 19mm spanner, unscrew the nut that secures the rear lever to the steering knuckle. |
Similarly, unscrew the front fastening nut.
| Remove the locking plate. |
| Having removed the lever from the bolts, we move it away from the steering knuckle. |
We disconnect the brake hoses from the steering knuckle (see here) We disconnect the fastening of the upper and lower ball joints from the levers (see here and here)
| From the splines of the front wheel drive outer joint housing, remove the steering knuckle assembly with ball joints, hub assembly and brake disc. |
| We disconnect the steering knuckle and the hub with the brake disc. |
If it is difficult to separate the parts, clamp the steering knuckle in a vice...
| ...and use a soft metal drift to knock out the hub. |
| Now you can remove the bolts securing the lever to the steering knuckle. |
To separate the hub and brake disc, screw the nut onto the stud...
| ...and knock out the pin. |
| Unscrew the nut and remove the stud. |
We dismantle the other studs in the same way.
| Disconnect the hub and brake disc. |
| Use a chisel to knock down the dirt ring. |
| Using a 10mm wrench, unscrew the bolt securing the protective casing... |
| ...and remove the casing. |
To dismantle the seals and hub bearings, clamp the steering knuckle in a vice.
| Use a screwdriver to pry off the seal... |
| ...and take it out. |
| We take out the ring. |
| We take out the inner ring of the outer bearing with the cage and rollers. |
Similarly, we remove the oil seal, ring and inner ring of the other (inner) bearing with a cage and rollers.
| We use a punch to knock out the outer ring of the outer bearing... |
| ...and take it out. |
Similarly, we knock out the outer ring of the inner bearing. We perform assembly in reverse order. Before installing the bearings, clean the inner cavity of the steering knuckle from old grease. We press in a suitable piece of pipe...
| ...outer rings of bearings. |
We put 40 g of Litol-24 lubricant into the cavity of the steering knuckle and into the bearing separators.
| Using a suitable piece of pipe, press in the seals. |
After installing the mud ring,...
| ... using a chisel we press the metal of the ring into the groove of the steering knuckle in several places. |
By connecting the brake disc to the hub...
| ...press the studs with a soft metal drift. |
| The milled surface of the stud heads must face the cylindrical surface of the brake disc. |
To prevent the bolts securing the lever to the steering knuckle from falling out when installing it on the car...
| ...we screw the nuts on them. |
By inserting the shank of the outer drive joint into the hub splines,...
| ...mount the steering knuckle. |
Upon completion of assembly, adjust the clearance in the bearings (see here)
To prevent your Chevrolet Niva from being “taken off” the next night after installing new tires, it is recommended to install 1 secret nut on each wheel. No matter how new technologies develop, more reliable means of stingray theft have not yet been invented. Hence the first and main advantage of the secret: such fasteners will help protect much more expensive property from thieves than it is worth.
Modern secrets are no match for the first ones that appeared in distant Soviet times. They are structurally more perfect and differ in aesthetics, which is important. The part is an elongated nut with an adapter for an individual key. If you choose closed-type decorative fasteners of the same length for it, then the wheel as a whole will look quite aesthetically pleasing.
The secret mount is very useful for the spare wheel of the Chevrolet Niva, which is screwed to the bracket on the rear door with ordinary nuts, and therefore most vulnerable to thieves. To unscrew secrets, the following types of keys are made:
To prevent the nut from being grabbed by a gas wrench or other similar tools, the lock on top is equipped with a rotating bushing (shell), and the place for the wrench is located in a recess. Cheap products and fakes may not have a shell, so you cannot buy such nuts. The disadvantages of secrets are:
- The tightening torque is weak, so the remaining nuts must be held securely;
- any tricky fastener can be unscrewed if the thief has the time and opportunity to do so;
- the need to always have the key with you and not forget it under any circumstances.
The last drawback is a real scourge of forgetful drivers. If the ramp of exits 2 is punctured: go get the key or call a tow truck, otherwise the wheel cannot be removed.
Removing the hub
To do this, dismantle the conical bushing.
Unlocking the nuts is done by gently tapping them through a chisel.
After which, using a size 19 wrench, the rear and front clamps of the lever to the knuckle are unscrewed sequentially,
not forgetting to get rid of the locking plate.
Then, using the keys “17” and “10”, as well as a flat screwdriver, the brake circuit hoses are removed from the steering knuckle.
Also interesting: How to correctly perform chip tuning of a Niva engine
Having placed the stop under the lever from below, use two “13” keys to unscrew the nut located on the bolt that secures the ball mount to the upper lever. Unscrew 2 more nuts in the same way. And take the knot to the side.
Possible improvements
The Chevrolet Niva hub does not require any maintenance work during operation. In this case, the car owner is obliged to constantly monitor the condition of the wheel bearings. By replacing them, improvements are possible. First of all, this is the installation of non-adjustable, reinforced bearings. Instead of two single-row ones, one double-row bearing is installed, and the landing part of the steering knuckle is bored. The landing part of the hub is also bored. Today you can already buy a non-adjustable hub along with a steering knuckle. You just need to pay attention to the number of splines for the drive. Such bearings are more reliable. In addition, there is no need for constant adjustment.
How to change the wheel bearing on a Chevrolet Niva with your own hands?
For repairs you will need:
- Powerful socket wrench 30.
- Puller for steering rod pin.
- A mandrel for pressing out a bearing or a piece of pipe of suitable diameter.
- A set of spanners or ratchet sockets.
- Balloon wrench.
- Hammer.
- Round nose pliers.
- Jack.
- Wheel chocks.
- Vise.
- Mount.
- Torque wrench.
- Boards or wooden block.
The replacement process is divided into five stages:
- Disconnecting the assembly (brake disc, hub and steering knuckle) from the CV joint strut.
- Pressing out old bearings.
- Installation of new parts.
- Assembling the unit and installing it in place.
- Tightening the adjusting nut.
Work is carried out on a level area. The presence of an inspection hole is not necessary.
To change bearings, you must perform the following steps:
- Place the car on the site and place wheel chocks under the rear wheels.
- Jack up the wheel.
- Unscrew the wheel rim mounting bolts.
- Build an improvised support under the side member from a wheel with boards or timber laid on it and lower the jack so that the car rests on it.
- Jack up the lower arm, compressing the suspension spring.
- Turn the steering wheel to the right or left (depending on the side from which the replacement is performed).
- Unscrew and remove the caliper, caliper and brake pads.
- Hang the caliper so that it does not put any weight on the brake hose.
- Turn the steering wheel in the opposite direction.
- Remove the ABS sensor.
- Unscrew and unscrew the tie rod nut.
- Remove the pin using a puller.
Attention! Without a puller to remove the rod pin, you can disconnect it in another way. To do this, you will have to dismantle the bipod of the steering mechanism from the steering knuckle.
- Unscrew the hub nut.
- Remove the ball joint mounting bolts.
- Carefully remove the hub along with the steering knuckle, ball joints and brake disc.
- Remove the caliper protective screen.
- Remove the brake disc.
- Unscrew the steering arm.
- Clamp the steering knuckle in a vice.
- Remove the seals with a pry bar or a powerful screwdriver.
- Substituting the mandrel, knock out the outer races of the bearings.
- Wipe and clean the seat.
- Disassemble new bearings.
- Press the outer races into the hub using a mandrel or old parts.
Important: the clips are installed with the wide edge inward. You can make pressing easier by preheating the hub.
- Apply lubricant, filling ⅔ of the space in the cage.
- Install the bearing race and inner race.
- Carefully press in the new oil seal.
- Repeat the installation operation for the bearing on the second side of the hub.
- Place the assembly on the CV joint splines.
- Tighten the hub nut.
- Screw on the ball joints and steering bipod.
- Install the protective cover and caliper bracket.
- Tighten the bolts securing the protective screen and lock.
- Put the caliper and brake pads in place.
- Jack up the car.
- Place and secure the wheel.
- Tighten the hub nut by tapping the wheel in the 6 and 12 o'clock directions.
What kind of disks can be installed?
The manufacturer recommends installing R16 standard wheels. It is allowed to mount smaller wheels R15 on the car. It’s easier to choose tires for this size; there are plenty to choose from compared to 16-inch wheels.
The depth of the body arch of the Chevrolet Niva allows the driver to install 17-inch cast wheels on the car. Correct installation of wider wheels will allow you to:
- improve directional stability and vehicle control;
- reduce braking distance in case of unexpected braking;
- increase the vehicle's maneuverability in off-road conditions.
It is worth noting the negative aspects of such a replacement:
- the likelihood of damage to the integrity of the disc increases when the tire is damaged, for example, from a side impact;
- the smoothness of the ride decreases, the movement on it becomes harsher, and vibration increases.
Niva wheel nut thread
VAZ-2121, 21213-15, 2129-31 are a famous family of SUVs that have gained enormous popularity from the first day the production model appeared in 1977. The VAZ-2121 Niva is a basic model, which is based on a monocoque three-door station wagon and a transmission with permanent all-wheel drive.
During the production of this car, many different modifications were designed and manufactured regarding the body structure, appearance, engine used and many other elements of the car. For example, the VAZ-21213 “Taiga” is a redesigned restyled version of the base car, the VAZ-21214 is a model with a domestic 1.7-liter engine, and the VAZ-21215 was equipped with the French Peugeot XUD 9SD engine. A special place is occupied by specimens converted for commercial use. In particular, the VAZ-2129 “Utility” is a model extended by 500 mm with two front seats and a cargo body, and the VAZ-2131 is an extended five-door station wagon.
Due to the huge number of modifications, it is difficult to talk about a specific group of spare parts that are in greatest demand. However, it should be noted that for many years there has been a steady interest in the details of the classic basic version of the Niva.
Nuts M12 * 1.25 wheel Niva Heptagonal (narrow 20 pcs. + special wrench)
For alloy wheels (chrome plated)
The nuts do not have a standard number of edges (7), which does not allow the use of regular wheel wrenches.
The nuts are tightened and unscrewed only with the help of an adapter head for seven edges.
Includes 20 nuts and 1 adapter head.
To secure a car wheel to the hub, a special type of fastening element is used - nuts. The usual shape that car wheel nuts have is a hexagon. Currently, their range includes nuts, which may differ in many respects. This is not only the height of the nut, diameter and thread pitch, but also appearance, strength class and coating resistance. Therefore, when planning to purchase nuts for discs, you should not neglect the advice of professionals who will help you make the right choice.
Another parameter by which nuts can be classified is the material of manufacture. Standard products are usually made of steel. They are characterized by optimal strength and reliability, as well as an affordable price. To increase the protective properties of the metal, as well as to give products an attractive appearance, chrome, galvanized or colored coating can be applied to the surface of the nut.
If wheel nuts must meet certain specific requirements, they can be made from aluminum. As a rule, such fasteners are used on racing cars. Their main difference is their low weight, as well as the increased softness of the metal. Such nuts have to be tightened quite often.
When carrying out tuning, titanium wheel nuts can be installed. They are characterized by exceptional strength combined with low weight. However, it must be borne in mind that their cost is significantly higher than that of other fasteners for similar purposes.
Stamped and cast wheels require different types of nuts. This is due to the fact that it often happens that spherical wheel nuts are used on cast wheels, and conical wheel nuts are used on stamped wheels. Also, most often, open-type wheel nuts are used on stamped wheels, and closed-type wheel nuts are used on cast wheels. This requirement is fully met by high-quality wheel nuts from. One more point: since the metal of cast wheels is relatively soft, at first after installing them it is advisable to check the degree of tightening of the nuts and bolts.
In our company you can purchase wheel nuts for various types of modern wheels. Having specialized in the production and supply of fasteners for automobile wheels for a long time, we have established relationships with a number of reliable foreign factories. This allows us not only to guarantee high quality products and the availability of a wide range, but also to set affordable prices for all types of products we offer. From us you can purchase nuts for Ford alloy wheels and for almost all passenger car brands. Our specialists will help you choose a fastener, and you can be sure that you will purchase exactly the nuts that suit your car and rims. You will thereby ensure not only driving comfort and safety, but also an attractive exterior of your car.
Wheel nuts wholesale and retail: large selection and excellent quality
Have you decided to order wheel nuts wholesale and are looking for a reliable supplier? Need quality products? It will help you. They choose us for several reasons:
• Wide choose. The catalog includes more than a thousand product names. You will be able to find what you need.
• Delivery. In Moscow, products are sent to wholesale buyers free of charge; please check with the manager for delivery conditions to other cities. We are sure there will be a solution. For retail customers, there is express delivery, delivery in the evenings and on weekends.
• Reliable products. We offer products of our own production and are responsible for the quality of our products. All products are certified.
If you need wheel nuts wholesale and retail, you can contact our specialists by phone or.
Bolts and nuts for alloy wheels - drive2
To secure the disc to the wheel hub, use special bolts suitable for alloy wheels.
The use of bolts from stamped disks is unacceptable. Depending on the fastening design, nuts for alloy wheels can also be used; nuts from stamped wheels are also not applicable for use with alloy wheels. The thing is that bolts and nuts for alloy wheels have a more developed spherical or conical surface in contact with the disk. This feature of the fastener is a consequence of the softness of the metal from which the cast disk is made and, accordingly, entails an increase in the contact area between the disk and the fastener.
Most alloy wheels are designed to use tapered fasteners (60 degree angle).
For alloy wheels, the thickness of the wheel is greater than that of steel, so longer bolts are used.
It is also worth saying that due to the softness of the metal of the disk, it is necessary to regularly check the tightness of the bolts and nuts, especially on new disks, when the metal in the contact spot of the disk has not yet been strengthened due to the forces of the load on the wheel and fastening the bolts. When choosing bolts and nuts, it is important to purchase exactly the fasteners that fit your drive.
A conical bolt (nut) is a bolt (nut) whose contact area with the mounting hole has a conical shape, and is ideal for fastening alloy wheels.
The nuts for fastening alloy wheels must be selected those that necessarily have the same height and thread as the disk, as well as contact surfaces (nuts for alloy wheels must have special washers that increase the mating area). Also make sure that the cone of the nut coincides with the cone of the hole.
The cylindrical form of fastening (fastening element with a flat press washer) is also used for fastening light-alloy wheels.
Typically, spherical nuts are used to fasten stamped (metal) disks, and conical nuts are used for cast and forged disks (aluminum alloy). Take this into account when installing a spare tire and replacing stamping with casting!
And also interesting: Lada Nadezhda tuning. VAZ (Lada) 2120 “Nadezhda” - a story of unfulfilled expectations
Tightening bolts and nuts on alloy wheels
Lubricate bolts for alloy wheels and nuts for alloy wheels with graphite grease before installing them in the mounting sockets; this is necessary so that when contact with the disk begins, the head of the bolt or nut has the opportunity to rotate, ensuring a complete fit, and not become stuck due to the initial forces friction between the disc and the fastener.
There are also bolts that compensate for slight deviations in the dimensions of the fasteners on the wheel rim. More details about them in the article “Bolts with a floating cone (eccentrics)”.
Having discs with similar but slightly different PCD dimensions, the situation can be corrected using floating cone bolts. So there are disks with a PCD size of 98 mm, but 100 are needed, or vice versa, which is not important. These two millimeters can be compensated for by a floating cone placed on the bolt. The gap between the inner seat diameter of the cone and the outer diameter of the bolt will provide some movement. Usually this movement is specified when the bolts are sold and is indicated on the packaging as “variation”.
When selecting wheel fasteners, it is especially important to take into account the length of the threaded part of the bolts screwed into the hub, where the number of complete screwed-in turns must be at least six (10mm), the same applies to the nuts. If the number of complete turns is less than six, replace the bolt (stud) with a longer size.
Prepared using materials and articles from the Internet.
Article on the topic: What types of nuts, bolts, studs and wheel locks are there (photo)
Pros and cons of secret fasteners
To prevent your Chevrolet Niva from being “taken off” the next night after installing new tires, it is recommended to install 1 secret nut on each wheel. No matter how new technologies develop, more reliable means of stingray theft have not yet been invented. Hence the first and main advantage of the secret: such fasteners will help protect much more expensive property from thieves than it is worth.
Modern secrets are no match for the first ones that appeared in distant Soviet times. They are structurally more perfect and differ in aesthetics, which is important. The part is an elongated nut with an adapter for an individual key. If you choose closed-type decorative fasteners of the same length for it, then the wheel as a whole will look quite aesthetically pleasing.
The secret mount is very useful for the spare wheel of the Chevrolet Niva, which is screwed to the bracket on the rear door with ordinary nuts, and therefore most vulnerable to thieves. To unscrew secrets, the following types of keys are made:
To prevent the nut from being grabbed by a gas wrench or other similar tools, the lock on top is equipped with a rotating bushing (shell), and the place for the wrench is located in a recess. Cheap products and fakes may not have a shell, so you cannot buy such nuts. The disadvantages of secrets are:
- The tightening torque is weak, so the remaining nuts must be held securely;
- any tricky fastener can be unscrewed if the thief has the time and opportunity to do so;
- the need to always have the key with you and not forget it under any circumstances.
The last drawback is a real scourge of forgetful drivers. If the ramp of exits 2 is punctured: go get the key or call a tow truck, otherwise the wheel cannot be removed.
Adjusting the clearance in Niva hubs
After installing a new bearing, a new wheel nut should also be used. The wheel must be on the car.
Adjustment of the front hubs on the Niva and Chevy Niva is carried out as follows:
- Screw the hub nut all the way and loosen slightly.
- Checking the play. If it persists, tighten the nut.
- We check the play again.
- The procedure is carried out until the backlash disappears.
- Use a sledgehammer to break a tire or drive a Niva a couple of meters.
- A small backlash appears. We also tighten the nut and leave it barely noticeable.
- Now the nut can be tightened.
Attention! You should drive the car for one day, after which, adjust the bearing again.
Why change the mount?
There are several reasons why Niva car owners change their wheel nuts to new ones:
Old nuts that are worn or mechanically damaged do need to be replaced, especially when they have poor threads or missing edges. It is difficult to tighten such a part with a torque of 10-11 kgf/m to securely fasten the wheel. It’s better to install a new set; it’s pointless to change 1-2 fasteners. The main thing is that the threaded part of the stud remains normal.
Alloy wheels, although thicker than stamped steel ones, can theoretically be fastened with factory nuts. Another thing is that such details will ruin the entire appearance of the new wheels, so in such a situation it is better to install elements that are in harmony with the wheel. There is another point: in some models of alloy wheels, samples are made in the form of a hemisphere, rather than a cone. Then the standard fasteners will definitely not fit; you need to purchase nuts with a spherical end that fit into the mating part of the rim.
In addition to improving the appearance of the car, there is another reason that forces you to change 1 out of 5 nuts to a special one that can only be turned with an exclusive key. The reason lies in the high cost of car tires and storing the car itself in the open air in the yard, as often happens in cities. To prevent tires from being stolen at night, one clever security nut is installed on the car.
Adjusting the wheel bearing
To work, you will need an indicator and a torque wrench.
To prepare for adjusting the wheel bearing, you must perform the following operations:
- Secure the indicator by resting its leg on the hub near the adjusting nut.
- Place spanners on the studs and secure them with nuts.
- Rotate the hub and move it axially. (Screwed spanners are used as handles).
- Measure the amount of axial movement (clearance) of the hub, guided by the indicator readings.
- If the stroke exceeds 0.15 mm, adjust the play.
The adjustment is carried out as follows:
- Straighten the collar of the nut.
- Unscrew it with a spanner.
- Install a new nut and tighten with a force of 2 kgf*m.
Important: when tightening, it is necessary to rotate the hub in different directions.
- Loosen the nut and tighten again with a torque of 0.7 kgf*m.
- Loosen the tension by turning the key 20-25 degrees counterclockwise.
- Check hub play.
- Make sure that the indicator readings correspond to the norm (0.02-0.08 mm).
- Lock the nut by pressing its edge into the groove of the outer CV joint.
You can adjust the hub play without using a torque wrench. To do this you need:
- Tighten the nut tightly.
- Rotate the wheel a few turns.
- Check the play.
- If necessary, loosen or tighten the nut slightly.
- Continue until the free play of the hub is within 0.02-0.08 mm.
- Lock the nut collar.
Video instructions for adjusting the wheel bearing
You can install IVECO non-adjustable bearings on Chevy Niva. To do this, you need to buy the appropriate hubs or remake the old ones. For the rework you will need a jig boring machine. In addition to boring the mounting hole, you will have to make spacer rings. Drawings of parts are provided at the link.
Attention! Rework makes sense only if you have turning skills and free access to the machine. Otherwise, it is easier and cheaper to buy ready-made hubs for non-adjustable bearings.
The design of the rear wheel mounting of the Chevrolet Niva is very different. However, they also use bearings that need periodic replacement. They are replaced either together with the axle shafts or separately. The second option is much cheaper, but requires good metalworking skills and a torch to heat the metal.
To work you will need:
- Jack, wheel wrench, chisel, hammer.
- Standard set of screwdrivers and wrenches.
- Axle puller.
- Gas (gasoline) burner or muffle furnace.
- Repair kit including bearing, oil seal and retaining ring.
- A pipe with a diameter of 40-45 mm, the length of which exceeds the size of the axle shaft.
Replacement of bearings is carried out as follows:
- Place the machine on a level surface.
- Place wheel chocks or bricks under the front wheels.
- Jack up the car.
- Remove the wheel.
- Place a support under the rear axle.
- Unscrew the brake drum mount.
- Dismantle the part.
- Unscrew the nuts holding the bearing.
- Load the rear axle by lowering it onto the stand.
- Pull out the axle shaft using a puller.
- Hang the brake mechanism on a wire.
- Knock down the retaining ring using a chisel, hammer and grinder.
- Crack the bearing races using a chisel.
- Remove rust and dirt from the seating surface.
- Put the new bearing in place.
- Heat the locking ring to 200-250 degrees (dark red color) and hammer it into the seat with a pipe
- Replace the oil seal.
What kind of disks can be installed?
The manufacturer recommends installing R16 standard wheels. It is allowed to mount smaller wheels R15 on the car. It’s easier to choose tires for this size; there are plenty to choose from compared to 16-inch wheels.
The depth of the body arch of the Chevrolet Niva allows the driver to install 17-inch cast wheels on the car. Correct installation of wider wheels will allow you to:
- improve directional stability and vehicle control;
- reduce braking distance in case of unexpected braking;
- increase the vehicle's maneuverability in off-road conditions.
It is worth noting the negative aspects of such a replacement:
- the likelihood of damage to the integrity of the disc increases when the tire is damaged, for example, from a side impact;
- the smoothness of the ride decreases, the movement on it becomes harsher, and vibration increases.
What is the wheel bolt pattern of the Chevrolet Niva under 15 and 16 radius
The wheel bolt pattern on the Chevrolet Niva provides for the installation of 15 and 16 inch wheels . For this purpose, tire sizes 205/75 R15 or 205/75 R16 are selected. If you use wheels with these parameters, the driver and the car itself will have fewer problems. But there are some deviations from the factory values.
For example , 215/75 R15 tires fit perfectly into the wheel arches, and do not touch the wheel arches or other body parts even with the maximum steering angle while driving off-road. But if you install mud tires of a similar size, then in other positions the side lugs can independently engage the bumper or wheel arch liners. 225/75 R16 tires can drive in the same way, but if the steering wheel is in the extreme position.
The bolt pattern of the Chevy Niva should be done without additional modifications.
Tire sizes must match the performance parameters . R15 tires are often installed on cars. These sizes are ideal for asphalt. If the car is planned to be used for off-road driving, then R16 tires are recommended for installation.
The rubber ingredients are selected in such a way that they do not melt in the summer and do not harden in the winter.
All-season tires are installed at the request of the car owner . The difference is the presence of a tread. The inner side is designed to drive through loose snow. The tire size for the domestic SUV is 205/75 R15.
Now about the tightening torque
Before fixing the cylinder head, carefully inspect the bolts. Their type is M12×1.25. Be sure to measure the threaded rods - be prepared to replace any element whose length is more than 11.7 centimeters. The fact is that they stretch during use, which means they no longer hold properly.
It is recommended to tighten the bolts in five stages. This will save you from having to tighten them additionally each time during preventive examinations.
In the first step, tighten all ten bolts by hand, and then tighten them in the correct sequence with a torque wrench, with a torque of 20 Nm.
On the next run, increase the indicator to a minimum of 70, and a maximum of 85 Nm. Here it is advisable to strive for the moment to be closer to the last digit.
Next, tighten the 11th bolt - a force of 31 to 39 Nm is required here.
Finally, secure the bolts by turning them one by one with a wrench exactly 90 degrees. Then repeat this procedure again.
There is nothing complicated in the process described, but, of course, a lot of effort must be applied. To make the work progress faster, hire an assistant - in this case you can complete it in 3-4 hours.
axel-roman › Blog › Tightening torques. Chevrolet Niva.
Tightening torque table for Chevrolet Niva 2123. If you don’t have the book, you can look it up here. Tightening torques for cylinder head, engine, gearbox, transfer case, axles and brake system.
Why do you need a wide torque range?
Because all dynamo keys have an error. It is better to take the moment in the middle of the range. Minimum permissible - maximum tightening torque. For example: 100-110 Nm.
Reminder:
In places where there are many tightening points, for example, the intake manifold. It is better to go through the final moment several times. The dots in the middle “sag.”
List of tightening torques (table):
— Cylinder head bolt (cylinder head). M12×1.25.
Clean the threaded holes from oil.
Degrease surfaces.
If the length of the bolt shaft exceeds 117 mm, it should be replaced with a new one.
A non-shrinkable metal-reinforced gasket is installed between the block and the head. Reuse of the gasket is not permitted.
To ensure a reliable seal and avoid tightening the bolts during vehicle maintenance, we tighten them in four steps:
1st step - tighten bolts 1–10 to a torque of 20 Nm; 2nd step - tighten bolts 1–10 to a torque of 70–86 Nm, and bolt 11 to a torque of 31–39 Nm. 3rd step - then turn bolts 1–10 by 90°; 4th move - and another 90°;
It is advisable to use a rotation scale.
— Hydraulic support of the valve lever. (Hydraulic compensator) М24×1.5 15–20 Nm — Camshaft sprocket mounting bolt. M10×1.25. 41–51 Nm — Nut securing the camshaft bearing housing. M8. 18–23 Nm
Apply a thin layer of engine oil to the camshaft cams and journals, bearing housing beds and working surfaces of the valve drive levers. When installing the bearing housing, make sure that the installation sleeves (on the outer mounting studs of the cylinder head on the left side) fit into the housing housings without distortion.
What wheels were installed on different car bodies and configurations?
The ride comfort, the condition of the chassis and the further operation of the vehicle depend on the dimensions of the wheels and tires installed on the vehicle.
To ensure the correct operation of the above criteria, vehicle manufacturers provide the recommended parameters of parts, components and assemblies installed on the vehicle in the vehicle operating instructions. The same applies to the Niva Chevrolet.
AvtoVAZ recommends the following wheel and tire sizes with appropriate air pressure.
| Tire sizes | Load Index | Speed index | Disc width, inch | Reach ET, mm | Air pressure in the wheel, MPa | |
| Front | Rear | |||||
| Original | ||||||
| R16 185/75 | 92Q | 95T | 5.0 J | 58 | 0,21 | 0,19 |
| Acceptable from other manufacturers | ||||||
| R15 205/70 | 95Q (S, T) | 6; 6.5J | 40 | 0.19 | 0.19 | |
| R18 175/80 | 88Q | 95T | 5; 5.5 J | 48-58 | 0.21 | 0.19 |
Advice. It is not recommended to install alloy wheels that are too large on a Chevrolet Niva; this may cause problems with the operation of the vehicle’s chassis.
The speed index is an important parameter when selecting tires. Depending on the speed at which the car moves, wheels with a certain index are selected:
- Q – up to 160 km/h;
- S – no more than 180 km/h;
- T – up to 190 km/h.
As for the load capacity of the car, before installing the wheels, you need to check the markings on the tire. It corresponds to 85, 88, 92. The minimum carrying capacity of the car is 515 kg, corresponding to index 88.
Pros and cons of secret fasteners
To prevent your Chevrolet Niva from being “taken off” the next night after installing new tires, it is recommended to install 1 secret nut on each wheel. No matter how new technologies develop, more reliable means of stingray theft have not yet been invented. Hence the first and main advantage of the secret: such fasteners will help protect much more expensive property from thieves than it is worth.
Modern secrets are no match for the first ones that appeared in distant Soviet times. They are structurally more perfect and differ in aesthetics, which is important. The part is an elongated nut with an adapter for an individual key. If you choose closed-type decorative fasteners of the same length for it, then the wheel as a whole will look quite aesthetically pleasing.
The secret mount is very useful for the spare wheel of the Chevrolet Niva, which is screwed to the bracket on the rear door with ordinary nuts, and therefore most vulnerable to thieves. To unscrew secrets, the following types of keys are made:
To prevent the nut from being grabbed by a gas wrench or other similar tools, the lock on top is equipped with a rotating bushing (shell), and the place for the wrench is located in a recess. Cheap products and fakes may not have a shell, so you cannot buy such nuts. The disadvantages of secrets are:
- The tightening torque is weak, so the remaining nuts must be held securely;
- any tricky fastener can be unscrewed if the thief has the time and opportunity to do so;
- the need to always have the key with you and not forget it under any circumstances.
The last drawback is a real scourge of forgetful drivers. If the ramp of exits 2 is punctured: go get the key or call a tow truck, otherwise the wheel cannot be removed.
Dimensions of standard wheels
A peculiarity of domestic car models, including the Chevrolet Niva, is the lack of individual wheels for a specific year of manufacture of the car.
Common wheel sizes for Niva Chevrolet:
- rim width 8 inches;
- rim diameter 15 inches;
- offset ET40 – distance between the plane of fastening and symmetry.
Failure to comply with these parameters may result in:
- rapid wear of mechanical parts and components of the vehicle chassis;
- Excessive load on the wheel arches of a car and their breakdown, for example, the use of wheels with a dimension greater than R16 and a high rubber profile, will negatively affect the condition of the fender liner. Its surface will be erased. On the Internet you can see a large number of photos devoted to this topic.
Advice. Before purchasing a new wheel, it is better to consult an experienced specialist.
Another important parameter is the bolt pattern or drilling of the disk. It is designated by the Latin letters PCD. For Niva Chevrolet it is installed by the manufacturer with dimensions 5x139.7. The number 5 means that the disk is fixed to the hub with five bolts, which are located on a circle, and the distance between adjacent fastening bolts corresponds to 139.7 mm.
The center hole (DIA) of the rim is 98.5mm. Therefore, when choosing a wheel, you need to pay special attention to this parameter, since a discrepancy from the standard even by 1 mm will certainly affect the quality of the disk fastening to the hub. After some time, due to a loose fit, the hub will simply wear off.
And the last no less important parameter is the ET offset, which should not exceed a value of 40. Otherwise, this will lead to failure of the internal bearing. The most acceptable offset for the Niva Chevrolet is ET35.
Chevrolet Niva hub malfunctions
Most wheel hub repairs involve replacing the wheel bearing. Less often, the hub itself fails, since the material from which it is made is quite durable. The reason for replacing the wheel bearing is simple wear. It is necessary to understand that there is a huge load on it, because the distributed load from the car itself exerts pressure from above. When driving over uneven surfaces, this load increases. If we also take into account the mobility of the bearing parts, the reason for the wear that appears on the inner and outer race will become clear. A failed wheel bearing begins to emit extraneous noise, which intensifies over time.
Since the condition of the hub directly affects traffic safety, at the first suspicion, the bearing must be replaced.
There are two simple ways to diagnose a bad wheel bearing. The first is that on an empty highway you need to drive along a large radius curve, first in one direction and then in the other. In simple words, when driving, you first need to turn the steering wheel slightly to the right, and then to the left. Typically, bearing noise will increase in one case and then decrease. If the noise increases when you turn the steering wheel to the right, then the reason is in the left bearing and vice versa.
You can finally verify that the bearing is faulty by hanging the wheel. It will make some noise when rotating. When vibrations occur relative to the horizontal axis, play may occur. To detect this play, it is necessary to apply force to the upper and lower points of the wheel.
About the wheel mounting design
The fact that the wheel nuts are a special product is evidenced by a non-standard metric thread with a diameter of 12 mm with a pitch of 1.25 mm. Standard coils of the same diameter have a different pitch, 1.75 mm. That is, the wheel threads are made smaller in order to increase the reliability of the connection and implement the “self-tightening” effect due to constant rotation. Larger coils will not work here.
The factory nuts are sized so that when the thick stamped steel wheel is tightened, they will fit completely onto the stud. In this case, the element is equipped with a cone at the end, adjacent to the mating part on the disk. Due to the cone-shaped connection, 2 problems are solved:
- self-centering of the hole in the disk opposite the stud when the nuts are evenly tightened;
- more reliable connection of the wheel plane with the hub.
The pin, which carries the load of the entire fastening, is pressed into the hub on splines with an interference fit, and it is sometimes very difficult to knock it out. This is another reason to take the selection of parts for this unit seriously. All nuts available for sale for Niva can be divided into 2 types:
- Open, the pin passes through them when twisted. The car is equipped with such parts at the manufacturer.
- Closed, with a blind hole. Installed on Chevrolet Niva, but the size is also suitable for VAZ-21213.
Factory elements are manufactured with a size for a 19 mm wheel wrench. Various parts found in stores can be made with a 21 mm turnkey, and reach a height of 30 mm or more. The standard length of the open VAZ-2121 nut, made of uncoated carbon steel, is 17 mm. The new decorative parts have a nickel plated finish and a different protruding head shape.
Changing the wheel
It is necessary to change the wheel in the following cases:
- tire damage;
- disk damage;
- when the tire wears out;
- when upgrading a car.
The replacement process is as follows:
- The Shevik is placed on a hard surface and the handbrake is applied.
Do not forget about supports or shoes, they prevent the raised car from rolling off the jack.
It is also important to tighten the nuts evenly. This will reduce the risk of the wheel skewing and unscrewing spontaneously. The final tightening of the nuts is carried out after removing the jack.
Replacing front and rear wheel studs on a Chevrolet Niva
A stud is the same threaded bolt, only its head is mounted into the car hub. Studs are replaced when they break: the thread is damaged or the design of the part is deformed. In this case, you need to change it to a new one. The procedure for removing and replacing the front wheel product:
- The car is jacked up, then the wheel, brake caliper and disc are removed. Disconnect the hub and disc.
- Using a hammer, knock out the damaged pin from its seat. It will not be possible to knock it out completely, since its head will rest against the shoulder of the rotary cam. To remove it without dismantling the hub, you need to use a file or cut off the head with a grinder. The head is ground off with a file on one side and then protruded through the collar.
- The front wheel stud has been removed. Now we install a new one. Before installation, it is worth grinding off the edge of the stud head in the same way and installing it in the hub hole. You can use a spacer to fix the stud in the flange until it stops.
Why change the mount?
There are several reasons why Niva car owners change their wheel nuts to new ones:
Old nuts that are worn or mechanically damaged do need to be replaced, especially when they have poor threads or missing edges. It is difficult to tighten such a part with a torque of 10-11 kgf/m to securely fasten the wheel. It’s better to install a new set; it’s pointless to change 1-2 fasteners. The main thing is that the threaded part of the stud remains normal.
Alloy wheels, although thicker than stamped steel ones, can theoretically be fastened with factory nuts. Another thing is that such details will ruin the entire appearance of the new wheels, so in such a situation it is better to install elements that are in harmony with the wheel. There is another point: in some models of alloy wheels, samples are made in the form of a hemisphere, rather than a cone. Then the standard fasteners will definitely not fit; you need to purchase nuts with a spherical end that fit into the mating part of the rim.
In addition to improving the appearance of the car, there is another reason that forces you to change 1 out of 5 nuts to a special one that can only be turned with an exclusive key. The reason lies in the high cost of car tires and storing the car itself in the open air in the yard, as often happens in cities. To prevent tires from being stolen at night, one clever security nut is installed on the car.
What kind of wheels does a Chevrolet Niva have from the factory?
Owners of Nivs received different wheels and tires in different configurations. So what kind of wheels does the Chevrolet Niva have from the factory?
Owners of fifteen-inch wheels received original tire sizes of 205/75 R15 and 205/70 R15. Owners of sixteen-inch wheels got size 215/65 R16.
Wheel bolt pattern Niva Chevrolet
The bolt pattern of Chevrolet Niva wheels is a parameter that is marked as PCD in the wheel markings. The bolt pattern of the Niva Chevrolet wheels is 5×139.7. These numbers marked PCD mean that the wheels on the Niva are mounted on 5 wheel bolts, and the distance between the centers of the holes for them is 139.7 mm. There is also information that in 2002, modifications of the Chevrolet Niva 1.7 and 1.8 i were fitted with wheels with a bolt pattern of 5×139 and an offset of ET 48. Please note that you cannot use wheels with a bolt pattern of 5/139 if you are prescribed to use 5 /139.7!
Bolt pattern 5x139.7 on a cast wheel
Bolt pattern 5x139.7 on a stamped disc
The fact is that the difference in diameter of less than a millimeter is unnoticeable during installation - the disc will still sit on the hub studs. But when tightening the nuts, the wrong disc will not be properly secured. That is, the wheel can simply unscrew while driving! Therefore, carefully observe all parameters of the Niva Chevrolet wheel size.
Niva Chevrolet wheel size
What about other important disk parameters? If the diameter of the rims of your Niva Chevrolet wheel is 15 inches, then in addition to the PCD 5×139.7 bolt pattern, they have a width from 6J to 6.5J (in inches), an offset of 40 and a hub hole diameter of 98.5 mm. If you have 16-inch wheels, then they have a width from 6J to 7J, but other parameters are the same.
Chevrolet Niva hub
If we consider only one hub of a Chevrolet Niva, it consists of a flange assembled into a single unit for attaching a wheel rim and a guide on which the wheel bearing sits.
But some other functions are superimposed on the wheel hub:
- It connects the wheel to the shaft through bearings, allowing the wheel to rotate;
- The hub is pressed into the steering knuckle, thereby ensuring rotation of the wheel relative to the vertical axis;
- The brake disc is mounted on it, and the brake mechanism is mounted on the steering knuckle.
