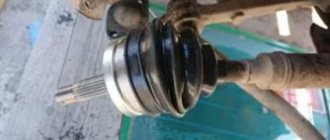
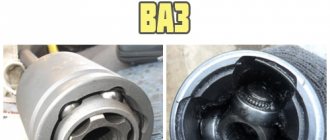
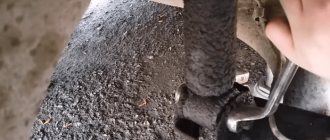
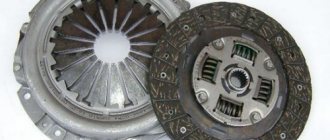
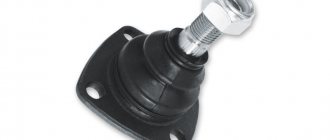
Inner CV joint of VAZ 2110 or constant velocity joint, or popularly “grenade”, is an integral part of the transmission of a front-wheel drive car.
Its main role is the continuous transmission of rotation from the gearbox to the wheels at different angles. Despite the same principle of operation of all CV joints, they differ in design features for different car models. In addition, different operating conditions cause differences in the design of the external and internal CV joints.
How to diagnose a problem
It is clear that there are no problems diagnosing obvious faults. But what to do if there are no visible faults, the machine is working normally, although in fact minor, insignificant damage that can lead to expensive repairs has already appeared? There are two main effective methods for determining a malfunction:
- Listen to the car while driving. If you think you have heard unusual noises, do the following: stop, move the gearshift lever into first or forward gear (depending on the type of transmission), then turn the steering wheel as far as possible in either direction. Next, take off sharply, pressing the gas pedal fully. If during such a maneuver you hear crackling or clicking sounds from the front of the car, check the condition of the CV joints.
- Options for visual diagnosis of faults include a careful external inspection of the condition of the anthers. If, when looking at the wheel rims (this will be especially noticeable on alloy wheels, since stamped ones make it difficult to see), you see traces of thick grease on the front ones, it means that the boot is torn and urgent intervention is required. If there are no traces of lubricant on the discs, then carefully inspect the boot itself. Any defects on it mean the possibility of dust, dirt and water getting inside the hinge. Therefore, make sure that there are no scratches or cracks on the boot itself, as well as that the clamps are securely tightened (the most common cause of contamination and lubricant leakage from the boot).
How to check the inner CV joint
The breakdown of any car part is associated with a change in its size, physical properties or the appearance of wear on rubbing parts. A CV joint is a hinged joint in which the elements of the mechanism are in close contact and are under constant load. Over time, wear develops in the places where the parts interact and the gap increases, which manifests itself in an increase in the characteristic “crunch” during sharp acceleration or overcoming obstacles.
Unlike the outer CV joint, which is easy to check when driving at maximum angle of rotation, the inner one is rarely in a state of maximum curvature. You can verify whether the unit is in good condition or broken when hanging the wheel. To do this, on the lift, with the engine running, engage first gear so that the wheels rotate slowly. If a crunching sound is heard from the faulty part, and play is felt when the shaft is impacted, then the CV joint is faulty.
Device and appearance
Even before you encounter problems with your car, it is important to understand how it works. That is why, before talking about malfunctions in the external grenade or methods for eliminating them, it is necessary to show the general structure of the wire
This paragraph will be especially informative for those who are encountering the concept of a constant velocity joint or the abbreviation CV joint for the first time. So, the photo below shows the CV joint drive assembly. All the main elements of the drive are labeled in the photograph.
Of course, it is not enough to look at something to understand its design and operating principle. In the next photo you can see a cross-section of the CV joint drive, with all the parts that make up its design indicated.
As can be seen from the photographs above, the drive has two CV joints: one external or external, the second internal. When it comes to CV joints in a conversation, you may hear the term “grenade” - this is the popular name for CV joints (obviously, due to a certain external similarity).
We also invite you to watch the video, which shows the operation of all the elements of the CV joint:
The principle of operation of the CV joint drive is very simple: the shaft is engaged with the differential, which transmits torque from the transmission to the front wheels. The inner CV joint is attached to the gearbox, the front one is connected to one of the drive wheels. Obviously, the external grenade will experience greater loads and interact with the environment more often. Such operating conditions can lead to increased wear in the grenade and its faster failure.
Therefore, it is especially important to monitor the condition of the outer CV joint and observe changes in its operation and possible malfunctions
Causes of failure
Development on the CV joint cage
The reasons may be as follows:
- A manufacturing defect that was not identified before installation. There are often cases when counterfeit products are installed on new cars. This also includes the very low quality of the metal used to make the assembly.
- Insufficient amount of graphite lubricant or its absence. Poor quality of the anthers, as a result of which it ruptures and dust, dirt, sand, water and other debris gets onto the rubbing surfaces.
- How you drive and where you drive is also important. Aggressive driving coupled with poor-quality road surfaces means rapid wear of the grenades and prompt replacement.
Replacing CV joints on VAZ cars.
Initial stage of work.
Before replacing the CV joint with your own hands, you need to secure the car with a parking brake, and put bars under its rear wheels for better fixation. Then you should loosen the hub nut, first removing the protective cap using a regular screwdriver. Only a strong tool that will go in conjunction with the pipe will help you do this. Although for these purposes you can also build (or borrow) a homemade key designed to unscrew the drive, which is deservedly considered the most reliable and trouble-free tool. It consists, by the way, of a chisel with a welded screwdriver for 30 and a one and a half meter metal pipe.
Replacement
It is recommended to drive the car onto an inspection hole or overpass, put the handbrake on, engage the gears and support the rear wheels with wheel chocks to ensure safety during repairs.
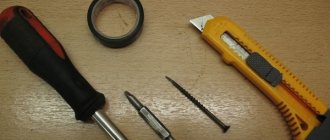
We arm ourselves with the following tools: wrenches 17.19, socket 30 and 13-17, mount, wheel wrench, wrench, lift (jack), lubricant and pliers.
Both hinges, internal and external, are located on the shaft drive, which means replacing them is identical and the point is to get to this very drive.
- At the rear on the crankcase protection we unscrew two nuts with a 19mm wrench, and at the front there are also two, but with a 17mm wrench.
- Drain a little oil (less than half) from the box.
- From the required side we tear off the wheel bolts with a balloon.
- Unscrew the nut of the outer grenade using a 30mm socket.
- We lift the vehicle using a jack.
- We remove the wheel by unscrewing it first.
- Find the bolts on the hub that secure the CV joint and unscrew them using a 13mm wrench (only two bolts).
- Use a pry bar to move the hub away from the reaction rods.
- We take the grenade pin out of the hub, to do this we pull the stand towards ourselves.
- We move the shaft drive aside.
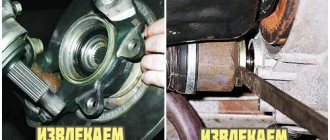
- Now you need to remove the inner hinge from the box. To do this, open the hood and, using a pry bar inserted between the parts, jerk it towards the box. The CV joint must move, otherwise we repeat the action. As soon as it works, we go down to the wheel arch and remove the shaft drive with two CV joints.
- Remove the clamps (large and small) of the protective cover from the hinges. If damage to the anthers is detected, we replace them; if the condition is satisfactory, we move them to the side.
- Using a hammer, we hit the inner clip of the inner grenade with force, making sure that it flies off. We repeat similar actions on the other side.
- We remove the old rings from the shaft drive, put on new ones and a boot.
- We install the new hinge using a hammer and lubricate it and the boot with grease.
- Using clamps, we fix the protective cover on the grenade and the shaft. We do the same with the second part.
- We drive the shaft drive into the box, having first screwed the nut onto the CV joint.
- We collect spare parts in reverse order.
Diagnose part problems
The grenades are protected by a rubber boot. It is mounted on an external and internal hinge. The boot prevents dirt from getting into the CV joint. Another of its functions is to retain lubricant; without it, the hinge will not work.
If the boot wears out over time or is torn, sand, small stones and dirt will begin to get into the joint. After some time, the CV joint will become unusable and the grenade will have to be replaced. Such repairs will cost much more
Therefore, it is important to monitor the integrity of the anther. If a defect is detected, replace the CV joint boot
You can visually check the condition of the anthers yourself, without resorting to the services of service station workers. It is best to drive your car into the inspection hole
First of all, you should pay attention to the boot of the outer CV joint. VAZ 2110 has two boots on each outer side of the wheels
These anthers most often fail. The inner boot needs to be replaced much less frequently than the outer boot.
You can check the integrity of the outer CV joint boot without a hole. We stop the VAZ 2110 on the road, preferably in a place where the car will not interfere with the movement of either cars or pedestrians. We turn the steering wheel to the right to the extreme position, this will be enough to diagnose the outer boot on the left side.
We similarly inspect the boot from the opposite side. If traces of grease are visible on the boot or there are cracks and cuts, then the boot should be replaced. The design of the VAZ 2110 allows you to cope with the replacement yourself.
Following the recommendations of experienced craftsmen, you should replace the boots of both the outer and inner CV joints at the same time. Even if the inner CV boot still looks intact and without cracks.
What are the types of CV joint defects?
Replacing a CV joint on a VAZ 2110 involves a preliminary study of the problem: what defect has occurred, so as not to harm the condition of the structure. In practice, there are situations when replacing the internal CV joint of a VAZ 2110 does not bring the expected results, or problems arise during the operation of the new part.
Among the main defects are:
- Unsatisfactory quality of the material from which the parts are made.
- Defective design or counterfeit.
- Low quality components or lack of lubricant. As a result, the grenade quickly receives mechanical damage and breaks.
- The outer CV joint boot of the VAZ 2110 needs to be replaced if debris and dirt gets inside the mechanism.
In the case where the VAZ 2110 internal or external CV joint has not been replaced before, it is recommended to watch a video on the topic and understand the proposed operating instructions.
Removing and disassembling the inner hinge
Removing and disassembling the internal hinge of Lada Priora (VAZ-2170)
We carry out the work when replacing a hinge or its cover. Remove the front wheel drive (see “Removing the front wheel drives”).
We clean the outside of the hinge and clamp the drive shaft in a vice with soft metal jaw linings.
Using sliding pliers, squeeze the large clamp by the protrusions and pry the end of the clamp with a screwdriver...
... disconnect the clamp and remove it. Similarly, remove the small clamp.
Slide the cover off the hinge body. Using a rag, remove the grease from the end of the hinge housing.
When replacing the hinge cover, we use a file to mark the relative positions of the body, holder and hinge separator so that they take their original places during assembly.
Use a screwdriver to pry up the inner hinge retainer...
...and remove the lock. We move the hinge body along the shaft...
By striking the end of the joint cage through a soft metal drift...
...remove the cage with the separator and balls.
The drift should not transfer force to the cage and balls to avoid damaging them. Using a screwdriver...
...remove the retaining ring from the shaft groove. Remove the protective cover of the joint from the shaft. To inspect the hinge parts, take out the balls and arrange them in order. We remove the clip from the separator.
We remove the old grease from the hinge body and wash it in kerosene. Wipe the hinge parts with a rag and blow with compressed air.
We inspect the balls, separator, cage and internal cavity of the body. Scratches, dents, cracks, and traces of corrosion are not allowed - we replace such a hinge.
We clean the shaft of old grease and apply a thin layer of new grease to it. We put a new joint cover on the shaft and install a new retaining ring in the groove of the shaft. We put a separator on the end of the shaft (the conical part to the cover).
Using a hammer with a plastic striker, press the cage onto the splined part of the shaft. Rotate the separator until the marks align.
We insert the balls into the separator windows. To hold the balls in the windows, we apply lubricant to them (CV joint-4).
We put the same lubricant into the cavities of the hinge body and the cover, apply it to the balls and the separator - 80 g in total. We put the hinge body on the inside of the hinge according to the marks and install the lock. We check the mobility of the hinge body - it should move without jamming.
We put the cover on the hinge body and install a small clamp. We install the hinge body approximately in the middle position from its longitudinal movement relative to the shaft.
Using a screwdriver with a thin blade, we move the edge of the cover away from the hinge body to equalize the air pressure inside and outside the cover. We secure the cover with a large clamp.
Video on the topic “Lada Priora. Removing and disassembling the internal hinge"
Replacing the outer and inner CV joints of the drive on VAZ 2110, 2112, Kalina, Granta, Priora, 2109, 2114 Replacing the outer grenade and internal boot of the VAZ 2112 drive Disassembling and assembling the CV joint (grenade)
CV joint malfunctions: symptoms and causes
CV joint is a very durable part that lasts from 100 to 200 thousand kilometers. However, it may fail earlier.
The main symptom of a CV joint failure is a crunching sound that intensifies when the steering wheel is turned. At high speed, the crunch of the CV joint can turn into a roar.
The main reasons that “kill” CV joints:
— Torn boot. Through the hole, dirt gets into the hinge, which slowly destroys the moving elements
— Frequent driving on broken roads. Impacts also affect the condition of CV joints.
— Incorrect gearbox alignment. If you removed the gearbox and then installed it crookedly, the CV joints will work at the wrong angle and will wear out faster
— Incorrect toe angle and increased maximum steering angle. These parameters can be violated due to poor repair and “tuning” of the steering linkage. CV joints, again, operate at extreme angles and quickly break down
— Severe damage to suspension parts - hubs, steering knuckles, shock absorbers, etc. All this can lead to disruption of the CV joint angles and their accelerated destruction
— Heavily worn engine and gearbox mounts. The destruction of the supports causes strong vibrations, causing CV joints to suffer.
— Errors when installing CV joints. A relatively new hinge can also fail if it was installed incorrectly: with insufficient or excess lubrication, for example, or with improper installation of the boot.
— Frequent driving and especially sharp accelerations with the steering wheel turned out. The habit of dashingly turning and turning greatly shortens the life of the hinges, because they have to experience heavy loads at maximum turning angles.
This video shows the moment of “death” of the CV joint while the driver was forcing a puddle with the wheels turned.
Why does the CV joint crunch?
Video of replacing the outer left CV joint
Experienced drivers are able to determine the location of a car breakdown by ear. Such skills are acquired over time, but the crunch of a CV joint cannot be confused with anything.
In order to understand the nature of this characteristic noise, you should remember how the CV joint is designed. The task of the CV joint is the transmission of rotation from one axle shaft to another, provided that the angle between them continuously changes.
This property is due to the need not only to rotate the drive wheel, but also to give it the ability to turn and move up and down on a spring.
The CV joint consists of the following main elements:
- outer body in the form of a bowl with six semicircular grooves inside and a semi-axis outside;
- the inner race is in the form of a spherical fist and also has six grooves and a splined connection for the axle shaft;
- Between the inner walls of the bowl and the holder there are 6 balls in the separator.
All elements are made so precisely that they have no play when assembled. The cage transmits force through the balls to the body and rotates it, and moving the balls along the grooves makes it possible to change the angle between the axle shafts.
Over time, a hole forms at the point where the balls come into contact with other elements and a backlash appears. The free movement of the balls (rolling) generates a sound that is very similar to crunching.
Considering that CV joints are installed two on each wheel, when alarming symptoms appear, it becomes difficult to find out which CV joint is crunching: inner or outer, right or left.
Service life and maintenance
A grenade in a car is a consumable item. It will have to be changed quite often. Fortunately, the cost of the unit and repairs is usually not the highest.
How much a factory part costs depends on three factors:
- Driving manners;
- Machine models;
- Timely service.
The first factor is critical. Grenades are especially afraid of the trigger falling down when the steering wheel is turned to the extreme position. At such moments the node experiences maximum load.
If you mostly move calmly, then you can look for a resource for your car on thematic forums. There are cars in which a standard product can cost more than one hundred thousand.
Timely maintenance means periodic inspection of the boots, their timely replacement and filling with lubricant. If a crack appears in the rubber, the death of the CV joint will occur in just a couple of weeks. And in rainy weather this can happen even faster. This is due to water, which, when it gets into the assembly, leads to corrosion and leaching of the protective lubricant.
Surely you will be interested to know that in addition to grenades, absolutely all ordinary cars have a TV! Be sure to read our article on this so you can be a knowledgeable car owner.
A torn boot is a typical malfunction.
Boots, by the way, are quite inexpensive. The lubricant is also cheap and is called tritely - “CV joint”. When purchasing, do not forget to check that the anthers come with clamps for tightening them.
Advice on how to extend the life of a grenade:
- Do not press the pedal to the floor when turning, especially when starting off
- Change boots and lubricant in a timely manner
The lifespan of external and internal grenades is very different. The first is subject to great effort, since it is forced to turn at significant angles, and therefore makes itself felt more often.
The internal part may well not be bothered for the entire service life of the car.
Signs of a problem
Malfunction of CV joints can be identified by very characteristic moments in the operation of the unit:
- Crunch when starting from a place;
- There is also a crunching sound when cornering. Here you can determine which of the CV joints has begun to fail. This is done on the side of the turn when a crunch is heard;
- Jerks during acceleration;
- There is play in the hinge itself.
If you look closely at the car, you can quickly notice the problem and fix it.
Differential diagnostics and repair
The VAZ 2110 differential often requires repair. Very often the malfunction depends on the bearing and the degree of its wear. The process of replacing a part can be done at home, and it consists of pressing the box from the axle. In this case, the separator is no longer suitable for use; the part cannot be reinstalled. When diagnostics are carried out, it is important to carefully examine the teeth of the satellites, gears and splines for wear and mechanical damage. If this is the case, the parts will also have to be replaced.
Repairing a differential is almost impossible without replacing the bearing. The work process begins with unscrewing and removing the automatic transmission. This is labor-intensive work that requires a lot of time and physical effort. First of all, disconnect the selector cable from the automatic transmission, oil supply hoses and electrical connectors. Remove the front of the machine to expose the drive shaft. It is better to hang the engine, unscrew the longitudinal ski and box cushions. Remove all fasteners associated with the motor. Remove the box and diagnose and replace damaged elements. Bearings must be replaced. To ensure high-quality work in the future, it is important to clean the old parts and lubricate the component parts with new sealant before assembly.
To diagnose the differential, it must be removed from the vehicle. Next, we will consider the differential elements, the requirements for their permissible wear and repair, one by one.
- Remove the differential from the transmission.
- Having turned 90° around the axis of the satellites, remove the side gears from the differential housing.
- Next, remove the retaining ring from the satellite axis.
- Remove the pinion axle and both pinions from the differential housing.
- Remove the bolts securing the driven gear to the differential housing.
- Press the driven gear off the differential housing.
- Inspect the working surfaces of the satellites, the axes of the satellites, side gears and the spherical surfaces of the differential housing in contact with them. Remove small irregularities with fine-grained sandpaper. Replace parts that have obvious defects immediately.
- Then assess the condition of the driven gear of the gearbox. If there are chips, chipping or significant wear of the teeth, replace the gear with a new one. Main gears with different gear ratios are installed on the car. The number of teeth on the driven gear 1 and driven gear 2 is stamped on the driven gear. The final drive gears are selected in pairs at the factory based on noise and contact patch. Therefore, when replacing the driven gear, also replace the drive gear: they are sold in pairs. To check, count the number of teeth on the drive gear.
- Inspect the bearing seats on the differential housing. If these areas are significantly worn out, replace the differential housing. If there is pitting (sinks) on the raceways and rolling elements, traces of indentation of the rolling elements on the raceways, or damage to the cages, the bearings must be replaced.
- To replace the bearings, use a puller to press them off the differential. In this case, the bearings are destroyed. Then…
- ...press the outer rings out of the gearbox and clutch housings with a special puller. If there is no puller, press out the axle seals first. Please note that in this case the seals are damaged and must be replaced (for more details, see subsection 3.2.10). Press out the bearing rings from the outside of the crankcases with a punch.
- Please note that there may be an adjusting ring under the ring installed in the gearbox housing, which must be re-selected before pressing in new rings (see “Selecting the differential bearing adjusting ring”).
- If you need to replace the speedometer drive gear, you can compress the bearing (without destroying it) using two screwdrivers, applying force to the inner ring of the bearing. The gear will be destroyed, but it still needs to be replaced.
- Reassemble the differential in reverse order. When assembling, lubricate all parts with transmission oil. Attention! The driven gear is installed with the teeth markings facing out.
