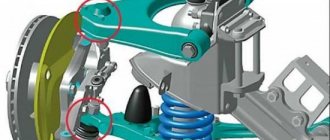
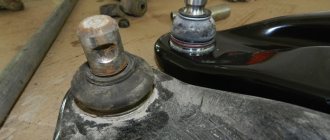
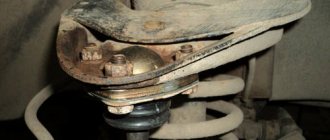
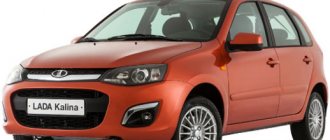
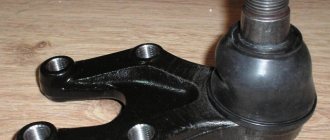
The ball joint is one of the most important components of the front suspension of front-wheel drive cars, including the Lada Kalina. The main purpose of the ball joint is to be the connecting link between the steering wheel hub and the suspension arms. That is, during vertical movement, the hub rotates, but the horizontal position of the wheel remains unchanged. The condition of the ball joint should be carefully monitored. Otherwise, there is a high probability of serious consequences, especially if the breakdown occurs while driving. If the ball joint fails, the wheel will turn outward and the car is guaranteed to fall onto the wing. If you imagine such a situation at high speed, there is a high probability that its development will lead to a serious accident.
Characteristics of the ball joint on the Lada Kalina
This unit holds the wheel in a certain position, while at the same time allowing the hub to rotate and maintain horizontal stability.
The ball joint is called because of the ball-shaped tip. Structurally, it is a cone-shaped unit. The Lada Kalina uses a modern collapsible element, although the first VAZ models had stamped assemblies from several parts, and then cast structures. The ball joint installed on a Lada Kalina car, regardless of modification and generation, has a standard device that includes several main components:
- frame;
- a part in the form of a cone (another name is “finger”);
- rubber protective boot (prevents dirt and dust from entering).
The main elements are made of high quality steel. This is due to the fact that during operation the working parts are constantly exposed to load, friction and, as a result, high temperatures. The only exception is the hollow part of the body, which is covered with polymer materials. Plastic is mainly used for these purposes.
The main advantage of the Kalina ball joint is the extreme simplicity and efficiency of the design, which allows the contacting parts to move freely at equal angles.
Looking at the structure of the ball in more detail, it can be noted that it is actually a steel finger, which on one side ends with a tip in the form of a small ball. The tip rests on a plastic (or polyurethane) gasket. The bushing and ball end are located in the body and are rolled to prevent flyout. The body is additionally galvanized against corrosion. It is fixed to the upper or lower control arm and the threaded part is secured with a knuckle nut. Thanks to this, the fist is not fixed too tightly, which allows it to rotate along with the wheel hub, and the vertical position is maintained when the vehicle’s suspension is operating.
The ball joint is a fairly reliable and durable unit if you follow the operating rules. The long service life of the ball joint is possible thanks to the lubricant located in the part of the housing where it comes into contact with the working part. Insufficient lubrication, its leakage and moisture entering the internal cavity can cause premature failure of the entire assembly. To protect the working parts, a special boot made of rubber that is resistant to aggressive environments is used.
In order for the ball joint to last as long as possible, every car enthusiast should check the condition of the suspension from time to time, paying special attention to the rubber boots. There should be no cracks or other visible damage on their surface
If there are defects, it is recommended to check the condition of the entire assembly for wear.
Malfunctions
Despite the fact that the support parts of the Lada Kalina are made of durable steel, the unit, which experiences the most powerful loads, fails from time to time, because it is the suspension that experiences the vibrations that come from driving on a bad, bumpy road, and the suspension also absorbs a significant part of the weight of the machine, which leads to wear of parts.
- Most often, the contacting surfaces in the supports wear out, which are in constant friction. Mechanical damage and overheating lead to deformation: the formation of a gap from the pin to the body, chips, cracks. For this reason, parts malfunction, rotate, even hang out in the body, and as a result, have the most negative impact on the operation of the suspension. And since the stability of the car depends on the suspension, we can say for sure: faults in the ball joints lead to loss of controllability, and, therefore, to an accident.
- In addition to deformation of the contacting surfaces, damage also occurs in the boot; rupture of the boot also has a bad effect on the operation of the entire system, because in this case, all the dirt, dust and water that falls on the suspension while driving gets inside, which causes corrosion processes and rapid wear. components.
- Lack of lubrication also leads to the formation of mechanical deformations. Therefore, you must always monitor the lubrication level in all systems, without losing sight of the suspension.
How to change a ball joint on a viburnum with your own hands
Lada Kalina Station wagon PORT WINE NOT LIKE EVERYONE Logbook Rear door lock
The ball joint is an important part of the car’s suspension, responsible for turns and vertical movement of the wheel. The quality of our roads, and sometimes driving style, lead to this part failing. And although the VAZ 2110 at one time became a fundamentally new car, ball failure on it happens no less often than on Samara class models. In this case, replacement is necessary.
Where is the ball joint located on the VAZ 2110
Based on the fact that this part is involved in turns, it is located behind the front wheels - on the left and right. This mechanism received the circuit, as well as all the sores, from the VAZ 2108 - the first Samara, and passed it on to all subsequent cars of the 110 class.
Many people mistakenly believe that there are 2 ball joints in a car, while forgetting that in addition to the upper ones, there are also lower ones. The diagram clearly shows that there are two ball wheels on one wheel - one at the top, one at the bottom.
Causes of malfunction
It is the ball joint that is responsible for the smooth passage of uneven areas. In a normal situation, the gap between the finger and the body is constant, and the finger rotates freely. When worn, it begins to wobble from side to side - the gaps increase, and sooner or later it may break. Constant driving on uneven roads can significantly shorten the life of the ball joint.
There are cases when even new parts broke. When driving, this joint experiences heavy loads, and if the wheel falls into a hole at high speed, the support can be torn out of its socket.
In a normal situation, the hinge is covered with a special boot. If the latter breaks, the support loses protection from external influences. If liquid gets on it, corrosion can begin, and if any solid particles get in, abrasive wear can occur.
Do I need to change
Inexperienced drivers often wonder: is it necessary to change? If you notice any of the indicated signs, you need to change it.
Symptoms of a problem
One of the main signs of failure is uneven tire wear. An experienced car enthusiast knows that in order to wear tires evenly, it is necessary to periodically change places - right to left, front to rear, but if the tire on one wheel “goes bald” noticeably faster, you need to check the ball joints of that wheel. Other signs of damage include:
- suspicious knocking in the wheel area;
- strange squeaks when turning;
- the wheel wobbles from side to side even when driving in a straight line;
- It became much more difficult to turn the steering wheel (on cars without power steering).
At the slightest suspicion, you need to check, since a breakdown of the support can even lead to the loss of a wheel, which will create an emergency situation on the road.
Diagnostics
You don't need any expensive equipment or a service station to check. Although it doesn’t hurt to contact the service, there are a couple more ways to check.
First way
- Jack up the car so that the front wheel hangs freely.
- Grab it firmly and start pumping. If there is a lot of play, the ball will have to be changed.
For the second method, you will need an inspection hole.
Second option
- Just like in the first method, they lift the car.
- Insert a pry bar or crowbar into the gap between the ball and suspension arm. Backlash, if there is any, can be noticed without difficulty.
A normal indicator is considered if the wheel remains motionless in both methods.
What will you need for replacement?
First of all, you need a ball joint remover for work.
Puller options in the photo
- spanner 17;
- socket wrench 19;
- wheel wrench;
- jack;
- mount;
It would be a good idea to call a friend who will hold the pry bar while you carry out other operations.
Options for choosing parts in the photo
How to change: step-by-step instructions
It's better to work in a pit.
Use a jack to lift the front of the car from the problem side. Unscrew the fastening nuts and remove the wheel. Unscrew the nut that secures the ball pin. Then remove the bolts located along the edges of the support - the fastening to the steering knuckle. Insert the puller and squeeze the finger out of the lever (see photo). Remove the support using a puller. If you don’t have a puller, you can use a hammer (see photo)
Holding your finger with the reinforcement, knock it out with a hammer. Ask a friend to carefully press the lower end of the lever with a pry bar. Removing the old part
They put a new one in its place and bolt it to the steering knuckle. Manually pointing your finger into the eyelet, ask a friend to slowly lower the lever. Secure the nut that secures the pin. Return the wheel to its place and lower the car.
The ball joint on modern Vases from 2108 to Granta also changes.
Video of replacement for VAZ 2110
The operation, which is often performed at a service station, can be done at home even by one car owner. But if you have a friend, the operation will take up to an hour, and the cost will be several times cheaper.
Price list for basic VAZ suspension repair work
Check with our managers by phone. They will be happy to answer all your questions.
The reasons for contacting the service center may be:
- extraneous sounds when the car is moving, such as knocking or grinding;
- vehicle vibration;
- large body roll when cornering;
- uneven wear of wheel tires.
Diagnostics of your car for suspension health will include checking the shock absorbers
tors, springs and struts, ball joints, CV joints, degree of wear of brake pads.
Diagnostics and repair of the VAZ front suspension, as well as repair of the VAZ rear suspension, is carried out at our car service center using special equipment. The car is located on a special stand, which provides unhindered access to all parts of the car. If during diagnostics malfunctions in the operation of the shock absorbers are discovered, they will be replaced, followed by wheel balancing.
Change ball joints on a viburnum with your own hands
Lada Priora Sedan Snezhka Logbook Replacing the support bearing
Hello. Today we’ll talk about how to replace ball and tie rod ends on a Lada Kalina with your own hands. Why ball and tie rod ends fail and how to diagnose their malfunction is written here
Before starting work, you need to prepare: a set of keys, a universal puller, a jack, WD-40 fluid, as well as new spare parts.
How to replace ball joints on a Lada Kalina - step-by-step instructions
1. Before starting work, apply a few drops of WD-40 to threaded connections that you think may have problems. They will be different for everyone, it all depends on the condition of the car, the roads on which it drives, and the attitude of the owner towards this car...
2. Unscrew the ball joints. There are two TORX bolts that are attached to the hub; for this we take an E12 head.
3. Afterwards, we proceed to the stabilizer strut, it must be unscrewed.
4. Bend down the lever with the ball joint.
5. Using a universal puller, press the ball joint out of the lever. If you don’t have a puller, you can use a crowbar, but in this case there is a high probability of damage to the CV joint boot if the crowbar comes off.
6. When the old ball is removed, take the new ball and attach it to the hub and lever.
7. Jack up the lever, using a jack to place it under the ball. This will compress the spring of the shock absorber strut and screw on the stabilizer bar.
Step-by-step instructions - how to replace tie rod ends on a Lada Kalina
- We unscrew the steering wheel in the direction opposite to replacing the steering tip.
- We remove the locking pin and unscrew the nut securing the tip to the stand.
- Now you need to “release” the tip mounting bolt.
- Using a puller, press the tip out of the stand. Some people use a hammer and simply knock out the tip.
- Next we unscrew the tip, this is done clockwise. If the adjusting sleeve starts to rotate, fix it using a wrench.
6
I draw your attention to the number of turns, it must be counted, this will save you from the need to go to a service station and do a wheel alignment
7. Assembly is performed in reverse order. If the car pulls to the side and the “trick” with counting the turns didn’t work, don’t be lazy and do a wheel alignment.
The result of the work done should be the disappearance of play and knocking, which are an integral part of chassis malfunctions.
That's all for me, thank you all for your attention, I hope everything worked out for you!? Until we meet again, take care of yourself and your car! Text belongs to: VAZ DIY repair
Text belongs to: VAZ DIY repair
L-shaped screw puller
Replacing the outer CV joint on a viburnum with your own hands.
What cars can this ball joint puller be used for? 2107, 2105 and 2106 - these are the VAZ cars for which it is best suited. The tool is quite versatile. To make it, you will need a metal rod - its diameter must be at least 10 mm, and its length - 15-17 cm. An L-shaped blank is made from this rod, the arm length of which must be at least 5 cm. So, take a rod, measure 5 cm on it, clamp it in a vice and bend it at a right angle. A thread is cut on the long part of the element. Find a suitable nut.
Now you need to make a thrust bar. It is made according to the wedge principle. A plate with a thickness of at least 5 mm is suitable for the workpiece. On one side of the plate a slot is made that fits the support pin. On the other hand, they make a hole for the diameter of the rod. Next, put the plate on the long part of the rod and clamp it with a hook.
Spherical bearing
Lada Kalina Hatchback MyLittleFriend Kalinich Logbook Floating speed or Replacing the idle air control
A ball joint is a connecting unit that secures the steering wheel hub and suspension arms. The unit fixes the position of the wheel, which allows the hub to rotate, which in turn determines the stable movement of the car.
The support is represented by a cone-shaped part with a movable spherical tip. Over the years, the supports have changed their design. At first these were stamped parts welded together.
Stamping was replaced by cast and then collapsible supports. In addition, the units come with grease nipples, serviceable and maintenance-free. Each type has its own design features and is suitable for a specific model.
A modern support of any type, including that installed on the Lada Kalina we are considering, has the following design:
- frame;
- a cone-shaped element, popularly called a “finger”;
- Anther protects the body from dust and moisture.
All these parts are usually made of steel, since they are in constant motion, friction and overheating. And only the recess of the support body is covered with a polymer material, most often plastic.
Replacement
- The first step is to soak the fasteners in WD-40 engine oil for a day to make the boiled parts easier to remove. It is advisable to do the impregnation twice, one and a half to two hours apart, and leave until the next day.
- Now we begin the most difficult dismantling work. Raise the front of the car and remove the wheel.
- Unscrew the fasteners holding the supports. There are only two bolts that can be removed with a 12mm wrench.
We dismantle the stabilizer strut.
To remove the supports, you must first bend the lever down a little. We arm ourselves with a puller and press the part out of the lever. An analogue of a puller can be an ordinary crowbar, which is likely to be found in every home of the real owner. But when pressing out the support, you need to be extremely careful: you can damage the boot, which is quite fragile, especially on the Lada Kalina. After dismantling, we install a new support and reassemble in the reverse order. Now we do the same with the rear supports.
Of course, repair work on the suspension is not as simple as, for example, replacing a steering rack or muffler, but if you use competent instructions and patience, everything will work out. We wish you good luck and good roads!
Let's sum it up
There are a number of features of operating the Lada Granta on Russian roads. For some reason, a domestic car is not very suitable for our roads; it crashes and fails instantly. Sometimes you come across a well-built car that doesn’t show any character after 100,000 kilometers. But in most cases, the Garnet justifies the title of the cheapest car in the Lada line. And when it comes to racks, the manufacturer saves a lot on these elements. The installation of low-quality suspension elements leads to the fact that more and more people, after purchasing Grants, repair it under warranty.
However, sometimes it is better to cancel the warranty and install normal racks, supports and other parts. In this case, you will ensure the normal service of your car’s suspension and will be able to establish normal operation of each unit. This will take a certain budget, but can provide you with comfortable movement without any particular difficulties or problems. Of course, even the best quality rack will eventually fail. But it can travel far beyond 100 thousand kilometers. What brands of spare parts do you choose to repair the suspension of your Lada Granta?
How to check a ball joint Several ways - useful information
- Drive the car onto an inspection hole or overpass. A flat surface is possible, but access to the bottom of the car is desirable;
- Squeeze the handbrake, turn on neutral speed, jam the rear wheels with special shoes;
- Jack up the left and right front wheels alternately, holding one hand at the top of the tire and the other at the bottom. With some effort, try to shake the wheel up and down. If you hear a slight knock and play, then it is necessary to urgently replace the ball joint. Otherwise, driving onto the highway is extremely dangerous. If there is no play, then you can proceed further.
- Natural wear and tear of vehicle chassis components;
- Exceeding the maximum permissible loads;
- Exposure to the negative effects of water, cold, dust, dirt due to damage to the protective boot on the ball joint;
- The actual absence of lubrication inside the product, which leads to a wedge.
- A characteristic and distinct knocking sound when driving over uneven surfaces and potholes;
- When turning the steering wheel, a grinding noise is heard and the force with which the turn is performed is increased;
- The car doesn't handle the road well. It feels like it's fluttering rather than moving;
- Uneven and rapid wear of car tires.
- Drive the car into the inspection pit of the garage;
- Putting on the handbrake, securing the rear wheels with shoes, you can turn on the first speed for reliability. Jack up the wheel;
- Some take off the wheels, some don't, depending on who you like. In principle they do not interfere;
- Armed with two keys on “17”, we unscrew the fastening of the ball joint to the spar. Just two bolts;
- For convenience, it is better to turn the steering wheel left or right. Using keys “14” we unscrew the support mount directly on the hub itself. Using a hammer and a wooden insert, carefully knock out the support itself from the saddle without damaging the brake hoses;
- Before installing a new one, you should walk a little with WD-40 liquid to remove rust. After wiping the socket with a dry cloth, lubricate it a little with Litol-24M graphite lubricant;
- Install the support and tighten the bolt. We do the same with the fastening;
- Then we move on to the second wheel or test the car on the track.
AutoFlit.ru
What can cause ball joints to become unusable?
There are only two factors that worsen the condition of ball joints, but both of them can be attributed to mechanical stress.
First
– this is dust and dirt that penetrates through a torn boot. When driving over uneven surfaces, the rubber boot that protects the unit's lubrication can easily be damaged. When dirt or moisture gets in, the lubrication properties deteriorate and sand gets into the smooth part of the hinge. After that, it gets scratched and starts to play.
Second factor
- These are shock loads. Although the product can withstand a wide range of impacts, it still has its limits. With frequent impacts and horizontal displacements, the product may break off or gaps may appear in the smooth part of the hinge. This also leads to backlash and subsequent destruction of the support.
Replacing a ball joint on a Lada Kalina
The instructions for carrying out work on the first generation Lada Kalina and the “two” are no different. This does not depend on the modification, for example, sedan, station wagon or hatchback (cross). You can do everything yourself. To do this you will need the following set of tools:
- wrenches or socket heads 17 and 19;
- TORX E12 head;
- special puller for ball joints.
You may also need a torque wrench to ensure optimal tightening of nuts and bolts, a pry bar, and a hammer to knock out the pin. As for the TORX E12 key, it can become useful when working with a ball joint on Kalina 2, where this fastener is used for fastening to the steering knuckle, and not a 17 bolt, as on Kalina 1st generation.
Rules for removing the ball joint
Before starting work, you should raise the parking brake lever all the way and use the jack to hang the desired wheel. The further process is as follows.
- Using a socket or a 19 mm wrench, unscrew the fastening nut, thanks to which the ball end is mounted on the wishbone.
- Use a special puller to remove the conical pin from its seat in the body.
- Using a 17 wrench (on Kalina 2, a TORX wrench), unscrew the fastening bolts that secure the ball to the hub knuckle.
- Using a pry bar, lower the lever lower. This will give you access to remove the ball joint.
To make the task easier, you can pre-treat the bolts and nuts with VD 40 or any similar liquid. This is true in some cases, but usually there are no problems with unscrewing nuts and bolts. If there is no puller for ball joints, you can remove the pin in another way:
- loosen the nut and leave it on the tip;
- Use a mounting spatula to press the lever from top to bottom;
- Use a hammer to knock the pin out of the body, thereby pressing it out of the seat.
If desired, the ball can be visually inspected and tested for compliance. To do this, the assembly is clamped in a vice. And with movements in different directions, the axial and other play of the finger in the socket is checked. The play should not exceed 0.7 mm; if there are large deviations in this indicator, the unit should be replaced; the ball joint cannot be repaired. If it is in order, but the rubber boot is damaged, you can only get by by replacing it. To do this, the support is dismantled and the boot is removed from it; before installing the cover, it should be filled with a suitable lubricant and fixed to the support.
Installing a new ball
Lubrication in the case will also be required for the other support; without lubricants, the unit will not last long. Installation is carried out in the reverse order of removal. To do this, you can use one of two methods.
- Install the support on the steering knuckle, then fix the lever and secure the nut to the tip.
- Install the assembly on the lever and only then bring them to the steering knuckle, then secure the structure with bolts.
In the case of using the second method, it should be borne in mind that there are some inconveniences due to difficulties in bringing the lever to the fist, therefore, if possible, it is better to prefer the first method. It is recommended to use a torque wrench to properly tighten the mounting nuts and bolts. Having installed a new support, you can operate the car as before. However, after an approximate mileage of about 100 km, it is imperative to check the tightening of all bolts and nuts. Then you can drive without any additional actions.
In general, replacing a ball joint on a Kalina can be done with your own hands, even by beginners. Contacting a car service is possible to save time, especially since it is inexpensive: usually no more than 250 rubles per side, not counting the cost of the unit.
DIY car suspension diagnostics
Suspension boots, bushings and silent blocks
| To determine the condition of the covers, you need to feel it with your hands. |
| These cases with deep cracks are not yet worn out, but their service life is almost running out. If you replace them now with new ones, then this cheap part will protect much more expensive ones from damage. |
| If the protruding edges of the rubber bushings of the rods, suspension arms or shock absorber eyes are cracked, then it makes sense to replace them |
| If the pin has moved from the center of the eyes to the edge, then the rubber bushing is badly worn or torn, so in this case only replacement with a new one is required. |
| To determine the wear of the silent blocks (these are rubber-metal hinges) of the suspension arms, you need to use a pry bar or a crowbar so that there is enough force to move the arm relative to the body. If there is play or a knock is heard, then it’s time to change the silent block. The same technique works for other hinges. In this case, the condition of the silent blocks cannot be determined with bare hands. |
xn--2111-43da1a8c.xn--p1ai
Changing the ball joint on a Lada Kalina photo and video
In the design of a car, the ball joint plays a very important role, since it bears all the load that the vehicle experiences
Also an important function is the level of inclination of the wheels. On the Lada Kalina, the factory ball joint is not very reliable, so many car enthusiasts replace the standard part with an analogue
Video on replacing a ball joint
The video material talks about replacing the ball joint of the Lada Kalina and the features of the process.
Ball joint replacement process
When you have decided on a spare part, you can carry out the replacement operation. So, let's look at the step-by-step process of changing the ball joint on Kalina:
- We dismantle the wheel.
The wheel has been removed! - We clean the ball joint and all surfaces that connect to it.
- Unscrew the fastening of the ball joints.
The ball mount is marked with an arrow. - The stabilizer link also needs to be unscrewed for easy replacement.
We unscrew the stabilizer mount for easy replacement of the Kalina ball joint - We bend the lever down.
- We take a special puller for balls and press it out of the lever seat.
- Installation is carried out in reverse order.
Using a jack, raise the lever and tighten the stabilizer mountInstalled a new ball joint on Kalina
Peculiarities
Consequences of untimely replacement of the ball joint
Harsh operating conditions, poor road surfaces, loads and passengers place a lot of stress and responsibility on the ball joint. Therefore, the condition of this node must be monitored regularly.
The entire load does not go to the ball joint itself, but to a small ball, which can fall out if worn out and worn out. If you remember, not so long ago you could see a Lada car on the road with a fallen ball joint.
Reasons for failure
There are several reasons why a ball joint may fall out. Let's consider the main ones:
- Wear.
The most common malfunction that occurs on cars. Inspecting the ball for wear - Insufficient lubrication in the boot leads to the fact that the finger begins to creak and may eventually simply break.
- The penetration of dirt and water into the ball contributes to the development of corrosion, which can affect the operation of the vehicle. At best, a wedge and the inability to turn the wheels; at worst, the car will fall onto the asphalt.
To avoid consequences, it is necessary to regularly diagnose and maintain ball joints.
Diagnostic operations
How can you diagnose the condition of ball joints on a Lada Kalina:
The first thing you need to pay attention to is the condition of the boot. If it has cracks or is torn, then it must be removed and the ball should be inspected.
We hang the wheel a little and swing it up and down with our hands. If there is play, then it’s time to replace the ball. The presence of a squeak, as well as heavy turning of the steering wheel, can also be signs that the ball joints are in critical condition. Instability in control, namely departure from the trajectory of movement to the left or right, with the steering wheel in a level position, indicates that the ball joint has failed.
It is almost impossible to determine the exact condition of the ball joint, but the above facts indirectly indicate the condition of the supports.
Ball selection, articles
The choice of ball joints for the Lada Kalina should be treated carefully, since it determines what loads the car can withstand:
Original
If you believe the spare parts catalog, then the original catalog number of the Lada Kalina ball joint is 2108-2904185. The average cost is 1000 rubles per piece.
Original Kalina ball joint produced by AvtoVAZ
Analogs
Belmag ball joint is an excellent option for replacing original spare parts
Let's consider possible options for replacing the original spare part:
| Weber | SS 2108-4185 | 500 |
| Master-sport | 1545601/E-PCS-MS | 500 |
| SCT | RM 485 | 500 |
| Denckermann | D110112 | 500 |
| Monroe | L70003 | 550 |
| Ruville | 917210 | 600 |
| Delphi | TC583 | 600 |
| Patron | PS3101 | 600 |
| Pekar | 2108-2904185 | 600 |
| Moog | LA-BJ-0063 | 650 |
| Pilenga | TS-P 3142 | 700 |
| TRW | JBJ 156 | 800 |
| Optimal | G3-199 | 1000 |
As you can see from the table, you can buy an analogue cheaper than the original. But don’t go to extremes and buy the cheapest.
TRW ball joint recommended for installation on Kalina
The process of replacing ball joints on the Lada Kalina is quite simple and easy
But, it is worth paying attention to the choice of part, since it depends on its quality how long and the quality it will hold the suspension
conclusions
The process of replacing ball joints on the Lada Kalina is quite simple and easy. But, it is worth paying attention to the choice of part, since how long and how well it will hold the suspension depends on its quality.
Sources
- https://zapchasti.expert/podveska/sharovaya-opora/sharovaya-opora-na-lada-kalina.html
- https://www.avtoall.ru/article/20981983/
- https://carfrance.ru/menyaem-sharovuyu-oporu-na-lada-kalina-svoimi-rukami/
- https://mylada.net/remont/zamena-sharovyx-opor-na-kaline.html
- https://ladakalinablog.ru/zamena-sharovyx-opor-svoimi-rukami/
Selection of ball joints for Lada Kalina
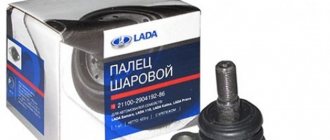
Its front suspension is not much different from previous VAZ models, for example, Priora, Samara, etc. The chassis of different generations of Kalina itself does not stand out fundamentally. On the first generation and on Lada Kalina cars of 2 different modifications, ball joints with catalog number 21100-2904192-82 are installed, and for supports with a set of fasteners, catalog number 21100-2904192-86.
The modern auto parts market offers customers different types of supports. The first are original (welded from several parts), and the second are stamped and reinforced. Structurally, all these hinges are arranged identically. The only differences are in the manufacturing technology and quality of the steel used, as well as its thickness. This determines the strength of the products, their durability and, of course, cost. In terms of size and principle of operation, they are no different from each other. From this we can conclude that the question of choice is not fundamental and depends on the personal preferences of the car owner.
Experienced car enthusiasts, as well as auto mechanics, recommend using exclusively original components. Only by choosing the original, you can be guaranteed to obtain the declared quality, reliability and long service life. However, as practice shows, original spare parts are sometimes much more expensive than analogues, so most car enthusiasts prefer to use the second option.
When choosing analogues, you need to approach the issue carefully and responsibly. You should not choose very cheap spare parts from an unknown manufacturer, and you should also not take components from markets, unknown points, or simply from your hands. Before purchasing, you should carefully inspect the components. There should be no visible welds on them; the surface should be gray, which indicates heat treatment of the part.
The components must have an emblem and a quality mark. As a rule, fakes do not have this.
Indirectly, quality is indicated by holograms on the case or packaging of components, as well as an additional set of fasteners. The cost of a ball joint for Kalina usually does not exceed 500 rubles. It's inexpensive, but it's worth considering that purchasing units for tuning can be significantly more expensive. For example, those from Pasker are valued tens of times higher.
How to choose the right one
Professionals say that it is better to give preference to original spare parts, since only they can guarantee impeccable quality, reliability and durability.
But this option is expensive, which is why a significant part of motorists pay attention to analogues of original spare parts
But here you need to be very careful: do not trust unknown manufacturing companies and do not buy components from unverified points on the market.
Before buying a product, it is necessary to conduct a thorough visual inspection: there should be no traces of welding on the body. Also, the parts should not undergo heat treatment, as can be seen from the dirty gray color of the surface.
But that’s not all: manufacturers of fakes sell products with a perfectly smooth surface, but! There is no emblem or quality mark here.
Quality can be determined by the hologram on the case and packaging in steel or red shades, with a mandatory set of fasteners.
The optimal price for VAZ supports is 500 rubles. True, not so expensive, but if you want to purchase tuning parts, then the price will be two zeros more - in the region of 20,000 to 48,000 rubles, from Pasker.
Replacing ball joints on Lada Kalina and tie rod ends
Ball joints, like tie rod ends, need to be replaced regularly. However, they are usually changed in cases of obvious symptoms. If knocking noises are heard from the front suspension, if the steering has become loose, excessive play and large free play - the problem is in the ball joints or steering ends.
Replacing ball joints is a theoretically simple operation, however, it requires patience and strength.
To replace ball joints yourself you will need:
- new parts
- jack
- universal puller
- a set of keys
- WD-40 penetrating fluid.
Before starting work, the car is put on the handbrake, jacked up, placed on supports and the wheel is removed.
The work of replacing ball joints on the Lada Kalina takes place in several stages
- Apply a small amount of WD-40 to problematic threaded connections.
- Unscrew the ball joint mounting (nut and two TORX bolts).
- Next, you need to unscrew the stabilizer link.
- Bend the lever with the ball joint down.
- The next step is to press the ball joint pin out of the lever using a universal puller. This will require a lot of effort.
- In place of the removed one, a new Kalina ball joint is installed and attached to the hub and lever.
- Using a jack, jack up the lever, placing it under the ball joint, which will help compress the spring and tighten the stabilizer link.
It is recommended to replace ball joints in pairs.
The work of replacing the tie rod end of the Lada Kalina takes place in several stages
- Turn the steering wheel all the way in the direction opposite to the tip being replaced.
- Remove the cotter pin and unscrew the nut securing the steering end to the strut.
- “Loosen” the tip mounting bolt.
- Using a puller, you need to press out the tip and disconnect it from the swing arm. Alternatively, you can insert a mounting spudger between the lever and the tip, press the tip away from the lever and press the tip out with a hammer.
- Unscrew the tip clockwise. In this case, it is necessary to count the number of revolutions made in order to screw the new steering end by the same number of revolutions. Thanks to this, there will be no need to do a wheel alignment.
- Secure the adjusting sleeve with a wrench if it starts to rotate when the tip is unscrewed.
- Installing a new tip and assembling the elements is performed in the reverse order.
- After finishing the work, be sure to check the wheel alignment angles and, if necessary, do a wheel alignment without delay.
The right tie rod end and the left tie rod end are not interchangeable.
