Required Tools
To carry out the work you will need:
- Socket wrench "22". It is the cap type, because the carob can “lick” the edges
- Metal brush. To clean the unit being repaired and its fastenings from dirt
- WD-40 or homemade penetrating liquid so that it can be easily unscrewed
- Socket wrench and socket set to “13”. One conveniently holds the bolts for fixing the supports to the levers, and the second one unscrews their nuts
- Crowbar, hammer, “adjustment” for an accurate blow
- Puller. You can replace the ball joints on a VAZ 2107 without a puller, but you will spend a lot of time and effort. I'll talk about this below.
Front suspension design of the VAZ 2107
The time-tested double wishbone suspension appeared much earlier than the McPherson swing plug. The double wishbone is objectively better than the racks in terms of geometry and controllability, stability and endurance. But it’s not for nothing that we started with the market. MacPherson is much cheaper. It is three times cheaper to produce the most profitable double wishbone suspension. That's why they put it on the front of very inexpensive cars. At the rear, MacPherson can be found in a Mercedes, Cadillac, or BMW - this is the number one suspension for expensive sevens. But it's not that.
Structurally, the double wishbone suspension holds the car much better when turning, has better control and is more stable in terms of directional stability. This happens due to a larger number of attachment points for the moving part of the suspension, if you don’t go into details. And the VAZ 2107 is an excellent example of how a strong and unpretentious design lasted on the assembly line for almost 50 years without any problems. This scheme is still used today and will continue to be used for a long time. Although the weak point in it is the ball joint.
Removing old ball joints from the car
Preparatory operations
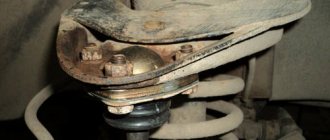
We take a metal brush and carefully clean the hinge nuts, the threads of the ball pins, the seats and the bolts that secure the supports to the suspension arms.
Soak with WD 40. Spray carefully so that the liquid does not get under the boot. Otherwise, during dismantling, the ball joint pin may rotate along with the nut. This will be a problem, but it can be solved, I’ll tell you about it later. We wait a few minutes for everything to sour. We begin to remove the old ball joint from the VAZ of the seventh model.
Dismantling
Let's start by replacing the lower ball joint. We are developing a nut. To do this, take a spanner wrench set to “22”. If you use a carob, you can “lick” the edges. If you tore it off, then we use an open-end wrench longer, because the cap wrench will not be able to be removed when you unscrew it all the way.
In most cases, this nut gets stuck and rusts. It takes a lot of effort to break it. Having torn it off, we walk it part way, unscrewing it and screwing it back so that part of the thread of the finger goes through, cleaning it.
You won't be able to unscrew it completely. Due to the design features of the steering knuckle on the VAZ 2101-07, it will rest against the bipod. Therefore, when dismantling the lower ball joint, you need to unscrew the nut as much as possible, as much as the design allows.
We take a puller and insert it between the fingers of the upper and lower support. We twist it until it rests against them with its edges. We continue to “tighten” it, but not to “useru”, so as not to break the thread on it. If it turns with great difficulty, stop. This force will be enough to press out the lower ball joint.
We have a hammer in our hands, it is advisable to take the adapter in the other hand to increase the accuracy of the blows. We rest one edge of it against the steering knuckle, there is a special protrusion there (shown in the photo below), and “hit” the other with a hammer. After several blows, the finger should “pop out” of the cone.
The rest is a matter of technique. We unscrew the nut completely, now there is enough space for full extension; if it still rests on the bipod, then use a pry bar to lower the lever down.
Important! We do not completely remove the hub from the lower ball pin; we will need it to press out the upper support.
And now the unpleasant moment. Once the finger has come out of the steering knuckle seat, there is nothing holding it. The nut has a fluoroplastic ring that secures it from unscrewing spontaneously. It can pull the finger along with it, and the nut will begin to spin with it.
This is a problem that I have encountered more than once. You can saw the nut or chop it with a chisel, which is what I did at the beginning of my journey as a car mechanic. This is “hemorrhoids”, a big waste of time and effort. With experience, I realized how to unscrew the lower ball joint nut if it rotates with the pin. I want to share this experience with you, but a little later.
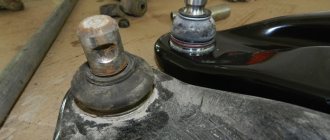
We soak the bolts securing the ball to the lever VD-40, having previously cleaned the dirt with a metal brush. We unscrew them with the key “13”. We use two keys, with one we hold the screw from turning, with the second we turn the nuts. We take out the old part from the groove.
Removing the upper support
To replace the upper ball joint, leave the hub on the lower pin. We carry out the preparatory operations mentioned above, “walking” the nut in different directions, gradually running it along the thread.
We unscrew it with the key to “22”. It is recommended to unscrew it completely; nothing will interfere. If this is not done, then after “knocking out” the support, the nut may spin along with the pin.
Place a brick under the lower arm and lower the car until it rests completely on it. Thus, fixing it. We insert the puller, unscrew it all the way and a little more, but not until your teeth creak. We need a “tension” to appear between the supports, sufficient to pull the upper ball out of the fist. We take the tip, a hammer and hit the ebb of the upper fist until it pops out.
We remove the hub from the fingers of both supports and put it aside so that it does not interfere.
Important! Do not damage the brake hoses, otherwise they will have to be changed; I described in detail how to do this in the article on how to change the front brake hoses on a VAZ.
We repeat the operations with fastening the upper hinge in the same way as its lower sister. We spray WD-40, take the keys to “13”, unscrew the bolts securing it to the lever.
Video on how to remove ball joints using a puller:
Checking status
You can check the condition of the support yourself. First you need to examine it carefully. If upon inspection it is discovered that the boot is damaged and there are cracks on it, then it is better to replace it immediately, even if the condition of the element is satisfactory.
It’s just that over time, more and more dust and sand will get inside, leading to intense wear, and eventually you will still have to replace it.
If the boot is intact, then the element will be checked for play. There are several ways to do this.
First way.
The simplest is to insert a pry bar on top of the lever near the support so that the end of the pry bar rests against the body or subframe.
Then rock the mount with force, creating shock loads on the lever. If the ball is worn out, you will hear a distinct knock.
Second way.
You can also jack up the wheel from which the knocking or squeaking sound is coming. Then ask an assistant to depress the brake pedal to block the wheel, and then rock it.
Significant wheel play will indicate wear of the element we are considering.
The most time-consuming check is to remove the ball joint and assess its condition. If the finger moves freely in the body, there is axial play - the part must be replaced.
You can, of course, carry out the test using special equipment or stands, although the simple diagnostic methods indicated above are often sufficient.
What to do if the lower support nut rotates with the pin
First way. We place a block or brick under the hub. We lower the car on a jack; there should be nothing under the lower arm. The car sits down until the hub is completely seated. When the jack is released lower, at this moment the trunnion warps relative to the lever. The ball pin is clamped like in a vice, this will be enough to unscrew the nut.
Second way. We insert the pry bar between the hub, shown in the photo below, and the edge of the lever, pulling it to the side, creating an artificial distortion. We do not put anything under it; it should hang freely in the air. As in the first case, the force to separate the two parts of the chassis should be enough; the hinge pin will jam in the cone of the steering knuckle. Unscrew the nut completely.
The third method is barbaric. Don’t want to bother with grinders and crowbars? Take a torch and heat the nut until the fluoroplastic ring melts. Once soft, it will not prevent unscrewing.
What to do if the upper ball joint nut rotates with the pin
Remove the hub from the lower pin. We pull it in our direction with our hand until it stops. We wedge the finger in the cone of the fist. It will be clamped, unscrew the nut completely.
Second option. We insert a pry bar between the pin and the edge of the lever. We are trying to move the pin away from the lever. We clamp the finger and unscrew the nut.
Video, if the nuts turn together with the ball pins, how to remove them:
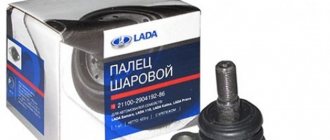
Features of choosing a new element
An important condition for a good service life of the ball joint of any car is not the correctness of its replacement, but the quality of workmanship.
Now the car market offers a large number of supports for all VAZ models from a wide variety of manufacturers, both famous and little-known.
Naturally, well-known companies producing spare parts are more preferable than unknown ones. The best are considered to be domestic manufacturers who supply spare parts to the manufacturing plant.
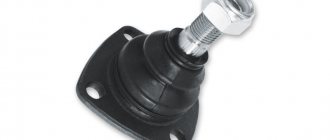
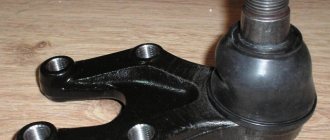
When choosing a ball joint, it is important to inspect it thoroughly. First of all, you should pay attention to your finger. It should be gray in color, indicating that it has been forged, and there should be no paint on its surface.
He must walk in the body with considerable effort. Its slight movement will indicate poor quality assembly.
You need to pay attention to the completeness. In addition to the support itself, the kit should include all fasteners and a boot.
How to replace ball joints without a puller
To press the ball joint pins out of the steering knuckle cones, you need to:
- Jack up the car under the beam, hang the wheel so that it and the lever “hang” in the air.
- Loosen the ball fastening nuts as described above
- We insert a pry bar, when replacing the lower ball joint, between the lever and the knuckle. We press it down, as if squeezing these two parts apart
- With the second hand we hit with a hammer with “bulging” eyes on the ebb of the fist, shown above in the screenshot. After some time, depending on the degree of souring of the ball pin in the cone, the pin will “fly out”
- For the top one we do the same. We insert the pry bar between the upper knuckle and the lever and hit it with a hammer until the ball joint pin pops out
The remaining operations are carried out according to the same scheme as replacement with a puller: preparation, cleaning, lubrication, etc.
Video - replacement without a puller:
Symptoms of a problem
The simplicity of the design provides the ball joint with sufficient reliability, but it also has its own service life, which depends on the operating conditions of the car.
Significant shock loads that occur when driving over uneven surfaces can quickly wear out this suspension element.
In general, the service life of a ball joint can vary from 15 to 150 thousand km, it all depends on the careful driving and the roads on which the car is driven.
With significant wear of this element, certain signs begin to appear indicating the need for replacement:
- Knocking from the suspension when driving over uneven surfaces;
- Car wobbles when driving;
- Uneven tire wear on wheels.
Increased effort on the steering wheel, additionally accompanied by creaking from the suspension;
These signs are a consequence of critical wear of the ball joint, accompanied by an increase in the gap inside the element.
If you do not carry out restoration work in a timely manner and continue to operate the car, this will ultimately lead to the pin popping out of the body - the hub will become disconnected from the suspension, the wheel will go sideways and the car will “land” on the body. As a result, repairs will be very expensive.
If signs indicating wear of the support appear, the condition should be checked to determine what caused the appearance - the ball or other suspension elements.
