Reasons why the Priora 16 valve engine is tripping. Nothing new
- Supply system;
- Ignition;
- Sensors
- The most common cause of 16 valves on a Priora is damage to the injector winding. You can check this by removing the cover and manifold. Then measure the resistance on the injector winding; it should be within 15-15 Ohms. If it is faulty, it should be replaced. Read more about how to do this in the article “How to check an injector nozzle”;
- Another reason is a clogged injector. This usually happens when using low-quality fuel. You can also “clog” these engine elements yourself by pouring various cleaners into the tank. They partially destroy sediments. Which, in the form of a suspension, enter the injector, where they get stuck in the nozzles. To fix the problem, you need to flush the injectors. You can do this yourself without removing them from the engine.
- First, let's visually evaluate the candle. It should be brown-sand color. If it is darker, then it may be faulty. It is advisable to check it on a special stand. The spark should be blue and white. If it is yellow or red, then this is a bad sign. You can, of course, try to clean it with sandpaper, but this may not bring the desired effect;
- Try using another spark plug and check how the engine runs. If everything returns to normal, then the cause has been found. Also check the high voltage wire;
- After this, check the ignition coil. It is the weakest ignition part in the Priora. To check, we reset errors from the ECU. And with the ignition off, they swap the supposedly non-working ignition coil with the obviously working one. The engine starts for a couple of minutes. The diagnosis is repeated. If the flash miss “migrated” along with the coil, the problem is in it. Replace it with a new one.
AutoFlit.ru
Siemens Deka injectors
Lada Priora Station wagon quartz from Morsha Logbook Replacing the heater fan on a Priora without air conditioning
There is no certainty with Siemens injectors, since the plant can install injectors of different markings on the same engine. However, there is a clear difference between the injectors for eight-valve and 16-valve engines.
In the first case, the nozzle
single-flare, in the second - double-flare, that is, it sprays fuel onto each of the intake valves separately.
They are marked as VAZ20734 (orange markings) and 20735 (blue markings). On eight-valve engines, a Siemens 6393 nozzle with a thick torch can be used. Its productivity is 1.662 mg/sec, and the operating pressure is 3 atm. Each of these injectors can be installed on a VAZ-2114 engine.
This video was processed in YouTube Video Editor ()
Several cleaning methods
Experienced drivers know that there are several ways to clean injectors on a Lada Priora. Moreover, each of them has both its pros and cons.
The first option is to use a detergent additive - the liquid is added to gasoline and, after entering the gas tank, it enters the injectors. Usually one bottle of the additive (0.5 l) is enough for a whole tank of fuel. In this case, absolutely all parts of the fuel system are washed. However, the disadvantage of this method is the lack of drainage of dirt - it will remain in the system.
When to change: self-diagnosis
Lada Priora Sedan 16kl Kvartsukha Logbook REPLACING THE FUEL FILTER
The fuel system of an injection engine has a fairly extensive architecture and faults can only be identified after an accurate diagnosis of each of the system elements. For example, a drop in engine power may be the result of either a malfunction of the injectors, insufficient performance of the fuel pump or a clogged fuel filter.
In addition, jerks and dips, unstable idle and difficult starting, increased consumption, can occur when the injector is simply clogged.
You can check the injectors themselves directly on the engine without removing them. To do this, just start the engine and remove the wires from the connector one by one. If the stability of the engine changes in this case, the engine begins to trip, then the injector
in order. If, when removing the wires from the connector, the stability of the motor does not change, the injector needs to be cleaned or replaced.
Purification process
Cleaning the nozzles itself should be done on a clean surface - for this you can cover the working surface with a piece of cloth.
Prepare a hose and a can for cleaning the carburetor. To flush, secure a plastic hose clamp at the inlet of the nozzle (make sure the length is at least 20 cm). The nozzle will need to be turned on, and the end of the hose itself will need to be lowered into the liquid that is used to flush the carburetor. Cleaning can be carried out by any of the proposed ones - RunWay, Liqui Moly or Hi-Gear.
You need to watch how the torch changes: it will expand or contract - it all depends on how dirty everything is. Once the jet stops changing, cleaning should also be completed.
But there is no need to add cleaning additives advertised on the market to the fuel: it very often happens that they harm the engine. The acidified dirt itself after such cleaning can create a blockage that will prevent normal access to the fuel-air mixture. Otherwise, fuel access may be blocked.
Replacing injectors (full technology)
Lada Priora Station Wagon Logbook Towbar and roof rack
Before replacing injectors on a VAZ-2114 of any generation, it is necessary to relieve the pressure in the power system.
To do this, remove the rear seat cushion, open the hatch and remove the contact block from the fuel pump. Now it is de-energized and will not build up pressure.
We start the engine and wait a few minutes until all the fuel in the system is used up. As a matter of fact, I’m interested in which spark plugs are best for Lanos 1.5, I take spark plugs seriously. The car drives every day, 5 thousand a month, so I want it to always start with a half turn and. The pressure has been relieved, now you can safely remove the old injectors and replace them with new ones. We proceed according to the following algorithm:
- We de-energize the car by removing the negative terminal from the battery.
Disconnect the negative terminal from the battery
Remove the hose from the pressure regulator
Disconnect the electrical connector of the throttle position sensor
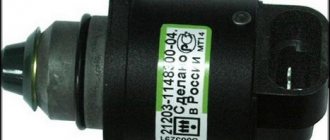
Disconnect the connector from the idle air regulator
Disconnect the connector block from the injector wires
Unscrew the fuel rail mounting bolts
We dismantle the fuel rail with injectors
Squeeze the spring clip and disconnect the electrical connector of the injector.
Rock the injector and remove it from the fuel rail.
Installation of injectors is carried out in the reverse order. Before installation, it is advisable to check the integrity of the O-rings; if they have lost their elasticity, it is better to replace them with new ones. The injectors are installed and ready for further use. Good luck to everyone!
Dismantling
How to remove a torpedo on a Priora
Before replacing or cleaning the injectors, they will need to be removed from the fuel rail. To achieve this, the following activities are carried out:
- Make sure the engine has cooled down properly. It is not safe to work on a hot engine;
- Disconnect the power wires from the fuel pump to de-energize the device;
- Try to reduce the pressure in the engine power system as much as possible. To do this, the engine starts, and then you need to wait until it stalls at idle speed;
- Repeat this procedure several times until the car simply stops responding to turns of the ignition key;
- That's it, now our goal is the fuel rail. To remove it, you must first remove the terminals from the battery, turn off the power to the ramp itself, disconnect the fuel supply hoses, and also disconnect all electrical appliances going to it. These are pressure, idle, throttle position sensors;
- If you have an 8-valve engine, then you do not need to remove the receiver. This step is relevant for engines with 16 valves;
- Experts do not recommend removing the intake manifold without dismantling the throttle valve and the hose going to it. It is better to unscrew and disconnect everything at once, which will allow you to continue working more conveniently;
- Cover the exhaust manifold openings with something to protect them from foreign objects;
- Using a hex wrench, you can unscrew a couple of bolts and remove the fuel rail along with the injectors;
- Make sure that there are no distortions when removing the ramp, otherwise problems may arise with the dismantling processes;
- We remove the injectors. To do this, remove the mounting brackets that hold the electrical connector. You also need to remove the bracket that holds the injector in its seat.
After dismantling the elements, be sure to close the seats to prevent debris and other objects from getting in, and place the nozzles themselves on a table or floor, after laying down a dry rag.
Here you can decide whether to change or clean the elements of the fuel system. If replacement is required, install new injectors in place of the old ones and follow the assembly procedure.
Cleaning
Here proceed as follows.
- Remove the rubber rings from the injectors, and when cleaning is finished, replace them with new seals.
- The cleaning process should begin with the nozzles, on which various deposits form as the car is used.
- Be sure to thoroughly clean the funnel-shaped surfaces where tar deposits accumulate.
- The next step is the fuel mixture supply channels.
- To open the solenoid valve to supply fuel, you will have to trick the device with a 5-7 V power supply.
- Some use stabilized voltage sources, phone chargers, or even a car battery. If using a battery, the voltage should be supplied through the light bulb. It will play the role of a current damper. Otherwise you risk burning the winding.
- Electricity is supplied through two wires, in the gap of one of which a button is installed. It will close and open the network. This creates an imitation of the operation of an injector in an engine due to the influence of a pulsed electric charge.
- You can supply the cleaning liquid to clean the injectors through a can of carburetor cleaner. Inexpensive and effective, even better than specialized chemicals.
- Be sure to tightly connect the cylinder and nozzle with a rubber tube, clamps and any other means.
- All is ready? You can then apply electricity to open the injector. At the same time, press the button on the cleaning agent canister.
- Soon the torch of the liquid jet, which will exit through the fuel atomizer of the injector, will change its “clumsy” direction and will begin to uniformly exit the nozzle. This indicates that you have removed all carbon deposits.
Auto diagnostics - Prices for work
Replacing the heater motor for VAZ 2110, 2111, 2112 1500 rubles
Replacement of engine compartment wiring harnesses for VAZ 2108, 2109 (without injection wiring) 2000 rubles
Replacement of torpedo electrical wiring together with the mounting block on a VAZ Kalina 5,000 rubles
Replacement of idle speed control VAZ, GAZ 300 rubles
Replacing the heater rheostat VAZ 2109, 21015
300 rubles
Replacing the rheostat of the VAZ 2110 heater 1000 rubles
Replacement of spark plugs (four) 200 rubles
Replacement of fuel injectors on a 4-cylinder engine 1500 rubles
Replacement of electric fuel pump on VAZ cars 1000 rubles
Replacement of electric radiator cooling fan VAZ, GAZ 800 rubles
Replacement and repair of electric windshield wipers on VAZ 2110, 2111, 2112 1500 rubles
Replacement and repair of electric windshield wipers on VAZ 2109, 2108, 2114, 2115
1000 rubles
Replacement of temperature sensor VAZ, GAZ 300 rubles
Computer diagnostics of Cevrolet, Daewoo 800 rubles
Computer diagnostics GAZ 600 rubles
Computer diagnostics of Peugeot electronic systems 900 rubles
Reprogramming (chip tuning) of the control unit “Mikas 11 ET” for GAZ cars, Euro-3 system 2500 rubles
Repair of the electrical heating system, replacement of stepper motor gearboxes on VAZ 2110, 2111, 2112 1500 rubles
Repair, setup, adjustment of mechanical injection systems (injectors K, KE-jetronik) 5000 rubles
Removing the fuel rail for repair or replacement of injectors on VAZ cars with 16-valve engines 2000 rubles
Removal and installation of fuel rail injectors, for replacement or repair of injectors on VAZ cars with 8-valve engines (except classics) 1200 rubles
Removing/installing the battery 200 rubles
Removal/installation of mounting block VAZ 2109, 21015 500 rubles
Installation of radio tape recorder 600 rubles
Installation of the activator in one door VAZ 2109, 2110 1000 rubles
Installation of two electric windows together with electrical wiring and buttons 3000 rubles
Installation of rear speakers, with wiring (including cutting out holes for speakers in the shelf) 1,500 rubles
Installation of immobilizers (immobilizer together with installation) 4000 rubles
Installation of parking sensors 4000 rubles
Installation of alarms without auto start and pager (the price includes the alarm and its installation) 5,000 rubles
Installation of alarms with auto start and pager (price includes alarm and installation)
7000 rubles
Chip tuning Renault 4000 rubles
Chip tuning of “Classic” cars (rear-wheel drive) with control units M 73 2500 rubles
Chip tuning of “Classic” cars (rear wheel drive) and Bosch 7.9.7+ unit 2500 rubles
Chip tuning of VAZ Lada “Samara” 1.6 and 1.5 cars with Bosch control unit 7.9.7+ 2500 rubles
Chip tuning of VAZ cars with control unit “January” 5.1, 5.1.1 and VS 2000 rubles
Chip tuning of GAZ cars Euro-3 system 16-valve ZMZ engine, with Mikas 11 ET control unit (electronic throttle)
2500 rubles
Chip tuning of Lada Kalina cars with Bosch 7.9.7+ control unit (16 and 8 valve engines 1.4 and 1.6) 2500 rubles
Chip tuning of Lada "Kalina" cars with control unit M 73 (16 and 8 valve engines) 2500 rubles
Chip tuning of Lada Priora cars with M73 control unit 2500 rubles
Chip tuning of Lada Priora cars with Bosch control unit 7.9.7+ 2500 rubles
Chip tuning of Lada Priora 1.8 cars 2500 rubles
Chip tuning of M 73 blocks 2500 rubles
Chip tuning of injection VAZ cars with control unit “January” 7.2 2000 rubles
Troubleshooting injector problems
First you should try to wash the Priora injectors. There are three methods for this procedure:
- Flushing during operation.
- Hardware flushing method, without removing it from the Priora engine.
- Ultrasonic cleaning in a special machine.
The most affordable and easiest way is to clean the Priora injectors yourself. This is done by pouring a special liquid into the tank. They are available for sale in a sufficient variety. The most popular of them are the following drugs:
- German "Liqui Molly".
- US "High Gear"
- Russian "Laurel".
To rinse, it is enough to pour liquid into the tank at the time of refueling, according to the instructions on the bottle. And drive quietly until all the fuel is used up. After this, replace the spark plugs.
Important! This operation is more likely not a repair, but a preventative measure for the Priora. It is advisable to carry it out every 30,000 kilometers.
Then it will be effective.
The other two methods require special equipment and can only be carried out in a service station. Washing the injectors, without removing them from the Priora, is carried out by connecting a special container to the engine fuel frame. The electric fuel pump turns off. The fuel line fitting is disconnected from the frame and the flushing tank is connected. It contains a mixture of gasoline and washing liquid under pressure. The Priora engine starts and runs until the mixture is completely exhausted. After which, the Priora spark plugs are also replaced.
Cleaning injectors using ultrasound
To do this, you will have to remove the injectors from the Priora engine. The operation is performed on a special stand or in an ultrasonic bath. Such equipment costs quite a lot, and not every car service center can afford it. Moreover, it is a risky operation. Sometimes, instead of putting the injectors in order, ultrasonic treatment, on the contrary, completely disables the components
Therefore, you need to treat this process with great caution
But in any case, the injectors, as when replacing, will have to be dismantled. How to do it?
Removing injectors for cleaning or replacement
This is a serious process that requires attention and patience. To bring it to life you will need:
- Screwdrivers.
- Pliers.
- Head keys for 13 and 10.
- 5mm hex key.
- 2 wrenches for 17.
- Mount.
First of all, of course, the Priora battery is turned off. After this, the connectors are removed from the ignition coils. Using a 10mm wrench, unscrew the fastening bolts and remove the coils. Using a 13mm socket, unscrew the 5 bolts and nuts that secure the intake receiver to the head. Using keys 17, disconnect the fuel line from the pipe going to the injector frame. Using a screwdriver, unscrew the fastener of this pipe to the block head. Unscrew the fasteners and remove the dipstick tube. After removing the clamp, move the rubber pipe from the crankcase to the head. Unscrew and remove the 10mm nuts holding the incoming air air receiver on top. Remove the air filter housing. Using a hexagon, unscrew the two bolts securing the fuel frame. Pull the receiver toward you (towards the radiator) by 3-5 centimeters without removing it completely. Disconnect the injector harness connector. Using a pry bar, carefully pry it up and pull it out of the nozzle holes.
Important! Ensure that the injector sealing rings are intact. Try not to drop it. After this it becomes possible to pull the fuel frame towards the battery
Transfer it to the table and start removing the nozzles. This is no longer difficult. Disconnect the wiring harness from each, remove the fixing bracket from the frame and remove the “injector” from the socket. All. You can install a new one or give the old one for washing. And put everything back together in reverse order. Start and check the effectiveness of replacement or flushing
After this, it becomes possible to pull the fuel frame towards the battery. Transfer it to the table and start removing the nozzles. This is no longer difficult. Disconnect the wiring harness from each, remove the fixing bracket from the frame and remove the “injector” from the socket. All. You can install a new one or give the old one for washing. And put everything back together in reverse order. Start and check the effectiveness of replacement or flushing.
There is a useful video for viewing on the topic, removing injectors on a Priora:
- How to change the fuel filter on a Priora
- How to change the cabin filter of Lada-Vesta
- How to change spark plugs on a Priora
- How to revive car wipers
Do-it-yourself injector cleaning - VAZAuto
Cleaning injectors with your own hands is a very simple process that must be done for prevention, since the “excellent” quality of our fuel quickly contaminates the injectors.
This article will describe a simple method for cleaning (rinsing) injectors.
You can easily determine when it’s time to clean the injectors on your own.
You just need to pay attention to whether symptoms of “dirty” injectors have appeared on your car
Probably one of the most basic symptoms is a decrease in engine power and reaction speed. The next symptoms are engine detonation.
Engine detonation is a process of spontaneous ignition of the combustible mixture in the cylinders, which has the nature of a blast wave.
Most likely, your car will have an unstable idle, possibly difficult starting when hot, and increased exhaust emissions.
These symptoms apply to injectors, provided that the remaining components and assemblies of the car are in good working order.
Injectors can be cleaned by removing them from the engine (ramp) or without removing them. The option without removing the injectors is easier, but in this case it is impossible to determine the quality of cleaning the injectors.
If washing will be carried out with dismantling the injectors, then it is necessary to replace the sealing rings.
There are several ways to clean injectors yourself.
The simplest thing is to add special liquids to the fuel tank.
Using products that are produced by almost all auto chemical manufacturers, you can clean everything from the gas tank to the injectors. But you need to take into account that you risk clogging the injectors even more with the washed dirt. This method will be effective if the fuel line is relatively clean and should be used as a preventive measure.
Injectors removed from the engine are cleaned using special compounds that are passed through the injector. This method is not complicated and can be easily implemented in the garage.
1. We will need to remove the injectors from the engine. This is done slightly differently on different cars.
2. Prepare a “device” for washing the injectors.
We will need a can of liquid for cleaning injectors or carburetor, a syringe (5 ml) and any container.
3. Now you need to connect the injector to the power supply to simulate engine operation.
Cleaning the injector with your own hands occurs when a voltage of 12 V is supplied to the injector, and in order not to burn the injector, we need to connect a 12 volt light bulb to the “+” gap of the injector wire. We need a switch to briefly supply voltage to the injector.
4. The circuit has been assembled, now you can start washing the injectors yourself.
5. Pump up the pressure into the syringe (by spraying from the can a couple of times) and briefly apply 12 volts to the nozzle.
6. Continue until the liquid spray becomes uniform.
7.Assemble everything in reverse order, not forgetting to install new O-rings.
Good luck to everyone on the roads.
My blog is found using the following phrases
to your website.
xn--80aaecx8b1a.xn--p1ai
When to change self-diagnosis
The fuel system of an injection engine has a fairly extensive architecture and faults can only be identified after an accurate diagnosis of each of the system elements. For example, a drop in engine power may be the result of either a malfunction of the injectors, insufficient performance of the fuel pump or a clogged fuel filter.
In addition, jerks and dips, unstable idle and difficult starting, increased consumption, can occur when the injector is simply clogged.
You can check the injectors themselves directly on the engine without removing them. To do this, just start the engine and remove the wires from the connector one by one. If the stability of the engine changes in this case, the engine begins to trip, then the injector
in order. If, when removing the wires from the connector, the stability of the motor does not change, the injector needs to be cleaned or replaced.
Car injector failure
The main reason for failure or wear of any fuel injector is contamination of the fuel system. The second aggressor is corrosion - it happens when there is moisture in the fuel. If particles as small as 0.01 mm (10 microns) are present in the fuel, this can also cause the injector to fail.
Cleaning injectors is an unavoidable task. Most often, they will need flushing by 40,000 km (in some cases this happens even earlier). Moreover, you can even do this on your own.
How to check for faults
The car owner can independently check the performance of the injectors on his car. The procedure is quite simple and does not require special training or expensive equipment. In garage conditions, diagnostics can be performed with a set of open-end wrenches, screwdrivers and a tester with a resistance measurement mode.
Reasons indicating problems
Diagnostics must be performed not after any period of operation or mileage has expired, but in the presence of external manifestations of injector failures. In cases where other vehicle systems are operating normally, the following indicators indicate problems with the injection solenoid valves:
at idle there is instability in engine speed;
starting the engine is difficult - the engine may stall;
when overclocking it is impossible to achieve the same dynamics;
The amount of fuel consumed has noticeably increased.
Unclip the plastic clips that secure the valve's power cable. Remove the connector.
Switch the tester to resistance measurement mode and take measurements of the windings of each of the injectors in turn. That is, you need to apply one contact of the tester to each of the five terminals, and the second one to the fifth wire for power.
Optimal resistance values in all cases should be in the range of 11–15 ohms. If at least one pin shows deviations, it will be necessary to change the nozzle.
Communication, commercial requests Help channel: PrivatBank 5168 7556 3188 1725, WMZ.
Cleaning procedure
Cleaning injectors can provide the car owner with the following benefits:
- restoring the original functionality of the device;
- reduction of fuel consumption;
- optimization of motor operation.
That is, in case of contamination (use of low-quality fuel), it is possible to flush and clean the valves in order to restore them to functionality.
Open the hood and make sure all vehicle systems are working properly
What injectors are installed on Priora cars
Injectors are an indispensable element in the operation of any power unit with continuous injection. Structurally, they are electromagnetic valves, which, when opening, ensure the supply (injection) of fuel in the required volume into the engine cylinders. At the same time, the main purpose of the part is to save fuel, so the valve opens at regular intervals, depending on the driving mode.
Have a red body
On "Priors" equipped with an injection type engine, imported injectors are installed. Products manufactured by Bosch and Siemens are characterized by a high degree of reliability and wear resistance. Their service life is determined by a mileage of 100–150, after which it is recommended to change them.
Usually available in black
Differences between injectors for 8 and 16 valve engines
Various modifications of Priora are equipped with parts of the same model. There are no differences for 8 and 16 valve power units. The only thing is that you should be careful when selecting injectors for engines of different sizes: for example, for a 1.5 engine, spare parts will differ in markings, color and thickness from those for a 1.6.
It is recommended to choose materials from the same manufacturer that were equipped with the car at the factory.
Injector works perfectly
Perfect combustion of fuel can only be achieved if the injector is fully operational. Translated from English, it is called a motor pump.
To understand how to properly clean, you need to know the operating principles of the mechanism itself. This part is based on one or two channels. The first will receive the sprayed liquid, the second will receive the same steam or gas, which will spray the first liquid. The torch will burn continuously and evenly if the nozzle is of high quality and clean. In gasoline engines like the Lada Priora, an electromagnetic injector is usually used. It is a simple device that operates using an electronic control unit - at the right time it is required to supply voltage to the valve excitation winding. Thus, an electromagnetic field will be created: it will retract the valve with the needle and release the nozzle. The fuel will inject, the voltage will disappear and the needle will return to the seat.
Injector malfunctions
Among the most common causes of injector failure may be the following:
- The injector nozzle is coked - in this case, increased fuel consumption may be observed, vehicle dynamics will decrease, and engine starting will be difficult at subzero ambient temperatures. Otherwise there are no differences.
- The injector valve does not close hermetically (“the injector is snotty” - note) - here there may be increased fuel consumption, “tripleting” and increased detonation (about checking the knock sensor here), unstable idling.
- Valve sticking - engine troubles. Replacing the timing belt on a Priora 16-valve engine is a little more complicated than on 8-valve engines, however, this procedure is necessary. In order to diagnose it, with the engine running, turn off the power supply to each injector in turn. How to change bearings on a generator in a VAZ 2110, replacing its bearings will be for you. With a non-working injector, no changes in engine operation will be observed, but with a working injector, the speed will drop.
If you find a non-working injector on your car, or they need cleaning, you need to know how to properly dismantle them. Replacing valves on a VAZ-2112 with 16 valves with your own. You could already read more about this above.
A problem arose - the injector nozzle was coked - we repaired it ourselves, thank you very much to the author of the article. When replacing, we found the same ones, plus we bought several o-rings at the car market, they cost pennies. The repair was very inexpensive!
I couldn’t understand what it was? I filled the tank, but it was eating like crazy. I dug around and couldn’t figure it out until I was advised to look for information on the internet. It’s good that smart people write and show how to understand and deal with the problem. I looked, listened and I figured it out myself - the injectors were snotty, changed it and that’s it... the problem disappeared. I didn’t have to spend any money!
Before going to the service station I read your article, now I’ll try to disassemble and wash it myself. It turned out to be easier than I expected. Timing belt Correct belt replacement. VAZ 2110 and 2111. -. Replacing the cylinder head gasket on a VAZ 2110 (8 and 16 valves. Thanks to the author.
Diagnostics of spark plugs by plaque
When the engine starts cold or hot, you can check the carbon deposits on the spark plugs. If the coating is white, then this indicates a lean mixture and overheating of the engine. A black tint indicates a rich mixture. In both the first and second cases there are problems with the operation of the electronics. This is either installing new firmware, or replacing the ECU. A normal candle has a brick color. By the way, the engine may stall at idle if the part is damp. This also significantly increases the warm-up time. In addition to the spark plugs, the ignition coil may also be acting up. Priora (8 valves) is equipped with distributor ignition. Overheating of the coil is often observed. You can restore the operation of the motor by simply replacing the element.
BOSCH injectors
Their use depends on the engine size and the number of valves. There is no particular variety in VAZ-2114 engines, so there are only the following options:
- Nozzle BOSCH 0280 158 022 The nozzle is marked black, has a productivity of 1.9644 mg/sec, operates under a standard pressure of 3.8 atmospheres. Installed on a 1600 cc engine with 16 valves. Works with January 7.2 controller.
BOSCH nozzle: productivity 1.9644 mg/sec
BOSCH nozzle: productivity 1.922 mg/sec
New injector
may have a thicker O-ring and, accordingly, a longer nozzle. The injectors are completely interchangeable. These injectors can only work with the January 5.1 controller.
In addition, you need to know which engine control controller is installed on the car, since January 5.1 and January 7.2 may require injectors of different capacities.
Important nuances
There are a few things to keep in mind when cleaning your injectors. Here they are:
- You cannot save on flushing fluid. The injector is a very important part of the engine. And it is extremely sensitive to the quality of the flushing fluid. The optimal choice for washing Priora injectors is a product from Wynns, developed specifically for injection engines. The cost of a liter bottle is 700 rubles;
Flushing fluid from Wynns is the best option for Priora injectors
The plastic bottle must be removed carefully after washing the Priora injectors.
Replacing injectors is a long procedure. Nevertheless, it is quite within the power of a novice driver if he has at least a vague understanding of the structure of an injection engine. When cleaning the injectors, the situation is much simpler: you just need to be able to use a drill and know where the main fuel hose is located.
About the design of Priora injectors
It was these components that gave the common name to the type of car with an ECM. None of the drivers wants to pronounce the full name. They say simply - an injector. So what is a nozzle (injector)? This is a device that allows you to inject fuel, under pressure, directly into the working chamber of the cylinder in strictly metered portions.
The principle of operation of Priora injectors is based on the electromagnetic effect. When the circuit is closed, the coil retracts the core, which opens the channel for supplying fuel accumulated in the fuel frame under pressure. The opening signal comes from the electronic control unit (ECU). The nozzle consists of the following parts:
- Frame.
- Coil.
- Fuel cleaning mesh.
- Nozzle with holes (diffuser).
Main problems of injectors
Malfunctions of these important components of the Lada Priora car can be divided into two categories:
- Electrical part.
- Mechanical component.
The first option includes damage to the coil or connector. A break or interturn short circuit may occur in the coil. One or both contacts in the connector may break. Over time or from an impact they break off. In any case, such a nozzle requires replacement.
Mechanical malfunctions of Priora injectors include various changes in the diameter of the fuel supply channel. Most often with Priora, this is contamination caused by the settling of foreign particles on the walls of the channel and in the diffuser. Or corrosion (increase) in diameter under the influence of additives. Although this happens extremely rarely at Priora. With an increase, there are no options other than replacement. But if they become dirty, you can wash the nozzles. About replacement and flushing, about identifying a breakdown, further.
Important! Contamination of the contact area of the shutter needle can also cause incomplete closure and fuel leakage.
Symptoms of malfunction and diagnosis of injectors
"Priora" begins to "triple". The engine shakes at idle. When driving, loss of power and failure to gain speed. The “Check Anger” lamp gives a signal. This means that one of the cylinders is not working as expected. First of all, you need to do computer diagnostics and count the errors. The ECU detects faults in the electrical part immediately. Otherwise, it gives at least an accurate orientation to the inoperative cylinder. And then all that remains is to determine what failed:
- Candle with coil.
- Compression in the cylinder.
- Nozzle.
Knowing which of the “boilers” is not working makes it easier to act. The first thing to do is measure the compression. On a cold engine. If it is within the normal range, move on to candles. First, swap the coils on the Priora engine. If the leaks are again in the same cylinder, swap the spark plugs. Here you go. Nothing has changed. So this is an injector.
Attention! The nature of the malfunction can be indicated by the spark plug! If it is clean, then fuel is not flowing. But blackening and deposits on the electrodes indicate that the nozzle “does not hold” fuel and “floods” the spark plug.
The main causes of injector contamination.
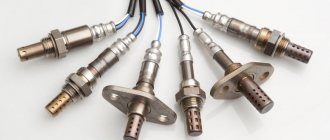
Oxygen sensor on a 16-valve VAZ-2112 engine: signs of malfunction
The main, but far from the only reason for clogging of the injectors of an injection engine, is undoubtedly the quality of the fuel. In Western Europe, almost no one cleans injectors; manufacturers only recommend changing them after 120-150 thousand kilometers.
But the injectors of cars that are operated in the territory of the former USSR have to be cleaned every 15 - 30 thousand kilometers. There is only one reason for the poor quality of fuel - the desire to receive excess profits from the sale of fuel and lubricants. As a result:
- Insufficient capacity for the production of A-92 and A-95 gasoline, but A-98 at domestic gas stations is in most cases a myth and a cunning marketing ploy - nothing more;
- Violation of fuel storage conditions. Often, the same tanks are used to store gasoline A-76, A-80, A-92, A-95, A-98, in which various tar deposits accumulate over the years of operation, dissolved by fuel with a higher octane number. As a result, tar deposits are washed into the tanks of our cars, leading to failure of the fuel system;
- The use of manganese-containing additives in the production of fuel, which increase anti-knock resistance. These are so-called anti-knock agents, which allow you to turn low-octane gasoline into high-octane gasoline with a slight movement of the hand. For example, an A-80 can “by magic” become an A-95, and there will be no detonation and its consequences as such. The additives, in turn, cause increased wear of the spark plugs and accelerated contamination of the fuel filter with fine brick-colored particles.
All these reasons lead to the need to replace spark plugs, clean the injector, and in some cases even overhaul the engine.
How to check the operation of injectors on a Lada Priora, the procedure for replacing and washing
Owners of Russian Lada Priora cars note the build quality and reliability of the car parts. But most of the comments and questions from car owners concern the maintenance of the engine and fuel systems. The most important role in the dynamics of a fuel-injected car is played by injectors, which provide fuel injection into the engine cylinders. They often require cleaning or replacement.
Supply system
If the Priora engine (16 valves) is tripping, the reasons may be trivial. When there is no flash in the cylinder, perhaps there is simply no fuel there. If it has a normal compression ratio, it is worth diagnosing the power system. You should pay maximum attention to the air filter and the pipe. It is necessary to make sure that the clamps are securely tightened, whether the purifier body itself is intact, and whether there is any air leakage from the outside
Also pay attention to the tubes. They must be tightly secured to the throttle assembly
Fuel leaks, cracks, and broken plastic may indicate that some parts are faulty.
Replacing injectors on a 16-valve Lada Priora engine
As mentioned above, symptoms of injector malfunction include unstable engine operation, starting problems and increased gas mileage. To change the nozzle to a new element, you will have to spend a lot of time, since the replacement procedure is quite complicated.
As a working tool, it is recommended to immediately prepare:
set of open-end wrenches;
Phillips-blade screwdriver.
After the car has stood for some time and cooled down, you can start working:
The plastic retainer of the harness must be pressed to the side with your finger to pull the bundle of wires out of the injector.
After which you will need to relieve the pressure in the car’s fuel system. The average pressure is approximately 380 kPa, that is, if work is carried out without bleeding, you can get injured due to sudden fuel emissions. To do this, you will need to open the car and remove the seat from the back row.
There is a carpet under the seat, and under it there is a hatch to the gas tank.
Using a Phillips screwdriver, unscrew the two screws that secure the hatch cover to the panel and remove the cover.
From the fuel pump, which is located in the gas tank, you need to disconnect the power wire - the connector can be pulled out without difficulty.
After this, you need to start the car and wait until the engine stalls due to lack of gasoline.
Next, you need to run the starter for at least three seconds so that the pressure in the system equalizes.
Disconnect the cable from the negative terminal on the battery.
After which the procedure for removing the injectors is possible without risk. To begin, use a screwdriver to unscrew the decorative box on the engine.
Next, remove the screws securing the air filter box from the car body - it will prevent free access to the engine, so it is better to remove it immediately.
The wire connected to the throttle valve is disconnected from the intake manifold.
Next, you will need to disconnect all the lines that connect directly to the frame connectors. It will be necessary to prepare to remove the fuel frame - to do this, use a 10mm wrench to unscrew the bolts that secure the frame to the body.
Using a screwdriver, loosen the clamps on the ventilation and vacuum hoses and disconnect the hoses from the cylinder block.
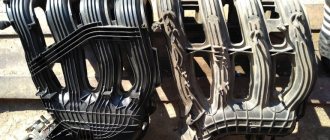
The intake manifold is bolted to the cylinder head with three nuts - you will need to unscrew them to remove the intake manifold.
After which it will be possible to disconnect the injector harness.
The fitting through which fuel is supplied is disconnected from the engine compartment.
After this, you can remove the fuel pipe from the frame, and then dismantle the fuel frame along with the injectors that are located on it.
The injectors can be pryed off with a screwdriver - the fixing element is easily removed so that you can get to the valve itself.
Characteristics of the VAZ 2110 injector 8 valves with a working volume of 1.5 and 1.6 liters.
• Engine VAZ 2111 1.5 l. 8-valve injector ➤ Displacement – 1499 cm3 ➤ Number of cylinders – 4 ➤ Number of valves – 8 ➤ Cylinder diameter – 82 mm ➤ Piston stroke – 71 mm ➤ Power – 76 hp (56 kW) at 5600 rpm ➤ Torque - 115 Nm at 3800 rpm ➤ Compression ratio - 9.9 ➤ Power system - distributed injection ➤ Acceleration to 100 km/h - 14 seconds ➤ Maximum speed - 167 kilometers per hour ➤ Average fuel consumption – 7.2 liters • Engine VAZ 21114 1.6 l. 8-valve injector ➤ Displacement – 1596 cm3 ➤ Number of cylinders – 4 ➤ Number of valves – 8 ➤ Cylinder diameter – 82 mm ➤ Piston stroke – 75.6 mm ➤ Power – 81.6 hp (60 kW) at 5600 rpm ➤ Torque - 115 Nm at 3800 rpm ➤ Compression ratio - 9.6 ➤ Power system - distributed injection ➤ Acceleration to 100 km/h - 13.5 seconds ➤ Maximum speed - 170 kilometers per hour ➤ Average fuel consumption – 7.6 liters
Basic faults
The main malfunction characteristic of the VAZ 2110 is the appearance of the engine tripping effect. Malfunctions can occur for various reasons. Let's consider the factors that cause unstable engine operation, as well as methods of elimination. If the stove doesn't heat up, look here, and about replacing the valves here.
Poor quality fuel
The first thing you need to check is how high-quality the fuel was poured into the vehicle. If the gasoline was of poor quality, then most likely one of the elements of the fuel system was forgotten. So, the motorist will have to find out what the fuel supply scheme is and find parts that could have failed. So, the first element that comes under scrutiny is the spray nozzles. Malfunctions of the injectors can cause unstable operation of the engine, which will lead to tripping. A special stand is used to diagnose and clean the unit, but many motorists carry out the process themselves, using carburetor cleaning fluid. Also, unstable engine operation may be caused by clogged fuel filters. One is located under the rear right wheel, and the second is in the fuel pump. There is a filter mesh on the fuel pump intake that needs to be replaced. The process is quite complicated, since you have to remove the rear seats and remove the fuel supply element. But the fuel filter under the wheel can be changed quickly and without any problems.
Ignition system
Damage to spark plugs or high-voltage wires can also cause tripping. So, it is necessary to check all the elements using a tester, as well as visually inspect them. If there is damage, it is recommended to replace the entire set.
Sensors and ECU
Another major reason for engine tripping is the failure of one of the engine sensors, as well as a malfunction in the electronic control unit. To carry out diagnostics you need to connect to the “brains”. Next, based on the errors shown, find the faulty meter and replace it. If this does not help and the error in the ECU remains, then it is recommended to reset, and in some cases flash the control element.
Maintenance
Engine maintenance is carried out every 10-12 thousand kilometers. The schematic map is available from official representatives of the manufacturer. But, as practice shows, it all comes down to changing the oil and oil filter. Many car enthusiasts ask the question - what is the best engine oil to pour into the VAZ 2110 8-valve power unit? The best option remains semi-synthetic motor oil of domestic or foreign production labeled 10W-30 or 10W-40.
Engine chip tuning circuit
Not many car enthusiasts can boast of a powerful 2110 engine. Thus, to improve the power characteristics of the engine, it is necessary to carry out chip tuning of the VAZ 2110. To do this, they usually turn to specialists, but more and more vehicle owners are doing the process themselves.
The chip tuning scheme is quite simple. To perform the operation yourself, you will need an OBD II cable (USB-Auto), a laptop computer and software. It is worth remembering that there are three options for modifying the power unit: for power (but this will increase consumption), for reducing consumption (leading to a loss of power) and balanced (balance between the optimal indicators of consumption and power). Typically, chip tuning of a VAZ 2110 is done with the aim of reducing fuel consumption, therefore, if the owner of the car decides to do it himself, then it is necessary to select the appropriate software. But, it is recommended not to take risks and turn to professionals for help.
