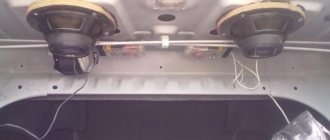
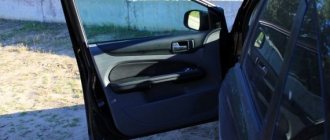
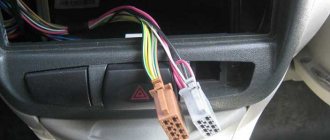
If your Priora has speakers, most likely their size is no more than 13 cm. Will such acoustics be able to satisfy a true music lover? Do they provide high-quality and good sound? It is not surprising that the owner of this particular car, after purchasing the Priora, first of all decided to replace the speakers in it and install 16-centimeter speakers instead of the standard ones.
It turned out to be much easier to buy them than to install them; there were some nuances here. And although there is nothing complicated in such a modification, let's see how this can be done practically. The first difficulty is that the doors of the VAZ model are designed for size 13 acoustics. So we will have to refine them.
Many car enthusiasts solve this problem simply by using additional podiums that are placed on the doors and into which the acoustics are then mounted. But not everyone likes this method; podiums create additional noise, knocking and vibration. Our owner of the Priora decided not to go down this path; he didn’t need unnecessary and extraneous sounds, so he decided to increase the existing places for acoustics.
The first step is to remove the door trim. We will not focus on this process, since almost every car enthusiast can handle this. The upholstery was removed, and we have a standard hole in front of us (see photo). What to do next? You can use a jigsaw. If this tool is not at hand, use a regular drill. We take a compass or ruler, use them to mark points for the 15th diameter, then in these places we drill small holes along the contour. Then, using drills of a larger diameter, we drill out the holes already obtained. Make sure that the edges of the holes are smooth; you can use a file to do this.
When the hole for the new acoustics has been made, we move on to the next stage. We need to make sure that the door plane and the sound device are in good contact with each other. To do this, you can make special spacers from plywood, for example, or wood. If you don’t want to tinker, go to a specialized store and buy ready-made spacers. We fasten them with self-tapping screws or “seat” them with sealant. But remember that this must be done carefully and thoroughly, otherwise the speakers will soon begin to rattle.
Now we need to install acoustics directly in the Priora doors. Before doing this, glue some elastic material onto the spacer. For example, it could be splen. The speakers themselves can be attached with self-tapping screws. Now the final stage of our refinement, we need to thoroughly refine the plastic trim on the Priora doors.
Why is this necessary? So that the sound is of high quality and nothing interferes with it. To do this, remove part of the plastic door pocket using a sharp utility knife as a tool. You can also cut a round opening, and then attach a mesh for the speaker in it.
Standard speakers - article number and price
At the front of the Priora (sedan, hatchback, station wagon), speakers with a diameter of 13 cm (5.25 inches) were installed, forming a bipolar coaxial speaker system. Maximum power – 80 watts, resistance – 4 Ohms, sensitivity – 4 dB. The AvtoVAZ spare parts catalog provides for audio speakers the designation 2170-791020. Audio components were supplied to the factory conveyor. This manufacturer sells its products under the URAL brand. Now speakers 2170-791020 are sold at prices starting from 600 rubles.
The Lada Priora sedan was also equipped with radio speakers 2170-7901030 with a diameter of 16.5 cm (6.5 inches), mounted on the trunk shelf. Components 1117-1901030 were installed in the rear pillar of the Priora station wagon. Hatchbacks in the “Norma” configuration were produced with the same audio components located on the support of the trunk shelf. In the Priora “Lux” hatchbacks, speakers 2172-7901030 were installed instead, characterized by an expanded frequency range (64-18000) and a diffuser with fabric filling. The price for a pair of these parts is from 700 rubles.
The acoustics of the standard Lada Priora speakers satisfy only unassuming car owners. Fans of high-quality car audio assemble and upgrade the car's acoustic system.
Installing speakers in the front doors of Priora
The main emphasis when playing music is on the front door speakers. They create volume, sound effects and acoustics inside the car. The speakers, which are built into the rear door, provide additional sound. It follows from this that it is advisable to install large speakers in the front doors of the Priora. This will make the car more comfortable, and it can be used as a source of music, for example, at a picnic.
Most often, speakers with a diameter of 13 cm are replaced with 16 cm ones, which adds sound power, although the replacement requires redoing the mounts. This is done in three steps:
Step 1: remove the door trim
This is necessary in order to get to the wires coming from the car radio. Before attaching them to the speaker, you need to trace its contours on a piece of plywood.
Step 2: cut a hole of the required diameter in the door
When the template is ready, we begin trimming. You can cut a circle of the required diameter using a jigsaw. We screw the plywood to the mounting location of the standard speaker, and attach the new speaker to it.
Step 3: Connect the Speakers
The speakers are connected to the radio using the serial connection method. Once the speakers are connected to the system, you can turn them on. If the sound appears, it means everything was done correctly. A few settings and you can enjoy music in your car.
Speaker size
You should not install a large speaker system in a car, since this is not a concert hall. Therefore, as a rule, for a car, speakers with a size of 10-13 cm that reproduce high frequencies, and speakers with a diagonal of 16-17 cm that produce high and low sound frequencies are sufficient (see photo).
Installing speakers in front and rear doors
How to independently install speakers in the door trim of a VAZ car? The designs of the rear doors in the Lada Granta and Lada Kalina cars, as well as in other VAZ cars, are identical, and they provide places for acoustics. But even to install the speakers in standard places, the design will still have to be modified.
Let's consider the standard option for installing speakers in the front and rear doors of modern Lada cars:
- First you need to remove the door trim (see photo).
- Choose speakers, preferably 13 cm in size (see photo).
- Prepare podiums for acoustic speakers. You can make them yourself from a sheet of plywood using a stencil (see photo).
- Buy a standard plastic mesh at the store, but it is better to cut it yourself from a mesh made of metal fabric (see photo).
Buy standard Priora acoustics in Moscow
Standard acoustics in a Priora or another car are the optimal solution from a technical point of view. Its installation will go as smoothly as possible and will not lead to the need to modify the car. Also, the loads on the vehicle’s on-board network will correspond to the parameters set by the factory, and this will prevent excess load on the generator while driving. At the same time, the quality of the music will be at a comfortable level.
If you want to purchase standard acoustics in Priora, you can do this in our online store. We specialize in selling all acoustics for VAZ, GAZ and other inexpensive brands, offering customers the following advantages:
- wide selection of acoustics;
- only high-quality original products;
- affordable prices due to direct deliveries;
- prompt delivery in Moscow and dispatch to other regions;
- various payment methods.
For more information and to fill out an application for the purchase of standard acoustics for Priora, please contact us by phone 8-800-510-00-07 or 8-495-500-56-56. We are ready to answer you on any working day from 10 am to 6 pm. On other days, you can submit your application by email or directly through the website.
Our tips to help you choose car audio:
1. It’s better to buy more expensive car speakers in the front, but you can save money on the rear ones.
2. Be sure to soundproof the car (doors, especially the front ones), because this greatly improves the car sound from car acoustics.
3. Take only old, good and time-tested companies.
4. Never choose car speakers based on power. As a rule, many companies lie, both to a lesser extent and to a greater extent. Focus on the company's reputation and advice from sellers.
5. If you have chosen spaced car speakers (with separate tweeters), then try to ensure that these tweeters are “silk”. They play softer than iron or mica.
6. Be sure to consult with competent sellers. Still, choosing the right car audio system yourself is quite difficult. There are a lot of companies and it’s not easy to navigate.
7. You should not choose car speakers based on magnet size, appearance, diffuser type, etc.
8. You should not choose car speakers based on the number of bands. It is not at all necessary that three or four way car speakers will be better than two way ones.
9. If we are talking about expensive car acoustics, then you need to understand that correctly selected car speakers for 12,000 rubles from correctly selected speakers for 25,000 rubles will differ very little in sound quality (if at all), and the difference in price is large. In other words, car audio for 25,000 rubles is more designed for car sound competitions, when only branded test CDs are listened to, and great importance is paid to the quality of the installation.
10. On the other hand, car acoustics have the greatest impact (of all sound system components) on the quality of car sound. Therefore, it is not worth saving much on it. After all, car audio is the main thing in a music system.
11. Forward, try to take spaced car speakers (with separate tweeters), and back coaxial ones (with built-in tweeters).
12. Good car audio should also look good. The basket, tweeters, crossovers, everything should look good. The diffusers must be well sealed and there should be no leaks.
13. Unlike car radios, it is not at all necessary that new car audio models are better than old ones. There are old, very good models that have not been discontinued for years.
14. Any car audio system (and expensive ones to a greater extent) wears out over time and loses its original characteristics. Don't buy used car speakers.
15. In my opinion, European car acoustics play better than American ones. Its sound is softer and it looks more natural. But car subwoofers are the opposite.
16. Nowadays there are very cheap car speakers (250-500 rubles), and they don’t play particularly bad. But I don’t recommend taking these because of their unreliability. If you install these yourself, you will spend two or three hours, and if you do it at a service center, you will pay 1,000-2,000 rubles for the work, and suddenly they will break quite quickly. We'll have to do everything again. They can even replace such car audio for you in a store, but unfortunately, it is unlikely that anyone will return the time spent on installation or the money given to you for the work.
17. If car speakers are quite expensive, then, as a rule, they are designed for a car amplifier. Of course, they should not be neglected. With the right selection of components, it will seriously improve the quality of car sound.
18. Nowadays car speakers with neodymium magnets (very small but powerful) are being produced. Of course, they play clearly and correctly, but they are very demanding on the quality of installation (noise and vibration insulation of doors), and they do not have enough low bass. Their sensitivity, as a rule, is also weak. I advise you to take these with proper installation and the presence of a car subwoofer in the system.
19. The higher the actual power of car speakers, the lower their sensitivity, as a rule. Therefore, in systems without an amplifier, you should not take particularly powerful speakers; they will sound, but quietly. But you shouldn’t take very weak ones either.
20. Acoustics with paper (cardboard) diffusers have greater sensitivity and the bass from them is deeper, but also less clear. To make the right choice, you need to rely on the entire sound system as a whole, but in the vast majority of cases, so-called “paper” diffusers are most preferable. The exception is expensive systems with subwoofers and good installation.
21. In many cars, car speakers (if they are installed in the door) do not fit in the seating depth, but don’t be upset, there are supply rings that cost only 300 rubles per pair and with the help of them you can install almost any acoustics in any door.
22. Lately, a lot of new brands have appeared; they are sold quite expensively and are not worth the money at all. This also applies to some old and respected companies (it’s just that some very good companies have doubled the price, and some haven’t yet), so you need to choose carefully.
Order delivery, consult: tel. +7 (495) 782-54-97 or
Copyright © 2004-2020 Auto-magnitola.ru. All rights reserved.
Removing the rear support
Using a 15mm spanner, unscrew the nut of the bolt securing the rear support to the engine bracket, holding the bolt with a wrench of the same size (for clarity, the rough road sensor with bracket and the solenoid valve for purge the canister have been removed). We take out the bolt.
Using a 15mm socket, unscrew the bolt securing the rear support to the body (the bolt is screwed into a cage nut installed in a closed body box).
...and remove the support. It is more convenient to start the assembly by installing the bolt securing the support to the body, since it is more convenient to center the cage nut while the support can move. Do not tighten the bolt. Then, aligning the holes in the support and in the engine bracket, insert the bolt. Tighten the nut of the bolt securing the support to the engine bracket and the bolt securing the support to the body.
Read more: How to connect the player to the radio
Welcome! The engine mounting cushions are located differently on all cars and the number of them is also different, on some there are only two, and on some there are up to 4 pieces (We are talking about VAZ models, on jeeps with large engines, the number of cushions is they mount the engine, much more or the same number, but they are simply larger in size), thanks to these cushions the engine does not vibrate much and, most importantly, the vibration is not transmitted to the car body, as is felt in some old Zhiguli cars in which the rubber of the cushions has already hardened and Instead of dampening vibrations, they rock the car itself and its engine.
Note! To carry out repair work, to replace the cushions, the smallest set of tools from the tool kit will be useful, in which you will need: A jack will be needed, a wrench and sockets for it, as well as an extension cord, we recommend stocking up!
Where are the engine mounts located? There are four of them in 16 valve engines (the largest number, by the way, 8 valves are mainly equipped with three cushions or just two lower ones), the two most basic ones that are present in any engine (These are the same lower cushions on which the engine sits) and more one (Additional) is located on top and one more (Also additional) below, we will not show photos of all the pillows, because you won’t be able to get one photo, you will have to take several at once, so as you read the article, you will get acquainted with all the pillows and find out where which one is located.
When do you need to change engine mounts? They change rarely and only because of their aging (rubber gets old and it begins to hold the engine poorly and therefore it shakes), there are isolated cases when the cushion has to be changed due to deformation, and this happens when you hit the engine hard on the road or when hitting a deep hole, due to which, in addition to the airbags, the windshields also burst.
Review of popular shelves on Priora
Priora station wagon acoustic shelf
Let's look at the most popular shelves sold today in stores in our country. First, let’s find out what technical characteristics stand out for the shelves on the Priora that have sidewalls.
| Type | Rear acoustic shelf with sides |
| Automobile model | 2171 station wagon |
| Material | Plywood or MDF |
| Shelf/sidewall thickness, mm | 10/25 |
| Possibility of upgrading the shelf | Can be made directional (for an additional fee of 200 rubles) |
| Possibility of installing a subwoofer | It is also possible for an extra charge |
| Shelf cost | 1600 rubles |
It is clear that the main advantage of a shelf with sides is the location of the speakers (see How to choose speakers for a car radio on your own). They do not stand on the main plywood, but on the side parts. This provides a unique opportunity to conveniently load cargo into the trunk for transportation. Now you won’t have to remove the shelf with the speakers every time. In addition, it is possible to select the desired color of the polo, depending on individual preferences and matching the interior color.
Graphite shelf produced in Tolyatti
| Type | Acoustic shelf |
| Price | 1250 rubles |
| Possibility of reupholstery with imported fabrics | For extra charge |
| Suitable Speakers | 6x9/13 cm/16 cm |
| Shelf dimensions, cm | 130x50x30 |
| Shelf weight, kg | 7 |
Priora station wagon acoustic shelf
Shelf without sides Tolyatti
| Type | Acoustic shelf without sides |
| Speaker sizes | 13/16/20 cm |
| Price | 700 rubles |
| Shelf weight, kg | 8 |
| Dimensions, cm | 130x70x40 |
What are the advantages of a homemade shelf in a hatchback compared to a purchased one?
- A homemade rear shelf will fit perfectly into the dimensions of the trunk,
- It is possible to choose the wiring diagram for the speaker system yourself, in which the sound of all musical compositions without exception will cause frantic joy,
What do you need to know before making an acoustic shelf for a Priora hatchback?
- For upholstery, experts advise using materials made from artificial and natural leather. This will give the shelf a solid look, and a high-quality finish will completely hide the new speakers from your fellow travelers.
- By choosing the right size and shape of the shelf, you can achieve maximum effect in sound and bass, even when purchasing budget speakers for Priora,
- When creating a layout for the rear parcel shelf, you must first calculate its dimensions according to the diameter and dimensions of the purchased speakers. Otherwise, at the installation stage you will have to redo the assembled circuit again.
Basic faults
The desire to install 16 cm speakers on the Priora arises due to the poor sound quality of the standard speakers. In addition to the complete lack of music due to faulty wiring, Prior owners with a factory speaker system have to deal with:
- Wheezing.
- Hissing at high volume.
- Not loud enough.
The problem can be solved by installing high-quality audio speakers, primarily in the front. This upgrade significantly improves the sound of the audio system without requiring significant costs.
Manufacturers and prices of analogues
Car audio systems are varied. Popular among Priora drivers:
- Mystery MJ-650, cost 2000–2500 rubles.
- Alpine SXE-1750s – price from 3000 rub.
- Kicx STC 6.3 – price 3000–3500 rub.
- Pioneer TS-A1600C, Price from 4000 rubles.
- Morel Maximo Coax 6 – approximately 4000 rub.
- Hertz DSK 165.3 – about 5,000 rubles.
Prices are for a set of two speakers. Of course, this is not a complete list. The choice of audio system is limited by the desires and capabilities of the car owner.
Modern podiums
Acoustic podiums yourself
Sound organization is a set of measures that includes not only sound insulation or installation of a subwoofer, but also installation in the front doors of the podiums. You don’t have to buy them, although you can find almost any option in stores today. You can make podiums with your own hands if you know the basic nuances of the operation presented in our instructions below. Modern acoustic podiums are not too different from those that came before. Although, this is at first glance, but if you take a closer look, you will see the following:
- Modern podiums are made of high-quality material, which significantly increases their service life. If earlier they were made of plastic, which soon became covered with cracks and delaminated, today podiums are made of more durable material;
Modern acoustic podium
- Acoustically, modern podiums have an excellent and comfortable matte surface that does not leave dirty marks. High-quality plastic or plywood, from which modern podiums are made, is quite difficult to accidentally damage;
- The current podiums are made in such a way that they provide the opportunity to conveniently lay hidden electrical wiring to the speakers;
- Modern podiums are distinguished by a slightly modified configuration, which allows the installation of not one, but several speakers that reproduce different frequencies.
Acoustic podiums for yourself
Choosing an audio system
First you need to determine the dimensions of the speakers that will be installed in the standard holes prepared for them when assembling the car. All speaker systems that are offered to customers have several standard sizes. Speakers installed in cars by manufacturing companies sometimes have overall dimensions that occupy a middle position between the proposed standards. But it's not scary. In order to switch to selected speakers with a certain standard of overall dimensions, it is necessary to prepare podiums for them, replacing the former standard plastic ones with those chosen by the car owner.
How and where to install
According to manufacturers' recommendations, it is better to install tweeters as close to the listener's head as possible. This provides high-quality sound. However, it is not always possible to mount this device at the desired level. More often, when installing a device in a car with your own hands, you have to choose a location based on the existing features of the car and the already installed equipment.
It is extremely important that the speaker does not subsequently affect the usability of the vehicle. In addition, it is necessary to select a place so that the horn remains close to the radio. This will make it easier to connect.
The tweeter is often installed in the area of the corners of the mirrors. In this case, the speakers fit well into the existing interior of the car and do not cause discomfort while driving. In addition, localization on the front panel and windshield is possible.
Among other things, there are special stands that make installation easier. It is better to purchase podiums for tweeters together with this acoustic device, so as not to make a mistake with the size. If necessary, you can make them yourself.
Manufacturing
Priora acoustic shelf
As you can see, such shelves stand in different ways. But one thing is for sure - to have a good quality acoustic shelf, you will have to pay at least 1.5 thousand rubles. A fair question arises: is it possible to make such a shelf with your own hands, taking into account your own wishes regarding its design. The answer is clear - of course, it is possible.
First way
Here's what you'll need for this:
- Plywood – sheet 12 mm thick;
- Electric drill;
- Electric saw;
- Metal mesh;
- Material for upholstery (carpet);
- Stapler;
- Other tools such as screwdriver, pliers, etc.
Note. Let us note right away that the shelf can be made using different templates and technologies. You can find a template anywhere today. Fortunately, there are no restrictions on this. Just search on various sites.
Priora acoustic shelf
- First of all, the template of the future product must be transferred to plywood. Apply all dimensions correctly;
- Next, you will need to cut the plywood along the intended lines using an electric saw (it is very convenient to work with).
Advice. In this case, a drill can also provide an invaluable service. You can easily use it to cut holes for the speakers by making dots along the marked circle on the plywood. The saw will easily pass along such a circle.
- We cover the holes for the speakers with a metal mesh (thus, we give an aesthetic appearance and construct a kind of protection);
- We reupholster the shelf using carpet material. It is perfect for these purposes as it is easy to work with.
Note. Reupholstering involves fixing the carpet to the shelf using glue and a stapler. For high-quality reupholstery, it is recommended to first place pieces of burlap on the ends of the shelf, and only then carpet on top of them.
Acoustic shelf on Priora
To install the sidewalls, they can be fixed to standard fasteners or additional ones can be used. As a result, we get an excellent homemade shelf, the cost of which does not exceed a hundred rubles. The sound quality of the rear acoustics will improve significantly, which can be directed towards the rear window (thus, you can get the effect of reflected sound).
The second method with a folding part
Again, plywood is used, but 2 pieces are already cut out of it. The first piece of plywood can be cut according to the template of the factory standard shelf. It is recommended to leave the second piece 2 cm shorter. Let's get started:
- We fasten two wooden pieces together (glue or foam are ideal for this task). Don't forget to secure it with self-tapping screws.
Advice. It is advisable to use Moment or epoxy as glue. They are the most suitable for this type of work.
- We make the folding part of the shelf.
Note. You don’t have to make it again, but cut it off from the factory one and screw it to the new one.
- The final part of the operation is re-upholstery with carpet.
Connection
Installing additional equipment and making podiums is half the battle. Installed devices need to be connected. How to connect a horn through a standard radio or speakers?
When the connection is made directly to the radio (without an amplifier), you need to use a capacitor, which is a filter for certain frequencies. It allows you to increase the life of the speakers, but its capabilities are limited. When purchasing new equipment, the capacitor is included in the kit, but if it is not there, you need to select and purchase it yourself. The horns are connected directly to the terminals of the radio, but a capacitor must be installed on the plus.
You can connect the horn to the speakers in the same way as conventional speakers. The plus is connected to the positive wire (via a capacitor), and the minus is connected to the negative.
You can connect the horn to the amplifier according to the principle of conventional speakers, and there are no differences in connection. The amplifier itself is installed according to the diagrams specified in the equipment instructions. In most cases, the connection is made with special wires (interconnect) to the radio, and then power wires (power) are connected. After this, connect the speaker wires to the speakers or subwoofer, observing the polarity.
Another type of connection is through a crossover. This is a device for separating a signal by frequency. It is most often made in the form of a separate unit and is perfect for connecting a multi-component audio system.
When connecting, you must comply with all safety requirements.
Installation of 16 speakers in Priora
When installing non-standard speakers, change the speakers in the front doors of the Priora, then in the rear and on the trunk shelf. Additionally, audio components are mounted in the rear doors.
Speakers for the front doors of Priora
The first stage of installing the speakers is removing the interior trim in those places where the components will be installed, in this case the front door panels. For good sound, noise and vibration insulation (NVI) of the car body elements in which the radio speakers are installed is necessary. Therefore, in its absence, it is advisable to use the disassembled state of the front doors and glue vibration and noise insulation material.
Installing the speakers from the front involves cutting metal, since the standard holes are designed to mount speakers with a diameter of 13 cm. The easiest way to do this work is to use a jigsaw with a metal file.
First you need to mark the metal of the front door, for which you use a template cut out of paper or cardboard according to the size of the column. Sometimes a ready-made template is included with the audio components. Move the center of the new hole straight up, in this case the 16 cm speaker will not interfere with the fastening of the front door trim.
After cutting out a piece of metal, to prevent corrosion, it is advisable to treat the edges of the hole made with an anti-corrosion compound, or better yet, prime and paint.
The place where the speakers are mounted is covered with noise and vibration insulation. If there is no material, foil-coated isolon is suitable. To prevent the transmission of vibrations from the speaker, it should be installed through a spacer made of plywood or similar material, which is also covered with sound insulation. The radio speaker is attached to the spacer with self-tapping screws.
It is necessary to cut off the plastic edge of the door card located around the holes in front of which the radio speaker is installed. After that, all that remains is to connect the audio cables, assemble the casing, and you can enjoy the improved sound.
In addition to radio speakers, some audio systems include crossovers and tweeters (tweeters). As a rule, the crossover has a place on the front door map, and the tweeters are installed on the triangular elements of the interior trim opposite the place where the side mirrors are mounted. Advanced acoustic systems require the installation of tweeters on the A-pillars.
How to install speakers in the rear doors on a Priora car
There is no standard place for installing rear door radio speakers. Therefore, in order to install speakers in the rear doors, it is necessary to cut out part of the door trim. The internal space of the rear doors is limited; installation of speakers with a diameter of 16 and even 13 centimeters requires the manufacture of a spacer. If it protrudes beyond the door, it is sheathed with carpet, leatherette or other material.
Back to rear shelf
The rear shelf is a place for oval speakers. Among the manufacturers, pay attention to JBL. If necessary, holes on the shelf are cut to fit the size of the speakers to be installed. The material of this part is quite soft, so it cuts easily.
Features of installing spacers for speakers measuring 16 cm in the shape of the VAZ “Ten” and Priora doors:
- simplicity of solving the issue;
- change in sound quality;
- highlighting low frequencies;
- noticeable sound difference;
- absence of mechanical interventions;
- minimum actions;
- high-quality sound of low frequencies.
Conclusion: in the absence of a subwoofer, it is better to equip the front system of the vehicle with speakers with a diameter of 16 cm. For better sound, the car’s acoustics should be supplemented with a subwoofer; plan to install it in the future. It should be remembered that even first-class speakers are not able to reproduce good sound when using a cheap, low-quality radio.
In Priora, what standard speakers cost what size?
A friend is looking for a fresh one with condensation in the advertisements, some rubbish
by Adminrive · Published 09.22.2016
I bought myself a pioneer
by Adminrive · Published 10/05/2015
Dimensions of standard car speakers
Round speakers (see photo) are one of the most popular speakers, built under metal mesh in the dashboard, in panels under the dashboard, in the doors, and also on the sides of the rear panel. 16.5 cm is the most popular speaker size.
Oval speakers (see photo) - mounted in mounting panels or on the side on the rear shelf, as well as in doors. 15x23 cm is the most common speaker size.
Installation of speakers (music) - Tuning and repair of Lada Priora
I decided to install this music in my Priora:
- Head Pioneer DVH-3200UB (I took the DVD and thought I’d install a TV... so it’s been more than a year and still no TV, don’t take the DVD, it’s not needed in the car)
- front Auditor rip 165 (a subsidiary of Focal, the sound is decent, they play cleanly)
- rear Auditor RIP 165C amplifier Blaupunkt GTA 470 (tested by me over many years - powerful and reliable for the money)
There were no questions with installing the head unit: I pulled out the plug, connected the power connectors, antenna, tulips and put them in place
The speakers had to be redone, since the standard places are for 13-inch speakers, and I have 16-inch speakers. In the end I decided to install spacer rings.
We cut the metal of the door. It's a shame, but it has to be done
We install the rear shelf, making sure that nothing touches it. and enjoy good music! The wires from the radio go to the amplifier (unfortunately there are no photos), and from the amplifier they are routed to the speakers
Lada Priora tuning → Sedan, rear parcel shelf.
Folks, is it possible to avoid the noise of the rear stock shelf (with speakers installed). Or can everything be treated with just an acoustic shelf?
- Ivanesko_Klichkov
- October 21, 2012, 21:53
- Vengr_Koguhov
- October 21, 2012, 21:58
- v
- Nikolay_Gorkov
- October 21, 2012, 21:59
- v
- Nikolay_Gorkov
- 22 October 2012, 15:07
- v
- Ivanesko_Klichkov
- 22 October 2012, 20:32
- v
- Nikolay_Gorkov
- 22 October 2012, 20:34
- v
- Ivanesko_Klichkov
- 22 October 2012, 20:46
- v
- Stas_Dmitrenko
- 22 October 2012, 20:58
- v
- Oleg_Menschikov
- 22 October 2012, 21:15
- v
- Nikolay_Gorkov
- 23 October 2012, 20:48
- v
- Nikolay_Gorkov
- 23 October 2012, 21:08
- v
- Dma_Baydauz
- 24 October 2012, 08:44
- v
- Nikolay_Shteyn
- 24 October 2012, 15:14
- v
- Oleg_Menschikov
- 24 October 2012, 15:35
- v
#10 Pavel Gorkov Where did you buy it (if in Moscow, then tell me where) otherwise I don’t want to bother with noise)))))))
I am not from Moscow. I have a sedan body, with acoustic. The music on the shelf is simply amazing, I like it. I think if you want good music and no noise, then you shouldn’t bother with a standard shelf (trying to soundproof it and attach other devices to it). They installed a shelf for me from a VAZ 10 model, they didn’t even adjust it. collapse branch
Speaker power
Beginners who decide to select a speaker system must remember that purchasing high-power speakers does not mean that the output can be high-quality sound. The main thing is that the power of the speakers matches the power of the radio. The total acoustic sound power should not be less than the declared power of the car radio. It is worth paying attention to the fact that at peak or maximum power the speakers produce very large distortions. A clean signal is obtained at rated power.
Which ones are better to choose?
There are a number of parameters that you should pay attention to when choosing a device. These include:
Are you a car driver?! Then you can take this simple test and find out. Go to test »
- availability of necessary exits;
- power;
- nature of the coating.
The sound quality depends on the type of material from which the horn is made. Silk horn tweeters are considered the best. Many brands use silk because... It is soft, so the sound is not fully transmitted. In addition, this material has a high degree of viscosity, which creates pronounced internal friction.
Moreover, in most models of such speakers, silk is treated with special substances that not only improve sound quality, but also increase the moisture and dust resistance of the device. Some companies produce good horns made from artificial materials that sound no worse than instruments made from natural silk.
It is advisable that the speaker be equipped with rear and front channels.
There must be a connector for connecting a subwoofer. The power of the device must be at least 50W. This will be enough to ensure volume. It is better to purchase devices with high sensitivity.
Installation of 16th speakers in doors without podiums
Removing the door trim will not be difficult. First task: enlarge the hole for the speaker in the car door. For this, it is most convenient to use a jigsaw. If you don’t have such a tool at hand, then you can get by with a regular drill. We drill a hole along the contour, first with small drills, and then with large ones. To make the edges of the hole smooth, remove the sharp edges with a file. The second task is to ensure maximum contact between the speaker and the door. To ensure that the speaker fits tightly to the door, you should make spacers (podiums), for example, from plywood. Or, buy spacers for 16 cm speakers for a VAZ 2110-11-12, Priora according to the shape of the door in online stores. Spacers should be secured with adhesive-sealant and self-tapping screws. Third task: install 16cm speakers in the door of a VAZ 2110. First glue an elastic material (anti-creaking, SPLEN, etc.) onto the speaker spacer .d.). We fix the speaker in the door with self-tapping screws. Fourth task: modifying the plastic lining of the car door. So that nothing interferes with the sound of the acoustics, you can cut out curtains in the plastic pocket of the door using a utility knife. Or cut a round hole for installing a speaker mesh. Thus, we were able to install 16cm speakers in the door without podiums. This process is much simpler than making acoustic podiums. By the way, you can improve the sound of the speakers in the door with sound insulation.
Photo source: Key words:
Refinement of the station wagon shelf
Acoustic shelf lada priora
You can start modifying the standard factory shelf if you don’t want to change it. On a station wagon, the factory shelf does not have a straight surface for mounting speakers. What is the point of revision? Ensure a flat surface, that's right. The material in this case will also be plywood, the thickness of which is 20 mm. As for the width, 35 cm is what you need.
Note. Note that the factory shelf is made of 2 layers of plastic.
- We cut off that part of the factory shelf where the speakers will be inserted with a sharp knife;
- We cut out the outline of the factory shelf from plywood;
- We glue the additional option to the back of the factory shelf using epoxy.
Note. In the process of such refinement, a difference is possible. To avoid this, it is recommended to cut 2mm plywood along the contour of the cut out part, and then glue the whole thing to a thick piece of plywood.
- Acrylic-based putty (for wood) will help hide all seams and irregularities, and sandpaper will clean the surfaces until they are smooth;
- At the end, we tighten the entire resulting shelf with carpet and, just in case, weigh it down with vibration material.
