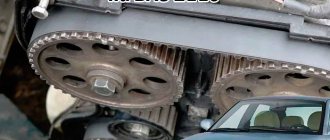
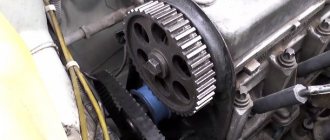
Most motorists know that the gas distribution mechanism of gasoline and diesel engines is a rather important component of the car. Due to the specifics of its operation, the timing belt has a number of typical breakdowns, the main one of which is rightfully considered to be the replacement of the drive connecting the crankshaft and camshaft. On many cars it is made of a high-quality rubber belt, which needs to be changed every 50-60,000 kilometers, but a chain drive also has its place and sometimes requires refreshment. The replacement procedure is not particularly difficult, however, setting the timing marks often causes some problems for motorists. To prevent similar problems from occurring among readers of our resource, in today’s article we will pay attention to the procedure for setting timing marks, the features of this process and its essence. Ready? Then carefully read the material presented below.
Why is it necessary to set the labels correctly?
For the correct operation of the gas distribution mechanism of a car, it is necessary that the closing and opening of the valves occur in a strictly defined sequence. The slightest inaccuracy in the operation of the camshaft and crankshaft leads to the fact that the gas exchange process in the cylinders is disrupted, and the engine stops working in the correct mode.
A timing belt is a rubber part that during operation can wear out, crack, tear, etc. Therefore, it is necessary to replace the element in a timely manner.
When installing a new one, you should set the labels correctly. This is necessary to ensure that the engine operates correctly from the first seconds of startup. If installed incorrectly, serious problems can occur, including engine failure.
Nuances and difficulties
Now a couple of tips on the hidden features of the timing belt change process:
- When diagnosing the condition of a belt drive, it is necessary to examine it completely, and not just the outer “open part”. Defects and oil residues can be anywhere.
- When performing any operations with the system belt, force must be used with extreme caution. Of course, this spare part is quite durable, but sudden movements can cause defects.
- When purchasing a new belt drive, do not forget that there are many low-quality products on the market. Therefore, the purchase should be made through trusted resources and keep all receipts in case a product is delivered with a manufacturing defect.
- Diagnostics and replacement of the timing belt must be carried out on time. A ruptured belt drive often leads to the destruction of valves, the replacement of which will cost a lot of money.
- The service life of the belt drive depends directly on the condition of the pump. When it fails, it also needs to be replaced.
Typically, the safety margin of the pump is twice that of the system belt, therefore it is recommended to change it every second time the belt drive is replaced.
Difficulties may arise when replacing timing parts. Novice mechanics talk about the difficulty of removing the elements that close the passage to the system belt.
Tools needed for work
Installing marks is not an easy process and if done incorrectly, you risk spending a lot of time installing the part. And that's not the worst thing. There are cases when careless drivers break the engine and other mechanisms of the car.
First of all, stock up on the necessary tools:
- Socket head.
- Jack to raise the car.
- Keys No. 17 or 19 - depends on what kind of car you have.
Advice: it is better that you have all key diameters starting from No. 10.
Large flat head screwdriver.
How to choose a chain length
When purchasing a new spare part, you need to take into account one parameter - the length, determined by the number of links. The indicated value depends on the type of engine installed on a particular car. For engines with a working volume of 1.5 and 1.6 liters (modifications VAZ 21061 and 2106) the piston stroke is 80 mm, and in 1.3 liter power units (VAZ 21063) this figure is 66 mm. Accordingly, the 1.5 and 1.6 liter engine blocks are taller and the chain is longer:
- versions VAZ 21061 and 2106 - 116 sections;
- VAZ 21063 - 114 units.
Conscientious manufacturers indicate the number of chain links on the packaging
The number of sections of a new spare part can be found out without a grueling recalculation. Lay the chain on a flat surface so that adjacent links touch. If the outer sections look the same, there are 116 links in the chain. The 114-piece part reveals one last link, turned at an angle.
When replacing the drive chain, it is strongly recommended to install new sprockets - driving, driven and intermediate. Otherwise, the mechanism will not last long - the links will stretch again. Gears are sold in sets of 3 pieces.
Video: choosing a new chain for the Zhiguli
Labeling
Before starting work, you need to understand that it is important that during the process of replacing the timing belt, the pre-set risks do not go astray. Otherwise, you will have to go deeper into the settings and spend more than one hour installing the part.
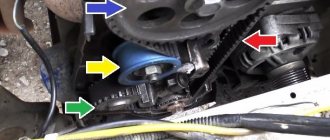
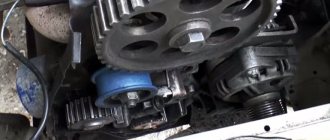
When installing the timing belt, it is important to align the pistons so that in the first cylinder the piston is at the highest point of the first cylinder. In this position, the piston is at its maximum distance from the crankshaft. This is the position the engine is in when the marks are correctly set. In this position it is necessary to change the timing belt.
The number of marks, as well as their location, may vary depending on your engine type.
The following marks can be distinguished:
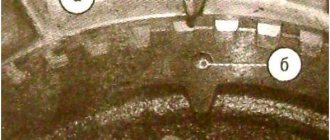
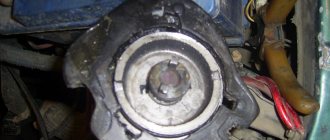
- Mark on the flywheel.
- Mark on the pulley.
- Camshaft mark (two on a 16 valve engine).
They all must match before replacing the timing belt. In order to set the correct position, rotate the crankshaft by the bolt securing the pulley to it. Please note: turning the camshaft pulley is prohibited.
After you have set TDC, replace the belt and tighten the tensioner.
At the end of the work on installing the belt, rotate the crankshaft several revolutions, check if the marks have gone astray. Repeat the adjustment if necessary.
What's the result?
On the dashboard of many modern cars, if the marks are set incorrectly, a “check” will be displayed when the engine starts. This is another sign that the work was carried out incorrectly and further operation of the car is undesirable. Skipping the belt by one “tooth” can result in unpleasant consequences. Even a novice driver can set the markers correctly, but you need to have enough free time and patience.
Share with friends on social networks:
Telegram
Replacing a timing belt without marks
In some cases, it is necessary to install the belt if there are no marks.
For this you will need:
- Calipers.
- Screwdriver
First of all, remove the belt protective cover and unscrew the spark plugs.
Let's take a closer look at the process of replacing a belt without marks on an 8-valve engine.
- It is necessary to align the camshaft in the overlap, for example, it is convenient to select the second cylinder. To do this you will need a caliper and a screwdriver. Slowly turn the camshaft clockwise and observe the overlap position. To do this, use a barbell. Place it on the expansion joints and rotate the camshaft until the expansion joints are at the same height. That is, the position of the barbell should be straight, not beveled.
- After determining the overlap, it is necessary to set the TDC (top dead center) of the second cylinder. Insert a screwdriver into the spark plug channel. Slowly rotate the engine, only in the direction of engine movement, so that the piston rises up. At a certain point, you will feel that the flywheel begins to rotate easily. After this, you need to feel the lower and upper points with your hand and set the upper one.
- After adjustments, put on the new belt so that it matches, you may need to turn it a little. And also pull it tight.
- The next stage is checking the belt installation. Rotate the flywheel and look for a mark on it. Set it to the top position and check the marks on the camshaft. If the adjustment is made inaccurately, the risks will disappear.
On a 16-valve engine (2 camshafts), the installation is carried out according to the same principle.
Purpose and design of the drive
The gas distribution mechanism is responsible for supplying the fuel mixture to the cylinders and releasing exhaust gases. To ensure timely opening of the intake and exhaust valves, the camshaft must rotate synchronously with the crankshaft. In the Zhiguli, this function is assigned to a chain drive installed in the front of the engine.
Replacing the timing chain and gears cannot be classified as complex operations, but the procedure is quite labor-intensive. To do the work yourself, you need to understand the operating principle and design of the drive, which consists of the following elements:
- a small-diameter drive gear is installed at the front end of the crankshaft;
- above it there is an intermediate large sprocket, which is responsible for rotating the drive of the oil pump and distributor;
- a third driven gear of large diameter is attached to the end of the camshaft;
- The 3 above stars are connected by a double-row chain;
- on one side, the chain is tensioned by a curved shoe, which presses the plunger device;
- to prevent the weakened chain from beating, a second shoe is provided on the other side - the so-called damper;
- A limit pin is installed near the drive sprocket, which prevents the chain from jumping off the teeth.
The main role in the mechanism is played by a double-row chain connecting the lower driving gear with the driven ones.
The gear size ratio is approximately 1:2. That is, while the crankshaft drive sprocket makes 2 revolutions, the camshaft gear rotates 1 time.
The required tension of the VAZ 2106 timing drive is provided by a plunger device supporting a semicircular shoe. Older cars were equipped with a purely mechanical plunger - a retractable rod with a powerful spring, which had to be tightened manually. Later models received a hydraulic chain tensioner that operates automatically.
More information about the timing belt drive: https://bumper.guru/klassicheskie-modeli-vaz/grm/grm-2107/metki-grm-vaz-2107-inzhektor.html
Unknowingly, I once found myself in a stupid situation. A friend’s chain on the “six” was stretched out and began to make a lot of noise, I advised it to be tightened. On site it turned out that the plunger fixing bolt was missing; the advice turned out to be useless. Later it turned out that the car has an automatic tensioner that is activated by oil pressure. The stretched chain had to be replaced.
The timing drive is lubricated by engine oil coming from the camshaft. To prevent lubricant from splashing, the mechanism is hidden behind a sealed aluminum cover, screwed to the end of the cylinder block with 9 M6 bolts. Another 3 screws connect the protective casing to the oil pan.
So, the chain drive performs 3 functions:
- rotates the camshaft, which alternately presses the cams onto the valve stems;
- through a helical gear (in driver's jargon - “pig”) transmits torque to the oil pump;
- rotates the shaft of the main ignition distributor.
Consequences of incorrect labeling
If the timing marks are set incorrectly, serious consequences for the car can occur.
The most common cases:
- Due to misaligned timing, valves can become deformed during engine operation, and the damage will accumulate.
- The valves will become deformed - bent. Although this will not happen in an 8-valve engine.
- Due to deformation of the valves, the cylinder head may be damaged. As a result, the guide bushings will fail, and cracks may appear on the main power elements.
- The piston mechanism may burn out due to incorrect placement of the timing marks.
- There will be an oil residue on the spark plugs. Plus, the ignition moment of the fuel mixture worsens.
- And also other unpleasant consequences arise.
How to install an injector on a Chevrolet Niva (with photo)
- The car is installed on the inspection hole. Wheel chocks are placed under the rear wheels and the hand brake is applied.
- The car hood is opened, unscrewed and the fan is removed. The radiator is also unscrewed and carefully moved to the side (it is not necessary to drain the coolant from there).
- Access to the engine valve cover is provided. Its fastenings are unscrewed with an open-end wrench, then it is carefully removed. There is access to the timing chain and the upper camshaft sprocket. The shaft pulley is rotated with a special wrench until the mark on the camshaft sprocket aligns with the protrusion on the timing case.
The mark on the timing case is aligned with the mark on the camshaft sprocket
The tension roller is removed, the chain can be removed
The mark on the crankshaft sprocket is precisely aligned with the DPKV core
How to understand that the marks are knocked down, symptoms
After replacing the belt, a situation may arise that the marks were installed incorrectly. How to determine this is described below.
- Traction and throttle response disappear.
- The car begins to accelerate more slowly.
- The engine gets very hot.
At the end of the article, we would like to note that not every car owner can correctly set the timing marks. It is necessary to have information about the operation of the engine and its design features. If you don’t want to spend a single hour setting up the mechanisms, we recommend turning to specialists.
What is timing belt?
Timing mechanism diagram
The gas distribution mechanism is a mechanism in which the valve timing of the power unit is controlled. For normal engine performance, there are special marks by which the timing belt must be set.
Some are on the block, while others are on the pulleys. When the cylinder is in the first upper position, all these marks must coincide.
The timing marks are misaligned if the drive toothed belt is broken or if it is replaced incorrectly. So, in these cases, the engine will not work correctly and the marks will need to be re-set. Doing this is quite problematic and not everyone can do it.
Final removal of the drive chain
Further steps to remove the timing chain on the Gazelle engine look like this:
- Unscrew the hydraulic tensioner fasteners. You need to take out two elements - upper and lower. They are removed the same way.
- Remove the tensioner housing.
- Remove the cover that covers the chain. To do this, unscrew the 7 mounting bolts. Be careful not to destroy the crankshaft seal and head gasket.
- After unscrewing the upper hydraulic tensioner bolt, you need to remove the lever and sprocket.
- Remove the chain guide.
- Unscrew the bolts securing the gear to the camshaft flange (there are two in total on the ZMZ-406 engine).
- Bend back the locking plate, while keeping the intermediate shaft of the ignition system from turning.
- Install a screwdriver and use it to remove the gears and the lower edge of the chain.
If difficulties arise, you need to remove the rubber seal, which is located between the bushing and the gear. The second gear can only be dismantled using a two-valve puller.
Checking chain tension on VAZ 2101-VAZ 2107
Welcome! Timing chain - thanks to it the engine works, over time this chain relaxes (Stretches out) and begins to knock, the knocking is very unpleasant and because of this the chain wears out faster and most importantly, if the chain is too loose, it can jump one tooth, and sometimes at two or three, etc., and this is already a mixture of valve timing, and therefore after a while the car will drive incomprehensibly, that is, its speed will fluctuate very much, and it may stall often or even at all will not start.
Note! In order to check the chain tension, you will need to remove the cover at the head, if you have never done this before, don’t be alarmed, there is nothing complicated about it, it is only attached to 8 nuts, so in order to unscrew them, you will need to stock up: A wrench with a socket head, as well as a new gasket will be needed for the head cover (It costs pennies in auto stores, but you definitely need to get a new one) and a regular flat-head screwdriver, which you will use to check the tension!
- Checking timing chain tension
- Additional video clip
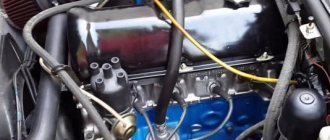
Where is the timing chain located? It is located under all kinds of covers, namely its upper part is under the cylinder head cover, the lower part is under the camshaft cover, and in the middle you can’t get to it unless you remove it from the car, but you don’t need the lower, as well as the middle part you only need to get to the top one, so for clarity, in the photo below the cover has already been removed and the chain is indicated by an arrow.
When should you check the timing chain tension? Let us tell you right away that if you want to tighten the chain, this is done using a chain tensioner (For information on how to tighten a chain, read the article: “Adjusting the chain on a car”) and you don’t need to remove the cover to check the tension (But in principle you can remove it if you want to tension the chain correctly with 100% accuracy), the tension is checked only when you do any work, for example, you changed the chain to a new one and checked whether it is tensioned normally or not, and just disassemble the engine of the car to tug on the chain and there is no need to check its tension, besides, if the chain weakens, it will let you know about it, firstly, the operating noise of the engine will increase (Try to start the car on an adjusted chain and let it idle and on an unadjusted chain, the same perform the operation, the sound of the engine in these situations will be radically different).
Note! By the way, if the chain is very weak, but you don’t know how to figure it out, then just open the hood and listen if there are any extraneous knocks in the place where it is located, but when you press the gas (pull the gas cable a little or ask an assistant to press the gas a little pressed) this knock disappears, that is, it is likely that it is the chain that makes this knock and tighten it using the tensioner!
How to check the chain tension on a VAZ 2101-VAZ 2107?
1) At the beginning of the operation, you will need to remove that same cover, read about how it is removed in the article: “Setting the valve timing by marks”, in this article everything is explained and chewed in detail, and you need to study it starting from point 1 and ending with 10 , in these points the removal of the cover is explained.
2) Now that the cover is removed and it no longer bothers you, proceed to checking the chain tension, this check can be done either with a screwdriver or by hand, but it is better with a screwdriver, to do this, install it in two different ways, as shown in the two photographs below, and in these position, check the tension of the chain in the photo below, where you need to move the screwdriver is shown in detail, but we will still look at these photos a little, the first photo shows how to insert the screwdriver and use it as a lever to press on the chain (It shouldn’t bend if it bends just a little then adjust the chain using the tensioner), then go to the other side of the chain (see photo 2) and also install a screwdriver and use it to press the chain in that place (You can also try to push the chain with your finger), the chain should also not bend and the string should be tensioned, and this is how the chain tension on classic cars is determined.
Note! You need to press on the chain with medium force, but in no case should you press with all your strength, even though it is metal, this does not exclude its deformation!
Additional video clip: For more details about what tension the chain should have, see the video below, it shows the installation of the chain on the engine removed from the car and at the very end it explains and also shows what adjustment should be.
Checking the condition of the belt
The inspection regulations for this unit require an inspection in a cold engine state. Remove the outer protective casing to allow visual contact with the surface of the gas distribution unit parts. Having gained access directly to the timing belt, rotating its drive, inspect both sides of the consumable in detail for the presence of any kind of defects (wear, broken teeth, protruding cord, rubber delamination, etc.). Tensioner rollers are subject to careful inspection; in the presence of mechanical damage and large play, they contribute to increased wear of the consumables. The presence of oil stains on the surface of a rubber technical part, which contribute to the destruction of its structure, is not allowed. If found, immediately remove from surface.
