Car: Lada Granta. Asks: Evgenia Kislyakova. Question: The window goes down but doesn't go up, what happened to the window regulator?
Good afternoon. I pulled into a parking lot, rolled up the right passenger window all the way, started to roll up the left one, and stopped in the middle. I had to put Grant in the garage with a friend, I was afraid to park him in case it rained or a bird flew.
Two front windows shattered simultaneously. There is no power supply at the back, the glasses are lowered and raised using handles. When I press the power window button, nothing happens. I also tried this with the machine turned on.
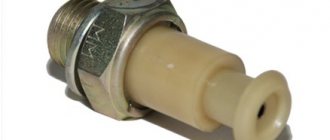
Grant window lifter control unit
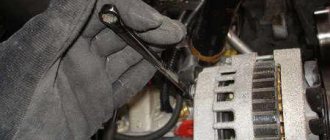
Its design is almost completely similar to the design of the windshield wiper gearmotor.
The gearmotor can be called reversible, because The direction of rotation of the output shaft depends on the direction of movement of the electric current in the armature winding. The built-in thermobimetallic fuse protects the gearmotor from overloads.
The schematic electrical diagram of lifts with electric drive of the Lada Granta is shown in the figure.
Here, gearmotors 2 and 5 are powered through switches 3 and 4, which are mounted in the armrest handles. Voltage to the switches is supplied from contact “2” of the immobilizer through the contacts of relay K2 located in the mounting block and fuse F2. Relay K2 is a relay type 904.3747-10.
If the power window mechanism does not work, then to eliminate this malfunction you need to remove the door trim and check whether voltage is supplied to the gear motors, and also check the fuse and the power window relay. If necessary, restore broken contacts in the wires, and replace the faulty gear motor with a new one.
Data for checking the serviceability of the gearmotor:
The idle speed of the gearmotor shaft is 56-90 rpm if the supply voltage is (13.5±0.1) V and the air temperature is (25±10) degrees C.
An electric window regulator (ESP) is a car device that allows you to raise and lower the door windows using a button. The ESP consists of a drive mechanism, a lifting mechanism and a control unit.
Like any other systems subject to intensive use, electric windows have an increased service life - about 30 thousand opening/closing cycles.
This resource is sufficient for 10 or more years of uninterrupted operation, however, if handled carelessly and/or under the influence of other negative factors (for example, water ingress), the device may fail much earlier than the stated period.
Most often, problems arise in the mechanical part, that is, some part of the lift itself breaks. In this case, when you press the button, you will hear the sound of a running motor, but the glass will remain in place.
It is worth inspecting the lifting mechanism for damage to the guides along which the glass moves.
If the ESP electric drive itself at one point suddenly stops responding to the press of a button, you should not rush to a car service center.
In this case, you can repair the power window yourself. You should start by finding the cause of the problem, and there may be several of them.
Here are the most common:
- The fuse has blown. If any electronic device in your car stops working, you should first look at the fuse box;
- The wires have broken or the contacts at the terminals have become loose. In this case, it is enough to restore the connection;
- The drive motor has failed. In this case, it will need to be replaced;
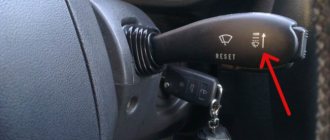
- The button itself is broken. If the driver's door power window button does not work or works intermittently, but the window rises properly from the main control unit, then the problem is in the button itself.
Due to constant temperature changes, a layer of oxide forms on the copper plates, which is why the button first starts working once. To fix the problem, you need to disassemble the control unit and clean the contacts from traces of dirt or oxidation.
It should be understood that any cleaning gives a short-term effect; over time, the problem will certainly recur. For greater reliability, it is recommended to replace the button.
Tips for motorists
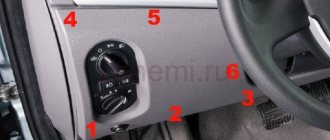
You can use electric windows (ESP) on a Lada Granta passenger car only when the ignition is turned on and within 30 seconds after the ignition is turned off. If at this time not a single power window is activated, then the driver will have to first check the integrity of fuse F2 (30A), located in the mounting block to the left of the steering column, and then relay K2, which is responsible for supplying voltage to the terminals of the power window motors.
If the fuse is intact and the relay is working, you need to try to reset the errors in the memory of the electronic unit by removing, for about five minutes, the negative terminal of the battery. Well, if this doesn’t help get the power windows working, then you’ll have to check the control unit.
When only one window lifter refuses to work, there is no point in looking into the mounting block, so you will have to remove the inner door trim and look for the problem there. The first thing you need to do is make sure that there is no mechanical damage, and then check whether voltage is supplied to the motor terminals. If the required voltage is present at the terminals, then you will have to completely remove the entire window regulator in order to eliminate the fault in the electric motor, and if this is not possible, then replace it along with the gearbox.
But before you do this, you need to use tape to fix the side glass in the up position. Also, mark the places where the guides are fixed so that during subsequent assembly you do not have to adjust them. The causes of electric motor failure may be hanging and wear of the brushes or poor contact of the wires with the commutator lamellas, since they are connected by crimping rather than soldering.
In addition to electrical malfunctions of window regulators, they may also experience mechanical malfunctions. One of them is cutting off the teeth of the plastic gear of the gearbox, since it engages with the metal winding of the worm located on the armature shaft of the electric motor. In this case, the driver will hear a cracking sound when turning on the power window with such a malfunction.
There are also cases of the window lifter jamming when the side window approaches the upper position. The reason is a metal bracket, which, when the glass moves upward, crashes into a plastic roller. To force the window lifter to work again, the moment you press the power button, you sharply slam the door. This does not always help the first time, and in the future, so that the window lifter does not jam, this glass is not raised completely by a couple of millimeters.
The right window regulator does not raise or lower at all. What could it be?
Look at the velvet covers on the guides; if they have worn down to the rubber, then replace them (glass does not slide on rubber).
0 0 Answer rating: 0
Maxim, she’s right next to these velvet shorts) and even when you take them off she still lifts them up(
0 0 Answer rating: 0
Georgy, take off the motor and try to lubricate it.
0 0 Answer rating: 0
Let's understand the scheme
Before you begin diagnosing a power window malfunction, you first need to familiarize yourself with the features of the vehicle's electrical circuit. If you can master it, there will be no special problems with making a diagnosis. To do this, you will have to find the car's owner's manual; there are separate wiring diagrams for the driver, passenger and rear doors. To diagnose a malfunction, you will need to know the location and connection of the following elements:
- Control block;
- central locking;
- turn signals;
- mirrors;
- blocks to the rear wiring harness, as well as to the speaker;
- window lift motor.
All described elements are indicated in the basic diagram. Why is all this needed? So that you do not mix up the connections and avoid confusion with the car’s electronics. Sometimes there are situations in which, for example, an inexperienced car enthusiast connects the right window regulator to the left side and vice versa.
Electrical equipment Lada Kalina
Car electrical diagram
Diagnostics of electrical equipment of VAZ 1117 Kalina. VAZ 1118 Kalina car diagrams, wiring, electric motors VAZ 1119 Lada Kalina.
Electrical diagram of a Lada Kalina car: 1 - right headlight; 2 — hood open sensor; 3 — sound signal; 4 - starter; 5 - battery; 6 - generator; 7 — windshield wiper gear motor; 8 — left headlight; 9 — right front door power window switch; 10 — motor-reducer for window lifter of the right front door; 11 — connection blocks to the right front speaker; 12 — electric drive for locking the lock of the right front door; 13 — windshield washer electric motor; 14 — ambient temperature sensor; 15 — block for connecting the wiring harness of the engine control system; 16 — electric drive for locking the left front door lock; 17 — brake fluid level sensor; 18 — connection blocks to the left front speaker; 19 — power window switch for the right front door, located on the driver’s door; 20 — left front door power window switch; 21 — door lock switch; 22 — motor-reducer for window lifter of the right front door; 23 — mounting block; 24 — control unit for the automobile anti-theft system; 25 — security alarm control unit; 26 — instrument cluster; 27 — right side turn signal; 28 — glove box lighting lamp; 29 — switch for the glove compartment lighting lamp; 30 — brake signal switch; 31 — ignition switch with transponder of the automobile anti-theft system; 32 — control unit for external lighting, instrument lighting and headlight beam direction control; 33 — steering column switch; 34 — left side direction indicator; 35 — connection blocks to the right rear speaker; 36 — electric drive for locking the right rear door; 37 — rear window heating switch; 38 — reverse lock switch; 39 — alarm switch; 40 — heater fan operating mode switch; 41 — additional resistor of the heater fan electric motor; 42 — heater fan electric motor; 43 — connection blocks to the left rear speaker; 44 — electric drive for locking the left rear door; 45 — electric fuel pump with fuel level indicator sensor; 46 — reverse light switch; 47 — parking brake warning switch; 48 — cigarette lighter; 49 — reverse lock solenoid; 50 — connection blocks to the head unit of the sound reproduction system; 51 — backlight lamps for the ventilation and heating system control unit; 52 — electric power steering control unit; 53 — interior lamp; 54 — right rear light; 55 — electric drive for locking the trunk lock; 56 — trunk light switch, built into the trunk lid lock; 57 — license plate lights; 58 - additional brake signal; 59 — rear window heating element; 60 — trunk light; 61 - left rear light. This diagram does not show the connection points and wiring harness terminals.
Maintenance and operation manual for Lada Kalina, with injection engines 1.4 and 1.6. The car owner can easily diagnose and repair the Lada Kalina car unit on his own in a garage workshop, find faults in electrical equipment, steering, brake system, engine and gearbox. Care tips can also be found in our sections. All Lada Kalina manuals are divided into thematic sections.
Grant window lifter control unit
Its design is almost completely similar to the design of the windshield wiper gearmotor.
The gearmotor can be called reversible, because The direction of rotation of the output shaft depends on the direction of movement of the electric current in the armature winding. The built-in thermobimetallic fuse protects the gearmotor from overloads.
The schematic electrical diagram of lifts with electric drive of the Lada Granta is shown in the figure.
Here, gearmotors 2 and 5 are powered through switches 3 and 4, which are mounted in the armrest handles. Voltage to the switches is supplied from contact “2” of the immobilizer through the contacts of relay K2 located in the mounting block and fuse F2. Relay K2 is a relay type 904.3747-10.
If the power window mechanism does not work, then to eliminate this malfunction you need to remove the door trim and check whether voltage is supplied to the gear motors, and also check the fuse and the power window relay. If necessary, restore broken contacts in the wires, and replace the faulty gear motor with a new one.
Data for checking the serviceability of the gearmotor:
The idle speed of the gearmotor shaft is 56-90 rpm if the supply voltage is (13.5±0.1) V and the air temperature is (25±10) degrees C.
Car: Lada Granta. Asks: Evgenia Kislyakova. Question: The glass went down, but didn’t go back up, what happened to the window regulator?
Good afternoon. I stopped in the parking lot, raised the right passenger window all the way, began to lift the left one, and it stood in the middle. I had to put Grant in a friend’s garage; I was afraid to put it in the parking lot in case it rained or a bird flew in.
Two front windows broke at once. I don’t have electrics at the back; the windows are lowered and raised using handles. When I press the power window button, nothing happens. I tried it with the machine turned on too.
Video
A simple way to increase the speed of the windows on a VAZ:
DC power supply with a voltage of 12V and a current of no more than 2.5A;
The glass lifting time is no more than 5 seconds;
Nominal lifting force 120 N;
Noise level 40 - 50 dB.
In order to unify and reduce the cost of the people's car, the designers of OJSC AvtoVAZ retained most of the parts (approximately 70%) from the Lada-Kalina car. And the electric door windows were no exception - Lada-Granta cars are equipped with an electric drive for raising and lowering the front door windows, which is completely similar in design and execution to the mechanism previously installed on Lada-Kalina cars.
If in previous VAZ models, on which a mechanical window lifter was installed, the usual gear reducer was used, then on the VAZ 2190 model there is only a drum with a hole into which the output shaft of the gearmotor is pressed.
Causes of malfunction
So, we gradually approached the issue of malfunctions. What if the window regulator cannot go down or up? Before you remove the window regulator, disassemble and repair it in your car, let's look at the main reasons. If the rear or front windows do not work, the reason may be either electrical or mechanical.
Detailed design of the EP system
Electrical faults
First of all, if the window regulator has stopped working, it is necessary to diagnose the safety element responsible for the functionality of the system. If you realize that the power window is not working due to a fuse, then you just need to replace it. But if the fuse is working, then you will need to measure the voltage at the electric motor terminals. This task can be accomplished using a regular 12-volt lamp or using a tester.
If you find that the driver's window or any other door does not work due to voltage, then you need to further check:
- wiring;
- relay;
- system control unit.
Sometimes a car owner thinks that the window regulator is broken if, after opening the window, it automatically begins to close until the key is turned in the ignition. As a rule, in this case the problem lies in the contacts, which should be cleaned. Much less often, but it still happens that repair of electric windows includes replacing or repairing a button.
Mechanical defects of the mechanism
If, after measuring the voltage, you realize that there is current in the system, but it does not go down or the window regulator does not work at all, most likely the problem is mechanical. As a rule, in this case, something is interfering with the device, so you will have to disassemble the door and look for the reason. Much less often, the reason lies in a failed electric motor (the author of the video is the channel In Sandro’s Garage).
How to raise the glass if the electric seal is broken - there are several options:
- Purchase a window regulator repair kit and repair the device, after which you can fully use the system.
- Try to grab the glass on both sides with your hands and pull it up. If the glass falls after being lifted, you will have to disassemble the door and place a support of the appropriate size under it.
- If you can’t lift the glass with your hands, you can take a fishing hook on a fishing line and lower it into the door card. You need to try to pry the glass and lift it.
Tips for motorists
You can use electric windows (ESP) on a Lada Granta passenger car only when the ignition is turned on and within 30 seconds after the ignition is turned off. If at this time not a single power window is activated, then the driver will have to first check the integrity of fuse F2 (30A), located in the mounting block to the left of the steering column, and then relay K2, which is responsible for supplying voltage to the terminals of the power window motors.
If the fuse is intact and the relay is working, you need to try to reset the errors in the memory of the electronic unit by removing, for about five minutes, the negative terminal of the battery. Well, if this doesn’t help get the power windows working, then you’ll have to check the control unit.
When only one window lifter refuses to work, there is no point in looking into the mounting block, so you will have to remove the inner door trim and look for the problem there. The first thing you need to do is make sure that there is no mechanical damage, and then check whether voltage is supplied to the motor terminals. If the required voltage is present at the terminals, then you will have to completely remove the entire window regulator in order to eliminate the fault in the electric motor, and if this is not possible, then replace it along with the gearbox.
But before you do this, you need to use tape to fix the side glass in the up position. Also, mark the places where the guides are fixed so that during subsequent assembly you do not have to adjust them. The causes of electric motor failure may be hanging and wear of the brushes or poor contact of the wires with the commutator lamellas, since they are connected by crimping rather than soldering.
In addition to electrical malfunctions of window regulators, they may also experience mechanical malfunctions. One of them is cutting off the teeth of the plastic gear of the gearbox, since it engages with the metal winding of the worm located on the armature shaft of the electric motor. In this case, the driver will hear a cracking sound when turning on the power window with such a malfunction.
There are also cases of the window lifter jamming when the side window approaches the upper position. The reason is a metal bracket, which, when the glass moves upward, crashes into a plastic roller. To force the window lifter to work again, the moment you press the power button, you sharply slam the door. This does not always help the first time, and in the future, so that the window lifter does not jam, this glass is not raised completely by a couple of millimeters.
The right window regulator does not raise or lower at all. What could it be?
Look at the velvet covers on the guides; if they have worn down to the rubber, then replace them (glass does not slide on rubber).
0 0 Answer rating: 0
Maxim, she’s right next to these velvet shorts) and even when you take them off she still lifts them up(
0 0 Answer rating: 0
Georgy, take off the motor and try to lubricate it.
0 0 Answer rating: 0
Removing and installing the rear door window regulator on a Priora
So, before you begin this repair, you need to remove the rear door trim. After this, unscrew the two glass mounting bolts from the glass mounting strip. The bolts are accessible only when the glass is raised almost as high as possible.
When you have dealt with this, you can fix the glass so that it does not move down. Then we take the keys and unscrew all the nuts securing the window regulator. You can clearly see them in the photo below. The top nut is in close proximity to the glass.
Then the lower one is at the same level, everything is also clearly visible in the top photo. And after that there are three more fastening nuts directly next to the power window drive handle.
Now, through the largest technological hole in the door, it is necessary to pull out the entire structure of the rear window regulator.
The final result of the repair is shown in the photo below.
Replacement is quite simple - we take a new window regulator and install it in its original place. The price of a new lift is approximately 350 rubles. If you decide to install electric lifts, then the price of one can reach up to 1200 for one assembled.
One more point is worth noting: when installing a new window regulator on a Priora, pay special attention to the fastenings of the bar to the glass. It is necessary to fix it in such a way that the glass lowers and rises without distortions and unnecessary effort.
It is for these purposes that the holes in the plank are made oblong.
Operating principle of electric windows
Power window
The electrical control system, as a rule, has a trapezoidal design that ensures easy lowering and raising of the windows when the corresponding buttons are pressed on the main switch block, which is either located next to the driver or is embedded directly in the door panels. An independently functioning motor is installed inside each door, which is capable of working in two directions, raising the glass up and lowering it down.
The power window system on modern cars includes special relays that control the electric current going to the window motors.
On some machine models, in addition to the fuse that protects the entire circuit, there are circuit breakers designed for each of the electric motors separately.
The introduction of such an element guarantees proper operation of the entire system of electric windows in the event of failure of one of them.
Sequencing
- Before starting work, the body element must be installed on the supporting structure. The algorithm is described at the beginning of the article;
- We clean the inner surface of the metal structure from dirt, deposits, and degrease it with acetone and gasoline.
- We check the condition of the vibration isolation pad. We paste over new ones as needed.
- Cut out pieces of Visalis of the required shape.
- Lubricate the moving elements with Litol.
- We place the electrical wiring in a plastic sleeve.
- Heat Bitoplast and apply Visalys.
- Assembling the body element.
Lada Granta 2012, 87 l. With. - breakdown
Lada Granta, 2015
Lada Granta, 2015
Comments 12
Hello everyone, I also have a grant, but the right window lifter does not work for me
Hello. I have the same problem, and I also have window closers, the right lift has stopped working. How did you solve the problem?
I didn’t decide, I gave up, every other time it either works for me or doesn’t, I just started lifting the windows with my hands (like this is more reliable than checking every time whether it’s up or not)
Good day!
When I press the button on the right front passenger window, the window goes down all the way and immediately returns up (LADA GRANTA luxury).
What could be the reason?
I would like to inform you that an additional security alarm was installed along with the standard one.
My right one is also having some nonsense
=) That’s right... the button is dead, the power window buttons are connected in series
This happened to me, and I thought the engine was dead. But it turned out that the button is the brain... I disassembled and reassembled everything works
I stopped by the service center, one of the electricians said, go to the officials, you’re not the first, supposedly the engine of the grant is bent, I’ll talk to them tomorrow, everything would be fine, but the officials are in another city 60 km from mine, I work until half past six , after work, either rush or ask to take time off earlier.
But the most annoying thing is that they will have to leave the car to get home - figure out how to do it yourself, and...
I have a major Shumka there, but I feel like they won’t stand on ceremony, they’ll tear everything up, so when I get there, I’ll ask what holes they need, and I’ll tear them off as needed =) (there’s a possibility that they’ll also come after me, saying, well, I shorted the Shumka there =) )
Troubleshooting
Minor breakdowns include glass rattling, noise in the window lifter, free movement of glass under mechanical influence (for example, the glass does not rise or fall with the lifter, but the same can be done by hand). Their cause is skewed glass, failure of rollers or cables. If the glass is skewed, it must be adjusted. If the cable is broken, it must be replaced. If the cable comes off the rollers, you need to pull it back and adjust the car window regulator. The occurrence of noise is a sign that the mechanism is poorly lubricated. To eliminate the malfunction, you need to thoroughly lubricate all the power window mechanisms, as well as the glass guides. If the mechanism operates slowly, it should also be lubricated or replaced with a new one. Over time, the speed of lowering and raising the windows decreases due to wear and tear on the window lift motor.
Specifications
| See all advertisements in the archive |
| Rated supply voltage Raising (lowering) time, no more than Nominal force when lifting Current consumption at rated force, no more Maximum force on glass Operating life | 12 V 5 sec 120 N 7.5 A 200 N 30,000 cycles |
The power window operation mode is short-term. After ten lifting and lowering of the glass in continuous mode, it is recommended to take a break from work for at least 10 minutes.
Lada Granta right window lifter does not work
Car: Lada Granta. Asks: Evgenia Kislyakova. Question: The glass went down, but didn’t go back up, what happened to the window regulator?
Good afternoon. I stopped in the parking lot, raised the right passenger window all the way, began to lift the left one, and it stood in the middle. I had to put Grant in a friend’s garage; I was afraid to put it in the parking lot in case it rained or a bird flew in.
Two front windows broke at once. I don’t have electrics at the back; the windows are lowered and raised using handles. When I press the power window button, nothing happens. I tried it with the machine turned on too.
Photo report on the installation of GRANAT electric windows in the front doors of LADA Granta
Our buyer, Sergey Igorevich Burlakov (Volgograd, Volgograd region), as part of his participation in the campaign, prepared and sent this report on the installation of GRANAT electric windows in the front doors of LADA Granta.
Hi all! I wanted to share my experience in installing Garant window lifters for the Lada Granta (in the front doors) and the power window switch block! To begin with, I had to remove the door trim, it’s better not to use a screwdriver (you can scratch the trim) - to pry it off, but you can use a plastic card or a special one. tool for working with plastic. As you can see, we removed the plastic trim, and also unscrew the metal fasteners on the right side (it is held on by 3 bolts) in order to slip in the window lifter itself and remove the old one.
Next, to avoid touching the glass again, you need to fix it with a screwdriver near the rubber band, but before that, lift the glass itself to the top. Next we unscrew all the holders, screws, etc. and remove the old window regulator through the large hole. Now you can try on the new window regulator and mark the place where you need to drill a hole! You can do it according to the diagram that is in the instructions for the window lifters. You can also put the window lifter in its standard places, on the inside we feel with our hand the place where we need to drill and tap on it with a screwdriver. This, in my opinion, is faster and easier, but you need to be sure that it is the screwdriver that is knocking. I made 2 doors myself and didn’t make a mistake more than once! The photo shows the result of the drilling itself.
Now we fix the entire window lifter in place and attach the seats to the glass carefully so that they do not put pressure on the glass at the initial stage and there is no chance of breaking it! Next, we test run the window lifter up and down a couple of times to make sure that nothing prevents it from moving normally, and only then can we finally screw everything on.
We stretch the wiring, lowering the remaining parts of the wiring so that they lie at the bottom of the door and do not interfere with the opening of the window lifter! The negative can be connected to the bolt from the window lifter. We put everything in place (trimming, handle and metal fasteners), before that we cut a hole for the window lifter button. The fastest way is to do this, attach the button itself where you need to make a hole, mark the place with a colored pencil, then drill it along the contour and cut it out with a stationery knife, sand the edges so that they do not cling. And now we carry out wiring through the cabin to the middle from two doors.
We connect two wires from two doors so that the passenger door can be controlled from the driver’s button, and then we connect “+” and the backlight to the cigarette lighter. In order not to remove the entire console, you can remove the glove compartment and insert the wires to the cigarette lighter in the upper left corner. For the cigarette lighter: - red and white are a constant plus, - white is the backlight, - black is a minus.
In the end, everything works, just before connecting, remove the terminals from the battery, otherwise the fuse can burn!! They rise very quickly, I really liked them))) Thanks to the store Steklopodem.RF
And thank you, Sergey Igorevich, for the photo report and we will transfer the promised prize to your mobile phone account.
Buy
Connection instructions
To connect the button of the mechanism that raises the glass, you will need a whole set of tools and materials. If the installation is carried out on several doors, then you will need the same number of kits as there are doors.
- female-male block having two contacts;
- connection connector;
- 2 male terminals;
- 2 large female terminals and 7 small terminals;
- beet lifting mechanism key;
- glass and key connector;
- 4 meters of wire with a cross section of 0.75;
- 7 pistons for the door.
Electrical connection diagram
If the key for raising the glass is installed directly in the door, then its installation will consist of the following steps:
- Before work, you should turn off the power to the car by removing the negative terminal from the battery.
- To access the glass lifting mechanism, the trim must be removed.
- The power window button is installed on the driver's door; you need to run wiring from it to those doors where the same keys will be installed.
- There is a black and white 12 V wire on the power window relay. Connect 2 red 12 V wires to it.
- On the car door there are blue and gray wires connected to the window lift motor. The prepared wires need to be connected to the block connector: black and white to the blue wire, and black to the gray.
- There should be 5 wires connected to the button. The black wire is responsible for ground; red receives 12 V; black and white goes to blue; white — illumination of power window buttons; The black one is connected to the gray one from the block.
Switch connection pinout
It is necessary to connect wires with terminals using the following diagram:
- red 12-volt connects to hole #2;
- black and white (from blue) – hole No. 3;
- white (backlight) – hole No. 4;
- black (“ground”) - hole No. 5;
- black (from gray) - hole No. 6.
It is important to correctly connect all wires to the appropriate sockets of the connector, otherwise the control buttons will not work. Then you need to take black and black-and-white wires of the appropriate length and insert the black one into socket No. 1, and the second into socket No. 2
The loose ends should be crimped using large female terminals and connected to the new connector. In this case, you need to make sure that the connected black and white wire is directed to blue, and the black wire is directed to black
Then you need to take black and black-and-white wires of the appropriate length and insert the black one into socket No. 1, and the second into socket No. 2. The loose ends should be crimped using large female terminals and connected to the new connector. In this case, you need to make sure that the connected black and white wire is directed to blue, and the black wire is directed to black.
At this stage, the connection is considered complete. All that remains is to install the glass and the window lifter button, securing them with sealant in a specially made connector in the door trim.
Thus, you can connect the switches for raising the glass yourself, if you use the connection diagram and have experience in electrical work. This will give you the opportunity to improve your car without resorting to the help of a car service.
Sorry, there are no surveys available at this time.
How to fix stuck power window buttons on a Priora
If the power window buttons work every once in a while or get stuck, but at the moment it is not possible to purchase a new control unit, you can fix the problem as follows:
- We remove the control unit. To do this, you need to carefully snap off the 6 plastic clips on the body of the decorative cover;
- Let's disassemble the block. To do this, you also need to unclip 6 clips on the body of the unit itself;
- We take out the control board and clean it of any contaminants;
- We remove the buttons themselves by carefully bending the side fastenings with a screwdriver;
- We remove all dirt and debris from the paths using alcohol and cotton wool;
- Lubricate the working part of the button with silicone grease (this is not necessary, but this will make the button move smoother);
- We assemble everything in reverse order.
Replacing the power window button Renault Logan and Megan
VIDEO REVIEW » alt=»»>
You can also replace the power window button block on Renault Logan and Megan cars yourself.
- All you need is a flathead screwdriver and a cloth or tissue.
- To remove the control unit, just carefully pick it up with a screwdriver and gradually pull it out of its seat. To avoid accidentally damaging the casing during dismantling, it is recommended to wrap the screwdriver in a thin cloth.
- Next, you need to disconnect the terminals with the wires, making sure that they do not fall inside the casing. Then you need to connect the new unit and install the buttons in place.
Car: Lada Granta. Asks: Evgenia Kislyakova. Question: The glass went down, but didn’t go back up, what happened to the window regulator?
Good afternoon. I stopped in the parking lot, raised the right passenger window all the way, began to lift the left one, and it stood in the middle. I had to put Grant in a friend’s garage; I was afraid to put it in the parking lot in case it rained or a bird flew in.
Two front windows broke at once. I don’t have electrics at the back; the windows are lowered and raised using handles. When I press the power window button, nothing happens. I tried it with the machine turned on too.
Recent Entries
After releasing the door trim, there is no need to rush to remove it. In this case, when you press the control button, you can hear the electric motor running, but the glass does not move.
Black and white - to hole number 3. American statistics literally record dozens of accidents associated with a simple situation: a baby left in a stationary car stuck its head out the window, and with some paw - front or back - accidentally pressed a button on the armrest lifting the glass.
Window lifter button, troubleshooting methods The window lifter button fails If problems arise due to the power supply, first of all you need to check the fuses. This option occurs much less frequently.
Next, apply conductive glue to the surface of the rubber shell in the place where the printed circuit board and contacts come into contact. In such a situation, either something interferes with the movement of the window lifter, or the electric motor has failed. To remove the trim, you should: Unscrew the three screws from below that hold the plastic pocket of the trim. Otherwise it will be impossible to remove the mechanism.
Connecting the window lift button with your own hands To connect the button of the mechanism that raises the glass, you will need a whole set of materials and tools. Remove the two bolts holding the inner handle. If there is no voltage, check the wiring, relays and control unit. But the second wire to the engine goes past the closer.
Window control unit - how to connect it yourself? Apparently this was done so that if the door closer fails, you can always close the window by simply holding the button.
Next, align the holes in the rail with those you made in the door. Keep an eye out for any parts of the drive adapter that may fall out when removing the motor. It is recommended to switch all power circuits using relays to maintain the integrity of the buttons. Connecting the window lift button with your own hands To connect the button of the mechanism that raises the glass, you will need a whole set of materials and tools.