Removing the front electric windows of the Lada Granta
You will need: slotted and Phillips screwdrivers, a “10” wrench, removing the door trim.
Scheme 1. Fastening the front ESP.
1. glass guide fastening nut; 2. nut for fastening the gearmotor; 3. glass holder bolt; 4. block with electric drive wires.
First you need to remove the Granta door glass ; to do this, you need to lower it to its lowest position. Further:
- Remove the door trim mounting bracket by removing 3 bolts.
- Remove 2 bolts while holding the glass.
- Remove the front door glass by lifting it up and turning it in the door opening.
To remove the Lada Granta power windows you need:
- Unscrew the 8 nuts securing the glass guides, as well as the 3 nuts securing the window lift motor to the inner door panel.
- Remove the window lift mechanism assembly with the gear motor from the door cavity.
Installation is carried out in reverse order.
Delivery by transport company
Delivery by one of the transport companies with a representative office in your city. Delivery time: 2-10 days depending on the distance of your locality from Togliatti. The most convenient and fastest way to deliver orders of different sizes. Delivery cost from 250 rub. depending on weight and delivery distance.
Orders are sent by transport companies based on 100% payment for the order.
We cooperate with:
PEC
Find the nearest representative office, track the cargo and calculate the delivery cost
pecom.ru
Business Line
Find the nearest representative office, track the cargo and calculate the cost of delivery
dellin.ru
Baikal Service
Find the nearest representative office, track the cargo and calculate the cost of delivery
baikalsr.ru
Energy
Find the nearest representative office, track the cargo and calculate the cost of delivery
nrg-tk.ru
GTD (formerly KIT)
Find the nearest representative office, track the cargo and calculate the delivery cost
https://gtdel.com
Zheldor expedition
Find the nearest representative office, track the cargo and calculate the cost of delivery
jde.ru
SDEK
Find the nearest representative office, track the cargo and calculate the cost of delivery
edostavka.ru
If you do not know which method of delivery of goods will be more convenient for you to use, then place an order for any method, and when our manager contacts you to confirm the order, he will recommend you the most optimal method in terms of cost and delivery time for your order. No matter what region of Russia you live in, there is always a profitable and convenient delivery method for you.
The lead time for placing orders with “In Stock” items is 1-4 business days, after receipt of funds (orders are not generated on Saturday and Sunday). Lead time for orders that include painting services: 3-8 business days. The lead time for placing orders and “made to order” items is from 14 days; you can check with the manager for more detailed information.
Delivery is carried out throughout Russia and the CIS. Orders for pickup are placed on the website, the processing time is on average 1-4 business days, after the items arrive at the pickup point, the manager will notify you when you can receive your order.
Attention! Regardless of which delivery method you choose, check the integrity of the goods and packaging upon receipt of the cargo (parcel).
ATTENTION! All fragile goods (headlights, plastic products, glass, etc.), by default, are sent in additional paid packaging from TK. If you take responsibility for integrity, we can ship without it. To do this, you need to make a note in the comments when placing your order. For additional information, please contact the managers.
To improve the quality of customer service, video recording of order packaging is performed.
Removing rear windows on Lada Granta
You will need: key set to “8”, remove the door trim.
Diagram 2. Mounting the rear window regulator.
1. glass guide fastening nut; 2. glass holder bolt; 3. nut securing the window lift mechanism.
To remove a mechanical window regulator you will need:
- Remove the spacer.
- Remove the 2 bolts securing the glass holder to the slide.
- Unscrew the 3 nuts securing the window lifter guide.
- Unscrew the 3 nuts securing the window lift mechanism to the inner door panel.
- Pull out the window regulator through the access hole in the panel.
To remove the power window you will need:
- Remove the 2 bolts securing the glass holder to the slide.
- Disconnect the block from the wires.
- Unscrew the 6 nuts securing the window regulators to the door.
- Remove the Lada Granta ESP through the technological hole in the door.
Installing the interior light of the Lada Kalina in the Lada Granta Rear view camera on the Lada Granta Lada Granta hatchback photo Removing the fender liners on the Lada Granta Adsorber Lada Granta Lada Granta hybrid
Installation
Window lifter mounting diagram in Vesta doors
:
Removing and installing a window regulator
(the process is similar for mechanical and electrical):
- Remove the spacer from the handle axle.
- Unscrew the two bolts securing the glass holder to the slide by 2-3 turns.
- Raise the glass and secure with tape.
- Remove the 2 nuts securing the window lifter guide.
- Unscrew the 3 nuts securing the window regulator mechanism to the door and remove it.
- Installing the window regulator is performed in the reverse order.
Wires for rear ESP
No, so you will have to do the wiring yourself. We remove the wires from the driver's door. Here we either buy female/male terminals for the door connector, or make holes with a drill.
Next, we stretch the wires under the threshold to the rear left door, and then under the sofa to the rear right door.
We install a new ESP control unit and ESP switches for rear passengers.
Relays and fuses Lada Granta
Fuse and relay box in the passenger compartment
To access the mounting block, pull the bottom left corner of the cover to release the left locking point 1, then release the middle bottom point 2 and the two right locking points 3 and 6, then release the top locking points 4, 5 and remove the cover.
Installation of the cover is carried out in the following order: first snap the right fastening elements of the cover at points 6 and 3, then snap the lower fastening elements of the cover at points 2 and 1, then the upper ones at points 4 and 5.
| № | A | Protected Circuits |
| F1 | 15 | Ignition coils Injectors Engine control system controller |
| F2 | 25 | Norma, Lux: Central body electronics unit Driver door module |
| F2 | 5 | Standard: Daytime running lights |
| F2 | 30 | Window lifters |
| F3 | 15 | Norma, Lux: Automatic gearbox control controller Automatic gearbox control drive |
| F3 | 10 | Standard: Hazard Alarm |
| F4 | 15 | Airbag system controller |
| F5 | 7.5 | Terminal 15 devices |
| F6 | 7.5 | Reversing light VAZ-2190 Turn indicators (Standard) Automatic gearbox control controller (Norma, Luxury) Safe parking system control unit (Norma, Luxury) |
| F7 | 7.5 | Canister purge valve Mass air flow sensor/pressure sensor Phase sensor Oxygen concentration sensors |
| F8 | 25 | Rear window heater Heated exterior mirrors (Normal, Lux) |
| F9 | 5 | Side lights on the starboard side |
| F10 | 5 | Side lights on the left side Illumination of instruments and keys License plate lights Luggage compartment light Glove box light |
| F11 | 5 | Rear fog lights |
| F12 | 7.5 10 | Low beam, right headlight Electrical corrector for right headlight |
| F13 | 7.5 10 | Low beam, left headlight Electrical corrector of the left headlight |
| F14 | 10 | High beam, right headlight |
| F15 | 10 | High beam, left headlight |
| F16 | 10 | Right fog lamp |
| F17 | 10 | Left fog lamp |
| F18 | 20 | Front seat heaters Cigarette lighter |
| F18 | 10 15 | Cigarette lighter |
| F18 | 15 | Front seat heaters |
| F19 | 5 | Norma, Lux: Anti-lock brake control unit |
| F19 | 20 | Standard: Door locking motors |
| F19 | 15 | ABS Lada Granta |
| F20 | 15 | Sound signal |
| F20 | 15 | Horn Trunk lock Gearbox Cigarette lighter Diagnostic connector |
| F21 | 15 | Fuel pump |
| F22 | 25 | Windshield washer Central body electronics unit Rear window washer Rear window wiper |
| F22 | 15 | central locking |
| F23 | 5 | Instrument cluster Diagnostic connector |
| F23 | 10 | Daytime Running Lights |
| F24 | 7.5 | Norma, Lux: Air conditioning compressor clutch Automatic climate control system controller |
| F25 | 7.5 | Brake lights Interior lighting (Standard) |
| F26 | 10 | Norma, Lux: Central body electronics unit |
| F26 | 25 | ABS/ESC |
| F27 F31 | 25 | Anti-lock brake control unit |
| F28 F32 | 30 | Electric heater fan Automatic climate control system controller Electric power steering3) |
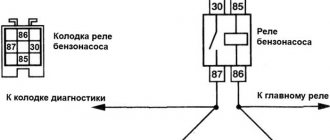
| Relay | ||
| K1 | Radiator cooling fan relay | |
| K2 | Window lifter (standard version) Minimum cooling relay for cooling module (luxury version) | |
| K3 | Starter relay | |
| K4 | Ignition switch unloading relay | |
| K5 | Turn signal and hazard warning relay | |
| K6 | Windshield wiper relay (standard version) Seat heating relay (luxury version) | |
| K7 | High beam relay | |
| K8 | Horn relay | |
| K9 | Low beam relay | |
| K10 | Heated rear window relay | |
| K11 | ECM relay VAZ-2190 | |
| K12 | Fuel pump relay | |
| K13 | Additional alarm relay | |
| K14 | Additional alarm relay | |
| K15 | — | |
| K16 | — | |
| K17 | — |
New mounting block
Fuse box in the engine compartment under the hood
| № | A | Protected Circuits |
| 1 | 50 | Heated windshield |
| 1 | 30 | Low beam |
| 2 | 60 | Generator |
| 3 | 60 | Generator |
| 4 | 30* 40 | Electric radiator cooling fan |
| 5 | 50 | Electromechanical power steering |
| 6 | 40 | Anti-lock brake control unit |
Please note that there are different variations of this block.
Connection option 1
- 30A Low beam headlights or main relay, circuits protected by fuses F1 and F21 of the mounting block in the passenger compartment 50A Windshield heater
- 60A Generator VAZ-2190
- 60A Generator
- 30/40A Heater fan (heater fuse grants)
- 50A Electromechanical power steering
- 60A ABS block
Connection option 2
- 60A Generator
- 60A Generator
- 30/40A Electric radiator cooling fan
- 40A ABS/ESP
- 25A ABS/ESP
- 50A Electric Power Steering Controller
Connection option 3
- 30A Low beam headlights or main relay, circuits protected by fuses F1 and F21 of the mounting block in the passenger compartment
- 60A Generator
- 60A Generator Lada Granta
- 30A Heater fan (heater fuse grants)
- 50A Electric power steering
Lada Granta SETUP › Logbook › Electric windows on Standard. All at once.
With the arrival of spring, I quite clearly felt that I no longer wanted to lower and raise the windows with my hands. I want to push buttons. This means that it’s time to install electric windows. To drive just like a white gentleman. Want
ESP is not harmful. Put
– not so difficult. The Drive is full of entries. Ready-made sets of rack ESP “Granat” and “Forward” are sold. There you will find the mechanisms themselves, wiring, and buttons. And even instructions for connecting.
But we are not looking for easy ways.
Rack and pinion
Installation
For installation, no special fixtures, instruments or other equipment are required. The entire installation process is trivial and will be simple for any male person. The main thing is to have desire and skillful, masterly hands. Before starting the installation, you need to purchase a five-pin standard relay for VAZ car models in advance. Then the door closer itself is installed; all you need to do is run a wire under the door trim and that’s it. But the most important role here is played by the alarm system, since a free open channel comes from it, to which the automatic glass closer system is connected.
Through this signaling channel, a negative pulse is sent, which polls the sensors.
When you have already reached the finish line of installing the closer, you must disconnect the negative power cable from the battery . This is a kind of protection against short circuits that can occur and damage the entire electrical wiring of the car. These actions must be completed without fail.
The next step is to remove the door card from the driver's door. When removing, you need to act carefully so as not to damage or deform it. If it is not available, then it is better to buy hedgehog clips in advance. The new ones are better, there will be no worries about poor fastening.
After this, the connectors are removed from the power window control module in the Lada Granta model.
Similar products
Do you like the store? Rate it on the Market! Familyevich Evgen
Very good store, I recommend it!
Aminev Maxim
The best window lift store in Russia! :)
Latysheva Julia
Fast? placing and sending an order, complete and accurate information about the order.
Osipov Alexey
They called back right away and clarified the order. The order arrived ahead of schedule.
Safarov Oleg
Well done. You work quickly. And most importantly, the prices are reasonable. Keep it up!!
Nikolay Sotnichenko
Advantages:
Good order processing speed. Pleasant communication from employees.
Flaws:
No.
Ruslan Lukoyanov
I am very pleased with the work of the store, everything is without deception and fast delivery. Keep it up!
Dorofeev Timofey
I definitely recommend the store. Very quickly and clearly. Other online stores could do it.
Vitaly Sukhovlovsky
Advantages:
All liked it
Flaws:
No
A comment:
The order arrived on time, everything is fine, thank you.
Malenkin Roman
Ordered on Sunday, they called back within 10 seconds. Sent on Monday. Lightning-fast comrades! Well done!
Fedotov Nikolay
Advantages:
Excellent shop
Flaws:
No
A comment:
fast, cheaper than other stores, high quality.
Korolev Alexander
Very responsive sellers, after placing the order they immediately called back and discussed the order and sent it out the next day.
Sulin Vladimir
Excellent store, received the order clearly, shipped quickly, received it earlier than expected. The product corresponds to the order. Well done!
Bogumilov Valery
Advantages:
Everything is super, fast and high quality.
Flaws:
No
A comment:
Thank you, well done, everything is high quality and fast.
Bobrovsky Igor
Advantages:
convenient, fast, no problem
Flaws:
No
A comment:
They work quickly and ship quickly. Thank you!
Semyon Semyokhin
Advantages:
Quick response to orders, polite technical support, prompt assistance in any questions that arise
Flaws:
Not found
Read more: Kia Sorento 2 Forum Bohun Orest
Overall only positive impressions. I recommend this store. Prices may even be cheaper than in retail stores.
Arbuzov Valery
Excellent store, quickly received and processed the order. They delivered the parcel efficiently to its destination. Good luck guys. All the best.
Tushakov Rusya
Advantages:
Fast delivery, quality
Flaws:
No disadvantages
A comment:
Shipped quickly, ESP are great to install and use
Gilmanov Sergey
I liked the efficiency, the promptness upon receipt of the goods, the wide selection with delivery of goods, and of course the quality of the brand itself is not great.
super.tatana87
I filled out the application incorrectly myself, ordered a call back, they called me back right away, everything was corrected, I really didn’t expect this, the coolest online store
Borisov Vladislav
A little more than three hours passed from the moment of order to delivery. and this is on a WEEKEND day. Well done. A worthy example for other online stores!
Alexey Smirnov
I ordered a window lifter for Kamaz. Even delivered ahead of schedule. Installed it, works great, everything fits in the right place. Well done guys work quickly.
Ushakov Dmitry
Advantages:
Fast processing, sociable consultants, fast delivery, convenient.
Flaws:
No
A comment:
Excellent store I ordered it and don’t regret it
Lovtsov Alexander
There are simply no words, especially about the store staff. Well done guys, they kept you informed all the way about what and how))) I didn’t regret one bit that I ordered from you)
Pugachev Alexander
Advantages:
everything is prompt.
Flaws:
undetected
A comment:
I haven’t installed it yet, but everything seems to be of good quality, even the rather thick wires.
Viktorov Artyom
Advantages:
Fast ordering and delivery
Flaws:
No
A comment:
Only the best impressions, reasonable prices and delivery on time
Vilisov Vyacheslav
Advantages:
Convenient, understandable, accessible, easy to place and receive an order!
Flaws:
Didn't find it when I first ordered
( 2 ratings, average 4 out of 5 )
The procedure for replacing a window regulator on a Grant with your own hands
So, the first step is to complete several preparatory steps, without which it is impossible to get to the structure itself.
- Remove the front door trim
- Unscrew the bolts securing the glass to the lift bar
- Disconnect the power wires from the window motor
Next we perform the following steps. Using a 10 mm socket, unscrew all the nuts securing the trapezoid to the door. They are clearly shown in the photo below.
There are 11 such nuts in total.
When everything is unscrewed, lightly press on each of the lift studs so that it moves inward.
Then, by simple manipulations with the trapezoid, you can pull it out together with the motor.
We thread the motor through the same hole in the door and remove the remaining part of the Granta window regulator, as is clearly shown below.
If you have any questions about further repairs or replacing the motor itself, then the video review below will show and explain everything in detail.
Main causes of failure
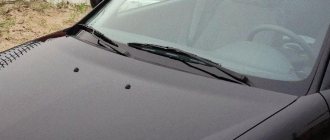
Most likely the power window fuse is at fault.
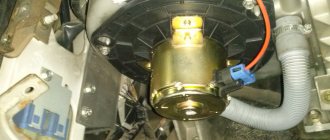
The angle is not good, but this is exactly what the mounting block looks like when you look at it from above
From the situation you described, it follows that the fuse is to blame. There are enough symptoms and prerequisites for its breakdown. First, you raised one glass, which is already good, since raising both windows at the same time is not recommended due to the increased load. Then they started to lift the second window, and the fuse burned out.
If one of the glasses works, then the fuse is good.
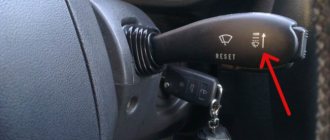
The button is broken
The power window buttons in the Norma configuration usually do not cause problems
If only one of the two or four power windows does not work, depending on the configuration and equipment of the car, then the problem is most likely in the button or in the wiring to it. It is necessary to remove the front door trim and ring the buttons, you can also look at the voltage on them.
Front passenger window button
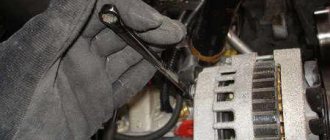
Motor failure
Appearance of the new motor (purchased to replace a broken one)
The window lift motor on the Lada Granta rarely causes problems. This part is reliable, but it can also fail. You can check the motor by applying voltage to it forcibly, that is, directly from the battery.
Power window doesn't work
Modern, well-equipped cars are always equipped with electric windows. The presence of such a function is no longer a special innovation, but, nevertheless, it is appreciated by numerous motorists for the convenience that this system provides.
However, during the operation of their car, car owners often notice how poorly the window regulator works, that it does not respond to pressing a button or periodically jams. To understand what happened to this element, you need to have an idea of the window lift system as a whole and the principles of its operation, and only then start troubleshooting.
Components of the window lift system
The power window system operates thanks to electric motors that are built into car doors and are responsible for raising and lowering the side windows. The electric window system includes the following elements:
☑ regulators (electric motors);
Operating principle of electric windows
The electrical control system, as a rule, has a trapezoidal design that ensures easy lowering and raising of the windows when the corresponding buttons are pressed on the main switch block, which is either located next to the driver or is embedded directly in the door cards. An independently functioning motor is installed inside each door, which is capable of working in two directions, raising the glass up and lowering it down. The power window system on modern cars includes special relays that control the electric current going to the window motors.
Specifications
| See all advertisements in the archive |
| Rated supply voltage Raising (lowering) time, no more than Nominal force when lifting Current consumption at rated force, no more Maximum force on glass Operating life | 12 V 5 sec 120 N 7.5 A 200 N 30,000 cycles |
The power window operation mode is short-term. After ten lifting and lowering of the glass in continuous mode, it is recommended to take a break from work for at least 10 minutes.
How to disassemble the grant window lifter button
We are carrying out work to replace the window lifter mechanism. Operations for removing the window regulator are shown on the driver's door. The window lift mechanism of the right front door is removed in the same way. Set the glass to the top position. Disconnect the wire terminal from the negative terminal of the battery. Remove the front door trim (see “Removing the front door trim”).
We secure the glass with tape to the door frame. Loosen the tightening of the glass holder bolts (see “Removing the front door glass”).
By pressing the latch, we disconnect the wiring harness blocks of the window lift motor gearbox.
Video
A simple way to increase the speed of the windows on a VAZ:
Specifications:
DC power supply with a voltage of 12V and a current of no more than 2.5A;
The glass lifting time is no more than 5 seconds;
Nominal lifting force 120 N;
Noise level 40 - 50 dB.
In order to unify and reduce the cost of the people's car, the designers of OJSC AvtoVAZ retained most of the parts (approximately 70%) from the Lada-Kalina car. And the electric door windows were no exception - Lada-Granta cars are equipped with an electric drive for raising and lowering the front door windows, which is completely similar in design and execution to the mechanism previously installed on Lada-Kalina cars.
If in previous VAZ models, on which a mechanical window lifter was installed, the usual gear reducer was used, then on the VAZ 2190 model there is only a drum with a hole into which the output shaft of the gearmotor is pressed.
The gearmotor itself is structurally made of a direct current electric motor, excited by permanent magnets and a worm gearbox.
Repair or buy new parts
The question often arises: is it worth trying to repair an old window regulator, or is it better to install a new one? You need to proceed from the specific situation - if during the disassembly process it turns out that everything is worn out, there is no particular point in repairing it.
Based on the prices for spare parts for AvtoVAZ cars, it is more logical to buy new spare parts - this will not break a serious hole in the budget.
If the “opening” shows that the mechanism is in perfect condition and the problem can be easily solved, then it is better to fix it without spending money on new spare parts.
Changing the color of the Lada Granta power window buttons
As you understand by the locations of the reeds
But on the driver’s side (there are no sides here, only two in front and two in back)
The module is removed in the same way, but either with two screwdrivers or something wide (I didn’t remove it a second time for the sake of the photo. I actually removed it while removing the casing to find where these tabs are.)
Then we take them home. They are held in place by 5 latches (two on the side and one) I pushed a cap under each, and then pulled the 5th with a screwdriver and pulled it out
Don't lose these things:
They stand on both sides of the board in the slots
We see the following: The diode itself is circled
Let's solder it. Here it is on the tape side by side: DDD
Next, take a knife and remove the varnish from the tracks in order to increase the area. We tear off, tin, and weld the diode from the tape. Angled towards the larger part of the board
Yellow indicates the corner on the diode. This is checked by supplying 12V to the appropriate terminals. “+” is written on the board, but just in case I noted it in the photo.
It’s easy to assemble: put the main part in place, if the plates fall out, put them back in place. We take the part with the button in our hands and holding it by the body so as not to press the button, we simply snap it into place.
How to remove the window lifter handle on a Grant
What you need to remove the window lifter handle
In order to remove and install a new window lifter handle, you will need to obtain:
1) Flat screwdriver;
2) A handle I just bought, complete with a washer and a latch.
No special pullers or rare tools are needed. That is why repairing the window lifter mechanism will not be prohibitively expensive from a financial point of view.
Important points
- It is necessary to remember that there are also plastic latches under the fastening screws of the casing. And after unscrewing all the screws, you will have to overcome the resistance of these latches, literally tearing the trim off the door. It will not be possible to pry these clips with any tool - they are too far away. So it is not uncommon for situations when, after removing the casing, half of the clips are broken. There is only one way out: have a set of spare door latches on hand;
- on cars with electric windows, control units are located only in the front doors. Therefore, when removing the rear door trims, you will not have to disconnect all kinds of wires from the connectors;
- The locking button has a left-hand thread only on the earliest Granta models released in 2022. On later machines, the threads became right-handed.
So, removing the door trim from Granta is not a difficult task. Even a novice car enthusiast can do it. And an experienced car owner needs no more than 10 minutes to deal with one door. The picture is spoiled only by the internal plastic latches, the breakage of which, it seems, has never been possible for anyone. But this is an “innate” design flaw that you have to come to terms with.
Video on the topic “Lada Granta. Removing the Granta rear door window lifter mechanism"
Lada Granta. Rear door disassembly.
Detailed installation of rear window regulator on Priora
Replacing the electric window and motor on Lada Kalina and Grant
Common faults
There are many reasons why the window regulator on Kalina does not work and why the device needs to be replaced, but we will look at the main ones:
- The electric motor brushes are stuck, usually as a result of overheating of the brush elements themselves, which, as a rule, are not resistant to sudden temperature changes. Accordingly, as a result of heating the brushes, the plastic socket may melt. This will also cause the brushes themselves to lose mobility. If the malfunction has just begun to appear, you can knock on the plastic door lining several times to restore the unit’s functionality. However, over time, this method will no longer be able to produce the required result, so intervention in the design of the joint venture will be inevitable.
- The cause of the malfunction, which may require replacement of the joint venture, can also be the ill-conceived electrical circuit installed at production. The contacts themselves are not able to withstand the necessary load that is placed on them. The SP system may fail due to the fact that the electrical circuit is not supplemented with a unloading relay. So in the event of a breakdown, it often happens that the car owner has to repair not only the power windows, but also the control panel itself.
As practice shows, in most cases, repairing a unit is either completely impossible, or can be done, but with great difficulty. Accordingly, the best option would be to install a new joint venture (video author - Emilien Ok).