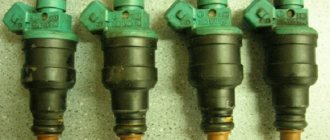
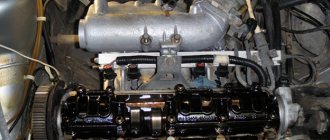
On VAZ cars, carburetor engines were replaced by inverter engines. Unlike the previous generation of engines, now the fuel supply to the combustion chamber is carried out not by one unit - the carburetor, but by an entire system. Car enthusiasts call it an injector.
In such an engine, it will no longer be possible to manually regulate fuel consumption or engine idle speed. An injector is a complex system that is controlled by special electronics. It receives and analyzes data from a large number of sensors, and then regulates the fuel supply to the engine.
VAZ 2114 is equipped with an injection engine. You can see a “check engine” sign on the dashboard. If this signal comes on, you need to diagnose the vehicle's operation in order to maintain the serviceability of all components. However, if, in addition to the burning icon, other symptoms of deteriorated vehicle performance are recorded, then you need to check the VAZ 2114 injectors.
Signs of injector failure
If misfires occur at idle, if the engine becomes unstable, and fuel consumption increases significantly, if the car accelerates slowly, you need to diagnose the injectors. An injector is an electromechanical atomization system that supplies fuel to the combustion chamber. If the nozzle is dirty or faulty, it must be replaced or cleaned at all costs - repair is useless.
During engine operation, various deposits remain in the elements of the car’s fuel system, namely injectors, fuel frame, and intake valves. The main reason for the deteriorating performance of nozzles and the fuel system is, first of all, their contamination. One of the main causes of pollution is the presence of heavy fractions in fuel. Deposits accumulate especially intensively immediately after the engine has stopped.
At this point, the injector body is heated by the engine, and the fuel does not cool the atomizer. Lighter fractions in the working area of the nozzle will simply evaporate, and heavier fractions will accumulate in the form of deposits and thereby reduce the cross-section of the channel. Deposits 5 microns thick can change the channel capacity by a quarter. If the fuel spray holes become dirty, this will impair the creation of the air/fuel mixture.
Since the gasoline sold at domestic gas stations does not always meet modern standards, the injectors do not last even 100 thousand km. The cost of a new VAZ part is about 500 rubles. Although many car enthusiasts argue that it is worth buying imported components.
Symptoms of clogged injectors
Loss of dynamics is one of the main signs of clogged injectors. If they are contaminated, the car simply will not accelerate properly.
- Unstable idling, the engine at idle will operate unstably and intermittently.
- Starting difficulties can occur when there is contamination or when the injectors stop holding pressure. Fuel begins to drip into the cylinder, which can cause popping sounds in the exhaust pipe.
- Ringing fingers are inevitable when the spray nozzle is clogged; this is due to the fact that the fuel entering the cylinder is mixed with air and the concentration of fuel in this mixture is quite small, so the engine experiences detonation.
Driving with dirty injectors will not provide any driving pleasure. And driving with such a problem is highly not recommended.
How to extend the life of the sprayer?
To begin with, if the car's mileage is low, you can try using various fuel additives. Buying them is not a problem; they are sold at gas stations and stores. They are inexpensive. This method can be used, but regularity is important here. So, replacing injectors on a VAZ will not be needed any time soon. But not all car enthusiasts prefer to use chemicals, believing that the use of additives can lead to even more widespread clogging of the injector.
Cleaning the injectors on the VAZ 2114 is recommended every 40 thousand km. These services are provided in many service stations. Cleaning there is carried out on stands using ultrasound. Some argue that it is not very effective at the price they charge for it. Many car enthusiasts prefer to clean the injectors themselves. It is not difficult. Some people check the operation of nozzles and injectors on stands, but purchasing a stand to check it a couple of times a year is wasteful.
You can check the injectors and injector in a simpler way. If you suspect that the injectors are not working properly, you need to start the car and let the engine idle and run at high speeds. Next, you need to unscrew the caps on the injectors and then check their serviceability.
Ultrasound or chemicals for cleaning the injector?
So, it was decided that the injectors and injector needed to be cleaned. Which method should I choose? Common methods are washing the injector without removing the injectors or cleaning the injector on an ultrasonic bench. The cleaning efficiency of the second method is several orders of magnitude higher, but in this case, except for the nozzles, nothing else is cleaned. For VAZ cars, sometimes cleaning is not the right solution. It is much easier and cheaper to simply replace the injectors.
Types of services
Flushing the injector and nozzles can be of three types:
- Liquid . A special device is used to supply liquid to the nozzles. It operates on the principle of a pump.
- Ultrasonic . It is considered a more effective cleaning method, but also more labor-intensive.
- Comprehensive . Combines the two methods described above.
The service also happens:
- With the injector removed from the engine.
- No removal.
Depending on the time allocated by the client for work, the order can be:
- Urgent.
- Not urgent.
According to the performer, the service is:
- Professional.
- Independent.
Depending on the location, washing can be:
- In the garage of a private master.
- At the service station.
- At the address where the car is located.
Cleaning VAZ injectors
To clean the nozzles, you need to disconnect the minus on the car battery, then remove the protective cover and air filter. The pipeline must be unscrewed from the pump and nozzle and the brackets removed. Next, using a spanner, you need to twist the injectors and the washer. Don't forget to remove the electrical connectors and slide the ramp clamp and the frame itself. This sequence of actions must be done for all 4 sprayers.
Before cleaning the injectors, you first need to carefully examine them. If signs of leakage are noticeable, they will need to be replaced. Next you need to remove the seals from the body and injector nozzle. Finished parts should be temporarily soaked in acetone or solvent. At this time, you can start cleaning the ramp and valve cover.
As practice shows, the ramp can be cleaned perfectly with a vacuum cleaner. Now let's move on to cleaning. You can see coke around the nozzles, it needs to be removed. Next, using a needle or pin, you need to clean the surface near the nozzle. The outside of the nozzle is now completely clean.
To clean it from the inside, you need electrical tape, a carburetor cleaner, a tube and a syringe. The product must be supplied under pressure through the tube. This action must be repeated several times for each nozzle. Then all that remains is to dry everything well, install new seals and put the structure back together.
Hello readers of my swallow and just those who accidentally stumbled upon this post. I haven’t posted anything for a long time, because I haven’t done anything with the machine, it makes me happy every day, it doesn’t act up and doesn’t break down, ugh ugh ugh. But it was the weekend and my hands were a little itchy, I wanted to do something, somehow pamper my basin)
I’ve been thinking about doing this manipulation for a long time, but somehow I couldn’t decide, I was afraid, and the service department was asking 2500 for it. I decided to try, no one can do it better than me, I’ll save money and service the car no matter how.
what we have: 1) engine 11183, 8 valves, 1.6L, plastic receiver 2) a new VAZ model ramp.
To begin with, I stole the idea from many guys from the drive and assembled a device for cleaning the force. for this I bought:
1) heat shrink. 2) wire 2 meters 8rub/meter 3) Hein Gear bottle (for cleaning carburetors and remote control) 4) lamp 12 volt 21 watt. 5) a button without locking (this means that when you press it, it closes, when you release it, it opens the circuit. That is, the circuit is closed only as long as you hold the button) 6) a pair of crocodiles, for the battery 7) a 2mL syringe, you can use 5mL. block for injector 1.pc. and of course I had a soldering iron.
This is how it turned out.
then we run to the car, remove the ramp along with the wiring harness and injectors. I won’t describe it in detail, I’ll just describe the sequence without photos.
1) remove the battery 2) remove the supply pipe from the throttle to the filter 3) if it’s not difficult, remove the air filter housing itself, it will be more convenient 4) remove the filter valve from the clamp and move it to the side (also for convenience) 5) remove the main chip from the wire block injectors (such a hefty one to the right of the ramp) 6) IMPORTANT! release the pressure from the fuel rail (there is a nipple on the left of the ramp) 7) also no less IMPORTANT! Using TWO 17mm wrenches, unscrew the nut securing the ramp to the main line. why two? yes, because with one wrench you hold the lock nut on the line, with the second you unscrew the ramp nut, otherwise you’ll just turn the line in a circle and I don’t even know what to do next
