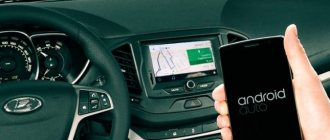
On a Lada Vesta car, the antenna is usually mounted on the roof, above the windshield. Which increases the risk of breakdown when clearing the car, for example from snow. When the antenna breaks down, you need to contact the official representative (dealer) of Lada Vesta with the problem. Replacement of the part or repair will be done free of charge, using the warranty certificate. The main thing is to have all the parts of the antenna with you, otherwise repairs may be reasonably refused. Antennas on cars are used to catch: radio; body signals; satellite signals for navigation. A Lada Vesta car can be purchased initially without a radio if you do not plan to use a music system. However, when you decide to install a radio, you will have to install the antenna yourself.
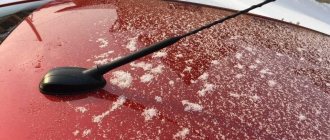
Broken antenna of the Vesta car - unfortunately, it is quite fragile and can be broken either by driving into the garage or removing snow from the roof
Lada Vesta antenna fell off
For some Lada Vesta owners, the car's antenna has become a living hell. The fact is that the antenna mount leaves much to be desired and can fail at any moment. If the cases when the antenna breaks due to mechanical impact are still at least somehow explainable, then such moments when the antenna falls off by itself while moving can cause a real shock to the owner.
What to do if the antenna is broken?
The answer to this question depends on whether you lost it on the road or just accidentally caught it when you were clearing snow from your car. If you have the antenna in your hands, then you can attach it yourself to sealant or special glue. If you do not want or cannot deal with this issue yourself, then you can go to any official Lada dealer, since they will fix the antenna back for free as a warranty. If you lost the antenna while driving and could not find it, in this case the dealer will no longer be able to help you and there can be no talk of any warranty repairs.
Source
Reasons for frame deformation
The causes of deformation include several factors:
- Poor quality material from which the profile is made. In appearance, it can be practically indistinguishable from high quality. It can manifest itself either immediately after installation or after some time. It is better if this happens right away, since it will be possible to replace the plastic window under warranty. If this happens after the window’s warranty has expired, you will have to do the repairs yourself or change the frame.
- Incorrect handling of the window adjustment system. Failure to maintain your windows can affect the window's alignment, which can result in warping.
- Installation in winter, when the temperature outside the window was -15 degrees or lower. This can lead to freezing of the foam joint inside the room if the proper temperature of the air and the wall opening has not been ensured. In the spring, rising temperatures usually trigger the process of foam expansion. This is explained by the fact that in low temperature conditions, the foam does not have enough moisture contained in the air, and therefore the foam can freeze immediately after application. And in the spring, when the humidity normalizes and the temperature rises, the foam begins to polymerize and expand. As a rule, this leads to the fact that the plastic window is beveled.
- An insufficient number of window unit fasteners can also lead to frame deformation. This is explained by the fact that in winter, the outer part of the window, that is, the frame and sash, cools greatly at low temperatures and tends to reduce its size, that is, shrink, and the inner part of the window, on the contrary, expands. As a result, the frame and sash are in a state of twisting. Therefore, if there are not enough fasteners, the plastic window may bend.
Thus, there are quite a few reasons for the deformation of a plastic window, so to prevent this from happening, you need to know how to properly prevent the occurrence of deformation and how to deal with it if the frame does become bent.
Lada Vesta antenna: mounting and connection - tips
On a Lada Vesta car, the antenna is usually mounted on the roof, above the windshield. Which increases the risk of breakdown when clearing the car, for example from snow. When the antenna breaks down, you need to contact the official representative (dealer) of Lada Vesta with the problem. Replacement of the part or repair will be done free of charge, using the warranty certificate. The main thing is to have all the parts of the antenna with you, otherwise repairs may be reasonably refused. Antennas on cars are used to catch: radio; body signals; satellite signals for navigation. A Lada Vesta car can be purchased initially without a radio if you do not plan to use a music system. However, when you decide to install a radio, you will have to install the antenna yourself.
Antenna Top Mount
Next, use the following algorithm of actions:
- At the very beginning, you need to remove the lampshade behind which you will see the mount;
- Then remove the front passenger handrail;
- Remove the sun visor and the plastic panel on the right pillar;
- Next, loosen the inner headliner and insert the wire;
- It is important not to use a screwdriver or other metal tools. To avoid scratches and other consequences. It is better to use a plastic card.
When the device plug is connected, it is necessary to reassemble in reverse order.
How to connect the antenna to the radio on a Lada Vesta
In order to connect the second end of the wire to the music system, you need to find the location of the plug, then:
- Remove the instrument rim, or rather the plastic panel.
- Plastic panel of the music system. To do this, you need a special tool to pick up the panel.
- Remove the air ducts using a Torx (asterisk).
- Pull out the radio seat.
- Insert the plug with adapter. The beacon cord is located behind the instrument panel. The GPS plug is also attached there. They should be moved to the right inside, to the music system compartment.
Lada vesta antenna has fallen off, searching for solutions
Owners of domestic cars often encounter such breakdowns. If you want to fix the antenna yourself, then you need to have epoxy cream or sealant.
- First you need to clean the surfaces of the part from dust and moisture.
- Then degrease with anti-silicone.
- Apply silicone sealant along the entire internal border of the broken part. Stick to the car along with the electronics on the roof of the car.
- Use masking tape (time until the sealant dries: 24 hours). Keep in mind that work on attaching the antenna must be done at air temperatures above +5 degrees.
AvtoVAZ has long recognized the problem of fastening failure. And since 2016, the assembly of machines uses fastening bodies with a compacted structure.
Repair
If you haven’t decided to buy an antenna for Vesta, you can repair this device yourself. As practice shows, the optimal solution is epoxy glue or sealant. Before gluing, the surface will need to be cleaned of dust and moisture, and then degreased with anti-silicone.
As you can see, the problem is far from isolated and can cause some trouble. However, to AvtoVAZ’s credit, it is worth noting that the Russian auto company recognized the problem and took measures to combat it. So, from June 2016, a new design of seal began to be used during assembly, and in September of the same year, the housing fastening components were replaced with more durable ones.
And here are the screws with the fastenings falling off to the top of the structure.
The snow is flying in flakes, but we need to go urgently. gave up, drove without an antenna. I’ve done all the work. I understand that the skiff can come to the payment from the snow. I take electrical tape and make something like this...
I drove like that for the next couple of days. Then I found time to work on the antenna. I decided not to go to the dealer. Not at all up to him. And there was no desire to prove to him that it had broken off on its own. Plus time, first go to show everything, tell us, then wait two or three weeks until AvtoVAZ approves and order it, since they usually have nothing in stock, and then go again for repairs... It turns out to be a lot of wasted time... And the plastic on the antenna leaves much to be desired in quality, which is why apparently all four fasteners broke off at once. Install a new one, but where is the guarantee that it won’t break either...
I decided to do it myself. I pulled into the warm parking lot of a shopping center. I stood there for a while and the body of the car dried out. To clean the board and under the board, possible dust and moisture, after driving in snowfall, I bought a can of compressed air to blow everything out. I didn’t remove the antenna platform itself, I did everything on the spot.
After cleaning the board, I took glue. An ordinary moment. I applied it to both the platform and the upper part. Then I realized that it was better to use transparent glue. Since it is yellowish in color as in the photo it will be visible if there are smudges. Therefore, I had to apply it very carefully and in a thin layer so that there was no excess glue.
Well, after that, I glued both parts together. No glue leaks are visible, thank God.
Well, in order not to lose the antenna, before the glue was completely dry, I took magic blue electrical tape and fixed it. It turned out to keep up with the X design, so to speak) (First photo) After finishing the work, I launched the Era - Glonass self-diagnosis system. Testing completed successfully.
First, the rubber pad under the antenna does not fit as tightly to the body as you might think... And it is possible, for example at a car wash, that moisture gets under it. Perhaps there is a possibility of corrosion over time... Sometime in the summer it might be worth taking it completely apart and checking everything.
Secondly, there is an impression that there are now slightly fewer radio stations available. Why dont know. There is no other way to install the antenna, since there are grooves in which the antenna cover is attached. Even the broken screw fastenings stuck together. The contact plate on the board is connected to the pad on the antenna; I cleaned them before installation. I put it in the grooves as it was... But it’s a fact... I’ll go the same way until the summer, and then I’ll see. You can solder the duplicate contact wire from the board to the antenna.
Antenna article number Lada Vesta
If the dealer refused the warranty, then you have three options: 1. Purchase a new device (original article number: 8450007952, or shark fin). 2. Repair the broken part yourself. Please note that the fin device fits on Vesta after reconstruction of the previous mount. Remember that a shark fin is just a replacement for the top of the antenna, not a replacement for other systems (navigation, etc.). 3. Make a new device with your own hands. Having studied all the nuances of signal transmission on a machine.
Make a beacon yourself
If you are confident in your abilities, then you should try to make the part yourself. In fact, the creation process is very simple. At the preparatory stage, you need to study the following information: • The car is constantly in motion, and this is important when designing a beacon. Ordinary ground beacons will not work. Therefore, a special approach is required in assembling the structure. • Is frame construction a suitable option? How it should be routed under the rear window seal. • How to design a part that is tapered at the top. There is a capacitor in the center; it adjusts the frequency on the channels. There are only two receiving frequencies - 27 and 65 MHz or 28.2 and 68.
Materials
It is necessary to have the following elements: wire MGTF 0.5; capacitor; two cables, 45 cm long; soldering iron
Manufacturing process
On the rear perimeter of the glass, lay out a trapezoid with MGTF 0.5 wire (top border 56.5 + 56.5 cm, bottom – 66.5 + 66.5 cm, side – 22.5 + 22.5);
- Place the pluses where the matching capacitor wires are added, remove the signal with cable RK - 50;
- Draw two wires in the middle of the glass, where they are fixed along the axis of a tuned capacitor (5 - 25 pF).
- Fold the wires in a zigzag;
- Solder the cable from the cut side.
- There should be no gap on the opposite side;
- Connect the device through the connector used by the communication equipment.
Product delivery options
Note! Below are the shipping methods available specifically for this product. Payment options may vary depending on the shipping method. Detailed information can be found on the “Delivery and Payment” page.
Parcel by Russian Post
Available payment methods:
- Cash on delivery (payment upon receipt)
- Using cards Sberbank, VTB, Post Bank, Tinkoff
- Yandex money
- QIWI
- ROBOKASSA
Shipping throughout Russia. Delivery time is from 5 to 12 days.
Parcel by Russian Post 1st class
Available payment methods:
- Cash on delivery (payment upon receipt)
- Using cards Sberbank, VTB, Post Bank, Tinkoff
- Yandex money
- QIWI
- ROBOKASSA
Shipping throughout Russia. Delivery time is from 2 to 5 days. More expensive than regular delivery by Russian Post, approximately 50%. Parcel weight up to 2.5 kg
Express Parcel EMS
Available payment methods:
- Cash on delivery (payment upon receipt)
- Using cards Sberbank, VTB, Post Bank, Tinkoff
- Yandex money
- QIWI
- ROBOKASSA
Shipping throughout Russia. Delivery time is from 3 to 7 days. More expensive than regular delivery by Russian Post, approximately 100%.
Transport companies
Available payment methods:
- Using cards Sberbank, VTB, Post Bank, Tinkoff
- Yandex money
- QIWI
- ROBOKASSA
Delivery is possible to any locality where there is a representative office of the transport company. Delivery time is from 2 to 10 days. Sending large parcels is approximately 50% more profitable than by Russian Post.
Pickup from our warehouse
Available payment methods:
- Cash upon receipt
- Credit, installments
- Using cards Sberbank, VTB, Post Bank, Tinkoff
- Yandex money
- QIWI
- ROBOKASSA
Antenna "Lada Vesta"
An antenna can break for several reasons. One of them is mechanical damage. They are especially relevant in winter, when the driver hastily clears snow from the roof of the car.
The Lada Vesta antenna is an element of the Glonass GPS emergency warning system and multimedia system. You need to know about the location of the receiving unit in order to replace it in case of breakdown or, if desired, carry out modifications.
Where is the Lada Vesta antenna located?
The usual (standard) place for mounting this element on a car is the roof, on the side of the windshield. This site was chosen due to easy access to the Glonass system.
How to attach
The antenna is attached to the top of the Lada Vesta with a clamping nut. It attracts the radio element to the roof. There are no additional fastenings. If the driver performs any manipulations with the device, then he needs to make sure that it is tight.
The wire to the radio goes through a hole in the roof, and then goes into the same nut and is pulled to the multimedia system through the pillar in the front. You can get to it by removing the headliner.
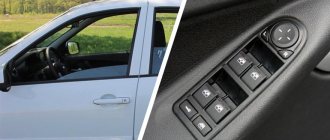
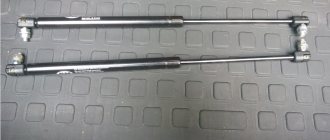
Installation of limiters from Ford Focus 3
To work you will need the following tools:
- Collar;
- Torx bit T20;
- Torx bit T40;
- A plastic spatula for dismantling upholstery components - if you don’t have one, you can use a thin screwdriver, first placing a cloth under it so as not to damage the door card components and paintwork.
- Head for 10.
First you need to remove the door cards. First, use a plastic spatula to remove all components that block access to the bolts. You need to work carefully so as not to break the latches. Next, the mounting bolts are unscrewed using a T20 Torx bit. That's all - all that remains is to snap off the card, which is secured along the contour with caps
At the same time, it is important not to break the door opening handle, and also to disconnect the plugs for the electric windows. Then you need to remove the insulating material glued to the door to gain access inside
The next step is to dismantle the limiter itself. It is screwed to the body with one Torx T40 bolt, and to the door with a pair of bolts, to unscrew which you will need a 10mm socket. When the bolts are unscrewed, all that remains is to remove the limiter, but this must be done carefully, since you can lose the washers on the studs (in the places where the element is attached to door). In addition, after removing the limiter from the Vesta door, you need to make sure that the door does not open further than it should, which is especially important for the front doors. Otherwise, you can crush the edge and damage the paintwork.
The process of removing the upholstery and the door stop itself from the Lada Vesta is clearly demonstrated in the video
Installing limiters from Focus 3 in Vesta is not difficult, but there is one point. During installation, those 2 mm differences between the studs that were mentioned earlier begin to affect. For this reason, the limiter is not installed. There are two ways to solve the problem:
- Working with holes - you need to carefully drill out the seats with a drill or bore them with a file so that the element becomes as needed.
- Adjusting the studs - it involves bending the studs slightly inward so that they fit freely into the holes.
As practice shows, it is still better to squander the seats. Yes, it takes longer, but it is much more reliable. The reason is that the pins on the limiter are hardened, so if you bend them more than necessary, they can break and the limiter will have to be thrown away. In addition, before installation you need to put thick washers or nuts on the studs themselves. This is necessary, since the length of the element pins from Focus is several millimeters longer than those on Vesta.
Place the nuts on the studs.
If this is not done, the functionality of the component will not be affected, but at the end of the stroke it will no longer be a spare part from Ford that will stop the doors, but a factory additional stop. As a result, the paint will peel off very quickly and corrosion will appear at the contact point.
Once the stops are installed, you can reassemble the doors in reverse order.
A limiter from a Ford Focus 3 installed on a Lada Vesta.
Why does the Vesta radio not pick up the radio?
When a car enthusiast complains that his car has become difficult to pick up the radio, then the reasons should be looked for in a broken antenna, a broken cable or a weak contact.
More often the problem arises from the antenna; this element is responsible for the level of the received signal.
Causes of antenna failure
An antenna can break for several reasons. One of them is mechanical damage. They are especially relevant in winter, when the driver hastily clears snow from the roof of the car and does not notice how the radio wave reception is being disrupted.
Also relevant for car antennas is a malfunction in the form of damaged microcircuits. This element is located outside the body, so if its plastic body breaks without the driver noticing, it will be exposed to water and wind.
Photo source: https://lada-vesta.info/24-antenna-lada-vesta.html
The last problem that affects the operation of the radio appears after connecting additional devices: a DVR or a car charger. A cigarette lighter that sparks due to poor contact emits noise that interferes with radio waves.
The driver will have to repair the cigarette lighter or refuse to use this element. You can also compromise and try not to notice noise when listening to the radio.
Briefly about the algorithm for those who are too lazy to read
1. Download Google Earth Pro and a layer collected by Belnetmon enthusiasts with the indicated operator base stations (links below). Using the program, find the nearest BS and check their accessibility in terms of terrain and distance. A nearby but busy station may have a worse signal than a more distant but “empty” one.
2. If you have decided on the first point, you need to get a USB modem, an outdoor antenna, a cable assembly (one cable for connecting a 3G antenna, two for LTE, they can be included with the antenna) with a set of adapters - pigtails (according to the number of cables for their connections to the modem), access point (2.4 GHz is sufficient, with support for USB modems).
The more powerful the antenna, the better the reception, and in this regard, parabolic options win. They work more effectively in areas with plenty of vegetation and at great distances. Directional ones are better when the BS is in the line of sight and without obstacles. There are also nuances with directional patterns, but in the budget segment there is little point in thinking about this.
3. Set up the connection by choosing the optimal antenna placement and its direction (changing it, observing the parameters and regularly taking speed measurements).
First, some background information .
Without going into the weeds of numbers, if quality is poor the indicator on the smartphone screen will show several bars (it seems like everything is ok), it may even show an optimistic 3G or something similar. Even running the popular Speedtest, under certain circumstances, will show an adequate speed of a megabit or two for the countryside.
However, website pages will open every once in a while and slowly (often swearing: “Check the connection”, “The connection cannot be established” and the like), viewing and listening to streaming content will turn into torture with constant loading and stuttering, downloading torrents will make you remember the dial-up , mobile and not so games that require a connection to a remote server will refuse to work.
Does the warranty apply to the Lada Vesta antenna?
Owners of Lada Vesta, including the Cross version, can contact an official dealership for diagnostics or repair of the radio receiver unit. But it’s better not to count on a replacement under warranty service.
To obtain this service, you will have to provide the dealer with the antenna cover and each accompanying element, which is problematic if the device falls off while driving. But even after this, representatives of the salon can answer that the strength of the element was sufficient for operation and the breakdown occurred due to an impact or other mechanical impact.
It is easier to obtain warranty repair services if an element of the radio system has stopped working in the absence of visible damage. In this case, you can count on manufacturing defects and equipment replacement.
Lada Vesta: antenna replacement
You can change the antenna on a car for several reasons: it is possible to install a more beautiful option, the level of signal reception and amplification does not suit the driver, or the standard element is broken.
First you need to choose the type of device, find out what the price of the antenna for Vesta is in this case, and only then ask questions about dismantling and connecting.
What to choose: manufacturers and prices
The antenna on the Lada Vesta can be factory or similar, the price varies, although they are all installed on the roof, including standard ones.
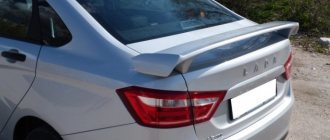
The XRay model often comes with an active shark fin. This element makes the car more beautiful, since there are no long dark elements sticking out from it, like on taxi service cars.
Drivers can buy an antenna from. The element is similar to the standard one, but is smaller in size, so it looks more aesthetically pleasing. The price of the tip is about 500 rubles, the assembled element will cost 1200 rubles.
The last option is a standard combination antenna from the manufacturer. A factory radio element is installed if the driver is satisfied with the quality of the signal it receives, but a mechanical breakdown has occurred.
Photo source: https://www.drive2.com/l/507508455053984165/
The cost of factory equipment is the highest. When ordering from an official dealer, the price will be about 3,000 rubles. For independent purchase, you can use article number: 8450007952.
How to remove
To remove the antenna on the Lada Vesta, you need to follow the instructions:
- Take a thin screwdriver and press it onto the latch, which is located in the hole in the center of the back of the lighting and emergency communications unit.
- Remove the plastic cover.
- Unscrew the screws that hold the lampshade.
- Remove the retaining nut.
- Remove the two Torex screws from the passenger sun visor.
- Reach under the headliner with your hand and lightly push the antenna cable towards the driver's seat; it is almost close to the roof.
- Get out of the car and remove the rod. To do this, turn it counterclockwise.
- Lift the main element of the radio system up.
- Remove the 4 small screws from the underside of the antenna.
After this, you can make a replacement.
How to connect
The previous instruction is carried out in reverse order if only the antenna is changed. It's another matter when, for some reason, you have to lay a new cable to the multimedia system.
Before starting to follow the instructions, purchase an adapter for the ISO ANT-1 antenna, which will allow you to connect to the radio if you purchased a non-standard multimedia system for Vesta.
In cases where you need to connect new equipment to the media system, you have to carry out the following actions:
- Remove the instrument panel (plastic trim).
- Detach the plastic on the media system itself, which is secured with latches.
- Remove the center air ducts secured with Torex screws.
- Remove the radio seat; it is secured with Torex screws.
To install a “shark fin” instead of a standard device, follow the instructions:
- Remove the old radio system element.
- Install the retaining nut with the wire pulled through it into place.
- Degrease the surface on the roof, as the “fin” is attached with double-sided tape.
- Remove the protective film from the new element and attach it to the original antenna position.
- Make sure that the double-sided tape “grabs” by pressing it for a few minutes.
If the “shark fin” is not an element that complements the appearance of the car, but a full-fledged antenna, then you will have to install a new wire inside the car.
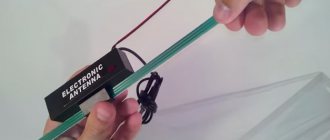
Is it possible to make an antenna for Vesta with your own hands?
The development of an antenna for the Lada Vesta is possible with minimal experience and knowledge in assembling and soldering electrical equipment.
Materials and tools for work:
- soldering iron and related materials;
- insulated (PVC) copper wire 0.5-0.5 mm thick, length - three meters;
- a piece of plastic knitting needle with a diameter of 3-8 mm and a length of 5-20 cm;
- a plastic case with an internal diameter sufficient to accommodate a knitting needle with a wire wound around it.
Photo source: https://www.drive2.com/l/494563904660176995/
- Take a knitting needle and wrap copper wire around it. The turns should be located at an equal distance from each other without overlaps or bends.
- A cable (central core) is soldered to the resulting winding, which will later be run through the car interior and to the radio.
- Take the purchased case to install the winding in it.
- Install the resulting equipment on the roof in any convenient way.
- Ground the cable braid (ensure reliable electrical contact with the car body).
The wire to the radio is stretched along one of the roof pillars.
Therefore, it is much easier to buy a standard receiving unit or an analogue available on the car accessories market if the driver is not satisfied with the quality of the device from AvtoVAZ.
Noise insulation
Do-it-yourself soundproofing of a Lada Vesta dashboard should begin with an assessment of the situation. LADA Vesta has standard insulation at a decent level, especially on the engine panel directly in the cabin. There is thick vibration insulation, complemented by felt, the same as the floor. Taking this into account, sound-absorbing material glued to the top of the heater will suffice.
First, it is better to work directly on the dashboard from the back side, and then proceed to the body. The thickness of the layer will depend on the preferences of the owner and his plans. But there are some general recommendations:
First, the surface must be wiped free of dust.
Before gluing, be sure to degrease the surface with a cloth soaked in anti-silicone.
The first layer on the back side of the dashboard is vibration isolation, but not too thick - a thickness of 2 mm will be quite enough. This solution will make the panel heavier and dampen vibrations. If you work in the summer, in hot weather, you don’t have to heat the material, but simply smooth it with a roller. Otherwise, it is recommended to use a hair dryer to warm the surface. Just be careful; if you overdo it, the hairdryer may even melt the plastic.
On top of the vibration insulation layer, sound insulation of the Lada Vesta dashboard is glued - biplast, etc. material. This guarantees the absence of creaks and crickets that “love” to appear in the depths of the dashboard.
Removable panel components - the glove box and others - are glued in the same way.
Fastening points - it is recommended to glue these areas with madeleine or other material that eliminates squeaking.
In addition, car owners recommend paying attention to the seat for the radio. The compartment is very small, which is why many people either cannot install a new radio at all, or notice that it constantly gets hot
Therefore, it is worth thinking about a slight expansion of the compartment.
Installation occurs in reverse order.