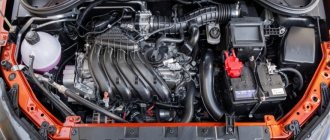
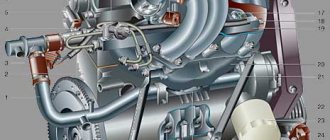
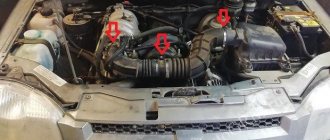
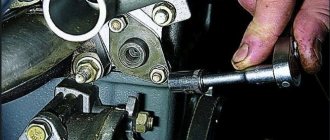
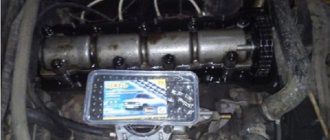
Here we will talk about independently replacing the timing chain drive on a Niva 21214. The timing belt affects the operation of the entire car, so the importance of this unit should not be underestimated. Replacing a chain drive is a rather complicated process, which, however, can be done by any car enthusiast, provided that he follows the instructions and shows a little diligence.
A chain has significant advantages over a belt drive. These include, first of all, its reliability. While a belt can break, this rarely happens with a chain. Usually it just stretches. It lasts much longer than the belt, which means it needs to be changed less often. But still, the chain does not last forever, and after a while it also has to be replaced with a new one. When replacing the chain yourself, it is very important to set the marks correctly and follow safety precautions.
How to tension a chain on a Niva 21213 carburetor
20 Niva VAZ 21213 chain tension adjustment Chain
tension adjustment GENERAL INFORMATION
Chain tensioner section
1 – cap nut; 2 – tensioner body; 3 – rod; 4 – plunger spring; 5 – washer; 6 – plunger; 7 – spring; 8 – cracker; 9 – spring ring; A – plunger surface; B – places of punching at the end of the body
Procedure 1. Loosen nut 1 of the tensioner. In this case, shaft 3 is released and the chain is tensioned by shoe 7 (see figure. Plan of the drive of the camshaft and auxiliary units), which is acted upon by spring 7. 2. Turn the crankshaft 1–1.5 turns in the direction of rotation. In this case, the tensioner spring acting on the shoe will automatically adjust the chain tension. 3. Tighten the tensioner nut 1, due to which the shaft 3 is clamped by the collets of the block 8, and when the engine is running, only the spring 4 acts on the plunger 6. This spring presses the plunger away from the head of the rod 3, and oil flows into the space between them when the engine is running, which plays a role shock absorber during chain impacts. Replacing the chain Procedure 1. To remove the chain, brake the vehicle with the parking brake, open the hood, remove the spare tire with its support pipe and remove the battery. 2. Remove the air filter and close the carburetor inlet neck with a technological plug. 3. Separate the air and throttle valve drive cables from the carburetor. 4. Drain the coolant from the radiator and cylinder block, remove the radiator with hoses and thermostat. 5. Remove the fan by unscrewing the fastening nuts. 6. Remove the cylinder head cover and turn the crankshaft until the mark on the camshaft sprocket aligns with the mark on the bearing housing (see figure. Checking the alignment of the installation mark on the camshaft sprocket with the mark on the bearing housing), and the marks on the generator drive pulley – with a long mark on the camshaft drive cover (see figure. Marks for setting ignition timing). 7. Unscrew the camshaft sprocket bolt. 8. Loosen the cap nut of the chain tensioner, press out the tensioner rod with a mounting blade and secure it with the cap nut. 9. Remove the camshaft sprocket. 10. Loosen the generator and remove its drive belt. 11. Engage 4th gear in the gearbox, unscrew the nut and remove the generator drive pulley from the crankshaft. 12. Remove the camshaft drive cover with the gasket by unscrewing the nuts securing the cover to the cylinder block and the bolts securing the oil sump to the cover. 13. Unscrew the limiting pin 6 (see figure. Layout of the camshaft drive and auxiliary units) and remove the camshaft drive chain. 14. Install the chain in the reverse order of removal, following the recommendations set out in subparagraph 2.4. 15. Lubricate the chain with engine oil before installation. 16. Install new gaskets under the camshaft drive cover and cylinder head cover. 17. After installing the chain, adjust the tension of the chain and generator drive belt, adjust the carburetor drive and ignition timing. Niva VAZ 21213 chain tension adjustment Next page»»»»»»
1.2.3.4.5.6.7.8.9.10.11.12.13.14.15.16.17.18.19.20.21.22.23.24.25.26.27.28.29.30.31.32.33.34.35.36.37.38.39.40.41.42.43.44.45.46.47.48.49.50.51.52.53.54.55.56.57.58.59.60.61.62.63.64.65.66.67.68.69.70.71.72.73.74.75.76.77.78.79.80.81.82.83.84.85.86.87.88.89.90.91.92.93.
Features of setting timing marks
Marks are marks and notches located on the gears of the gas distributor. For clarity, below is an example of installing a notch on a drive gear disk. It coincides with the center of the DPKV (crankshaft position sensor).
The marks on the camshaft pulley are fixed against the ebb on the bearing housing, which fixes the main shaft on the platform.
How to replace the chain tensioner on a VAZ 21213-VAZ 2131
Replacing the heater tap on a Niva 21214 injector
Cars of the Niva family are very old models, in my opinion the very first cars went back to 1977 if memory serves, but these are new times and the car is still being produced and refined, so here are the chain tensioners which AvtoVAZ installed on its cars, depending on the year of production, may differ from each other, for example, somewhere before 2000 or even higher, these cars of the Niva family came with the most common spring chain tensioners, these tensioners are very easy to remove, but they have one drawback (And maybe an advantage) is that they do not tension themselves, that is, from time to time you have to tighten them yourself, which is very inconvenient, but it’s for someone, because it only takes 1-2 minutes to tighten the chain tensioner!
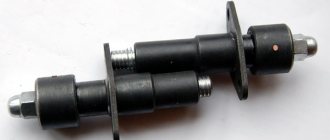
Now let’s look at a new type of tensioner that came on cars that were produced much later, so to speak, during Russia and not during the USSR, and so in new times, the so-called hydraulic chain tensioner was installed on this family of cars, its whole advantage is that you won’t need to constantly tighten it, that is, it was installed at the factory, and you, as they say, forgot about it, but it’s not so simple, if this tensioner suddenly jams or something else happens to it, then you will have to change it to a new one , and today you will learn how to replace this type of chain tensioner in this article. (By the way, you can see what a hydraulic chain tensioner looks like in the photo below)
By the way, if you have a regular tensioner of an old model, but it looks like it is shown in the photo, then read more about how to replace this unit in the article entitled
Removing the chain tensioner
1) At the very beginning of the operation, use a wrench to unscrew the tube that is connected to the hydraulic chain tensioner itself, and after this tube is unscrewed, disconnect it and move it aside.
2) Then, using a wrench or a socket with a universal joint (If it is difficult to get to), unscrew the two nuts that secure the hydraulic tensioner to the car engine (One of the nuts is not visible in the photo, but when you look at this tensioner on the car, then you will immediately understand where the second nut is, since it is located nearby) and then carefully remove it from the hole in which it is located.
Installing a new
Installing a new tensioner occurs in the reverse order of removal, and by the way, after installation, close the hood and sit behind the wheel of your car, then try to start the car and if that chain rattle disappears, then you did everything correctly and that’s why the chain rattled the tensioner itself.
Checking the tensioner for wear
- If you have removed your old tensioner and think that it is in working order and there is no point in changing it, then first rinse this tensioner in a container filled with gasoline (Rinse the tensioner at your discretion, just if all the dirt comes away from it, then it may even improve its performance like this how small particles of dirt will not interfere with the movement of the plunger itself, but more on that a little later), and after washing, thoroughly dry this tensioner or simply blow it out with compressed air.
- After washing and drying it, let's look at what it consists of, namely the plunger itself, which is also indicated under the number 1, and the tensioner housing, which is indicated under the number 2.
- Now, after studying this material, let's move on to checking, firstly, inspect the tensioner plunger itself; in no case should there be any kind of defects on its surface, such as, for example, scuffs, deep scratches, etc.
- Then inspect the body itself; there should also be no nicks, dents, etc. on its surface.
- And finally, perform another fairly simple check, namely, grab the tensioner plunger itself with your hand and then try to move it; if the plunger sticks in any place, then replace the tensioner with a new one.
Adjusting the chain according to the marks.
When replacing a chain, installing a new one should be done in several stages:
- collecting the necessary tools: screwdriver, set of keys for 8, 10 and 13. Wrench for rotating the crankshaft
- The car is placed on a viewing hole or raised using a jack. The wheels are fixed with shoes or a stop.
- Before starting work, you must turn off the fan and unscrew the radiator mounts. All pipes, except the air duct, remain in place; the antifreeze does not drain.
- After this, the valve cover is dismantled. After all the fasteners have been unscrewed, you must carefully remove it, preventing dirt from getting inside.
Replacing the hydraulic chain tensioner on Niva
Quick replacement of the timing chain on a Chevrolet Niva
The new model Nivki, which is better known to us as the Chevrolet Niva, cutting through domestic roads, inherited the above-mentioned disease from its older brother, the VAZ 21214, which, in turn, is now proudly called Lada 4x4. But the problem is not as scary as its description. In order to keep the power unit in good condition, it is enough to always keep your finger on its pulse: listen to extraneous sounds, regularly carry out maintenance after 60-100 thousand kilometers and not let the problem take its course.
Thanks for subscribing!
If it was not possible to solve the problem of extraneous noise by replacing one hydraulic tensioner with a new one, you can decide to install a mechanical device. Going to car forums for the VAZ 21214, you might be surprised how people almost unanimously give their preference to mechanics. The mechanical tensioner of the “Pilot” series is very popular among the masses. But this does not mean that you should definitely take it; among the mechanics there are a lot of worthy offers, and they are not that expensive. To lengthen the product for the Chevrolet Niva, you just need to weld an additional bushing onto the plunger.
Mechanical chain tensioner
Please note that simply replacing a used VAZ 21214 hydraulic tensioner with a new one is not the right way out of this situation. At a minimum, it is necessary to change the timing chain, which is clearly in critical condition, disposable rubber sealing gaskets in the form of rings and oil seals
And, if replacing such a simple device as a hydraulic tensioner does not present any particular problems on a VAZ 21214, then as for the timing chain, this is already a reason for a separate article.
general information
It has long been known that the quality of car parts produced at the AvtoVAZ plant is not of a high level. And timing parts are no exception. The chain has to be constantly tightened, almost every thousand kilometers. A hydraulic chain tensioner will help get rid of this problem. It is this device that we will talk about in this article. Let's look in detail at the operation scheme and replacement of the device.
Scheme of work
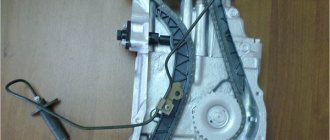
The figure below shows a diagram of the operation of the spring-hydraulic chain tensioner of the VAZ 21214 car. 1 – camshaft star; 2 – timing chain; 3 – chain damper; 4 – auxiliary device drive star; 5 – crankshaft star; 6 – tensioner “shoe”; 7 – hydraulic chain tensioner; 8 – line fitting; 9 – oil line; 10 – adapter fitting; 11 – oil pressure sensor (emergency).
Replacing the drive chain hydraulic tensioner
Detailed instructions with photos for replacing the hydraulic chain tensioner: The hydraulic tensioner is located under the cooling pipes in the front of the cylinder head.
Using a “10” wrench, which has five edges, we unscrew the tube fitting that supplies oil to the hydraulic tensioner. We take out the tube.
Selecting tools and spare parts for replacement
Replacing the timing chain on a Chevy Niva is impossible without an inspection hole or a lift . Therefore, before you decide to carry out such repairs yourself, you need to find a suitable place. Convenient access from below is necessary to remove the engine protection and conveniently unscrew the auxiliary pulleys. You will have to remove the radiator with fans and drain the coolant. On average, the entire replacement operation will take from 3 to 5 hours.
Necessary tools for repair:
With spare parts for repairs everything is also simple . Buy them only from trusted stores and well-known brands. The abundance of spare parts for VAZ engines in stores does not always mean a quality product. Timing units from factory manufacturers and official conveyor suppliers have proven themselves to be the best.
Important! Parts for different VAZ engines may differ in design. The Chevrolet Niva has the VAZ 21214 engine model, while the classic Niva may have the VAZ 2106, 21213, 21214, 21218 engine and their modifications.
We will need:
Advice. It is convenient to combine such a labor-intensive operation of replacing the chain with other work on the engine. For example, replacing the pump, radiator, leaking oil seal, drive belts of mounted units and other minor repairs.
How to set engine marks on a VAZ 2121
Replacing a Niva Chevrolet chain guide
There is a standard 21213 NIVA, the engine of which has tractor traction at the bottom and lacks traction at speeds above 3000. Replacing the chain, all the sprockets, the camshaft with the bed did not solve the problem. Rearranging the chain on a tooth back and forth, too. It was noticed that the mark on the camshaft sprocket is not installed strictly opposite the protrusion; it can be placed half a tooth forward or backward. It was decided to check the valve timing. A device for adjusting valves with an indicator is welcome, but not at all required. However, I have it. The valve clearances must be properly adjusted!
When replacing the lower sprocket, check that the marks on the small sprocket and the pulley match. They correspond to TDC.
Having placed a mark on the pulley opposite the long mark 3 (TDC on the distributor drive cover), we mark marks 1 and 2 (5 and 10 degrees) on the pulley with a light marker (I used a white oil marker). We turn the crankshaft so that the standard mark on the pulley is opposite mark 1 (10 degrees) and mark 2 more marks - 5 and 10 degrees. on the other side of the zero mark. Also, by placing the extreme marks opposite the existing protrusions, we mark 15 and 20 degrees. We mark the zero mark on the second side of the pulley (now it is on both halves of the pulley). We have a scale marked on the crankshaft pulley - 20 - 15 -10 - 5 - 0 - 5 -10 - 15 -20 degrees. This is the easy way. You can make a scale out of paper, mark it more precisely, for example, with an accuracy of 1 degree, and stick it on the pulley. This method is a little more complicated, but also more accurate. I was quite happy with the 5 degree scale.
We install the crankshaft and camshaft according to the marks, as when adjusting the valves, the slider looks at the 4th cylinder. If there is an indicator, install it on the 2nd valve (intake of the 1st cylinder). We will use them to look for the moment of opening and closing of the valve. If there is no indicator, press the rocker up, using an open-end wrench 13-17. In this position, both valves of the 1st cylinder are clamped and slightly open (overlapping). Turn the crankshaft counterclockwise 10 -15 degrees. Using the applied marks, we find the moment when the intake valve begins to open by the appearance and disappearance of the gap between the rocker and the camshaft cam. We look at the pulley and the long mark on the cover, and count the degrees. For example, the mark is exactly between 10 and 15, we get 12.5 degrees. — the beginning of the opening of the intake valve. Let's remember. We move the indicator to the first valve (exhaust of the 1st cylinder) or control it by pulling the rocker up, turn the crankshaft clockwise, and find the moment when the exhaust valve closes.
For example, we got 15 degrees.
By simple calculations (in our head) we find the valve overlap point (15 + 12.5)/2 = 13.75 degrees. This point, located at TDC, is considered optimal. In our example, the overlap point moved 1.5 degrees after TDC. You can check the pie chart of the valve timing and compare the result:
On my car, the mark, with new sprockets and chain, turned out to be shifted forward by 5 (!) degrees. This is where the tractor came from. Perhaps VAZ specifically places this mark with an offset in order to increase the torque at the bottom, or maybe during assembly they use sprockets from Lada cars. In NIV, the block is slightly higher, which is why the mark shifts. Don't know. To correct the situation, a split (adjustable) sprocket was purchased and installed:
With its help, you can smoothly adjust the position of the camshaft relative to the crankshaft + - 1 tooth.
If we set it so that the overlap point does not reach TDC, we get earlier opening of the intake, an increase in power at high speeds and a drop in traction at low speeds, and vice versa, the overlap point after TDC - we have tractor traction at low speeds, and stupidity at high speeds. Exact recommendations like “how many degrees should I turn?” no one will give it to you. It all depends on the condition of the engine and personal feelings. However, you should not go more than half a tooth away from the point of zero overlap. It must be remembered that at large angles the pistons may collide with the valves. I made it so that the overlap point was shifted by 2.5 degrees before TDC, I got a good pick-up after 3000 rpm, and at low speeds the thrust remained almost unchanged. After all the manipulations, it is necessary to re-set the ignition timing, and it may be necessary to adjust the idle speed.
Source
When does a belt need to be replaced?
- when the pump that drives the “water pump” fails;
Advice : if the engine does not pull and does not gain speed, you need to check the DPKV and timing marks and set the TDC (engine top dead center) on the flywheel. Both pulleys (inlet and outlet) are placed along the marks with the chain tensioned.
Replacing the Niva Chevrolet camshaft drive chain guide
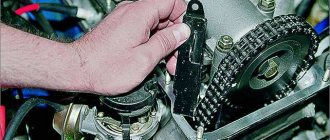
The damper is located inside the front part of the cylinder head on the left and is attached to it from the outside with two bolts. If the damper is worn or damaged in some engine operating modes, resonant oscillations of the drive chain may occur, which can lead to the chain jumping on the teeth of the camshaft sprocket and causing serious damage
engine. You will need: a screwdriver, a wrench (preferably a socket) “10”.
Remove the camshaft drive chain tensioner (see “Replacing the camshaft drive chain tensioner”).
Using a chisel, bend the edge of the lock washer of the camshaft sprocket mounting bolt (for clarity, the hoses of the cooling jacket outlet pipe are disconnected).
Using a 17mm spanner, unscrew the camshaft sprocket mounting bolt.
Remove the bolt along with washers.
To loosen the chain tension, unscrew the nuts securing the hydraulic tensioner to the cylinder head
In this case, we do not open the tensioner hydraulic drive tube.
To prevent the chain from jumping, we tie it to the sprocket and remove the sprocket with the chain from the camshaft (see “Checking and setting the valve timing by marks”).
To prevent the chain from jumping, we tie it to the sprocket and remove the sprocket with the chain from the camshaft.
Using a 10mm spanner, unscrew the two bolts (of the same length) securing the chain guide to the cylinder head.
The bolt has a cylindrical shank for alignment in the damper hole
When removing the damper, hold it securely with your hand, otherwise the damper that has fallen into the oil pan will be very difficult to remove.
Inspect the removed damper.
If there is a deep groove from the chain and chips on its working surface, or there are cracks and breaks on the damper body, replace the damper.
Pay attention to the original shape of the damper - it differs from the dampers previously used on VAZ engines. Buy exactly the same sedative
Buy exactly the same sedative
Install the new damper in the reverse order of removal.
Install the previously removed parts in reverse order.
Consequences of untimely replacement
Often the cause of repairs is an imperfect design of the hydraulic tensioner. To avoid this, many people replace the Chevrolet Niva chain tensioner from hydraulic to mechanical. Otherwise, operating the timing chain longer than expected can lead to disruption of the normal operation of the engine , and in advanced cases, to its overhaul.
The increased functional life of the components and simple replacement allow you to regularly replace the timing mechanism yourself. In combination with high-quality oil, this will significantly extend the life of the engine, and will save the car owner money and nerves.
Replacing the chain tensioner on VAZ 21213, VAZ 21214, VAZ 2131
Welcome! Chain tensioner - as is already clear from its name, it is only needed to tension the chain so that it does not loosen while the engine is running, but over time this part breaks for various reasons, this happens, sometimes the tensioner simply cannot withstand very heavy loads breaks, for example, if you keep the engine speed in the red zone for a long time, the tensioner cannot withstand and breaks, but it can also break because it is not very durable, for example, there are a lot of very bad tensioners on the market at the moment qualities that really fail very quickly and after that they will need to be replaced with a new one, and you will learn how to do this from this article. Note! In order to replace the chain tensioner, you will need to stock up on: A basic set of wrenches, which will contain the most basic keys that you use almost everywhere in the car!
Where is the chain tensioner located? It is located on the side of the engine, it can be easily found by the way if you approach the car from the right side of the engine compartment (The countdown starts from the rear of the car to the front), there is also a battery installed nearby and there is a standard injection receiver in the form of curved pipes ( It is white), so when you stand on this very right side, look for the place indicated in the photo, this is the same tensioner.
Note! In the photo above there is one nuance, there is a completely different tensioner that was never installed on Niva cars, so don’t pay much attention to the shape of this tensioner, but just find out approximately where it is and that’s it! (There will still be a tube coming from the original tensioner, you will immediately understand, just take a closer look and it is all located almost in the middle part of the engine)
When should you change the chain tensioner? It changes only if it has become unusable, but how can you understand this, you ask? In general, when the tensioner becomes unusable, the car’s engine begins to run significantly louder, because the chain is weakened and thus there is such a roar as if you started the car with a diesel injection system, and not with a gasoline one, so if you hear something rattling in the engine, vibration may also appear, and by the way, this knocking should become less as the speed increases, that is, if the engine is noisy at idle and the chain rattles, then just give a little gas and if this knock goes away (the higher the speed, the weaker it should be knocking) then it is most likely really the tensioner, although many other parts could be to blame for this, but first you need to check it, since it is removed very quickly and is also checked accordingly.
Consequences of incorrect installation and adjustment
- Characteristic extraneous clicks appear in the engine, which become louder as the vehicle speed increases.
- The engine is unstable even at idle speed.
- The car's acceleration time increases significantly because the engine does not respond well to pressing the gas pedal.
- Acceleration occurs in jerks, during which clouds of black smoke may fly out of the exhaust pipe.
- Valve wear accelerates many times over, and if the shafts are out of synchronization too much, the valves become deformed and their seats break.
- Incorrect adjustment can also lead to a broken timing chain. This, in turn, can puncture the radiator, break the fan and other engine parts.
- The engine constantly overheats, and the consumption of engine oil and antifreeze can increase significantly.
As can be seen from this article, correctly set timing marks are the key to long and uninterrupted engine operation. There is nothing complicated about this; even a novice car enthusiast can do it. It is important to take your time, follow the above sequence of actions, and also try not to drop the sprocket lock washers into the engine sump. Because it will be very difficult to get them from there.
The huge advantages of VAZ cars, even the latest models, are that repairs are quite simple. Almost all components can be replaced or repaired by a car enthusiast himself following the instructions with a little diligence. At the same time, the cost of repairs will be an order of magnitude lower than in the service, although without a guarantee from the master.
Hydraulic chain tensioner for VAZ 21214 device and principle of operation
general information
It has long been known that the quality of car parts produced at the AvtoVAZ plant is not of a high level. And timing parts are no exception. The chain has to be constantly tightened, almost every thousand kilometers. A hydraulic chain tensioner will help get rid of this problem. It is this device that we will talk about in this article. Let's look in detail at the operation scheme and replacement of the device.
Replacing the drive chain hydraulic tensioner
Detailed instructions with photos for replacing the hydraulic chain tensioner: The hydraulic tensioner is located under the cooling pipes in the front of the cylinder head.
Using a “10” wrench, which has five edges, we unscrew the tube fitting that supplies oil to the hydraulic tensioner. we take out the phone. Using a 10mm socket, unscrew the two nuts that press the tensioner to the cylinder block. Then remove the hydraulic tensioner. At the same time as replacing the tensioner, it is recommended to replace the sealing gasket.
Prices for hydraulic tensioner VAZ 21214 range from 400 rubles. up to 900 rub. Depending on the region. But there is no shortage of this device on store shelves.
Replacement video
The gas distribution system of any engine must work correctly. If problems occur in its operation, this leads to premature wear of the motor and numerous breakdowns. To accurately adjust the timing, special marks are used, according to which the shafts in the engine are aligned. We will tell you about the correct placement of marks on a Chevrolet Niva car in this article.
Niva Chevrolet timing chain replacement
To do this, do the following: Unscrew and remove the bypass and tension roller of the belt.
Replacing the timing chain of a Chevrolet Niva
He didn’t pull him out, but took him away. I took off the alternator belt.
I removed the pump. I removed the air duct. I removed the tension roller.
Installed the crankshaft sprocket. Timing belt Niva Chevrolet oil pump sprocket, do not forget about the spacer and lock washer, slightly sharpened the locking pin of the lock washer with a file so that it fits tightly into the groove of the sprocket, bent the pin at an angle of 90 degrees and tightened the bolt.
Lock washer Installed the RV sprocket in the same way, check the mark, if the timing belt of the Niva Chevrolet is set, I use my 13-socket spanner, using it as a lever, I gently press on the lower tooth of the sprocket on one side or the other.
Installed a new damper.
How to Replace the Timing Belt on a Chevrolet Niva
Put the chain on, after soaking it in engine oil, in the direction KB sprocket-oil pump sprocket-RV sprocket. Ensuring tension on the shoulders of the KB sprocket-oil pump sprocket, oil pump sprocket-RV sprocket, while the position of the shafts according to the marks must be observed, manipulate the oil pump sprocket.
The pilot installed the tensioner, having previously lubricated the gasket on both sides with sealant, installed the gasket on the tensioner mounting studs
Chevrolet Niva timing belt installed in place Attention!. The tensioner housing should be facing up
As a guide: Tightened the tensioner mounting nuts using the same techniques and tools as when dismantling the hydraulic tensioner. Checked the shaft marks and chain tension. The timing marks should be pulled out with Chevrolet pliers, the tensioner is cocked. Using a 24mm wrench I make 4 full turns of the kv
The tensioner housing should be facing up. As a guide: Tightened the tensioner mounting nuts using the same techniques and tools as when dismantling the hydraulic tensioner. Checked the shaft marks and chain tension. The timing marks should be pulled out with Chevrolet pliers, the tensioner is cocked. Using a 24mm wrench, I make 4 full turns of the HF.
I checked the marks. I tightened the bolts on the RV sprocket and the oil pump sprocket, using a screwdriver, bent the lock washers, tightly pressed the bent parts of the Chevrolet Niva timing belt lock washers onto the bolt heads, using an extension from the heads and a hammer. I re-rolled the HF and checked the marks.
Having lubricated the gasket on both sides with sealant, I apply it to the lid. I put the cover in place. I tighten the corresponding bolts and do not tighten the nuts completely, do not forget about the gusset of the generator bracket.
I installed the pulley in place so that it fits all the way and the lid can be manipulated. After installing the pulley, tighten the bolts and nuts of the cover, do not forget about the 3 engine sump bolts.
He pulled out the valve cover. Of course, the Chevrolet Niva timing belt will have to work hard, but it’s worth it, because replacing the chain drive yourself is not only about saving money, it’s also about gaining experience. There are no specific recommendations regarding the timing of replacing a chain on a Chevrolet Niva. Simply, after km, it is necessary to carry out diagnostic procedures in relation to this unit, in the timing belt of which the degree of wear of the consumables will be revealed.
The characteristic grinding sound of the motor will indicate chain wear.
Problems with chain stretching are indicated when it can no longer be tensioned in the usual way and when it is pulled back by half a tooth. If this happens to your car’s chain, it’s time to replace it with a new one. The chain will have to be changed even if chips and cracks are found on it, if the timing belt on the crankshaft pulley and the timing cover do not match.
Drain the coolant. To prevent engine oil from leaking into the cylinder head area, it is recommended to replace the cylinder head gaskets. Using the crankshaft pulley timing belt, marks are set on the camshaft gear and bearings. Adjusting the phases in case of mismatch If the notches do not coincide, work continues: The first gear on the gearbox is engaged, allowing you to avoid spinning when unscrewing the crankshaft gear bolt.
The fastener is removed with a lock washer. To prevent the bolts from falling into the engine sump, use a deep-head wrench or unscrew the bolt by hand.
Replacing the timing chain on a Chevrolet Niva with your own hands: instructions with video
Remove the chain tensioner using a screwdriver. It should be replaced in case of stretching or tension, during scheduled maintenance, after a thousand. The camshaft sprocket is removed.
What are tags and their purpose in the Shnivy mechanism
Marks in the timing system on a Chevrolet Niva car are special types of notches and holes that are located on the gas distributor pulleys. The photo shows pulleys with marks along which the timing chain is aligned.
See:
Aligning the chain with marks is done so that it is better fixed and holds the gas distribution mechanism itself. If you install the chain without following the marks, then the operation of the pulleys will be uncoordinated and will then lead to their rapid wear. Therefore, it is important, whenever replacing a chain or parts of a gas distribution mechanism, to install them in accordance with the marks. There may be a malfunction of the timing system when the chain tension is loosened or it is stretched. In order to correctly set the timing mechanism according to special marks, we will look at the procedure for installing the gas distributor phases on the VAZ-2123.
Setting the timing of the gas distribution mechanism using special marks
So, setting the phases in the timing system according to special marks on a Chevrolet Niva car includes the following sequence of actions:
Timing marks VAZ(LADA) 21214 NIVA
Installing timing marks
for VAZ(LADA) 21214
NIVA
. Sorry about the quality. The camera died.
Part 2. Valve piston = repair Niva Chevrolet NIVA Chevrolet 44
Overhaul of the Chevrolet NIVA engine.
After repair work, it is recommended to replace the cover gasket.
After the cover was removed, the following view is observed, shown in the photo below.
Under the valve cover
See:
Important! When unscrewing the bolt, it is necessary to control its position, because it is not fixed by anything and can freely fall into the engine sump. It is recommended that when loosening the tightening, unscrew it by hand or with a deep-head wrench.
When assembling, do not forget to replace the gasket on the cover!
The work carried out does not require much time, but is the key to the successful operation of the parts of the gas distribution mechanism of the Niva Chevrolet car. Drawing a conclusion, I would like to note the importance of setting the timing chain according to special marks. If for some reason you forgot to align the pulleys with the marks, then it is better not to start this process and make the adjustment again. This will extend the life of the timing system and all its components.
Do you still think that diagnosing a car is difficult?
If you are reading these lines, it means you are interested in doing something yourself in the car and really saving money , because you already know that:
And of course you are tired of throwing money down the drain, and driving around the service station all the time is out of the question, then you need a simple CAR SCANNER ELM327, which connects to any car and through a regular smartphone you will always find the problem, turn off CHECK and save a lot of money.
We ourselves tested this scanner on different machines and it showed excellent results, now we recommend it to EVERYONE! To prevent you from falling for a Chinese counterfeit, we publish here a link to the official website of Autoscanner.
Source
How is the replacement made?
If chain stretching is detected and the decision is made to replace only the hydraulic tensioner, then this is an incorrect assumption. It is necessary to replace all parts: chain, hydraulic tensioner, seals, gaskets. Replacement is done in the following sequence, using all the necessary tools:
Use a spanner wrench to unscrew the tube fitting, which has a “10” head. The tube is designed to supply oil to the hydraulic tensioner.
Having loosened the fitting, the tube is removed and moved upward so that it does not interfere with further work. The two nuts securing the device itself are also unscrewed using a “10” wrench.
The device is ready to be removed from its mounting location. We grab the protruding part with our hands and pull out the device. There is a gasket on it, which also needs to be removed to replace it with a new one.
A used device cannot be repaired and requires the installation of a new one. Before installation, it is necessary to coat the gasket with a layer of sealant to prevent oil leakage.
Replacing an old device does not require serious mental and especially physical effort. Installation of a new one is carried out in the following steps:
- The device is inserted into the new seat, having first checked that the structure is identical to the old tensioner.
- Screwed in with two fastening nuts.
- The tube is inserted and secured.
It is simply impossible to make a wrong replacement. After installation, the operation of the motor and the tension of the new chain are checked. An important point is to replace the timing chain in order to 100% protect the car and your health from unexpected breakdowns on the road. This article will tell you how to replace the chain.
Now the owners of the Chevrolet Niva can, without doubt and without errors, correct the existing problem with weakening the chain tension. Remember that if your car has traveled more than 100 thousand km, and there are no characteristic sounds from under the hood, then do not neglect the situation, but disassemble and check the looseness of the chain and the functionality of the tensioner. Happy renovation work!
Recently, an old friend of mine came to see me in his old Chevrolet Niva with the characteristic sound of an extended chain.
In addition to the timing kit, I had the foresight to purchase even a front cover gasket, a crankshaft oil seal and a kilo of marinated meat. I could not refuse such an offer. So, Niva Chevrolet replaced the timing chain and front crankshaft oil seal.
First, let the engine cool to an acceptable temperature. Remove the pipe by unscrewing the bolt by 10 and loosening the clamps.
Next, we unscrew the eight nuts by 10 and move aside the throttle cable and all the pipes that will interfere with us, remove the valve cover.
Remove the air conditioner belt by unscrewing the bolt 13 of the tension roller.
Then loosen three 13mm nuts and one bolt of the generator belt tension roller and remove it.
Now comes the fun part. To unscrew the pulley nut, we need a 38mm socket. Since the elongated head does not fit under a regular wrench (the radiator is in the way, but we don’t want to remove it), we use a pry bar, carefully sawed off from the hub key of some large car.
Everything fits perfectly. Unscrew the nut and remove the crankshaft pulley.
Unscrew the deflection roller.
We dismantle the reinforcing plate.
We unscrew the six nuts securing the front timing chain cover to the block and the three bolts securing it to the pan and remove it.
Set the top dead center. The key on the crankshaft should align against the mark on the block.
The mark for the camshaft sprockets is against the ebb of the camshaft housing.
Next, unscrew the oil supply pipe and two nuts 10 of the chain tensioner.
Next, unscrew the tensioner shoe, damper and remove the timing chain.
Compare the new and old timing chain. It could be worse.
New timing kit.
Reinstall the chain, guide and tensioner shoe. We tighten the chain by hand and check that the marks match.
To make it convenient for us to check the marks after installing the front timing cover, we find the factory mark on the crankshaft pulley and mark it with a white marker. This mark at TDC should be opposite the center of the crankshaft sensor.
We install the front cover, crankshaft pulley and tensioner. Let's check the marks again. We install all the removed parts in the reverse order of removal. Fill with fluids, start the engine and enjoy.
>
Useful post?
Yes
No
Replacing the chain drive
- Place the car on a level surface. Open the hood. Disconnect the battery. Remove the air filter.
- The choke cable should be disconnected and moved away. It is also necessary to disconnect all electrical drives and pipes.
- Remove the fan, generator belt and pump roller. The belt should be thoroughly examined. If deep cracks or other damage is found on it, it must be replaced with a new one. Remove the tray protection and thoroughly clean its cover.
- Remove the valve plug. Unscrew the camshaft sprocket screw.
- Take a wrench and unscrew the ratchet nut.
- Now we begin to rotate the crankshaft until the marks on it and on the engine casing completely coincide. Make sure that the marks also match on the bearing housing and camshaft sprockets.
7. Then remove the casing covering the motor. To do this you will have to remove several bolts. We remove the sedative. Unscrew the screw securing the oil supply pump. There is no need to remove the screw. It should only be loosened and left in place.
Now let's check the operation of the mechanism. To do this, start the engine and listen to how the engine operates. By hearing it is quite possible to determine whether everything was done correctly or something went wrong. If the sound is familiar, rustling, then everything is done correctly. If there is a characteristic grinding sound, the procedure must be repeated.
Timing belt 21213, specifics
single-row timing belt 21213
The photo shows a single-row timing belt 21213, which has already been checked and run-in. Set contents:
- Single row chain 21214
- Set of Rusmash stars
- Tensioner shoe, tensioner shoe shaft, short chain guide
- Front crankshaft cuff (Rezinotekhnika)
I'll try to explain why the new kit is better. The difference in losses between the SAME single-row and double-row circuits in terms of efficiency (efficiency) is relatively small. According to theory, about 4-5%. But we have an “ace of trumps” in our pocket. The double-row chain in timing belt 21213 is bush-type, that is, the roller does not rotate, the so-called “heavy chains”. The single-row chain that goes to this timing belt is a bush-roller chain, the rollers rotate, these are “light chains”. But in this case, the difference in friction losses is no longer a few percent, but tens of percent. There is a separate article about this bushing-roller chain. And of course, friction losses on the rubber and plastic shoe of the tensioner are clearly not in favor of the old design. Now about the chain tensioner for this unit. I recommend installing “Rusmash”. The point is this: the tensioner shoe 21213 has an iron base, and the shoe 21214 is plastic, and the TZA tensioner, with its sharp nose, will slowly break it. Mechanical tensioners were discussed in more detail earlier.
Cause and investigation
We received a lot of questions by email: why was the double-row adjustable gear removed from sale, why don’t you offer a good double-row timing kit? The reason is simple: I don’t see the point. The double-row timing chain and the rubber coating on the tensioner shoe “ate” all the fine adjustments. Since I don’t like criticism and loudmouthing, without offering an alternative, I picked up and tested a single-row kit for a carburetor engine. Now you can put a good split gear on it, a tuning camshaft, and you will really feel the nuances when adjusting.
Why do timing marks shift?
The most common cause is chain stretching, which needs to be changed promptly. The manufacturer does not give an exact time frame for replacement; usually the operation is carried out at 100 thousand km. The urgency of the repair can be determined by the characteristic metallic knock, loss of power and displacement of the marks on the crankshaft and camshaft pulleys. When replacing a chain, the valve timing must be set.
A chain has significant advantages over a belt drive. These include, first of all, its reliability. While a belt can break, this rarely happens with a chain. Usually it just stretches. It lasts much longer than the belt, which means it needs to be changed less often. But still, the chain does not last forever, and after a while it also has to be replaced with a new one. When replacing the chain yourself, it is very important to set the marks correctly and follow safety precautions.
Build process
- The front cylinder head cover is installed and a layer of sealant is applied.
- The bolts are tightened.
- The air filter is installed, sealant is applied and the pan is screwed on.
The fitting is unscrewed to bleed air from the block before filling with coolant. Pour liquid into the radiator. After it leaks out of the fitting, the lamb is screwed into place. Filling the engine oil. The hose and crankcase ventilation tube are connected to the fittings, and the copper wires are connected to the ignition coils.
The tips of the high-voltage wires are connected to the spark plugs. It is possible that after unscrewing the spark plugs, the remaining water in the wells penetrates the cylinders. Using a long knitting needle and a clean rag, it is easy to remove moisture from them.
Important! Adjusting the chain improves timing mechanism retention and pulley operation. It is important to ensure regular monitoring of its location.
Tranquilizer
Another important element in this system is the Niva Chevrolet chain damper, which prevents the resonance effect from occurring. This system consists of the following elements:
The damper is located inside the cylinder head on the front side and is attached to it with two bolts. If it is damaged or worn out, vibrations appear, which can lead to the chain jumping and thereby damaging the motor.
Replacement
To replace, you will need a ten-size socket wrench and a screwdriver. When the tool is ready, we go through the following steps:
- Remove the cover from the cylinder head
- Remove the camshaft drive chain tensioner
- Without disconnecting from the chain, remove the sprocket from the camshaft flange
- Starting from the bottom bolt, unscrew the two fastening bolts
- We fix the chain together with the sprocket and remove the damper. During removal, it is advisable to hold it so that it does not fall into the oil pan.
- We inspect it and if there is damage, we replace it with a new damper.
- We take a new part and install it in reverse order.
It is necessary to purchase a new element exactly the same as the one that was installed previously, since models that were produced earlier may have a damper of a different shape.
Summarizing everything written above, we can conclude that to carry out this work you do not need to have special knowledge or have a special tool, therefore, if necessary, following all the above instructions, you can do all the work yourself.
How are fund income generated?
Social funds are financed through contributions from the income of the working population, enterprises and entrepreneurs. If there is a lack of funds, the fund's expenses can be covered from budget funds.
Each enterprise or entrepreneur that has employees is obliged to transfer amounts to social funds, the amount of which depends on the total wage fund.
Currently, when paying at general rates, the employer is obliged to transfer monthly for the following purposes:
- pension insurance – 22%;
- social benefits for disability – 2.9%;
- compulsory health insurance – 5.1%
Choosing a timing chain
The service life of a timing chain is an order of magnitude longer than that of a belt. Replacement should be carried out after 150 thousand km or once every 5 years. A broken circuit is a rare occurrence. But it is advisable to prevent such situations from arising.
Since this can lead to serious problems and engine repair costs. Both original components and parts are available for sale, as well as analogues from manufacturers from China and Taiwan.
Optimal options in terms of price/quality ratio:
| Name | vendor code | Cost, rubles |
| VPM | 12616609 0636246 | From 2.2 thousand rubles |
| SAT | TKOP001 | From 2.7 thousand rubles |
| Skf | VKML82000 | From 5.6 thousand rubles including rollers |
Parameters of the original part:
| Name, manufacturer | vendor code | Cost, rubles |
| General Motors | 21214100604003; | From 5 thousand rubles |
Setting the piston of the fourth cylinder to the TDC position of the compression stroke
The piston of the 4th cylinder is set to the TDC (top dead center) position of the compression stroke so that when carrying out work related to removing the camshaft drive chain, the valve timing is not disrupted.
If the valve timing is incorrect, the engine will not operate normally.
Set TDC according to the mark on the camshaft sprocket (when installing according to the marks on the crankshaft pulley and on the front cover of the camshaft drive chain, the piston of either the 1st or 4th cylinder may be in this position).
After this, make sure that the marks on the crankshaft pulley and the cover match.
If the shaft marks do not coincide, it means that the valve timing is incorrect (the piston of the 4th cylinder is not installed at TDC).
In this case, it is necessary to remove the camshaft drive chain from the camshaft sprocket and rotate the crankshaft until the marks align.
You can rotate the crankshaft in the following ways.
1. Purchase a special wrench for turning the crankshaft by the pulley nut.
This wrench can also turn the crankshaft from above the engine compartment.
On a car without air conditioning, the crankshaft can be turned with a special socket wrench or a 38 socket by the nut securing the auxiliary drive pulley.
On a car with air conditioning, it is impossible to turn the crankshaft this way, because in addition to the accessory drive pulley, the nut also secures the air conditioning compressor drive pulley.
In this case, a ring wrench cannot be used, since the nut is located deep in the pulley, and when using a socket head, there is not enough space to install the wrench - it rests against the radiator frame spacer.
In this case, set the crankshaft to the desired position by moving the car in fourth or fifth gear.
2. Engage 4th gear and slowly roll the car in the desired direction until the mark on the camshaft sprocket matches the mark on the camshaft bearing housing.
3. Engage 4th gear and lift one of the rear wheels.
Then turn the hanging wheel in the desired direction until the mark on the camshaft sprocket matches the mark on the camshaft bearing housing.
