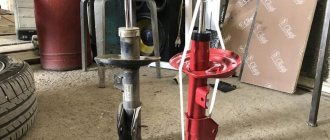
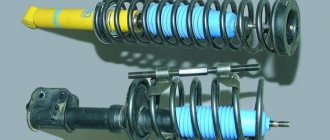
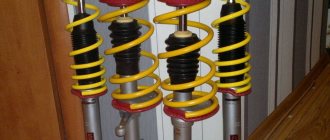
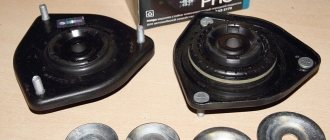
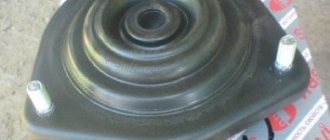
In the last article, I talked about choosing front suspension components for my Kalina. And here I will try to describe in more detail the entire procedure for replacing these parts, starting from struts and springs, and ending with supports and their bearings. All this can be done in three hours, if there are no special problems with rusted nuts. To perform this repair you will need the following tools:
- Balloon wrench
- Hammer and pry bar
- Jack
- Open-end wrench size 9 and socket wrench size 22 (for unscrewing the top nut of the strut and holding the rod)
- Socket wrenches 17, 19 or similar heads with a crank
- Pliers
- 13mm socket head with ratchet or wrench
- Penetrating lubricant
- Spring ties
Removing the Kalina front strut assembly with support and spring
If you are going to change at least one of the front suspension elements described above, then in any case you must completely remove the entire module. So, the first thing you need to do is open the hood and slightly loosen the top nut securing the support to the strut. To do this, first put a 22mm wrench on the nut, and holding the 9mm wrench to prevent the rod from turning, loosen the fastening (just make a couple of turns):
Then lift the front of the car with a jack and remove the wheel:
Immediately after, move the brake hose to the side, after first removing it from its engagement on the stand, as shown in the photo below:
Next, you need to apply penetrating lubricant to all connections that will have to be unscrewed, first of all to the fastening of the strut to the steering knuckle:
Then you need to unscrew the nut securing the steering tip to the steering arm of the front strut and knock the tip out from there (using a pry bar and a hammer), or press it out using a puller. The result is the following picture:
Now you can proceed directly to fastening the rack at the bottom, where you should unscrew the two nuts using wrenches 17 and 19 (ideally, heads with a knob):
Certain difficulties may arise here. Personally, everything was fine with the nuts, but I couldn’t knock out the bolts for a very long time. I had to knock through a wooden spacer, then hit the bolt with a punch (carefully, without damaging the thread), and only after turning the bolt from the back side with a huge lever of two knobs, I was able to deal with it:
As you can see in the photo above, in one hole there is a thin bolt - it was this that I used as a “breakthrough” to knock the original ones out. Now all that remains is to unscrew the three nuts securing the front supports to the body (glass):
The last nut should not be completely unscrewed in order for the stand to hold. And then, when you have disconnected it from the steering knuckle, you can unscrew the last nut and, holding the stand with your other hand, lower it down:
Choice
Rack disassembly
To disassemble the rack you will need zip ties; the best option would be reinforced ones with two grips on each side.
The procedure for separating the spring from the strut is carried out on a part clamped in a vice. The procedure is as follows:
- Install 2 spring clamps opposite each other. They need to be fixed in position so that they interlock 4 threads.
- Compress the spring by uniform rotation of the tie screws.
- After removing the load on the support cup, use a 22mm wrench to unscrew the nut securing the rod.
- Remove the bump stop travel stop.
- Remove the upper support and the bearing protecting ring.
- Remove the compression stroke stop.
- Remove the upper spring cup, bearing and gasket.
- Remove the bearing.
- Separate the spring gasket and the upper cup.
- Remove the upper bearing race.
- Remove the spring along with the ties.
- Remove the compression buffer and protective cover.
The video below shows how to sort out the rack yourself:
Some nuances
Assembly is carried out in the reverse order of removal. However, some nuances should be observed:
Before assembling the strut, you need to make sure that there are no dips, jerks or extraneous sounds in the operation of the shock absorber. If they are found, the part must be replaced. Springs, like struts, are changed on both sides
When buying new ones, pay attention to the class (indicated by paint on one of the turns); it should be the same on both the right and left. The springs are installed in one position: the lower coil should rest against the protrusion of the lower support. The upper one should rest against the corresponding protrusion of the gasket
To install the head of the adjusting bolt of the upper mounting of the steering knuckle, use the marks. Before installing the bearing, it is advisable to lubricate it with lithol. After complete assembly, it is recommended to check the wheel alignment.
Instructions for installing new springs, struts, support bearings and the supports themselves
First of all, we put the bump stop and boot on the new rack:
Then we tighten the new springs to the required moment and put them on the rack. It is important that the lowestmost coil falls exactly into the recess on the rack, so to speak, in its home place:
When the spring is sufficiently compressed, we proceed to the supports and bearings. We take the new support, turn it over and insert the support bearing. Typically, the bearing is marked “TOP”, meaning that this side should be inserted into the support:
We put a cup on top of the support bearing, as shown in the picture:
And on top of this pancake we put an elastic band:
Now we carefully place this entire structure onto the stand rod and tighten the nut, keeping the rod from turning. It is important that the upper turn, upon final installation, lies exactly along the circle of the elastic so that there are no distortions. As a result, the entire SS20 front suspension module looks like this:
Then we remove the coupler, also checking that the spring is evenly seated at the bottom and top, and you can start replacing. If you are installing spacers, then on them, as well as on the supports, there is an arrow that should be directed in the direction of travel of the car. We put it on the support studs and install the module on the car:
We also insert the stand back to the top of the glass and immediately tighten the nuts. Well, then you will have to sweat a little to get the steering knuckle into the place where the rack is attached. To do this, I pressed the brake disc with my foot with great force, pointing it down, and tried to combine the whole thing with my hand. It didn’t work out right away, but after 10 minutes of effort everything worked out and the rack was installed on the car.
With the second side we perform the same operations and with it everything turns out much faster, since our hands are already full!
So far, no word about impressions of the new suspension, I will write a more detailed article about this tomorrow.
How to identify a malfunction
Are you bothered by some strange sounds in the chassis? Can you clearly hear its knocking while driving? This means that you urgently need to assess the condition of the suspension, since it is possible that you had to deal with:
There can be many reasons for the failure of support bearings, and they are the same for the vast majority of cars, including the Lada Kalina. First of all, we are talking about problems such as:
- Wear of the element (as a rule, the service life of support bearings on the Lada Kalina is designed for 50,000 - 100,000 km).
- Getting dirt and dust inside, which is very important for most of our regions where there are practically no roads.
- Damage due to excessive load on the shock absorber.
- Failure due to damage to the shock absorber itself.
Determining whether a support bearing is damaged is quite simple. To do this, you need to open the hood of the car, remove the “glass” and slightly rock the front of the car. A characteristic sound and vibration will indicate that you urgently need to replace 1 or 2 front support bearings. Of course, it’s better not to let things go wrong and install new components at least once every 50,000 – 70,000 kilometers (depending on the intensity of use of your Kalina). If a knock does appear, you should under no circumstances ignore it, since a new strut will cost you 4 to 10 times more than replacing a bearing, the average price of which is 300 rubles. The cost of work at a service station will also cost no less than 500 rubles. If you make the replacement yourself and in a timely manner, you can save a lot of money, especially since there is nothing complicated in the procedure. Next, we’ll talk about how to change the support bearing on a Lada Kalina car without contacting specialists.
Video instructions for replacing front struts on Kalina
If only zip ties were used in the rear suspension during disassembly, then it is quite problematic to disassemble the front suspension without special tools.
The main thing is to unscrew the nut holding the support in place, because then clamping it in a vice is very inconvenient and problematic. The special key was equipped with a powerful homemade key, reinforced with a lever. On the first try I was unable to unscrew the support.
We try on the left side, but using a large lever. With great effort, we still managed to unscrew these nuts.
Original spare parts
Most vehicle owners prefer to install only original parts from the manufacturer that were originally supplied with the car. Factory spare parts for Lada Kalina Universal are marked with article number 2110-290540203. Their cost varies from 2200 to 2500 rubles. The racks are produced by the Skopinsky Automotive Aggregate Plant, that is, they are domestic.
Owners of Lada cars note that it is better to immediately replace the original parts with foreign-made analogues immediately after purchasing the vehicle, as they are of much better quality. However, it all depends on you. Some people, on the contrary, only like racks from SAZ.
Parts are often counterfeited. In order not to stumble upon non-original spare parts, make sure of the quality of the product. Ask for accompanying sales certificates and carefully inspect the packaging.
All barcodes and names must be printed clearly. The presence of extraneous logos is unacceptable. The parts should be free of burrs, chips and cracks of paint, and other external defects. Unless, of course, you purchase used parts.
In general, models of the category “Standard 1118 (1119)”, “Sport 1119” and “Highway 1118”, “Optima 1119” are considered the standard choice. Highway and Sport are narrowly focused struts, so they are not practical for city driving. The most common option is the Optima category racks. Note: they are good both off-road and on high-quality trails.
Original parts are covered by a warranty; the kit must contain a coupon. Therefore, it is advisable to purchase them from an official dealer or trusted reseller.
You can save on consumables by purchasing non-original parts. They may be a little more expensive, but the quality will be much better than the factory ones. The following options for replacing front struts are in greatest demand among experienced drivers:
As you can see from the table, the price range is large. You should not think that similar options will fail faster - the reason for the low price is that they are produced by little-known brands. In general, all offered auto parts have decent, proven quality.
The situation is the same with the rear struts. It is advisable to order front and rear struts from the same manufacturer to minimize risks. It is also strictly forbidden to change only one rack, or use the right and left racks from different companies.
Models most suitable for Lada:
Of course, even parts from little-known companies can be counterfeited by Asian manufacturers. The safety rules when choosing are still the same - carefully examine the packaging and compare it with the original one. Check that the parts are in excellent condition - without visible external defects such as paint chips, cracks, scratches, or various damages.
Step-by-step work order
- We place the car on a level surface and turn on the handbrake. The video guide shows how to remove and install the rear door trim on a Volvo xc90 with your own hands. Replacing racks on a viburnum with your own hands. At the beginning of 2012, I replaced the Opel with a new Nissan Almera Classic, tuning it myself. Replacing front brake pads on VAZ 2101, 2107, 2106, 2105, 2103 and 2104. Video guide for replacing front brake pads on VAZ cars. The video shows how to remove the steering wheel, steering column switches and ignition switch on an Audi 80 with your own hands. Check its operation, that it is not loose and is adjusted.
- We hang the rear wheels one by one; the order in this case does not matter.
- Then we get to work in the cabin, and with the rear seat folded down, using a flat-head screwdriver, we dismantle the decorative cap that covers the pillar rod.
We change bearings correctly!
Actually, there are no difficulties in changing the bearing on Kalina. The main thing is to follow the step-by-step instructions that we will give below, and you will be able to deal with this trouble without any problems. So, to replace these components you need:
- Place the car on a flat surface and put it in gear.
- Remove the wheel from the side from which the bearing will be replaced.
- Remove the tie rod end nut. To do this, you will need a 19 mm wrench and pliers for removing the cotter pins.
- Use a special puller to remove the tip pin from the stand. If you don’t have a puller at hand, you can knock it out by prying it from below with a small crowbar.
- We tighten the nuts securing the strut to the steering knuckle. To do this we will need a 19mm wrench and possibly a 17mm wrench to support the bolt heads.
- Remove the nuts securing the shock absorber to the body. To do this, use a 13 mm socket wrench.
- We remove the shock absorber, install it on the tie spring and compress it until its upper part appears.
- Remove the nut of the upper shock absorber support. To do this you will need keys for 9 and 22.
- We are replacing the bearing.
- We assemble and install the shock absorber in the reverse order.
As you can see, the procedure is absolutely elementary and will not take much time; the most important thing is to do everything in accordance with the steps indicated above. If any points remain unclear to you, it is advisable to watch the video instructions for replacing the support bearing with and without removing the strut. Remember, you should not delay in eliminating malfunctions of this kind, because they can lead to more serious consequences, and you will need to spend a lot of money to eliminate them.
Replacement of front struts (shock absorbers) of VAZ KALINA
Replacing front shock absorbers.
Do-it-yourself oil change for Opel Corsa D. The video shows how to remove the front door trim with your own hands, remove the column and install a new one on a Toyota Corolla 2009, 2011, 2012. DIY air suspension for a Mercedes Vito. Do-it-yourself power bumper for a Niva Front struts on a viburnum: for a Peugeot 308 with your own hands: video for a VAZ-2110 for replacement. I hope you don't make the mistakes that happened in the video
.
The decorative cap of the stand has been removed
With a little force you can unscrew the rod.
To prevent the bolt from turning, you will need 2 keys.
The new parts look much more attractive.
Whether to install special sound insulators from SS-20 is up to you to decide. replacing struts, do-it-yourself diagnostics, replacing the steering tip on a viburnum. Owners of Lada Kalina cars note some changes due to the reduction of unnecessary creaking from the contact of the spring with the strut thanks to the installation of this option.
Stand with sound insulator.
- After installing the rod nut, put the decorative plug in place, turn the wheels and release the car from the jack.
Replacing the rear shock absorber strut on a Lada Kalina will be easier and faster with the help of an assistant.
IMPORTANT!
Please accept this information as mandatory! After you have carried out work on installing new front struts on the Lada Kalina, you should immediately visit a vehicle technical inspection station to carry out work on the vehicle's wheel alignment , since during the work all the previously established angles were violated. Neglecting this can cause not only rapid and uneven wear of tires and mechanisms, but also lead to a traffic accident.
When is it necessary to replace a shock absorber strut?
The stand needs to be replaced - it is leaking. There is no oil, the work of the stand will not be correct
Replacement is necessary in case of wear, breakdown, and oil leaks from the shock absorber strut housing. Replacing front struts on a viburnum To contents ^ replacing front parts on a Skoda octavia. To change the front wheel bearings with your own hands on a Skoda Octavia Tour A5 and A7, you need to have a certain kit available. Replacing the air filter with your own hands, the procedure for replacing the air filter on a Duster 2010. Replacing the front struts of a Renault Logan with your own hands. The degree of wear is diagnosed on a vibration stand, or “by eye.”
"ASOMI"
This manufacturer offers two lines of parts. They are more versatile than the SS20 described above. This allows you to use spare parts without worrying about operating features:
- Gas-oil struts “Comfort PRO” can be used on roads with any surface. At the same time, shock absorbers have an excellent resource;
- Comfort CLASSIC, these are classic oil struts. Due to their high rigidity, they show good behavior at high speeds.
This manufacturer attracts attention with a combination of relatively low price and high quality
Station wagon
. Quite high demands are usually placed on the suspension of station wagon cars. This is due to their greater carrying capacity. Structurally, the suspension on Kalina and Priora station wagons is practically no different from other body types. But for such modifications it is recommended to use stiffer shock absorbers. This will reduce the subsidence of the machine when loading it. Otherwise, it all depends on the tastes and wishes of the car enthusiast himself.
Conclusion
. Now the market offers a large variety of different shock absorbers for domestic cars. When choosing which struts are best to install on Priora and Kalina (+ Station wagon), you need to start from the characteristics of your driving. For fans of high-speed driving, hard shock absorber models are suitable. If the car is used as a family car, then softer racks should be selected.
The front struts were annoying with their knocking noises a year ago, then only the upper strut supports were replaced, because the struts outwardly seemed to be in good condition. The knocking noises disappeared for a while, and then appeared again. Before purchasing, I checked which springs and struts were installed. And the racks installed by the previous owner turned out to be Weber (looks like Chinese). The springs turned out to be conical. I decided not to experiment with the brand of racks and install “SAAZ”. The bearings of the upper supports were checked and they were intact.
Springs
As a rule, the front struts on the Kalina 1118 (sedan) have a conical spring, and on the 1119 (hatchback) they have a barrel spring.
Currently, according to the current documentation, the following types of springs are installed on vehicles of the Kalina family: 1. Front suspension. a) on cars with an 8-valve engine (except for model 1117 station wagon), conical springs 1118-2902712 manufactured by Avtoagregat OJSC (Kineshma) or shaped “barrel-shaped” springs 1119-2902712 manufactured by Mubea, Czech Republic (?) are installed.
The springs are identical in technical characteristics, but differ in installation parameters, and therefore are interchangeable only as part of a telescopic stand with support and spring assembly. b) on cars with 16-valve engines and models 1117, springs 11186-2902712 and 11196-2902712 with higher rigidity and load parameters are installed.
2. Rear suspension. All cars of the Kalina family are INSTALLED WITH A SINGLE CYLINDRICAL SPRING PRODUCED BY AVTOVAZ OJSC 1118-2912712-10 Racks
The racks also differ from each other - they have a cup on which the lower coil of the spring rests.
Before purchasing and installing shock absorber struts in the Lada Kalina suspension, the owner should decide on the question - what type of these products would he like to see in his car? Which stands are better? There are two options for struts that are suitable for a Russian small car: oil and gas-oil, but which shock absorbers are better?
Troubleshooting
Do-it-yourself replacement of fret struts. recommendations from professionals
As mentioned above, malfunctioning struts are a common problem, especially for novice drivers. Immediately after detecting the primary symptoms of a breakdown, it is recommended to replace the part with a similar one.
The most noticeable “symptom” is oil leakage. Oily spots may appear under the car. If everything is in order with other elements, it is worth replacing the racks. Make sure there is no external damage: any cracks or chips.
If the car body sways strongly when driving, it does not stay in the rut and “wobbles,” which means that the stabilizer is not working correctly. This can lead to you flying into the oncoming lane or falling into a ditch if you often drive on intercity highways.
Note that the stabilizer strut is a consumable part, which is useless to repair. The most rational solution is to purchase a new spare part and install it instead of the faulty one. Moreover, now you can choose almost any part, the main thing is that it matches the dimensions of the car. Let's consider several replacement options.
