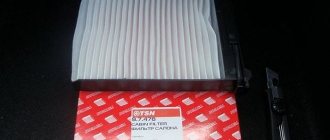
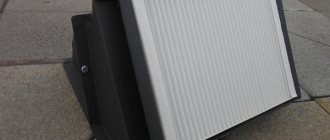
Lada Priora, regardless of configuration, is equipped with a cabin filter, which should be changed periodically. This is necessary to ensure that the car maintains clean air without dust and unpleasant odors. In addition, the cabin filter also affects the operation of the heater or air conditioner.
Each car owner chooses for himself the frequency of filter replacement, but it is better to do it more often. For example, at the beginning of winter and summer. To ensure that your car always has clean air.
In this article we will tell you how to change the cabin filter yourself.
Engine air filter
If the air is not filtered, then all the solid suspension in it will enter the engine and act as an abrasive, which will lead to deterioration in engine performance.
Timely replacement of the air filter is very important. Contaminated, it can cause even more harm than its absence. The consequences can be dire. First, fuel consumption increases by 10-15%. Ultimately, the device will rupture and the engine will fail. And buying a new engine costs much more than replacing an air filter. At the moment, 3 structural types of filters are produced: cylindrical, panel, frameless. Which one is better? Classic air filters are an accordion of filter material with seals around the edges. This is done to ensure that air enters the engine exclusively through the “filtering” elements. The filter partition (curtain) is made of porous cardboard, which is treated with special resins. This impregnation is necessary so that the device does not swell when moisture gets on it.
If during operation you notice that the partition is swollen or the filter element is deformed, it must be replaced immediately. The most common material for making curtains is cardboard. Sometimes it is made from synthetic fibers. Much greater operating tolerances must be applied to them. But such devices are rarely produced on the Lada Priora.
Air filter selection
It doesn't have to be expensive. There are no special requirements for this element, however, you need to choose one that uses high-quality paper, since in this case, effective dust absorption is ensured and pollution is prevented from entering the engine. The most popular parts today are the brands Mann, SCT, BIG. However, their price category is average or high. Many motorists install cheaper options that do their job just as well. For example, “Salyut” or “Nevsky” have proven themselves to be excellent, although they are cheaper.
In addition to choosing the right air filter, you need to know the rules for replacing it. Under normal operating conditions, the regulations require replacement every 30,000 kilometers. During hard use in dusty areas and off-road, the filter should be changed every 15,000 kilometers.
If the filter is dirty, air will pass through it with difficulty, the air-fuel mixture will be enriched in fuel, so gasoline consumption will increase significantly. In addition, in such conditions the engine will overheat, and all that is needed to prevent this outcome is to change the filter element in a timely manner.
Replacing the air filter
It is not necessary to turn to car service specialists for help. This element is located in a special housing next to the battery. The housing cover is secured with 4 bolts. For ease of replacement, it is recommended to disconnect the mass air flow sensor by unfastening the fastening latch. After this, you can remove the housing cover and remove the old filter, clean the box from dust and install a new filter element. Further assembly is carried out in reverse order.
Manufacturers and prices of analogues
The following list of analogues is known for the air-purifying elements of the Hull air conditioner on Priora:
- QML CF1007 = 86 rub.
- SibTek AC15 = 115 rub.
- ALPHA FILTER AF5034 = 162 rub.
- TSN 97671 = 96 rub.
- TSN 97672 = 297 rub.
- LGR LGR7409 = 164 rub.
- Nevsky filter NF6008 = 207 rub.
- Nevsky NF6008s = 253 rub.
- BIG Filter GB9937 = 214 rub.
- BIG Filter GB9937C = 275 rub.
- Sintec SNF2170HC = 230 rub.
- Ekofil EKO0416 = 275 rub.
- MITWELL MA2721 = 143 rub.
- Goodwill AG932CFC = 188r.
- LGR LGR7412 = 242 rub.
- LGR LGR7410 = 221r.
- Fortech FS017 = 265 rub.
- Fortech FS017C = 355 rub.
- Analogues for Panasonic:
- BIG Filter GB9957C – 265 rub.
- BIG Filter GB9957 – 234 rub.
- SibTek AC0416C – 195 rub.
- Fortech FS054C – 266 rub.
- Fortech FS054 – 224 rub.
- QML CF1008 – 107 rub.
- LGR LGR7411 – 231 rub.
- TSN 97739K – 211 rub.
- TSN 97739 – 135 rub.
- Ekofil EKO0417 – 238 rub.
- Ekofil EKO0407 – 128 rub.
- Nevsky filter NF6007 – 259 rub.
- Nevsky NF6007s – 304 rub.
- SCT SAK286 – 277 rub.
- Sintec SNF2170PC – 318 rub.
It is impossible to say for sure that the analogues will last longer and better, but they cope well with their main task - cleaning the air entering the cabin.
Main menu
Lada Priora hatchback Logbook Steering rack repair
Replacing the cabin filter in Lada Priora (Halla climate)
It's time to replace
Now we can get acquainted with installing a cabin carbon filter LGR 7410 in the Priora.
The cabin filter in a Priora with Halla climate control is located behind the engine and is not placed vertically.
If you have a front strut extension installed, it needs to be removed. Then we remove the hood seal.
There is also an option to disconnect the vacuum booster hose, because space is limited and it will not interfere.
Then, using a Phillips screwdriver, you need to unscrew the two bolts securing the compartment upholstery to gain access to the filter installation location.
Then you need to bend the upholstery without snapping off the filter cover by squeezing the latch at the top with 2 fingers without pulling the top edge only towards you.
Now you need to remove the filter itself using a special tab. Draining and replacing brake fluid and filter on Ford Focus 2; Drain and change oil c. The filter is difficult to remove without deformation or damage, but since we are changing it, it is natural not to try very hard. There are filters with a rigid frame - these are obtained by breaking them at the notches on the edges.
Replacing the cabin filter
Priors with
air conditioning
detailed video. At the bottom of the video, on
replacing
the cabin
filter
.
we call this filter
; salonnik.
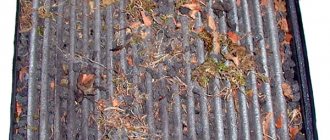
The filter turned out to be thoroughly clogged with dust. Removing and replacing the interior lamp of a VAZ. When I installed it, it was snow-white (regular filter - not carbon).
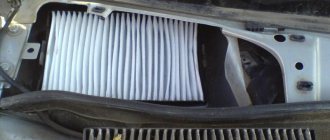
Given the experience of removing the old filter, it may seem that installing a new one will not be easy - there is very little space between the motor and the upholstery. But that's not true. And that is why replacing the filter with the air conditioner. cabin filter on Priora. If you look at the new filter from the side, you can see special slots.
Thanks to them, the filter can be twisted with a “screw”. In this case, the filter accordion will shrink and it will become very compact.
Carefully push the filter into place without applying much effort. If difficulties arise, we make back-and-forth movements.
Now you need to close the lid. To do this, insert the lower shank into the slot and press the upper part until it clicks. Do not mix up the sides - the sealing foam should be on the outside.
All that remains is to screw the engine compartment trim back on and reinstall the vacuum booster hose. Replacing the cabin filter
completed.
Good luck on the roads!
Why is it necessary to replace this element?
Dust in the summer, sand, leaves, dirt - all these particles can get into the cabin when you are at speed. But this is not the only thing that can happen if you do not have a filter installed in your cabin. If the purifier becomes dirty, air from the street will stop flowing into your car altogether. The result is foggy windows, poorly functioning air conditioning, or simply blowing air into the interior.
Therefore, you need to seriously approach the issue of regularly replacing the purifier. It is recommended to control the replacement time according to one of the criteria. Replacement is carried out:
- or once every 20,000 km of travel;
- or every year, before spring.
It is better to be guided by the first option, and your salon will always be clean. In winter, a cabin filter element is also necessary. Because the furnace is also powered by the air conditioning system, and clogged air paths also impair the operation of the furnace.
For greater efficiency, it is recommended to install carbon purifiers.
Replacing the cabin filter in Lada Priora (Halla climate):
Lada Kalina hatchback Sport Logbook Replacing handbrake cables on the Luca ZTD
Are the air conditioner filter and the cabin filter (heater) different filters? Does this plastic frame on the filter come with the filter right away?
The air conditioner filter and the cabin filter (heater) are one and the same.
The frame on the filter is not plastic. It is made of a soft material resembling impregnated cardboard. Sealing foam is glued over the frame.
Actually, there are some specifically with PLASTIC frames. Replacing the timing belt on a Priora 16 valve, replacement. Replacing the cabin filter on Priors with air conditioning! There is no need to mislead people here
Hello, please tell me, from the vacuum booster nozzle (on the right) there are 2 more nozzles, what are they for? You can see them in the sixth picture
These are rubber plugs for the intake manifold receiver. They plug holes for additional equipment in the receiver. They come from the factory muffled. Replacing the cabin filter on a Lada Priora with air conditioning. They are made from low-quality rubber - they crack and create air leaks, which can cause engine trouble.
With a Panasonic air conditioner, one of them has a recirculation valve hose on it.
You can see this in the photographs, here is the link https://hdd.tomsk.ru/desk/vqqvatju#, is this the hose from there? and why do I have one nozzle? thanks in advance for your answer.
Yes, apparently this hose is from there. How to remove the cooling radiator Re-upholstering the armrest on the Priora ICE Kalina with E. Why there is only one fitting - I don’t know. Never encountered it. Maybe one of the early modifications of the 21126 motor?
Maybe I'll look for information. Thank you for your answers.
How does the cabin filter work?
Replacing the cabin filter of Lada Vesta. Practical recommendations for choosing
It's a pretty neat design. It is made in the form of a rectangle made of plastic, with a core of filter material. So, there are:
- Frame.
- Filter element.
As already mentioned, the body is made of plastic. On its surface, along the outer rim, there is a small edge. This is due to the fact that it can only be placed in one position.
The filter element is made in the form of a kind of accordion, occupying the entire inner surface of the rectangular body. In general, the Priora cabin filter is quite thin. This is due to its location.
Important! The body is made of plastic in three places on each side, and has cuts that allow this part to be bent.
Climate control
Previously, this unit was simply called a heater. But now, due to the radical expansion of its functions and increased accuracy of mode adjustment, it is proudly called climate control. This device is not located in the cabin, as usual, but under the hood of the Priora. Or rather, under the windshield of the car. Below the bottom cut. Unlike previous VAZ models of this class, the peculiarity of the Priora interior air purifier is that it is not located horizontally in front of the system fan, but after it in a vertical position. This is due to the fact that the Priora’s climate control is designed for the installation of an air conditioner, and this forces you to be more careful with the free space.
Attention! Priora Ladas that are not equipped with air conditioning are equipped with a heater similar to the model installed in the VAZ 212 interior since 2004. Its replacement has been described in detail for a long time, and it makes no sense to present it here in full.
Then install a new one
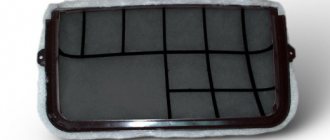
Simply remove the rubber wall seal from the heater compartment casing, and unscrew the screws securing the plastic grill covering the interior air purifier and remove it. Then install a new one.
When is it necessary to change a part?
According to the regulations, this part for the Lada Priora must be changed every 10,000 km. If the car is used on very dusty roads, in an industrial area or in rural areas, it will have to be changed more often. If you notice one of the following negative signs, you can arm yourself with a screwdriver and start repairing:
- There is a weak air flow from the ventilation and heater nozzles;
- Glass often fogs up - simply because the volume of incoming air is not enough;
- When you turn on the heater, an unpleasant smell spreads throughout the cabin.
Replacing the cabin filter on a Lada Priora with and without air conditioning, instructions
Spring is a wonderful warm and sunny season. The snow is melting, the trees are turning green, and the cars are getting dirty. Has anyone seen them dirtier than during this period? But, unfortunately, people are in no hurry to wash their faithful iron friends until May. After all, no one wants to not open a clean and shiny car in the morning, because due to the drop in temperature, the interior door freezes.
How can you drive on dusty roads without breathing in the dirt? To do this, the car is equipped with a special filter that retains dust and prevents it from spreading deep into the cabin.
Replacement should be made at least once a year, just before the onset of warming - this is what most of the world's manufacturers recommend. But if you are a resident of a metropolis or a city with a population of over a million, then do the check at least 2 times.
Let's look at replacing the filter using the Lada Priora model as an example. Have you noticed strange odors in your car when you turn on the furnace or air conditioner? In this situation, the first thing to do is to check the climate control system, because it may have stopped coping with its functions. The location of replacement cartridges for a Lada Priora car with and without air conditioning is in different places.
First, let's focus on choosing a cabin filter. Have you already decided which one is right for you? They come in two types:
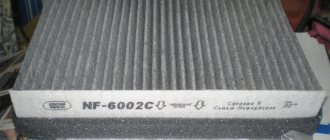
- The standard one will cost you less. It is made of special impregnated paper.
- Coal is more expensive, but its functionality is wider. Due to the presence of Activated Carbon in the composition, it effectively eliminates odors and also prevents bacteria from penetrating into the interior.
Let's prepare the necessary tools. In both cases they are the same, only the replacement is different.
- Cross screwdriver.
- A scrap of fabric or any rag from the store.
- Clean cartridge.
Once everything is ready, replacing the filter should go smoothly.
With air conditioning
In our case, we use a Panasonic air conditioner, since it is one of the most popular for the Lada Priora model.
Open the hood. Turn off the vacuum booster so that it does not restrict you or make your work difficult. The required space is hidden behind the engine, so we remove the mounting bolts from the sound insulation. Carefully move the upholstery out of place. Take a Phillips screwdriver and pry the filter lock apart. Carefully pull the contaminated element towards you so as not to spill debris from it.
Take a clean cassette prepared for replacement in the Lada Priora, and carefully place it in place of the previous one. This must be done smoothly and easily, t
because with a sharp movement everything can be broken.
If you have difficulty passing the cartridge, try pulling it out and putting it back in the stack, or check for debris in the compartment itself, because something might have remained when you removed the dirty cartridge. If installation is successful, put the latch back and return the upholstery to its place. Reinstall the mounting bolts. Ready! The replacement has been made.
Without air conditioning
Replacing a Lada Priora interior without air conditioning is not much different from the previous one. However, the location of the filter changes.
Look at the windshield on the passenger side. There is a filtration system under the right wiper. Open the hood and secure it. Carefully remove the cleaning grille, underneath it is our climate control system. Using a Phillips screwdriver, unscrew the 3 mounting bolts. Move the cover and remove the dirty filter
This must be done with caution so that debris does not get into the ventilation system. If this does happen, use a rag or mini-vacuum cleaner to clean the surface.
Replace the clean filter and return the lid to its original position. Secure the clean grille with bolts. Ready! You can close the hood.
The replacement of the Lada Priora model has been completed.
Let's sum it up
It is better to purchase air purification devices for Lada Priora in specialized stores. When purchasing, you should check the filter for defects and make sure that the selected model is suitable in shape and size.
Cabin filter
After reading the step-by-step instructions for replacing a used Lada Priora filter, it becomes obvious that this is a simple, inexpensive procedure that can be done with your own hands. If an independent change is not suitable for you, you can apply for the service at any specialized salon or auto repair shop. The replacement procedure will cost about 500 rubles.
It must be remembered that the system requires timely inspection, cleaning and replacement. It is necessary to pay attention to the cabin filter both in summer and in winter, because the device not only cleans the air, but is also needed to heat the cabin. You can take the advice of experienced car enthusiasts and carry out an annual replacement once a year, with the onset of spring.
Replacing the cabin filter of a Priora with air conditioning yourself CAR WORKSHOP
In the design of each car, it is very important to have a good heating system (“stove” in popular parlance). By “good” in this context we mean a system that is capable of constantly maintaining the microclimate set by the driver inside the car
Indeed, under the conditions of its operation, when the seasons are rapidly changing, for a comfortable stay of people in the cabin, temperature adjustment is constantly required: in the summer heat, the air conditioner saves us with cold air, and in the winter, the “stove” provides pleasant flows of heat. Therefore, the heating system in your car should always be in good working order.
It is also equally important to always keep the cabin filter, which is part of the car’s heating system, in good condition. This element is designed to keep dust and other components of street air from directly entering the cabin.
And some filters can even eliminate unpleasant odors, but they are a little more expensive than usual.
Over time, a large amount of trapped dust and dirt particles accumulate on the cabin filter, which leads to the cessation of its main function. Many car manufacturers and some auto mechanics advise replacing such a filter every 15-20 thousand kilometers. They call spring the best time of year for this - the season when dust on the roads and in the air is just beginning to appear.
Replacing the Priora cabin filter
- Place the car in a place convenient for repair and open its hood. On the left side of the car under the windshield you will see a small grille that must be removed to access the filter. To do this, you will first have to remove the screw caps and then unscrew them.
2. Now you need to get rid of the cover covering the air purification components. To do this, simply unscrew the bolts that secure it on the four sides. When you remove this cover, you will see a dirty cabin filter. Take it out.
3. Thoroughly clean the free space for the filter from dust, small stones, dirt and install a new filter. Do all the steps in reverse order.
Replacing the filter on a Priora with air conditioning
- Open the hood of the car and find the place where the cabin air filter is located. It's easy enough to spot. Now pinch the latch that secures the cover over the filter so that it can be removed. Remove the cover.
2. Pull out the old dusty filter. It cannot be cleaned, so we can safely throw it away
Did you notice what position he was in? The new filter must also be twisted using special cut holes in the housing.3. Reinstall the clean filter and screw on the cap.
Finish the job with the same steps, only in reverse order.
If you do not promptly replace the heating system filter, then dangerous concentrations of exhaust gases, dust and other harmful substances will soon begin to enter the interior of your car. Why is this dangerous?
The fact is that chronic inhalation of dirty air can provoke the development of a variety of diseases, primarily in the respiratory system, as well as aggravate existing health problems among passengers of such a car.
Therefore, it is so important to change the cabin filter on time and regularly monitor its cleanliness. Referring to these arguments, in today's instructions we will tell you in detail about how to independently replace such a filter on a Priora, a car of a famous Russian brand.
Replacing the cabin filter on a Priora without air conditioning installed is slightly different from replacing the filter on a car with air conditioning. Because of this, many new car enthusiasts who want to service their car themselves often have misunderstandings on this issue. To prevent such situations from arising again, we decided to describe these two cases separately by creating two separate instructions.
Product delivery options
Note! Below are the shipping methods available specifically for this product. Payment options may vary depending on the shipping method. Detailed information can be found on the “Delivery and Payment” page.
Parcel by Russian Post
Available payment methods:
- Cash on delivery (payment upon receipt)
- Using cards Sberbank, VTB, Post Bank, Tinkoff
- Yandex money
- QIWI
- ROBOKASSA
Shipping throughout Russia. Delivery time is from 5 to 12 days.
Parcel by Russian Post 1st class
Available payment methods:
- Cash on delivery (payment upon receipt)
- Using cards Sberbank, VTB, Post Bank, Tinkoff
- Yandex money
- QIWI
- ROBOKASSA
Shipping throughout Russia. Delivery time is from 2 to 5 days. More expensive than regular delivery by Russian Post, approximately 50%. Parcel weight up to 2.5 kg
Express Parcel EMS
Available payment methods:
- Cash on delivery (payment upon receipt)
- Using cards Sberbank, VTB, Post Bank, Tinkoff
- Yandex money
- QIWI
- ROBOKASSA
Shipping throughout Russia. Delivery time is from 3 to 7 days. More expensive than regular delivery by Russian Post, approximately 100%.
Transport companies
Available payment methods:
- Using cards Sberbank, VTB, Post Bank, Tinkoff
- Yandex money
- QIWI
- ROBOKASSA
Delivery is possible to any locality where there is a representative office of the transport company. Delivery time is from 2 to 10 days. Sending large parcels is approximately 50% more profitable than by Russian Post.
How to change the cabin filter
Replacement methods vary for different heater models. They come with or without air conditioning. The elements themselves also have differences; this must be taken into account when purchasing a new one.
For heaters not equipped with air conditioning
In these vehicles, the element is located under the windshield on the passenger side. It is located horizontally. For dismantling you need:
Lift the hood lid and remove the rubber seal, halfway on the passenger side. Unscrew the plastic trim under the windshield (it is secured with six screws, they are located under the plastic plugs on top, and under the rubber seal at the bottom). Remove the cover and unscrew the filter element cover (four screws). Take out the old element and remove all the debris that has accumulated in the shaft during the operation of the car (a vacuum cleaner is good for this procedure, but you can also use a damp cloth) and install a new one (it is important to follow the direction of flow indicated on the frame). We assemble everything in the reverse order and check the operation of the stove at maximum fan speed.
For heaters equipped with air conditioning system
For a Prior with such a heater, both the method of replacement and the location differ. It is located in the engine compartment, but is installed vertically. Change it this way:
Open the hood lid and loosen the vacuum booster clamp on the head and remove the pipe from the fitting (you don’t have to do this, but then it will be more difficult to get it out). If wires and pipes are attached to the casing with clamps, you need to remove them during replacement, and then attach them to their original place. On the trim of the engine compartment, under the windshield, approximately in the middle, there is a hatch for access to the filter. It is made of the same material as the casing, one part of it is attached with a screw. After unscrewing the screw, you can open the hatch by pulling it towards you. Behind the door there is a cover that must be removed by squeezing the latch. Behind it there is a vertical element that can be pulled out by pulling the tail towards you (you can not remove it carefully, because it must be replaced). We remove all debris from the canal, because
if this is not done, then it will end up in the cabin. The new filter must have places on its frame for breaks (if there are no slots, you need to bend the element in the same places as the old one), they are needed to install it in its normal place without damage. We bend it and put it in place, then close it with the lid (it is important to get the lid into the bottom groove, otherwise it will not snap into place). We check the operation of the heater and close the hatch.
All the steps described above will help you change the cabin filter without much effort. It takes a little time, but after replacement, the operation of the stove (or air conditioner) improves, and the interior will become cleaner.
