Print this article Font size 16
Like any other car, the VAZ 2110 has many consumables that need to be changed at certain intervals. These consumables also include a cabin filter for the VAZ 2110, the replacement frequency of which, according to the operating manual, is 15 thousand kilometers.
But in fact, taking into account our road conditions and the operating characteristics of cars of this type, it is necessary to change the filter much more often.
First, determine whether the filter is specifically present on your “ten”. The fact is that the first models were produced without it. Then old-style devices appeared, installed vertically.
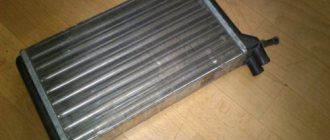
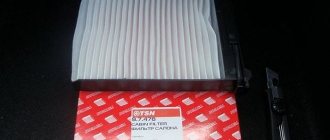
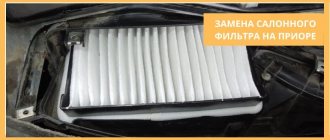
Cabin filter element for VAZ 2110
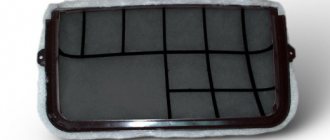
And already in 2003, the latest modifications of cabin filters appeared, which stand horizontally.
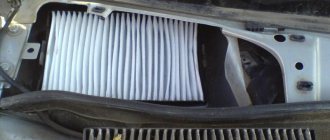
Location of the cabin filter on the VAZ-2110
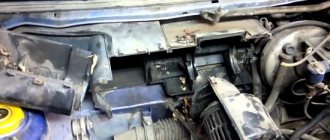
On a car, the cabin filter is located under the windshield on the passenger side.
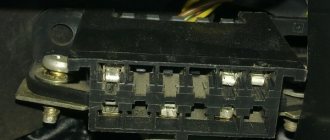
The cabin filter is hidden under this decorative grille.
On models produced since 2003, this element is located horizontally , and before 2003 it was located vertically . At the same time, these consumables are not interchangeable , so when purchasing, be sure to specify which filter is needed.
In order to find this element on the car, you should carry out the following manipulations:
- Open the hood.
- Find the protective grille on the passenger side.
- This is where this filter element is located.
How to determine if the filter needs replacing
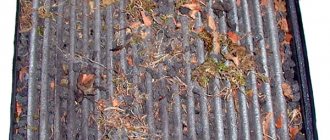
Dust flying out of the air ducts indicates the terrible condition of the cabin filter.
The cabin filter needs to be changed periodically . If, when purchasing a car, it is not known when the previous owner changed the filter, it is better to replace it immediately, since it is inexpensive. If you don’t want to spend even a little money, you can make a list when replacement is necessary:
- If the air inside the car has acquired a damp smell.
- Along with the air, a large amount of dust begins to fly out of the ventilation holes.
- The filter membrane has become dirty, which is immediately noticeable by its grayness.
Car manufacturers recommend replacing this element based on the total mileage. For the city, this figure is equal to 10–15 thousand mileage, for rural areas – up to 25 thousand.
Tasks and functions
The immediate task of the cabin filter is to retain and prevent all kinds of contaminants, dust, pollen, and harmful microorganisms from entering the cabin. A simple air filter is responsible for retaining dirt particles, and a carbon filter is used to combat odors.
clogged
If you are an allergy sufferer who cannot tolerate the smells of flowering plants, you will have to change the filter every year just before the flowering season begins. In other cases, replacement is performed approximately every 7-12 thousand kilometers.
If you do not change it in a timely manner, this will lead to numerous contaminants entering the cabin, which you and your passengers will breathe. It is unlikely that you want to inhale dust and dirt, as well as develop an allergy to plants in your child. Therefore, it is extremely important to carry out the replacement procedure on time.
Types of filters
Carbon filter.
Cabin filters come in simple and carbon types . Currently, it is not recommended to install simple filters that do not contain carbon, as it absorbs unpleasant odors. As for the choice, it is quite wide. The main thing is not to forget to mention in the store what kind of filter is needed. Cars before 2003 need one filter, and cars after 2003 need another.
Articles
Old style filter.
New sample filter.
The most popular elements are those with the following article number:
- 21110-8122021-83. This modification is suitable for VAZ-2110 after 2003 release.
- NF-6001c "Nevsky Filter" . This filter can be installed on cars up to 2003.
When replacement is required
Mileage cannot be taken into account solely. Because there are a number of other factors that may require immediate filter replacement. Such situations include:
- Problems with the ventilation system, which has lost its efficiency;
- The appearance of unpleasant odors when ventilation is turned on;
- Slow cooling process of the interior during the hot season;
- Poor interior heating in winter;
- Formation of fogging on the glass or the appearance of plaque from the inside of the cabin.
Installing a new part
Before installing a new filter, wipe the housing from dust!
The new part is simply placed in place of the old one.
In this case, you need to make sure that there is no moisture at the installation site . Installation of the wind grill occurs in the reverse order.
We insert a perfectly clean new filter into place.
Peculiarities
Inexperienced drivers often install the cabin filter on the wrong side. In order not to make a mistake, you need to remember how the old element was located. For those who may forget, it is recommended to take a photo of the location before replacing.
Subspecies
Filter elements for the VAZ 2110 cabin currently have several modifications.
They differ in the manufacturing method and can be:
- made of synthetic fibers with corrugated paper folded in rows;
- carbon, made with a layer of activated carbon. Such elements purify the air more effectively, but fill up faster and require replacement.
Depending on their location in the seat, there are horizontal and vertical filters. These consumables are not interchangeable, and you need to purchase a new one for a specific car model.
For city driving, it is better not to skimp on your health and choose a carbon element.
Old style
Until September 2003, dozens of models of consumables with a vertical arrangement of the cabin filter element were produced. Having removed the plastic protection, you can detect it by touch.
For old-style products, the catalog numbers are as follows: 2112-8122020-00 and 2110-8122012.
Suitable replacement consumables:
- NF-6001C, if the decision is made to install coal;
- NF-6001 - standard.
New sample
Since September 2003, on the VAZ 2110 model, the cabin filter unit has been installed horizontally. Car enthusiasts consider this arrangement not very successful, since additional protection of the element itself is required.
The new sample consumables have the following catalog numbers: 211-8122012 and 2111-8122020-00.
Suitable replacement products:
- NF-6002C - coal;
- NF-6002 - regular.
Making adapters from stainless steel
In order to make a cabin filter adapter with your own hands, you will need the following materials and tools:
- Several sheets of stainless steel;
- Metal scissors;
- Drill;
- A drill designed for drilling metal;
- Bolts brand M3, 50 pcs.;
- Auto-sealant, in a medium-sized tube;
- Vise;
- Mallet (necessarily made of wood or rubber);
- Pliers;
- Sheets of A4 format, with drawings printed on it, which will be used in the future as a stencil;
- And most importantly - a lot of free time.
Replacing the filter yourself
Since the procedure for replacing the cabin air filter on the tenth VAZ model is not labor-intensive and difficult to perform, most drivers carry out the repairs themselves, without resorting to the services of a car service center.
Where is it located in the top ten?
In the VAZ 2110 car model, the cabin filter unit is located between the engine compartment and the windshield under a decorative plastic trim on the right (passenger) side in the direction of travel of the car.
It is impossible to assess its condition, since it is covered with a plastic cover.
Required Tools
To carry out work on replacing the heater air filter, you need to stock up on a minimum set of tools and materials.
If no changes have been made to the fasteners installed by the manufacturer, you will need:
- 10mm wrench and socket;
- Phillips and flathead screwdrivers;
- clean rags for cleaning the installation site;
- new element to replace.
Step-by-step replacement instructions
For different options for the location of the VAZ 2110 cabin filter, the procedure for replacing it is different.
In order to get to the vertically positioned unit on vehicles manufactured before September 2003, you must:
- Open the hood.
- Unscrew the two nuts securing the cladding.
- Use a screwdriver to unscrew the five screws on the plastic housing.
- Using a flat-head screwdriver, pry up the latches holding the body and move the frill to the side.
- Wipe thoroughly with a rag, or better yet, vacuum the compartment.
- To remove, turn the element towards you and pull it out.
- Insert a new element.
All that remains is to install and secure the frill in reverse order and close the hood.
If the car has a new location for the cabin air filtration unit, then the replacement procedure will be slightly different and will require:
- Open the hood.
- Unscrew the nuts securing the wipers.
- Using a 10 mm wrench, unscrew the bolts around the perimeter of the plastic housing and remove the frill.
- Disassemble the plastic filter protection by unscrewing the four bolts and moving it to the side.
- Remove the filter element fixed in the seat and install a new one.
Replacement is complete. The protection, frill and wipers are attached in the reverse order of disassembly.
Instructions for replacing a new product
Dismantling the “consumables” of the new sample is carried out according to the following scheme:
- Having removed the screws and nuts, you need to partially disconnect the frill and move it to the side, but there is no need to disconnect the washer hoses;
Advice! In order not to remove the frill every time, you can modify it or simply install a product from Priora. The non-standard part is installed quite simply, and it is easy to move it to the side if necessary.
Location, necessary tools for replacement
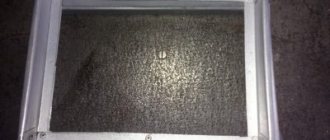
The exact service life of the cabin filter of a VAZ 2110 car can be found in the operation and maintenance manual. Experts recommend this “consumable” to me after 20-25 thousand kilometers. The cabin filter is located on the left side of the engine and can be reached after removing the protective cladding. It will be quite simple to determine that it is time to change the elements - it will be black.
For work you will need the following tools and materials:
- Replacement part. It is not necessary to buy a standard part; now there are carbon options that have a longer service life, as well as improved filtration.
- Socket wrench "10".
- Rags.
- Phillips screwdriver and star.
Making an adapter from plastic
In order to make an adapter from plastic, you will need slightly different materials than when making it from stainless steel. Well, if you still decide to do this, here is a list of the materials you need:
- Wide plastic ventilation pipe (150 cm length, 200 cm width);
- A4 sheets with drawings;
- Marker and pencil;
- Metal scissors;
- Bulgarian;
- Superglue, cold welding;
- Silicone sealant.
So, as in the first case, with stainless steel, first cut out a stencil from paper. Next, trace them on the plastic with a pencil or marker. It is best to choose a ventilation pipe, as it is white and all marks will be clearly visible on it. After you trace the parts, they will need to be cut out. There are two ways to do this. The first is using ordinary metal scissors, and the second, more accurate, is to take a regular knife (preferably not needed) and heat its blade over the fire. Once it is hot enough, gently run it along the cut line. This method will take you much more time, but the result will be obvious.
Device layout
Next, on the parts you will need to mark the bend location with a dash-dot line. It is worth paying attention to the fact that there is no need to drill holes for fasteners, since such an adapter is attached with glue. Unlike stainless steel, plastic is quite difficult to bend. And if you manage to do this, then how can you leave it in this position? There is an exit. Take a grinder and make a shallow cut along the dash-dot line. The depth of the slot should not exceed half of the entire thickness. Now your parts will be able to acquire the desired shape, and the most important thing is to maintain it.
Now it's time to connect the parts together. As stated earlier, there is no need to drill holes for the bolts. In order to fasten all the parts together, first, coat the joints with glue and attach them. Wait a little while for them to set. Once they hold, secure them firmly using cold welding. It should be applied both to the inside of the joint and to the outside. Since such a connection, in itself, will create a tightness, applying a sealant is not necessary.
And now, your plastic cabin filter adapter is ready. But, before you start making it yourself, remember that this work is quite hard and requires some experience. If you have never made anything from plastic, then it is better to choose a stainless steel adapter.