Main symptoms
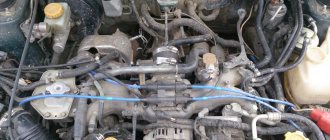
The malfunction of these elements can be determined by the nature of the car’s behavior. The main symptoms are difficult ignition, unstable engine operation, floating engine speed at idle. One of the signs of a malfunction is increased fuel consumption. It does not burn in the cylinder because there is no spark. At the same time, the car’s power decreases, since it runs on three (if we consider modern passenger cars) cylinders. Difficulty starting is also the cause of failed spark plugs. The spark may disappear or be completely absent. As a result, the crankshaft rotates, but the ignition power in the remaining cylinders is not enough for its normal operation. Moreover, this occurs even on a warm engine. Sometimes the lack of a spark in one of the cylinders provokes breakdown of the catalyst. The mixture that was prepared and fed into the combustion chamber does not ignite and enters the catalyst, where its elements are oxidized.
Why the engine won't start
In order for the power unit to start successfully, the following conditions must be met:
- normal crankshaft rotation speed has been achieved;
- proper compression;
- good battery charging;
- quality fuel.
Thus, if the Priora’s engine does not start, you should suspect a problem based on one of the above points.
First of all, knowledgeable car owners check:
If the latter is generally functioning, you should make sure that it rotates normally. The problem sometimes occurs if the battery or other elements of the starting system were replaced the day before.
The lack of voltage in the battery requires a mandatory check of the generator, because it is he who must charge it. At the same time, very often over time, the contacts in the electrical circuits of the car become oxidized, contaminated, or simply become disconnected. This must be taken into account.
As practice shows, these are the reasons most often behind the inability to start when cold.
Spark test
First you need to remove the high-voltage wires. Do this very carefully - sometimes they stick to the contacts. Do not forcefully pull the wire - this will break its insides, which will cause breakdowns. Next you will need a hex spark plug wrench. Depending on the make of the car, it can be of different diameters. When purchasing such a key, be sure to tell the seller the make and model of your car, as well as the size of the power unit. Without this tool, it is simply impossible to unscrew the spark plugs. Having taken the element out, we began to thoroughly clean it of carbon deposits. In general, it should not be on the surface. But before you check the spark plugs yourself, we clean them of all accumulated dirt. The first sign of a malfunction is a large gap between the electrodes. To determine it, you need a special measuring probe. The valve clearances on carburetor cars are measured in the same way. You can buy such a dipstick at any car market.
Dismantling algorithm
So, let's begin:
- We remove and remove the front seats from the interior so that they do not interfere with the disassembly;
- Disconnect power from the battery;
- We lower the steering wheel of the VAZ 2110 to the lower position;
- Unscrew the screws that secure the panel covers. These are two screws on both sides of the tunnel. Now you can remove the shield;
- We remove the plug on the tunnel in the center by prying it off with a screwdriver;
- We unscrew the screws of the central tunnel to remove it. Before doing this, disconnect the wires from the cigarette lighter;
- We remove the air duct for heating the interior of the VAZ 2110. To do this, having disconnected the cover from the gearbox, you need to pry off the latches with a screwdriver, then remove the air duct;
- We remove the central panel by unscrewing it from the floor;
- Now it is possible to disassemble the torpedo. First, unscrew the mount that holds the glove compartment, disconnect it from the backlight, and take it out;
- In the hole where the glove compartment was located, we remove the screws on both sides, as well as directly behind the glove compartment;
- We unscrew the VAZ 2110 torpedo mount with a key and a screwdriver;
- Near the left pillar we pull out the air duct by prying it with a screwdriver;
- With special care you need to remove the torpedo, supporting it with your hands while unscrewing the nut with a spanner. Then, lifting it up, remove it from the pins;
- Now you need to remove all the wires, marking them with a marker as you go so that you don’t get confused when reinstalling them;
- It is possible to replace the lining and carry out noise insulation work.
Unscrew the two self-tapping screws securing the right flap of the floor tunnel lining
and disconnect it from the air distributor housing
Remove the shield (Left is similar)
Diagnostics without instruments
How to check the spark plugs yourself if you don’t have the necessary testers? Everyone can do this. There is a proven method. But you need an assistant. To do this, unscrew the spark plug and put the high-voltage wire back on it. An assistant turns the starter. At this time, we direct one part of the spark plug to ground - we lean it against any metal part of the engine. It is important that there is no paint on it, otherwise contact will not occur. The spark should be blue.
Torpedo Priora 2 on VAZ 2110: On-site installation, wiring
Hello everyone who is interested in how the installation of the Priora 2 torpedo on the VAZ 2110 is going
There will be a lot of letters, since the entry is aimed at those who decide or have already decided to install a torpedo from Priora or Priora 2 on the tenth family
Meanwhile in the garage...
I turn on the stove and move on
I’m taking off the torpedo after the preliminary fitting, now it’s time for me to put it on and take it off, how to put on a shirt, I’ve lost count of how many times I’ve done this.
Next in line is laying the under-panel native tenth wiring. I remind you that I am leaving the tenth wiring, due to the inexpediency of switching to the wiring of Priora 2. On the Priora, the differences are: 1) From the fuse block to the center, the wiring runs above the steering column, at 2110 below it. Without extending a single centimeter of the wiring, it was easily possible lay it over the steering column, everything is real. 2) The wiring is held in place by its original clamps, which in turn are attached to the dashboard through iron brackets. I make my own:
Drilling holes
I install the same clamps on which the tenth sub-panel wiring was attached
As a result we get
I repeat that nothing was extended, except for the wiring to the backlight button and the glove compartment lighting itself + there are Prior connectors.
I untangled and separated the wires of the rear PTF buttons and the heated rear window (now they are not neighbors)
Preparing the installation site
For those who still doubt that the Priora torpedo may not fit the seats for the tenth family, I declare! fits perfectly!
If there are fewer fastening points, the load on the remaining fastenings increases accordingly. I welded the plates to the upper brackets (this is a rough version, maybe I’ll weld them and paint them), I’ll strengthen the lower ones later And then a surprise awaited me...
The bracket cracked and I didn’t notice it when I was welding the plate, or maybe the crack appeared after... in general, for welding
Central frame
I’ll say right away that you don’t need to buy a Priorovskaya one
No comments. The only thing that surprised me was the factory hole; the designers of AvtoVAZ foresaw that someday in the future they would invent the Priora and this hole would do its job.
The wiring is packed, everything is convenient, in order
I made it so that the entire torpedo could be removed with the under-panel wiring; a dozen additional connectors were added, most of which went to the alarm system (like a spider’s web connected the torpedo to the wiring and did not let go)
There are cracks, no matter how you look at them
Priorovodov, please respond, how is your situation with the cracks around the edges?
Some of the ground wires moved to the upper part, in my case to the steering column
That's all! The torpedo is installed, the wiring is laid out, the connectors are removed for further alteration, and you still have to remove it at least twice, but there are no problems, it has been done in such a way that all difficulties are reduced to a minimum.
To date
About R16
A small digression. A little more and the shesnari will delight the new owner, and I will move on - Be a hen!
WHAT'S NEXT?
In the following posts I will tell you how to install the tenth fuse block and make the emergency button work without a comfort block.
A thumbs up and repost are welcome as proof that the post is useful and it was not in vain that I sat and spent time sharing my experience with you.
Good luck!
Can it be cleaned?
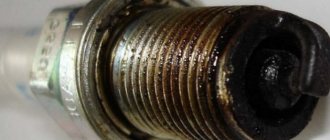
If there is a characteristic carbon deposit on the electrode and base, this is a sign of engine malfunction. If you simply clean the spark plug and put it back, the carbon deposits will reappear. The color of deposits can indicate many things. This is an incorrectly prepared mixture, the presence of oil in the combustion chamber, etc. By the way, lubricant gets into the cylinder due to existing scuffs or a worn oil scraper ring. Pay attention to this.
Why the spark disappears: the main reasons
On different types of engines, there is a fairly wide list of reasons why there is no spark at the spark plugs. Among the main experts are:
- Problems with spark plugs (destruction of the spark plug body, defects in the electrodes, etc.). It is also worth noting that the spark plugs may be filled with fuel or oil, which indicates a breakdown of the engine itself.
- Malfunctions of high-voltage wires associated with insulation breakdown or lack of contact.
- Failure or errors in the operation of the crankshaft position sensor.
- Problems with the ignition module, ignition coil, switch;
- Malfunctions or malfunctions of the distributor.
- Deterioration or absence of ground contact.
- Errors related to the operation of the electronic engine control unit (ECU);
Changing the idle air control
Car service specialists admit that sometimes they have to spend a long time selecting a correctly working (despite the fact that it is new) idle air regulator to stabilize the idle speed of the engine. It is in this case that, before handing over your car for service, you should use an IAC regulator removed (temporarily) from a working car of the same brand.
It is advisable to replace the idle air regulator itself in conjunction with cleaning the vehicle's throttle system.
No spark on an injection engine or an engine with a carburetor: how to check
Checking the spark is possible using several methods: to ground, using a multimeter, or a special tester on a piezoelectric element. The first method is the simplest. The body of the unscrewed spark plug is brought to the metal (usually the engine cylinder block), after which the engine is cranked by the starter and the presence of a spark is analyzed.
Please note that this verification method cannot be used when diagnosing fuel-injected vehicles. The fact is that a car with an injector has an ECU and other electrical equipment that is quite sensitive and can be damaged.
The second method allows you to better assess the condition of the spark plug, identify breakdown, etc. The use of a special tester is a method of checking the spark on injector cars, reminiscent in its principle of checking by analyzing the spark breakdown to ground (the first method). In this case, the risk of burning the control unit is minimized. Now let's talk about how to check the spark on a fuel-injected engine.
A complete lack of sparking indicates possible problems with the controller, ignition module, coil or center wire. Diagnostics should begin by checking the fuses. Then you should evaluate the condition of the ground contact, and also check the high-voltage wires.
If there is no spark at the ignition coil, then the functionality of the high voltage wire should be checked. The specified wire must be checked for insulation integrity, have no breakdowns, burnt areas, etc. Detection of any defects is grounds for its replacement.
Also, in the process of diagnosing the ignition system, you should inspect the spark plugs. This must be done if electricity reaches the candles. On carburetor cars, it is enough to remove the spark plug wire, and then bring it closer to a metal surface (for example, a car body) by half a centimeter. Then you need to turn the starter and make sure that there is a spark running between the wire and the metal surface. The spark itself should also have a certain intensity, be white with a slight bluish tint. If no deviations are noticed, then the spark plugs are working. The reason that there is no spark at the spark plug may be the ignition coil.
If you notice problems with the spark plugs, then you need to pay attention to the spark plug contacts. These contacts must be free of contamination. Let us add that if deviations from the norm are noticed, it is optimal to immediately replace the spark plugs. Failure to do so will indicate the need to clean the contacts.
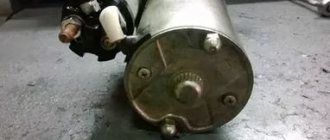
Starter or wiring problems
You can use a multimeter to test the wiring. The red wire is connected to the starter contact, the black wire to ground. In a normal situation, the device will show from 12.5 to 14.5 V. If the reading is less or even zero, then there is something wrong with the wiring.
The first step is to clean the contacts, check the integrity of the wires and fuses.
This is another popular problem when Kalina does not start. ECUs are the “brains” of the car; they themselves are quite reliable, and if you don’t touch them, then no problems will happen. However, most often the ECU is flooded.
This often happens when antifreeze leaks. This has already been discussed in the section on the immobilizer. When installing an alarm system or when pulling car wires, they forget to install the plugs - water gets into the ECU. Repairing an electronic unit is a futile task.
Checking the ignition coil for spark
To diagnose the performance of the coil, remove the wire from the distributor-breaker. Next, the test is carried out similarly to testing high-voltage wires, that is, the wire is brought to a metal surface and turned with a starter. The presence of a spark will indicate in this case a problem with the ignition distributor; if there is no spark, then the problem lies in the coil.
First you need to check the distributor contacts. These contacts may oxidize, insulation damage is also possible, and the rotor itself may be faulty. Detecting problems with the rotor allows you to eliminate the problem by replacing it. When checking the ignition coil, you should identify possible defects in the integrity of the winding, burnouts and other signs that a short circuit is occurring inside. If such signs are found, the coil should be replaced or the ignition coil should be repaired.
Now let's take a closer look at ways to check the main elements of the ignition system. To do this, let's go back to the coil. As already mentioned, the most common cause of a malfunction is a damaged winding. Then an insulation breakdown occurs and a short circuit occurs. It is also important to understand that the coil can fail due to overload. Such increased loads occur as a result of problematic spark plugs or spark plug wires. For diagnosis you should:
- put the car in a dry parking, repair or other box. You can also use the garage. The main thing is that the humidity is not too high;
- Next, you will need to clean the distributor cover from dirt, after which the specified cover must be removed;
- then you need to turn the engine crankshaft so that the distributor contacts are closed;
- Now you can turn on the ignition and bring the high-voltage wire of the distributor 3-7 mm to ground;
Lada Priora Hatchback › Logbook › Starts up and immediately stalls
I'm changing the IAC, it doesn't help, I'm going to the diagnostics on a hot one, of course there's nothing there, it doesn't show anything, everything seems to be fine. Well, great, I think I’m going to another diagnostic, and it also says everything is fine, but I need to look at it cold. I drag the car to him on a cable and he tells me that at the moment of tripling it begins to misfire in all cylinders in turn, I need an IAC sensor, I don’t have enough air for her, I change it, there are no changes, he says let’s flash it, maybe with the program we’ll flash something all the same. I am changing the fuel pump because this one gave 3.5 pressure, the new one gives 4+ pressure and still no changes, I tried installing all the coils and sensors from another working machine and still no changes.
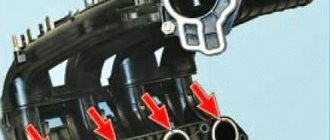
Hurray I did it! When it was left to try to replace the only camshaft sensor, then I started removing the intake to change it, otherwise I wouldn’t be able to get to it. I installed a new sensor and put everything back together, but it got worse. I started disassembling all this garbage again, installed the old sensor and noticed that the rubber bands on the intake manifold were completely dry. I went to the store and bought rubber bands for 80 rubles. I assembled everything and the car froze. Well, I think I’ll try it in the morning when it’s cold, I go out in the morning and here it’s -28, I sat down and the car started and didn’t stall for three days, everything’s been okay. The result of this event is almost 7,000 rubles, which were spent on sensors, diagnostics, and a fuel pump.
If there is no spark: ignition module
The following symptoms indicate possible problems with the operation of the ignition module:
- at idle speed the engine troits;
- power decreases, the car accelerates poorly;
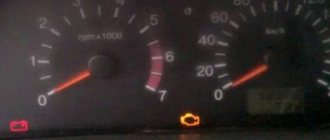
Engine vibration is most pronounced in two nearby cylinders, and the drop in thrust is more strongly felt during attempts to sharply accelerate the vehicle, that is, when the accelerator is pressed hard and sharply. In such a situation, the “check” light usually lights up on the dashboard of most cars.
If checking the spark plugs and high-voltage wires does not reveal any problems, then the ignition module should be checked with a tester. The test consists of connecting one output of the tester to the module connector, and powering the other to ground. Then the engine can be started. A tester reading of 12 V is evidence that the module is OK. A deviation in the instrument readings from the norm may indicate either the need to replace the module itself or to check/replace the corresponding fuses.
Poor quality fuel
Spark plugs can also flood due to bad gasoline.
This is another reason why the engine does not start. Very often, condensation forms in winter and clogs the coarse filter. To avoid this, periodically add pure alcohol to the tank in winter. It smokes, sneezes, smokes like a snake Gorynych, this often happens in our time, but, as a rule, people have some remnants of conscience and they try not to reduce gasoline to a non-flammable state.
The car can even run on this kind of gasoline, the only problem is that it is absolutely not useful for the engine. To avoid this, refuel at large chain gas stations.
They, as a rule, monitor their reputation and do not allow this to happen, but if it turns out that you have filled in burnt gasoline, and even so much that the car does not want to start, you can drain the gasoline and fill in another, road gas, or if there is not much left , you can fill in more good 95 gasoline and its mixture with palenka will be more or less normal.
Of course, there are severe cases when filters and injectors become clogged and they have to be washed out for a long time and tediously (or whatever is easier to change), but this happens mainly when buying gasoline from some garage “oil workers”.
It’s quite easy to protect yourself from them - just refuel at trusted places and under no circumstances buy gasoline from any garage gas dealers. In principle, they are not such a common occurrence now, but they still occur, and people buy gasoline from them because it is cheaper, but it is better not to do this, the stingy pays twice - an immutable truth.
And if you really had to buy such a piece of water, at least filter it, there is no need to clog the filter with nozzles.
Useful tips
Experienced car enthusiasts are well aware that spark plugs can fail at the most inopportune moment. For this reason, it is recommended to carry a spare set with you. The same can be said about the spark plug wires.
When working on the ignition system, extreme caution should be exercised as you may receive a severe electric shock. Insulated tools must be used.
Since spark plugs fail more often than other elements of the ignition system, checking for a spark always begins with them. Diagnostics can be done one by one. The procedure is carried out by unscrewing the spark plug from the cylinder head, then putting a cap and a wire from the coil on the spark plug, after which it is grounded to ground. The main indicator when checking while the starter is rotating is the spark itself and its quality.
When removing the spark plug wires from the ignition module, it is advisable to mark each wire. This will allow you to check and subsequently connect in a strictly defined order without the risk of mixing up the wires.
Signs of malfunction and checking injection nozzles without dismantling. Diagnostics of injector power supply, performance analysis. Tips and tricks.
Why does the starter turn normally, but the engine does not catch and does not start? Main causes of malfunction, checking fuel supply and ignition systems. Adviсe.
How to check engine performance using spark plugs. The main signs of engine malfunctions: the appearance of black, gray, red and white carbon deposits on the spark plugs.
Signs of malfunction or breakdown of the high-voltage spark plug wire of the ignition system. How to check car armored wires with your own hands.
Engine trouble: symptoms. Why does tripping occur and how to find the reason why the motor starts to trip. Checking power, ignition, compression, etc.
Priorik stalled while driving - logbook of Lada Priora Sedan Zelenka (Banditka2) 2008 on DRIVE2
The Priora stalled while driving, I was already expecting the worst, that the timing belt broke and the valves bent. But no, I open the hood, and everything is fine there. there is surprise and bewilderment on my face, what’s wrong with her? The car won’t start, even the starter doesn’t turn, when you try to directly close the starter, it turns, but the car still won’t start.(((They hook me onto a cable and tow me home, on the way I try to push start it and it starts and immediately stalls. First we actually replaced the bad connector on the crankshaft position sensor, and the sensor itself - no changes whatsoever(((
crankshaft position sensor
After spending half the night sorting through various options for the causes of the breakdown, we decided to turn to the Internet)))
There was no limit to anger when they found out that the problem was just one fuse responsible for the main relay circuit and the starter blocking.
It was this little thing that caused the whole problem.
Issue price: 380 ₽

