How to remove the interior rear view mirror on Lada Vesta, XRAY and Largus FL
Lada Vesta, XRAY and Largus FL cars use the same type of interior mirror.
Depending on the configuration, it may look different. During repairs or modifications to the car, the interior mirror has to be removed. How to do this yourself is described in the factory’s technological instructions. Vehicle configuration options include a simple windshield and an electrically heated windshield with a rain sensor. Depending on the installed windshield, a corresponding interior rear view mirror is also installed, Figure 15-1.
Figure 15-1 – Internal rear view mirror: A – rear view mirror for glass without electrical heating and a rain sensor; B – rear view mirror for glass with electric heating and rain sensor
Place the vehicle in the workplace and apply the parking brake.
Open the hood and disconnect the ground wire terminal from the battery (spanner 10).
Plain windshield rear view mirror
:
Remove mirror 2, Figure 15-2, by applying a shear force along the glass towards the top edge of the glass to the rear of mirror bracket 1.
Figure 15-2 – Removing the rear view mirror: 1 – mirror bracket; 2 – mirror
Electrically heated windshield rear view mirror with rain sensor
:
Insert a device into the joint between the top 2, Figure 15-3, and the bottom 3 trims of mirror 4 and using a squeezing motion, disconnect the top trim from the bottom, remove the top trim (a device for dismantling plastic and decorative body elements or a flat-head screwdriver).
Figure 15-3 – Removing the upper trim of the rear view mirror: 1 – device for dismantling plastic and decorative elements of the body; 2 – upper mirror trim; 3 – lower mirror trim; 4 – mirror
Remove the lower trim 1, Figure 15-4, from the bracket 2 of the mirror 3, sliding it down along the glass so that the trim clips come out of the holders on the bracket.
Figure 15-4 – Removing the lower trim of the rear view mirror: 1 – lower trim of the mirror; 2 – mirror bracket; 3 – mirror
Disconnect block 4, Figure 15-5, of the temperature sensor from the block of wire harness 5.
Disconnect block 3 of the wiring harness from rain sensor 2.
Figure 15-5 – Electrical connections of sensors: 1 – lower mirror trim; 2 – rain sensor; 3 – rain sensor wiring harness block; 4 – interior temperature sensor block; 5 – wiring harness
Remove the mirror by applying a shearing force directed along the glass to its lower edge to the front part of bracket 1, Figure 15-6.
Figure 15-6 – Removing the rear view mirror: 1 – mirror bracket; 2 – rain sensor; 3 – mirror mounting plate
Install the mirror in the reverse order of removal.
The process is also shown in the video:
Source
Installation
Connect wire 1 to terminals 7, Figure 1-4, of the electric heating of the mirror element.
Align the guide pins 6 of the frame 4 of the mirror element with the holes 3 in the moving part of the gearmotor 2
Figure 1-4 – Installation of the mirror element: 1 – wire of the mirror heating element; 2 – gear motor; 3 – guide hole of the gearmotor; 4 – frame of the mirror element; 5 – mirror housing; 6 – pin guiding the frame of the mirror element; 7 – terminal for electric heating of the mirror element
By pressing the mirror element, Figure 1-5, along the circumference of the location of the clamps, fix them one by one until they click.
Figure 1-5 – Installation of the mirror element
Connect the earth wire terminal to the battery (spanner 10).
Turn on the ignition and use the control keys to check for any obstacles when turning the frame to its extreme positions.
Rear view mirror Lada Vesta
On cars of the Lada Vesta family, two types of interior mirrors are installed, which are designed for viewing the rear view. Mirrors differ depending on the vehicle configuration. If the Lada Vesta does not have a rain and light sensor, a regular black mirror is installed; in a variant, the mirror has a white body, as well as a plastic cover behind which its connection is hidden.
In the Lada Vesta configuration with a rain and light sensor, a mirror from a Renault Megane 3 is installed, the article number of such a mirror is 8200000509. It is worth noting that the rear view visibility in both cases is sufficient, and the differences are due only to the technical component of the configuration.
Diagnosis of electrical faults
Diagnosis of a malfunction should begin with checking electrical faults. First of all, you need to turn on the ignition, but do not start the car, then lower the windows and press the mirror adjustment buttons. If the characteristic buzz of the electric motor is not heard under the casing, then there is a problem in the drive circuit. The first thing you need to do is check the fuse, the purpose and location of which is always indicated in the operating manual for each car. If that's the case, that is. it has burned out, you need to replace it with a new one of the appropriate rating, after which you must check the condition of the connectors in the device, make sure that the electric motors and control panel are receiving power. A multimeter (or, in extreme cases, a test lamp) will help you do this.
Interior rear view mirror, how to remove on Lada Vesta
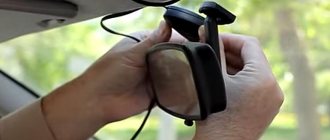
A regular black mirror does not have plastic covers and its fastenings are clearly visible; in order to remove it, you need to move the mirror up along the fastening guides.
In the case of a mirror with sensors, the first step is to remove the white plastic cover; to do this, press the cover and pull it up towards the roof of the car.
The bracket of such a mirror has guides down to the windshield of the car. Accordingly, when removing the bracket, you need to pull it down by pressing on the place indicated in the photo above. The bracket is tight, so you may need a partner when removing it; work with caution so as not to damage adjacent elements of the car.
Source
Diagnosis of mechanical faults
After making sure that the electrical networks are in good condition, it is necessary to diagnose mechanical damage. First, it is recommended to make sure that they are securely attached to the elements fixing them to the drive mechanism. It is also worth checking the integrity of the plastic parts and all latches that become accessible after the mirror element is removed.
A mechanism defect can be easily determined when power is applied to it. The detected defect must be eliminated slowly and very carefully. The mirror requires special care, as it can easily be damaged during dismantling.
We independently remove the interior rear view mirror in Lada Vesta and X-Ray
The need to independently remove the interior rear view mirror in Lada Vesta and X-Ray arises infrequently. However, sometimes this has to be done, and problems often arise here, since there is not much information on the topic. Moreover, not all dealership centers undertake to perform this operation.
The algorithm varies depending on whether the car is equipped with rain and light sensors or not.
So, if the specified items are not included in the configuration, then the mirror is removed upwards.
Regarding those cars that are equipped with the above sensors, everything is more complicated here, since their design uses a mirror from Renault Megane III, which can be found under article number 8200000509.
First, remove the top cover above the mirror itself. It is secured with 2 latches located at the edges. You just need to press on them and the panel will come off easily.
This will provide access to the bottom cover latches. You need to snap them off and then slide the cover down. You need to work carefully, as there are wires connected to it. Afterwards you need to remove the chip from the seat, and the cover will simply hang on the wires.
Next, you need to rest your fingers on the very base of the metal bracket (at the junction of the glass and the fastener) and press it down. It is worth noting that the mirror is fixed quite tightly, and therefore you will have to press with both hands and it will come off the sled.
Everything is clearly demonstrated in the video using the example of Renault Megane III.
As you can see, it is not difficult to independently remove the interior rear view mirror in Lada Vesta and X-Ray.
Installation is carried out in reverse order.
Source
Step by step guide
The need to dismantle the rear view mirror does not arise often, mainly in the event of an accident, collision, or impact with oncoming traffic.
Many car owners complain about the lack of methodological information on removing the rear view mirror of a Lada Vesta.
To help drivers, we will consider the main points during dismantling:
- Open the hood.
- Remove the terminals from the battery.
- Open the driver and front passenger doors wide.
- Remove the top and bottom plastic covers.
- Press the metal lock and slide the mirror up from the mount.
In the “luxury” configuration of the Lada Vesta, the rear view mirror (hereinafter referred to as the rear view mirror) is installed with a rain and light sensor. You need to move the mirror mount up. In all other configurations, sensors are not installed; the mount must be moved down.
Where is the interior rear view mirror located?
In a car of the Lada family, the EAF is pre-installed in the center of the windshield closer to the top. For preventative maintenance and replacement of equipment, first snap off the two halves of the plastic case.
- Place the car on a level platform and release the parking brake.
- We turn the rocker into the “first gear” position for the safety of work.
- We snap off the upper half of the plastic case at the base of the ZZV, then the lower half.
- Depending on the modification of the Lada Vesta, we move the ZZV up (down).
- We install a new interior rear view mirror in its original place.
- We fix the two halves of the plastic case.
Source
How to remove a mirror from a windshield
Car owners often need to remove the interior rear view mirror. Such a need may arise if it breaks and the windshield is replaced.
The mirror is removed together with the holder bracket. It is very difficult, and sometimes even impossible, to detach its base - a nickel - without damaging the glass surface. This part is dismantled very rarely, mainly when replacing glass.
Removing a mirror often ends in trouble - the car's upholstery is damaged, the plastic breaks. The windshield may crack or shatter, causing injury.
How to do this kind of work without problems?
Installing a mirror on glass: how to glue it
To attach the mirror to the windshield, you need to properly prepare the surfaces and select the adhesive. The installation site should be degreased (alcohol will do). The patch on the bracket is also cleaned and degreased.
Regarding the adhesive base, there are different types of glue:
- chemically or light-curing adhesive base;
- adhesive compositions based on epoxy resins.
At the same time, not all types of glue can be used to mount the interior mirror mounting bracket on the glass. Please note that you cannot use glue, superglue, double-sided tape, etc.
The fact is that these types of glue and tape are not designed for high temperatures. After the windshield warms up in the sun, the rear view mirror will simply disappear.
How to glue a mirror in the salon
To attach the interior mirror, it is optimal to use glue that hardens under the influence of chemicals. This adhesive base can be two-phase (the adhesive must be treated with an activator after application) or active single-phase.
Epoxy glue also holds well, but takes a long time to dry and requires strong pressure on the surfaces being glued. In the case of a salon mirror, this option will not work.
We also recommend reading the article on how to clean the air conditioner in your car yourself. From this article you will learn how to clean a car air conditioner yourself, how to clean the air conditioner in a car, etc.
In turn, glue that hardens when exposed to light will also not be effective without a special lamp. The reason is that it hardens in ultraviolet light, while sunlight or artificial lighting does not affect the gluing process.
Installing a rear view mirror on glass
After selecting the glue, you can proceed to installing the bracket. All work must be carried out at a temperature of about +20 degrees Celsius.
- The mirror holder is cleaned of old glue, the gluing area must also be roughened using fine sandpaper and degreased;
- The place where the holder is attached to the glass is processed in a similar way;
- Apply a small layer of glue to the mount;
- An activator is applied to the windshield at the gluing site;
- During gluing, you need to accurately hit the mounting pad on the holder at the place where the activator is applied;
- Apply slight pressure on the gluing point for the time specified in the instructions for the adhesive;
- After gluing, it is necessary to remove any remaining adhesive or activator from the glass and holder using a degreasing agent.
- It is better to install the mirror on the holder one day after gluing the bracket.
We also add that it is not advisable to park the car in the open sun or leave it in the cold for 2-3 days so that the glue dries normally and does not suffer from severe temperature changes.
You should also avoid for several days the stress that the mirror on the windshield is usually subjected to (after gluing, do not touch it with your hands, do not adjust the mirror with great force, etc.).
How to remove a rear view mirror without sensors
- On Lada Kalina, Largus and Grant, the bracket on which the mirror part is held is attached to the base on the glass using screws. By unscrewing them, everything can be easily removed.
- On Vesta and X-Ray, the mirror is inserted into vertical slots, so it simply slides upward. Duster, Logan, Sandero and other foreign cars assembled in our country are designed in the same way.
- On Lada Chevrolet there are two holes at the base of the mirror. A small flat screwdriver is inserted there and turned slightly. A small gap forms at the top, into which they also insert a screwdriver and pull slightly towards themselves. The fastening is loosened and the mirror is removed by pulling down.
- Some cars, for example Chevrolet Lanos, have rear view mirrors screwed onto a hexagon. To remove them, you will need to unscrew the fasteners with a hexagonal tubular wrench. When the fastening is loosened, the mirror must be pulled up.
- It is very easy to remove mirrors from Skoda Yeti, VW, VAG, Audi cars. You just need to turn them to the left and pull them towards you. The procedure is also carried out on other German and Czech-made machines.
- Mirrors on Hondas of the latest generations are quite easy to dismantle. These elements can simply be turned counterclockwise. In early models, they are mounted on the roof of the body and a stand resting on the windshield. You need to remove the stand by pulling it towards you, and then tilt the mirror down, disconnecting it from the roof. In this case, there is no need to unscrew anything, like in domestic cars with such a mount.
How to remove a rear view mirror connected to various sensors
Often, rear-view mirrors are connected to rain and light sensors that regulate shading depending on weather conditions and time of day. These models are connected to the vehicle's electrical system by wires, making removal difficult.
This system is installed on some modifications of Lada Vesta and XRAY. The design of the rear-view mirrors on these domestic cars is similar to that installed on the Renault Megane. This is why the interior mirrors of many other foreign cars are designed using the same principle.
It is quite difficult to remove such a mirror, since it is equipped with a protective plastic casing, under which there are wires:
- First, the upper part of the casing is removed. You need to press on the sides to release the latches, and then lift the detached part of the protection up.
- Then the lower part of the casing is removed. Special care is needed here because there are wires underneath this element. You need to press on the sides and pull down.
- Finally, the bracket itself is dismantled. To do this, you need to click on it from above.
Sometimes in domestically produced cars, the mirror elements are attached very tightly. Therefore, it is better to do the work together. One will press on the fasteners to unfasten them, and the second will pull up or down.
The mirrors of more expensive cars with sensors, such as many BMW models, are easier to remove. Their protective casing consists of two parts - left and right. You need to pull its parts and remove each half in its own direction. After this, the running wires will be visible. The mirror can then be removed by turning it counterclockwise. After this, the wire terminals are disconnected.
Foreign cars are often equipped with a rear-view mirror lock located in the passenger compartment. This could be a latch or a pedal that needs to be pressed to allow the mirror to be removed. If you can't find it, you won't be able to remove the part. Under no circumstances should you use force without understanding it. The fasteners may break or the glass may be damaged.
Comments
Guests cannot leave comments on the site, please log in.
Products for LADA at the best price
A selection of accessories for LADA from AliExpress
Side rear view mirrors come with manual mechanical and electrical adjustment of the position of the mirror element. In a mechanical system, changing the plane of the mirror element is carried out using three cables, and in an electrical system - using two electric motors. The article will discuss the repair of a side mirror with a mechanical method of controlling the mirror element.
In winter, when snow falls on the mirror element of the side rear view mirror of a car, and then melts and the water freezes again, the mirror element can freeze to the body. In addition, when it is cold, the plastic elements of the mirror become brittle and may crack when trying to adjust it.
This is what happened to my mirror. Randomly, when the mirror was not yet frozen, it changed its angle. And when in the morning I tried to set it so that there was a good view, the adjustment knob, after applying force, began to move freely, without affecting the position of the mirror element. It became obvious that one of the cables had broken out of its fastening.
Since the temperature outside was below zero, it was necessary to remove the side-view mirror for repairs in warm conditions. In some cars, to remove the mirror you have to remove the door trim, but in the Hyundai Getz this issue has been thought out, and it is enough to remove only the decorative panel.
To remove it, just move the panel at the top a little and pull the clip out of the door body. The lower part of the panel is held without fixation by two hooks placed behind the protrusions in the door body.
After removing the decorative panel and inspecting the fastening of the cables to the control knob of the mirror element, it became clear that the fault lies on the opposite side of the fastening of one of the cables, which was slack.
To detach the side mirror from the door, you need to unscrew three screws. If the mirror is electrically controlled, you will also need to disconnect the connector with the wires.
The mirror in the warm workshop has warmed up, and now you can begin to repair it. At negative temperatures, plastic loses its plasticity, becomes brittle, and the latches can break off.
The mirror element in the mirror is usually glued with double-sided tape to a shaped plate, which is attached to the movable element using latches. The photograph shows a view of a mirror element on a plate on which a circle with four latches is visible in the center.
In order to release the latches, you need to lift any of the corners of the mirror element and use a flat-head screwdriver to remove the latch. Repeat this operation with other corners until the mirror element is released.
After removing the mirror element, access to the adjustment device will open. It turned out that all three ends of the cables were securely fixed in their cells. For clear adjustment of the angle of inclination of the mirror element, each cable must be inserted into its own cell.
For the convenience of adjusting the angle of inclination of the mirror element, each cable must be inserted into its own cell. In order not to get confused during assembly, the ends of the cables are marked with paint of different colors and I marked them next to them. There was also a mark indicating the position of the adjustment unit.
The hinge mechanism was attached to the mirror body using three screws. When the screws were unscrewed, it became clear what the problem was. The outer shell of one of the cables pushed through the supporting surface in the stationary half of the hinge joint.
On the bottom left of the photo there is a hole that has the correct shape, and on the right in the middle, it is pressed through by the cable sheath. A large piece of plastic was practically torn out and most likely this was due to a manufacturing defect.
At first glance, it may seem that the fixed part of the hinge needs to be replaced, but plastic parts can be easily repaired in many cases. The most reliable method was chosen - installing a cut nut instead of the void. To do this, a slot was made in the M2.5 brass nut with a width slightly larger than the diameter of the cable.
Next, the nut was screwed onto the screw and, using heating with a soldering iron, fused into the plastic flush so that a cable could be inserted into it.
The nut was fixed quite firmly, but taking into account the fact that the side mirror is used in a wide range of temperatures and vibrations, I decided to strengthen the fastening by installing an additional brass bar, also with a slot for the cable.
I secured the bar to the fixed part of the hinge using two screws. Now the cable mount will definitely not fail.
Assembly is carried out in the reverse order of disassembly. The main thing is to install the cables in the hinge in accordance with the color marking. The test showed that the adjustment system works as well as before the repair.
On the advice of a fellow car enthusiast, I also did a little tuning - I installed plastic visors to protect the mirror elements from precipitation in the form of rain, snow and condensation.
As car operation practice has shown, visors have proven to be a very effective means of protecting mirror elements. When parking the car in moderate rain and even when driving during a downpour, the surface of the side mirrors provided good visibility.
I advise all car enthusiasts who have problems with precipitation getting on their side mirrors to install protective visors. They are cheap, attached with double-sided tape, so if you don’t like them, they can be easily removed.
Before the repair, I tried to find a replacement hinge mechanism on the Internet, but I couldn’t find it; only side-view mirrors are offered as a complete set, costing about 2,000 rubles. And it took me no more than an hour to repair the side mirror myself, including removal and installation.
Almost any modern car has basic comfort features that allow the driver to easily operate the vehicle. In the event of a malfunction, including failure of the electric drive of the side mirrors, it is, of course, better to show the car under warranty as quickly as possible to specialists. If the car has already expired its warranty period, you can try to cope with the problem yourself.
Original article taken from vento-club.com
The side mirrors are adjusted in different planes by two small DC electric motors using a worm wheel and set screws. Typically, electric drive control buttons are located on the driver's doors of cars. But, depending on the car model, there may be other variations.
Failures of the electric drive of side mirrors can be electrical or mechanical.
