This article will talk about how to replace the gasket and tighten the cylinder head of a VAZ 2107. In fact, it’s not difficult to do it yourself, although you’ll have to tinker a little. The head gasket is a small and cheap element, but it affects the operation of the entire internal combustion engine. And first, it’s worth finding out what symptoms of a damaged gasket may appear.
Valve cover tightening torque for VAZ 2107
This article will talk about how to replace the gasket and tighten the cylinder head of a VAZ 2107. In fact, it’s not difficult to do it yourself, although you’ll have to tinker a little. The head gasket is a small and cheap element, but it affects the operation of the entire internal combustion engine. And first, it’s worth finding out what symptoms of a damaged gasket may appear.
Basic faults
There is damage to the gasket in which the operation of the VAZ 2107 is strictly prohibited. But there are also breakdowns in which it is still possible to drive. So, here is a list of the main breakdowns:
- Destruction of the gasket between the lubrication and cooling channels. With such a breakdown, antifreeze begins to seep into the engine sump. Of course, mixing with engine oil occurs. If there is a suspicion of a gasket failure, then you need to remove the dipstick and check the lubricant level. It's also worth looking at the consistency of the oil. In this case, the antifreeze turns light brown. In the event of such a breakdown, it is strictly forbidden to even start the engine, as this can quickly lead to jamming.
- Destruction between the cylinders and the cooling system occurs if the cylinder head gasket is of poor quality. It is quite possible that there was a weak tightening torque of the VAZ 2107 cylinder head during assembly. Under pressure, the integrity of the gasket is destroyed. The result is that air gets into the engine cooling system, and something terrible happens in the expansion tank. The temperature rises, there are huge bubbles and seething in the tank. Of course, it is undesirable to continue driving in this case.
- Sometimes (much less often than in the two previous cases) destruction occurs between adjacent engine cylinders. The result is a significant decrease in compression and unstable engine operation.
- And, of course, one cannot help but mention the banal marriage. In this case, the cylinder head gasket of the VAZ 2107 simply collapses, literally before our eyes. In this case, you can see how antifreeze begins to leak between the cylinder head and the engine block. In this case, tightening the bolts has no effect. Most likely, there is unevenness in the gasket itself, which leads to a similar result.
And now you have decided that you really need to replace the gasket, your car has one or more symptoms. What to do? Arm yourself with keys and other tools, and then begin preparation.
Start of work
The very first step is to remove the air filter. Of course, on a carburetor engine it is somewhat easier to remove it. If you have an injector, you will have to tinker with its rubber fasteners. But the essence remains the same - it is necessary to disassemble the fuel system completely to get to the cylinder head. But we will look at the example of not an injection, but a carburetor seven. Still, there are many more classic cars with such a power system.
It is advisable to dismantle the carburetor, since if you remove the head along with it, you can accidentally damage it. On all classic series cars, the carburetor is removed in the same way. This procedure is quite simple, but it will take some time. Now you can unscrew the nut securing the distributor and remove the distributor along with the wires. Getting closer to the engine, all that’s left to do is drain the antifreeze from the system.
And then turn off all the pipes that you see. After this, it will be possible to dismantle the cylinder head cover. It is secured with nuts and shaped washers. Don't lose them during repairs. That's all, the preparation is complete, you can begin the most difficult part - dismantling and installing the cylinder head.
Dismantling the unit and preparing for repair
Carrying out work of this kind requires fairly high qualifications and special equipment. Removal of the cylinder head is carried out in the following sequence:
- The car is installed in a garage box, the battery is disconnected.
- The following elements are removed from the engine: air filter housing, carburetor and head cover.
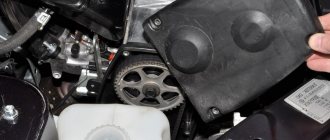
- The upper timing sprocket is unscrewed from the camshaft and removed.
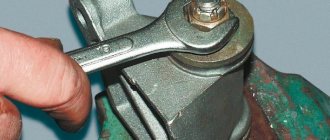
- Using a socket and a powerful wrench, the head mounting bolts are removed.
- After this, the assembly is carefully removed from the cylinder block.
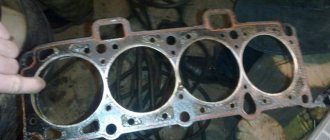
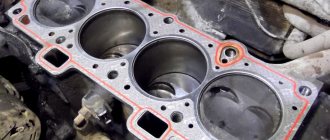
- The gasket, or rather its remains, remains on the surface; they must be removed using a non-metallic tool to avoid damage.
VAZ 2107 engines use gaskets made of fire-resistant composition. After dismantling the head from the cylinder block during the repair process, it is necessary to transfer it to a workbench for inspection and repair. It is necessary to start with a thorough inspection and testing of all components to identify parts with significant deviations from the nominal values. All such parts will require replacement with spare parts.
The VAZ 2107 block head is installed on a wooden stand on the desktop. It plays the role of a fixing valve device during their disassembly. Defective parts are removed and replaced; all sealing gaskets are also subject to renewal. At this stage, preparation for repairs can be considered complete.
Removing the cylinder head of a VAZ 2107
Now is the time to remove the timing chain. To do this, loosen the tensioner, or even better, remove it completely. Only after this can you unscrew the bolt that secures the sprocket to the camshaft. But don't forget to straighten the washer before you start unscrewing it.
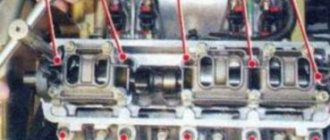
To prevent the chain from falling, it must be held with a soft wire. Next comes the turn of the camshaft. It is secured to the cylinder head with nine nuts. The shaft is very easy to remove, there will be no problems with it. Then you need to get rid of the exhaust pipe and unscrew the exhaust manifold mounting nuts.
That's it, the withdrawal is almost complete. There are 11 bolts left that secure the head to the block. To unscrew them, you will need to use a socket wrench with a long handle. A dynamometer is not suitable for such purposes.
How to choose quality parts
Buy a camshaft from a reliable and time-tested company, for example, PJSC Avtovaz. The packaging has a seal with a hologram. It shimmers in the light and features the company's logo. There is also a sticker with a barcode on the box. The item is packaged in blue translucent film. There is a stamp from the Quality Control department inside the package. Buy rockers together with adjusting bolts. There are new and old style levers. The holes in them differ in diameter and number of cuts. If you buy rockers and bolts separately, chances are they won't fit together.
READ How to install a lock on a bathroom door
Gasket replacement and assembly
If your car had pronounced symptoms of a gasket failure, then you don’t even have to look for its damage; it still won’t be possible to repair it. Immediately buy a new one and put it in place. But you need to clean the entire surface that the gasket is attached to beforehand. There should be no remnants of the old one left. You can even evaluate how smooth the surface of the head and the block itself are. It is quite possible that the cylinder head has an uneven surface, which is why, no matter what gasket is installed, it very quickly begins to leak antifreeze or air.
Before installing the VAZ 2107 cylinder head, it is necessary to check the serviceability of all valves. If there is such a need, replace the seals. This will reduce oil consumption. When everything is complete, place the gasket on the block. Place the head on top. Please note that there are two types of gaskets - old and new. The latter is produced by a very thin layer of sealant around the entire perimeter.
Do not forget to align the gasket so that it is positioned as accurately as possible. There are two guides for this purpose. And the time has come to tighten the cylinder head of the VAZ 2107. First, tighten all the bolts and tighten them by hand until they stop. And then you arm yourself with a torque wrench and, according to the diagram, tighten it. This diagram is shown in the figure. However, it is not difficult to remember it, since everything happens criss-cross.
It is necessary that all bolts are tightened as evenly as possible. To do this, they need to be pulled in two or three passes. During the first, the tightening torque of the VAZ 2107 cylinder head is 4 kgf*m. During the second pass, you need to set the moment to 11.5 kgf*m. The small bolt should be tightened to approximately 3.8. Installation of the camshaft is carried out in almost the same way; its fastenings will need to be tightened crosswise, but the moment here is not so important. The main thing is not to break the thread.
That's it, assemble your VAZ 2107 and try to start it. Just remember to fill the cooling system with water. If the engine is working perfectly and the gasket does not allow air or water to pass through, then you can add antifreeze.
We perform valve cover gaskets during engine repairs, cylinder head repairs, and when there are oil leaks from under the covers.
Remove the air filter housing from the carburetor.
Use a thin screwdriver to pry up and remove the spring clip.
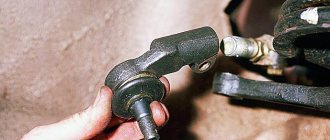
Disconnect the rod from the throttle valve drive shaft.
Use a screwdriver to pry up and disconnect the throttle valve drive rod from the carburetor.
Use a screwdriver to pry up and remove the spring lock washer of the lever.
Remove the lever from the axle along with the rods.
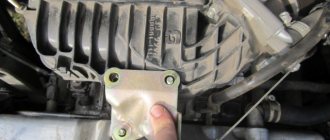
Remove the carburetor fuel hose from the bracket.
Using a 10mm wrench, unscrew the eight nuts securing the cylinder head cover
Remove the special washers from the studs
Unclench the holder and release the vacuum brake booster hose and wiring harness
Timing phases and when to set them according to marks
Valve timing refers to those moments at which the piston in the engine moves up and down over a certain interval. When irregularities in the valve timing occur, the pistons move incorrectly along the interval, resulting in uneven engine operation on the VAZ-2107.
If the driver notices that the car’s power decreases, fuel consumption increases, and engine interruptions occur, then it is necessary to resort to setting the valve timing according to marks. How to set marks on a VAZ 2107 carburetor and injector, we will learn from this material, since the design of the timing mechanism is identical.
How to set timing timing marks
The procedure involves performing the following manipulations:
- The VAZ 2107 needs to be placed on a hard surface, with chocks placed under the wheels and the hand brake pressed all the way. The gear shift lever must be set to neutral mode.
- The cover is removed from the cylinder head by first unscrewing all the fixing nuts to “10”. It is better to replace the gasket with a new one, even if the old one shows no signs of damage.
- Using a key set to “24”, you need to turn the crankshaft on a VAZ 2107 car. This is done in order to be able to align the marks on the moving and stationary parts of the mechanism. To carry out these actions, it is recommended to use good lighting or use a flashlight. The crankshaft rotates until the mark on the pump and generator drive belt pulley coincides with the long mark marked on the block.
- Combining these risks, the mark on the sprocket should eventually coincide with the ebb on the camshaft bed. If the mark ends up at the bottom, then you should rotate the crankshaft 360 degrees.
- If you can’t make sure the labels match, then proceed to the next steps, which are described below.
- The crankshaft is rotated until the marks on the star and the bed ebb align.
- Using the key at “13”, you need to loosen the tensioner. The 2 nuts securing the tensioner are unscrewed, after which this device is removed.
- The bolt that secures the sprocket to the camshaft is unscrewed. To do this you will need to use the key at “17”.
- The sprocket is removed, after which it must be rotated until the marks on the VAZ-2107 timing belt pulley coincide with the long mark on the block. The star fastening bolt does not need to be unscrewed, since after removing the tensioner the camshaft star rotates.
- We put a chain on the sprocket, if it was decided to unscrew it, and install it in place. Finally, the tensioner is installed, for which you should tighten it with 2 nuts to “10”. You can install the tensioner first, but later you will need to use a crowbar or pry bar to get the sprocket into place. Finally, screw the tensioner nut to “13”.
This relative arrangement of the parts allows the piston of the 4th cylinder to be positioned at top dead center TDC.
Features of servicing the timing mechanism
After the timing marks are installed on the VAZ-2107, you need to perform the following actions:
- The timing chain of the VAZ-2107 is being tensioned.
- Adjusting the valves, or more precisely, the thermal gap between the camshaft cams and the rocker arm.
- Setting up the ignition system.
The process of adjusting the valves on the VAZ-2107 is carried out according to the following scheme: initially 6 and 8 valves are adjusted, the report must be carried out from the radiator. After they are adjusted, you need to start adjusting valves 4 and 7, then valves 1 and 3, and finally valves 2 and 5.
How to adjust the valves on a VAZ-2107 car can be found out in more detail in the relevant material on this site. In conclusion, it is worth noting that VAZ-2107 cars are one of the most reliable vehicles, the production of which began back in the 90s.
Annotation on setting up the ignition system of the VAZ 2107 with your own hands
The Zhiguli “classic” VAZ 2107 does not belong to modern cars, manufactured with the latest technology and stuffed with sophisticated electronics. This is its beauty - there is no need to contact car service specialists for any reason; most of the car maintenance work can be done by the owner himself. This also includes the procedure for the ignition option, which anyone can perform, having previously studied the detailed instructions.
Tightening torques for cylinder head VAZ 2107
- 121 0 110k
When assembling the cylinder head after replacing the gasket or repairing the cylinder head, it is important to tighten the bolts to the torque recommended by the automaker. But different instructions suggest using two different schemes for tightening the VAZ-2107 cylinder head with a torque wrench. Let's figure out what is their difference, and how the cylinder head is tightened on a VAZ 2107 , and with what force.
The table below shows both options for the cylinder head tightening torque diagram on a “classic” VAZ, depending on the type of bolt. Because classic bolts require only two passes , but modern torsion bolts , due to their properties, require four passes . In the article we will look at everything in more detail.
| Bolt type | Diagram and tightening torques of the VAZ-2107 cylinder head bolts |
| Classic bolts | During the first pass, the bolts are tightened to 4.0 kgf/m. During the second pass , tighten the bolts with a torque of 11.5 kgf/m. Bolt No. 11 size M8x45 is tightened with a torque of 3.8 kgf/m. |
| Torsion bolts with elastic deformation | On the first pass , tighten the bolts with a torque of 2.0 kgf/m. During the second pass, it is necessary to tighten with a force of 8 kgf/m. During the third pass, tighten all the bolts at an angle of 90 degrees. For the fourth, you need to tighten all the bolts 90 degrees again. Bolt No. 11 size M8x45 is tightened with a torque of 3.8 kgf/m. |
Why is correct tightening of the VAZ-2107 cylinder head important?
If you have replaced the cylinder head gasket, and besides major repairs, this is practically the only reason to disassemble the cylinder head, then the exact sequence and tightening torque of the VAZ-2107 cylinder head are critically important for the correct operation of the engine. Because any discrepancies in the fit of the valve cover lead to problems in the engine processes.
If the cylinder head of the VAZ-2107 is not tightened, then the parts of the engine will not be pressed against each other enough, even despite the presence of a gasket. The result is a drop in compression and burnout of the gasket. Also, working gases from the cylinders can enter the channels of the lubrication or cooling system and lead to the entry of these technical fluids into the combustion chamber. And this is already very bad - antifreeze in the oil will lead to insufficient lubrication of engine parts with all the ensuing consequences.
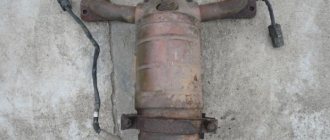
Antifreeze in VAZ 2107 engine oil
Traces of burnout of the cylinder head gasket on the cylinder block of a VAZ 2107
You also cannot tighten the cylinder head cover - this can damage it. Either cracks will appear in it immediately, or tension will arise, which will lead to this in the future. Also common is bolt rupture and thread stripping.
If you tighten the bolts in one place and not tighten them in another, the cylinder head of a VAZ-2107 car or its cover may warp. This will result in gaps that the gasket cannot compensate for. The result is the same as with loose bolts.
If not changed in a timely manner
On some cars, gasket failure is a chronic problem. The original standard part can withstand no more than 70-80 thousand kilometers. During active use of the car, it breaks down even before the mileage of 40 thousand km.
Changing the gasket on time is extremely important. If this is not done, there will be many unpleasant surprises: the entire valve group of the engine will be subject to a powerful attack of dirt and dust, which will penetrate inside without obstacles; severe oil leakage will begin, and a lack of lubrication will have an extremely negative effect on the service life of the piston group and valves; oil will get on sensors, spark plug wells, wires, and other mechanisms in the engine compartment - the risk of fire will increase; cooling of the power plant will become worse.
Change the gasket as soon as it stops doing its job. If you choose a low-quality product or make a mistake during replacement, oil leaks will appear again within a few days after replacement.
This is interesting: How to replace exhaust valves with your own hands - setup and restoration
Tightening torques for the VAZ-2107 block head on carburetor and injection engines
For the most part, the “seven” was equipped with carburetor engines of various modifications. Moreover, the most common version was a 1.5 liter engine with 77 hp. Although modifications of 1.3, 1.4 and 1.6 liters were also produced. There is no fundamental difference in the tightening torque of the cylinder head of the VAZ 2107 injector and carburetor.
The procedure for tightening the cylinder head bolts on a VAZ 2107 engine
The cylinder head of an injection engine differs structurally only in the enlarged “windows” of the intake manifold channels, because the injector needs a little more air than the carburetor. But the tightening force of the VAZ-2107 cylinder head for such engines will be the same.
The instruction manual for the VAZ Seven contains clear data. Firstly , the tightening order is important (see picture). Secondly , first you tighten the bolts by hand, and then tighten bolts No. 1-10 in two stages with the force indicated in the table (in newton and kilogram per meter). Bolt No. 11 is reached last, in one approach, with a force of 3.8 kgf/m.
| Tightening stage | Rated torque, Nm (kgf/m) | Minimum, N m (kgf/m) | Maximum, N m (kgf/m) |
| Preliminary | 39,2 (4,0) | 33,3 (3,4) | 41,16 (4,2) |
| Final | 112,7 (11,5) | 95,94 (9,79) | 118,38 (12,08) |
Tightening the cylinder head of the VAZ 2107 - second option
On some newer “sevens”, not ordinary M12x120x1.25 bolts were used to fasten the cylinder head, but torsion bar bolts - M12x115x1.25. Therefore, in addition to the first option of the sequence and degree of tightening, there is another option with data on the tightening force of the VAZ-2107 cylinder head. The process itself looks like this:
- Stage 1. Tightening the bolts to a torque of 2.0 kgf/m.
- Stage 2. Second tightening with a torque of 7.5-8.5 kgf/m.
- Stage 3. Turn each bolt 90 degrees.
- Stage 4. One more turn of all bolts by 90°.
- Stage 5. Tighten bolt No. 11 with a force of 3.8 kgf/m.
Different bolts and tightening degree of the VAZ-2107 cylinder head. What is the difference
The “classic” was originally equipped from the factory with ordinary M12x120x1.25 bolts for a 19mm head. Their original catalog number was 2101-1003271 or 21213-1003271. The second number suggests that such bolts were also used on the VAZ-21213 Niva, which is why they are also called “Niva bolts”. Another colloquial name is “penny”. But most often they are simply identified as “cylinder head bolts for an old-style classic.”
On VAZ-2108 and VAZ-2109 cars, torsion bolts of a new type began to be used, which are also suitable for the “classics” - M12x115x1.25. They were unscrewed and tightened with a 12mm hexagon. It is noteworthy that AvtoVAZ’s catalog number remained the same, 21213-1003271. And it is the bolts of the new type that are sold in the original packaging. Their difference is that they “stretch” - and if correctly, they undergo elastic deformation. Actually, this is why you need to turn it twice by 90 degrees.
Old style cylinder head bolt
New sample cylinder head torsion bolt
Pay attention to the length of these bolts, encoded in the markings. 5mm difference with regular bolts. It is by these 5 millimeters that the bolt is deformed, completely filling the internal thread.
What is the difference between these bolts, other than the first ones are not sold in the original packaging and different bolts require different torque patterns? Classic bolts can be used many times if their condition allows it. But on the other hand, you need to remember to do preventive tightening of the cylinder head bolts . About once a year , or more often, you will have to check the tightening torque of all the head bolts of your VAZ-2107 and tighten them if necessary.
The new type bolts do not require such a procedure, because due to elastic deformation they provide constant pressure on the cylinder head cover . But such bolts are disposable . When disassembling the cylinder head, you will have to buy a set of new ones. And unscrewing such bolts can be complicated by the fact that bolts tightened without a torque wrench can break .
Torque Tips and Common Mistakes
- Do not jerk the cylinder head bolts. Tightening should be done smoothly.
- When installing cylinder head bolts (especially old ones), carefully examine their condition - there should be no damage to the threads. Exactly the same as inside the installation site.
- If necessary, the part must be cleaned of contamination.
- It is better to lubricate the threads with oil, but pouring them into the mounting holes is not recommended. If the wells are blind, then the lubricant must be applied very carefully. Fluids do not compress and excess lubrication will prevent you from tightening the bolt all the way.
- Failure to use a torque wrench may result in inaccurate tightening torques and incorrect gasket operation or damage to the cylinder head.
Tightening torques for main threaded connections of VAZ PP
Tightening torques for various main threaded connections of vehicle components. These tightening torques can only be ensured using special equipment (torque wrench) Part Thread Tightening torque, N•m (kgf•m)
Engine Cylinder head mounting bolt M12x1.25 cm. Note 2 Stud nut securing the intake pipe and exhaust manifold M8 20.87–25.77 (2.13–2.63) Tension roller mounting nut M10×1.25 33.23– 41.16 (3.4–4.2) Nut of the camshaft bearing housing stud M8 18.38–22.64 (1.87–2.31) Bolt of the camshaft pulley M10 67.42–83.3 ( 6.88–8.5) Bolt for fastening the housing of auxiliary units M6 6.66–8.23 (0.68–0.84) Nut for the stud fastening the outlet pipe of the cooling jacket M8 15.97–22.64 (1.63– 2.31) Bolt for fastening the main bearing caps M10x1.25 68.31–84.38 (6.97–8.61) Bolt for fastening the oil sump M6 5.15–8.23 (0.52–0.84) Nut connecting rod cover bolt M9x1 43.32–53.51 (4.42–5.46) Flywheel mounting bolt M10x1.25 60.96–87.42 (6.22–8.92) Coolant pump mounting bolt M6 7, 64–8.01 (0.78–0.82) Crankshaft pulley mounting bolt M12x1.25 97.9–108.78 (9.9–11.1) Coolant pump supply pipe mounting bolt M6 4.17– 5.15 (0.425–0.525) Nut for fastening the exhaust pipe of the muffler M8×1.25 20.87–25.77 (2.13–2.63) Nut for fastening the flange of the additional muffler M8×1.25 15.97–22, 64 (1.63–2.31) Nut securing the clutch cable to the engine bracket M12x1 14.7–19.6 (1.5–2.0) Bolt securing the front engine mount bracket M10x1.25 32.2–51, 9 (3.3–5.5) Nut of the bolt securing the front engine mount M10 41.65–51.45 (4.25–5.25) Nut of the bolt securing the left mount of the power unit suspension M10 41.65–51.45 (4.25–5.25) Nut securing the left suspension support of the power unit M10 31.85–51.45 (3.25–5.25) Bolt securing the rear suspension support of the power unit M10x1.25 27.44–34 ( 2.8–3.47) Nut of the bolt securing the rear suspension support of the power unit M12 60.7–98 (6.2–10) Bolt securing the oil receiver to the main bearing cover M6 8.33–10.29 (0.85– 1.05) Bolt for fastening the oil receiver to the pump M6 6.86–8.23 (0.7–0.84) Bolt for fastening the oil pump M6 8.33–10.29 (0.85–1.05) Bolt for fastening the housing oil pump M6 7.2–9.2 (0.735–0.94) Oil pump pressure reducing valve plug M16x1.5 45.5–73.5 (4.64–7.5) Oil filter fitting M20x1.5 37 .48–87.47 (3.8–8.9) Oil pressure warning lamp sensor M14x1.5 24–27 (2.45–2.75) Carburetor mounting nut M8 12.8–15.9 (1.3 –1.6) Nut securing the cylinder head cover M6 1.96–4.6 (0.2–0.47) Clutch Nut securing the clutch housing to the engine block M12x1.25 54.2–87.6 (5.53– 8.93) Bolt securing the clutch housing to the engine block M12x1.25 54.2–87.6 (5.53–8.93) Bolt securing the guide sleeve flange of the clutch release bearing M6 3.8–6.2 (0. 39–0.63) Bolt securing the clutch housing to the flywheel M8 19.13–30.9 (1.95–3.15) Nut securing the clutch housing to the gearbox M8 15.7–25.5 (1.6–2 ,6) Bolt securing the bottom cover to the clutch housing M6 3.8–6.2 (0.4–0.6)
Gearbox Conical screw fastening the drive rod joint M8 16.3–20.1 (1.66–2.05) Bolt fastening the gear selection mechanism M6 6.4–10.3 (0.65–1.05) Bolt fastening the housing gear shift lever M8 15.7–25.5 (1.6–2.6) Nut securing the drive rod and torque rod clamp M8 15.7–25.5 (1.6–2.6) Nut of the rear end of the primary and secondary shaft M20x1.5 120.8–149.2 (12.3–15.2) Reverse light switch M14x1.5 28.4–45.3 (2.9–4.6) Bolt securing the forks to the rod M6 11.7–18.6 (1.2–1.9) Differential driven gear mounting bolt M10x1.25 63.5–82.5 (6.5–8.4) Speedometer drive housing mounting nut M6 4.5– 7.2 (0.45–0.73) Bolt securing the gear selector lever axle M6 11.7–18.6 (1.2–1.9) Nut securing the rear cover to the gearbox housing M8 15.7–25, 5 (1.6–2.6) Reverse fork clamp plug М16×1.5 28.4–45.3 (2.89–4.6) Conical screw fastening the gear selector rod lever М8 28.4–35 ( 2.89–3.57) Clutch housing and gearbox mounting bolt M8 15.7–25.5 (1.6–2.6) Drain plug M22x1.5 28.7–46.3 (2.9– 4.7)
Front suspension Nut securing the upper support to the body M8 19.6–24.2 (2–2.47) Nut securing the ball pin to the lever M12x1.25 66.6–82.3 (6.8–8.4) Eccentric nut bolt for fastening the telescopic strut to the steering knuckle M12x1.25 77.5–96.1 (7.9–9.8) Bolt for fastening the telescopic strut to the steering knuckle M12x1.25 77.5–96.1 (7.9–9. 8) Bolt and nut for fastening the suspension arm to the body M12x1.25 77.5–96.1 (7.9–9.8) Nut for fastening the brace M16x1.25 160–176.4 (16.3–18) Bolt and nut mounting the stabilizer bar to the arm M10x1.25 42.1–52.0 (4.29–5.3) Nut securing the stabilizer bar to the body M8 12.9–16.0 (1.32–1.63) Bolt fastening the brace bracket to the body M10x1.25 42.14–51.94 (4.3–5.3) Nut securing the telescopic strut rod to the upper support M14x1.5 65.86–81.2 (6.72–8.29 ) Bolt securing the ball joint to the steering knuckle M10x1.25 49–61.74 (5.0–6.3) Nut of the rear wheel hub bearings M20x1.5 186.3–225.6 (19–23) Nut of the front wheel hub bearings M20x1.5 225.6–247.2 (23–25.2) Wheel bolt M12x1.25 65.2–92.6 (6.65–9.45) Rear suspension Nut securing the lower end of the shock absorber M12x1, 25 66.6–82.3 (6.8–8.4) Nut for fastening the rear suspension arm M12x1.25 66.6–82.3 (6.8–8.4) Nut for fastening the brackets for the suspension arms M10x1.25 27 .4–34 (2.8–3.46) Nut securing the upper end of the shock absorber M10x1.25 50–61.7 (5.1–6.3) Brakes Bolt securing the brake cylinder to the caliper M12x1.25 115–150 (11 ,72–15.3) Bolt for fastening the guide pin to the cylinder M8 31–38 (3.16–3.88) Bolt for fastening the brake to the steering knuckle M10x1.25 29.1–36 (2.97–3.67) Bolt mounting the rear brake to the axle M10x1.25 34.3–42.63 (3.5–4.35) Nut securing the vacuum booster bracket to the bracket booster M8 9.8–15.7 (1.0–1.6) Nut mounting the main cylinder to the vacuum booster M10 26.5–32.3 (2.7–3.3) Nut securing the vacuum booster to the bracket booster M10 26.5–32.3 (2.7–3.3) Nut of brake connections pipelines M10 14.7–18.16 (1.5–1.9) Front brake flexible hose end M10x1.25 29.4–33.4 (3.0–3.4)