What are the reasons for the charging failure, how to fix the problem on the road or in the garage - this is discussed in this manual. The electrical circuit of the LADA Niva 4×4 is built according to a classic layout and has undergone virtually no changes since the start of production. Why, knowing its weak points and moving from the obvious to the complex. You will quickly find the root cause.
Generator connection principle, drawing:
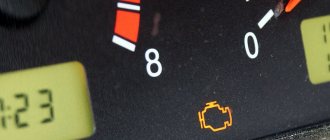
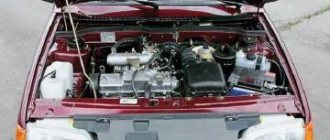
Basic information about the state of the charger can be obtained from the behavior of the instrument cluster - flashing of the indicator, emergency operation of electrical equipment (headlights, interior lighting, heater) and the engine.
Battery lost charging reasons
What are the reasons for the charging failure, how to fix the problem on the road or in the garage - this is discussed in this manual.
The electrical circuit of the LADA Niva 4×4 is built according to a classic layout and has undergone virtually no changes since the start of production. Why, knowing its weak points and moving from the obvious to the complex. You will quickly find the root cause. Generator connection principle, drawing:
Basic information about the state of the charger can be obtained from the behavior of the instrument cluster - flashing of the indicator, emergency operation of electrical equipment (headlights, interior lighting, heater) and the engine.
Video diagnosing the causes of an uncertain cold start
Chevrolet Niva will not start, we are looking for and eliminating the reasons.
No spark at the injector! Solution
Chevrolet Niva ignition coil
No spark on injection engine. We are looking for the reason without a scanner.
FOUND. Chevrolet Niva
NIVA 65 thousand rubles in six months. There is no spark - no reason. Replacing the axle shaft seal. Buying NIVA
Does not start?! Where to dig?! Search for “living” water for the “dead” Niva!
Situation on the road - no spark.
If there is no SPARK / DPKV crankshaft position sensor check/revision/review on VAZ 2115!
There is no spark on the candles.
The battery charge indicator light is constantly on.
The phenomenon indicates that the generator has stopped its normal operation; at this moment, the BS is powered by the battery. With a normally charged battery, you have 30-40 km of mileage left to get to the repair site. Disconnect consumers as much as possible, arm yourself with a multimeter and a set of keys.
A) Belt break.
Pay attention to the presence of a belt on the pulleys of the water pump and generator. To return it to its place, you will need 17 or 13 socket wrenches, depending on the year of manufacture of the car, as well as a strong flat-head screwdriver.
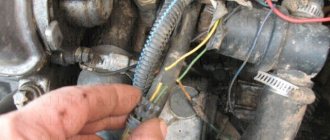
Disconnect the HF position sensor (for example, on 21213,21214).
Loosen the nuts securing the tension bar and slide it to the side towards the cylinder block.
Place the belt on your seat.
Upon completion of installation, adjust the tension, controlling the deflection when pressing with your thumb on the belt gap between the generator and pump pulleys - 10-15 mm, pump and crankshaft - 12-17 mm. Failure to comply with this requirement may result in the belt slipping with further damage and rupture.
B) Burnout of wires, poor contact in the circuit.
If the circuit opens at terminals B, V and Ш, tighten the nuts or replace the terminals with new ones.
C) The charging relay-voltage regulator has failed.
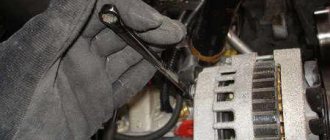
To initially check the performance of the LV, use a multimeter (voltmeter), which allows you to record the voltage directly at the battery terminals. Normal voltage is considered to be in the range of 13.85±0.35V . If it is different from this, we diagnose the element. The location where the charging relay is located near the Niva is determined by the age of the car. Thus, a remote relay can be found on the right fender liner of a car with a classic engine compartment layout; more modern modifications of generators are equipped with a LV combined with a brush assembly.
The element is not repaired, but replaced completely. To assess the condition, you will need power supplies of 12-14 V, followed by replacement with 16-22 V, and also an incandescent lamp of 1-3 W. According to the diagram drawing, apply current to the voltage regulator in series. If the first test is characterized by the operation of the lamp, and the second - by the absence of glow, then the LV is working.
If there is a break, the lamp will not light up at all, and if there is a breakdown inside the regulator, it will light up even when the voltage increases above 14 V. In addition, weak charging, as well as its absolute absence, is often explained by abrasion of the brushes (residual height less than 5 mm) and slip rings of the generator . If the first part is changed along with the brush holder, then the second is restored by grinding, grooving or removing the remains of the old rings and pressing in new ones. It is recommended to supplement the disassembly of the unit with a total cleaning.
D) Diodes or rectifier unit are faulty
To assess the condition of the mentioned components (negative, positive and additional diodes), arm yourself with a low-power lamp and battery. Diodes are indicated by numbers in the diagram: 1. Positive
Performance is determined by connecting “+” to terminal 30 of the generator (for positive), bolts of the rectifier block (for negative) or to 61 (for additional), and “-” to its body (for negative) or to any of the bolts of the rectifier block ( for positive and additional). The glow of the lamp indicates that the diodes have been shorted, which leads to the conclusion that the diode bridge will have to be replaced. Be attentive to the indications on the instrument panel. Often the icon lights up half-heartedly and is not noticeable in bright light.
6.4.3 Checking and charging the battery
Checking and charging the battery
Low-maintenance battery
If the car's annual mileage is low, the electrolyte density should be measured every three months to check the battery's charge. Measure the density with a hydrometer and compare the result with that given in the table below.
Ambient temperature
Fully charged battery
Please note that the data is based on an electrolyte temperature of 15°C. For every 10°C increase in temperature, it is necessary to add 0.007; for a similar decrease, subtract 0.007.
If the condition of the battery is of concern, check the density of the electrolyte in each jar. A difference of more than 0.040 indicates loss of electrolyte or damage to the plates.
If the difference in density exceeds 0.040, the battery must be replaced. If the difference in density is satisfactory, but the battery is discharged, it must be charged and the density of the electrolyte checked. The charging procedure is given below.
Maintenance free battery
If a sealed battery is installed on the car, it is impossible to check the density of the electrolyte and restore its level. The battery condition can be checked using the built-in indicator or an external voltmeter.
Some models are equipped with maintenance-free batteries with a charge level indicator built into the case. It is located on top and changes color when the battery charge level changes. If the indicator is green, the battery is fully charged; if the indicator is red, the battery needs to be charged. The sequence of actions when charging the battery is given below in this Section. Batteries from other manufacturers may also have a built-in charge level indicator. In this case, follow the instructions given in the battery's operating instructions.
Rechargeable batteries of all types
When checking the battery using an external voltmeter, connect it to the terminals and compare the result obtained with the data given in the Specifications. The measurement result will be correct if the battery has not been charged for at least the last 6 hours. If it was charging, turn on the headlights for 30 seconds, then wait 5 minutes and check the voltage at the terminals. All other electrical equipment (including even interior lighting) must be turned on.
If the measurement result is less than 12.0 V, then the battery is discharged, and a voltage from 12.0 to 12.4 indicates a partial discharge.
If the battery needs to be charged, remove it from the vehicle (refer to Section Replacing the Battery ) and charge it following the procedure described below.
Checking the fastening of the battery terminals and holder
If the battery is loose or the terminals are loose, the result may be premature battery failure due to vibration, cable fire, or electrical malfunction. Since disconnecting the battery erases the data of electronic memory units, for example, a radio receiver, read the notes on removing and installing the battery, refer to the Section Replacing the battery .
Move the battery terminals in different directions and check the reliability of their fastening, tighten if necessary.
If the battery is not securely fastened, tighten the fastening bolt to a torque of 20 Nm.
Checking the battery under load
Connect a voltmeter to the battery terminals.
Start the engine and check the voltage.
When starting the engine with a fully charged battery, the voltage should not drop below 10 V (at an electrolyte temperature of about +20°C).
If the voltage drops sharply and the electrolyte density is different in different sections, the battery is damaged and must be replaced.
The sequence of actions below may differ from those recommended by the manufacturer of the battery installed in the vehicle. In this case, use the manufacturer's recommendations.
Conventional and low maintenance battery
The battery should be charged with a current equal to 10% of the capacity (for example, if the battery capacity is 45 Ah, it should be charged with a current of 4.5 Amps) until the density of the electrolyte in the jars increases within 4 hours.
On the other hand, an automatic charger with a current of about 1.5 amps can be left on all night.
“Accelerated” type chargers, which supposedly can fully charge a battery in a couple of hours, are not recommended, since at high currents the battery plates can overheat and be destroyed.
When charging the battery, make sure that the electrolyte temperature does not exceed 37.8°C.
Charging a maintenance free battery
This type of battery will take longer to fully charge than a low-maintenance or regular battery. The charging time depends on the level of discharge and can take up to three days.
The voltage generated by the charger should be in the range of 13.9 - 14.9 Volts, the current should not exceed 25 Amperes. Under these conditions, the battery can be used after 3 hours, the voltage at the terminals should be about 12.5 Volts. It will take longer to reach full charge.
Safety Notes
Before charging the battery, read the safety notes in the Section Checking the battery condition, caring for it and charging .
- Do not disconnect the battery while the engine is running.
- Never short-circuit the battery, i.e. Do not connect the positive (+) and negative terminals (-). This causes the battery to heat up and may crack.
- Do not use open flame near the battery. Electrolyte is poisonous. Avoid contact with eyes, skin and clothing. Otherwise, rinse the electrolyte thoroughly with water.
- When charging a battery with a central gas outlet, do not remove the plugs (cross-shaped slot).
- Before charging a frozen battery, allow it to defrost. A charged battery freezes at a temperature of about 65°C, a half-charged battery at a temperature of about 30°C, and a discharged battery at a temperature of about 12°C. After defrosting, check the battery for cracks. Replace if necessary.
- When charging the battery with a normal charger or a fast charger, remove the battery. At a minimum, disconnect the negative (-) and positive (+) cables.
- When using a portable charger (low current), charging can be performed without removing the battery. There is no need to disconnect the cable to the on-board network. Naturally, the battery manufacturer's data must be taken into account.
The charging lamp does not light up.
Since the indicator on the instrument panel is a link in the generator excitation circuit, the absence of flashing when the ignition is turned on leads to loss of its functionality. Whether the lamp is to blame or the reason lies elsewhere (voltage regulator relay, lock contact group), can be understood by disconnecting terminal 61 from the generator with the ignition on, followed by shorting the wire from the instrument panel to the car body. If it catches fire, check the serviceability of the rotor winding, brushes and “chocolate”. If the circumstances are otherwise, examine the performance of fuse No. 2 (8A) and the light bulb by replacing the ones mentioned with known good ones.
The signal lamp is blinking
Blinking of the battery indicator, as a rule, indicates problems in the brush assembly, as well as the occurrence of a short circuit in the “W” and “-” terminals of the voltage regulator. The brushes, in turn, can “freeze”, not reaching the rotor slip rings at low and medium speeds. You have already read how to fix them in our instructions. However, the reason why charging on the Niva 2121, 2131, 21214 and 4×4 Urban disappeared is not always the above-mentioned components under the hood. In particular, the culprit of weak charging or its complete absence is an unmaintained battery with an insufficient volume of electrolyte or closed banks, loose and oxidized terminals, broken and melted wires. Additional difficulties arise when dirt, dust, traces of fuel and lubricants, etc. accumulate on suspended equipment.
Failure of the rectifier unit (diode bridge burnt out)
This is the most common reason why there may be either weak charging or its complete absence. In order to find out whether this is the reason, you must perform the following steps:
- Remove the diode bridge from the device
- Test it with an ohmmeter to check for burnt diodes.
- Replace the rectifier unit if necessary
Usually, if one of the diodes burns out, the charging does not disappear completely, but becomes only slightly less than the nominal value. But even in this case, the generator will not be able to properly charge the battery and it will run out more and more often. If all the diodes burn out, which also happens quite often, then charging disappears completely.
VAZ 2121 battery charging relay
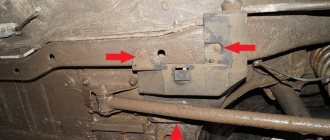
Relay type PC-702 is used to turn on the warning lamp on the instrument panel when the generator voltage is insufficient to charge the battery. The relay is installed in the engine compartment, on the top of the right wheel mudguard.
The relay winding (with the generator running) is under the rectified phase voltage of the generator. If the voltage between terminal “30” of the generator and “ground” is 13.8-14.5 V, the rectified phase voltage is 5-7 V.
The relay contacts close the power circuit of the control lamp 6 (Fig. 7-5). When the ignition is turned on, when the engine (and therefore the generator) is not yet running, current from the battery flows through the contacts. The lamp is on.
After starting the engine and when the car is moving, the lamp should go out, since under the action of the rectified phase voltage the relay armature should be attracted to the core and open the relay contacts.
If the warning light does not go out after starting the engine and while the car is moving, this indicates a malfunction either in the generator or voltage regulator, or a malfunction of the relay itself (broken winding, etc.).
AutoNews / Reviews / Tests
Where is the Charging Relay on Niva 21214
Battery charging lost
What are the reasons for the charging failure, how to correct the problem on the road or in the garage - this is discussed in this summary. Electrical diagram of LADA Niva
The 4×4 is built according to a traditional assembly and has virtually no configurations since the start of production. Why, knowing its weak points and moving from the obvious to the complex. You will quickly find the root cause.
Generator connection principle, drawing:
You will receive basic information about the state of the charger from the behavior of the instrument cluster - flashing of the indicator, emergency operation of electrical equipment (headlights, interior lighting, heater) and the engine.
Battery charging lamp VAZ 21214
After replacing the alternator belt, charging
, as a result, the battery died and the controller stopped working. The location where the charging relay is located near the Niva is determined by the age of the car. Yes, remote relay
can be found on the right fender liner of a car with a classic engine compartment layout. More modern modifications of generators are equipped with a launch vehicle combined with a brush assembly.
The element is not repaired, but replaced completely. To assess the condition, you will need power supplies of 12-14 V, followed by replacement with 16-22 V, and also an incandescent lamp of 1-3 W. According to the diagram drawing, apply current to the voltage regulator in series. If the first test is characterized by the operation of the lamp, and the second - by the absence of glow, then the LV is working.
If there is a break, the lamp will not light up at all; if there is a breakdown, it will glow constantly. In addition, weak charging, as well as its absolute absence, is often explained by abrasion of the brushes (residual height less than 5 mm) and slip rings of the generator. If the first part is changed along with the brush holder, then the second is restored by grinding, grooving or removing the remains of the old rings and pressing in new ones. It is recommended to supplement the disassembly of the unit with a total cleaning.
Replacing the power supply with your own hands
If any electrical circuit fails, the first thing you need to do is check the condition of the fuses and relays. This simple operation can be performed independently. The driver needs to know where the Niva Chevrolet fuse box is located and the purpose of the fuse links installed in it.
To protect electrical circuits on cars, fuses are used, located in a special mounting block. On a Chevrolet Niva VAZ 2123, this block is located inside the instrument panel, to the left of the plastic steering column cover.
In addition to the main unit, the Chevrolet Niva has an additional unit that is responsible for the operation of the car’s engine. This safety element is located in the passenger compartment and is located on the right side of the instrument panel behind the glove box.
The placement of blocks in the cabin is the same for cars of all years of manufacture.
The main blocks of machines are divided into two types - before 2009 and after. These devices are not interchangeable. The blocks behind the glove box are identical in design.
On a 2005 car, you can easily install a block from a 2011 car. The designation of the fuse rating is marked on the body; on the assembly itself there is a number of the fuse link and a pictogram of the purpose.
There are no fuse markings on the main unit cover.
If any electrical circuit in the vehicle fails, the condition of the fuse must be checked.
If it is necessary to replace parts, it should be taken into account that the VAZ 21214 fuses on the Niva injector belong to two different types:
Therefore, when you go on a trip, you need to take with you spare inserts of different types.
If, for example, a cigarette lighter fails on the road, you must:
The remaining fuses and relays on the VAZ 21214 are changed using a similar scheme.
In case of burnout or mechanical damage, it is necessary to repair the unit by replacing its components or the entire assembly.
To replace the main unit, follow these steps:
The photo shows some stages of dismantling the block.
Disconnecting the wiring plugs
Other fuse or relay blocks on the VAZ 21214 are replaced in the same way.
Read news about the new field
- About engines for VAZ 2121 Niva
- Chevrolet Niva idle speed sensor
- Fuses and relays Lada 2121
- FROST car air conditioners // Online store // Prices // Air conditioners for cars Lada VAZ, VolksWagen Polo, Daewoo Matiz
- Front lower suspension arms VAZ-2121 - Drawings, 3D Models, Projects, Cars and automotive industry (Car service)
- Timing marks on a Chevrolet Niva car
- Chassis, front suspension, device, Design, operation, description, device, car repair Niva VAZ 2121, engine, assembly, disassembly, transmission, gearbox
- Engine VAZ 21213 Niva
Read news about the new Niva
- Rearranging wheels on a car: diagram, recommendations
- Niva injector jerks when driving
- VAZ 21213 | Replacing the flexible coupling | Niva
- Tightening torques for threaded connections VAZ 21214
- Buy auto parts VAZ-2121 towing eye for foreign cars in the online store AUTOPITER
- Niva injector jerks when driving
- Happy birthday, Mikhail, Misha, Mikha, Mishanya, Mikhalych - congratulations, pictures, cards
- Controls and dashboard layout
The charging lamp does not light up.
Since the indicator on the instrument panel
is a link in the excitation circuit of the generator; the absence of flashing when the ignition is turned on leads to loss of its functionality. Whether the lamp is to blame or the reason lies elsewhere (voltage regulator relay, lock contact group), can be understood by disconnecting terminal 61 from the generator with the ignition on, followed by shorting the wire from the instrument panel to the car body. If it catches fire, check the serviceability of the rotor winding, brushes and “chocolate”. If the circumstances are otherwise, examine the performance of fuse No. 2 (8A) and the light bulb by replacing the ones mentioned with known good ones.
The wire came off the generator
There may be several reasons and it is better to eliminate them in a car service center or garage, and you just have to hope that the energy reserve in the battery is enough to get to them. To reduce current consumption when driving a car with a faulty generator, if possible, turn off the radio, unnecessary lighting devices, heater fan, etc. Experienced car enthusiasts can be advised to check the generator voltage regulator.
The operation of the voltage regulator is to continuously automatically change the generator excitation current so that the generator voltage is maintained within specified limits when the generator speed and load changes. Checking on a car To check, you must have a DC voltmeter with a scale up to class B, accuracy no worse than 1.0.
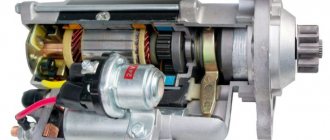
Niva Chevrolet: Generator is the most common problem
The voltage should be within 13.6 V. The diodes are indicated by numbers in the diagram: The glow of the lamp indicates that the diodes have been shorted, which leads to the conclusion that the diode bridge will have to be replaced. Be attentive to the indications on the instrument panel.
Often the icon lights up half-heartedly and is not noticeable in bright light. Video of current leakage and poor charging at the same time: The charging lamp does not light up.
Since the indicator on the instrument panel is a link in the generator excitation circuit, the absence of flashing when the ignition is turned on leads to loss of its functionality.
On-board network voltage.
- Go to page:
On-board network voltage.
Post by Al Giardino » Jun 10, 2011 09:59
The problem is this: I charged the battery with a stationary charger, drove for a month, without any problems, then stood in a traffic jam for an hour and a half with the lights on, the radio on and the cooling fans turning on periodically, the battery went to zero
Yesterday I changed the voltage at the battery terminals, without load at idle it was 13 (tenths are not visible on the tester), when turning on the headlights, music, cooling fans, wipers, it dropped to 12 (which is at 800 rpm, that is at 3000 rpm)
Who is to blame for everything!? Generator or battery!? What voltage should be in the on-board network?
Re: On-board voltage.
Post by Anton » June 10, 2011, 10:03
Re: On-board voltage.
Post by Al Giardino » Jun 10, 2011 10:48 am
Re: On-board voltage.
Post by tester12 » June 14, 2011, 4:12 pm
From experience: there is not enough current output from the generator + crappy wiring. Replacing the regulator relay, diode bridges and other components of the generator will not help.
I reduced this by replacing the generator with a more powerful 110A instead of 80A, + shook up all the power wiring + engine weight + tasol screen so it wouldn’t drip on the gene. Now my voltage does not go below 12.8 at idle. At 1000 rpm everything is already normal.
Re: On-board voltage.
Post by Anton » June 14, 2011, 4:16 pm
Re: On-board voltage.
Post by Al Giardino » Jun 14, 2011 4:31 pm
Even now, at idle, it doesn’t drop below 13 V! With full illumination (headlights, music, radiator cooling screws and stove) it jumps between 12 and 13 V
Z.Y. I measured it with a large tester for a household network, so I don’t know the tenths!
Re: On-board voltage.
Post by Antokh » June 14, 2011, 16:34
Re: On-board voltage.
Post by Al Giardino » Jun 14, 2011 4:41 pm
Re: On-board voltage.
Post by Anton » June 14, 2011, 4:43 pm
Re: On-board voltage.
Post by Axen » Jun 14, 2011, 06:51 pm
The fault is the relay-regulator - installed inside Gena. (and the excitation circuit, or rather the location of the reference voltage selection) Try replacing it. At the same time, clean the installation contacts - there the mass on the relay often gets “naughty” due to the ingress of water.
Sometimes it helps to replace it with a suitable “remote” 12V relay from another car, with winter-summer adjustment. The conversion is not difficult. AND.
+ replace the battery terminals + connect the housing Gen. with ground using a separate wire, clean all possible accessible contacts.
PS: The power of a standard working generator is sufficient for most cases. You need to follow some rules.
not all at once. on XX.
The signal lamp is blinking
Blinking of the battery indicator, as a rule, indicates problems in the brush assembly, as well as the occurrence of a short circuit in the “W” and “-” terminals of the voltage regulator. The brushes, in turn, can “freeze”, not reaching slip rings at low and medium speeds. You have already read how to fix them in our instructions. However, the reason why charging on the Niva 2121, 2131, 21214 and 4×4 Urban disappeared is not always the above-mentioned components under the hood. In particular, the culprit of weak charging or its complete absence is an unmaintained battery with an insufficient volume of electrolyte or closed banks, loose and oxidized terminals, broken and melted wires. Additional difficulties arise when dirt, dust, traces of fuel and lubricants, etc. accumulate on suspended equipment.
Hello! Let me start by saying that after purchasing the Niva I was always surprised by the operation of the generator. Even after replacing the original www.drive2.ru/l/2558502/ with a more powerful KZATE 80A from 21214, the voltage of the on-board network varied greatly depending on the load: headlights + stove = decent fit at xx. How so?! There are 1 million electronics in my Mercedes. times more and its native 90A Bosch, even at full load, provides a stable 14.2V in winter and clearly 13.7V in summer on a warmed up car. Whatever I turn on or turn off, the voltage DOES NOT CHANGE at any engine speed! Only when starting a cold engine in cold weather does the voltage rise to 14.7V. With all this, Mercedes does not provide any three-level voltage regulators. :-))) Taking into account the not very large difference in the power of the generators (80A Niva versus 90A Mercedes), we draw conclusions about the efficiency of their voltage regulators (VR)... Fortunately, the domestic auto industry began to “catch up” with the foreign one and released a new type of LV, the analogues of which are foreign cars have been in use for about 20-30 years, and they are installed on Shnivas, Priors, Kalinas of the latest releases. Features of the new sample launch vehicle are: 1st
and the main thing: the voltage is controlled at the B+ terminal, that is, essentially on the battery itself, and not at the output of additional diodes, 2nd
: no external voltage is needed at terminal D (the one to which the thin wire is connected) to power the field winding, because
it is taken from the output of one of the windings, i.e. pin D is used only for the operation of the charging indicator lamp (by the way, the new model LV “can” signal both a lack of charging and an overvoltage) and for the signal to turn on the generator, and 3rd
: power is supplied to the excitation winding after “spin up” generator up to 400 rpm (not to be confused with engine speed!), this is useful during cold starts, because an unexcited generator does not create a load on the starter. Now about the installation of such a launch vehicle in the VAZ 21214 KZATE 80A generator. I came across RN 845.3702 “Orbita” from Chevrolet Niva (but there are other analogues on sale that are compatible with our boot: 941.3702 - Autoelectronics, 611.3702-05 - Energomash, 7931.3702 I4 - Electromodul, Belarus).
Specifics of operation
The generator on the Niva Chevrolet works thanks to the effect of electromagnetic induction - when a moving electromagnetic field creates alternating current. The design has several coils that create the field. And also a receiver that removes electricity from them.
Basically, it is these elements that are subject to the fastest wear. For example, the coil windings may be damaged during generator operation. The only repair option is to rewind them, which is a complex and time-consuming procedure. Rewinding is carried out by repair services, but there is no guarantee that the current in the windings will be the same. Sometimes there is a noticeable drop in output after repair work, so a more reliable option is to buy a new Niva Chevrolet generator. After 120 thousand km of car mileage, it is worth checking the windings for integrity. Another structural element that can cause a problem is the bearing.
The relay regulator often breaks down. After a run of 100 or even 120 thousand km or more, this part has the risk of almost falling apart at any time if it is not replaced in time. Relay regulator 2123 KZATE series C3, article number 845.3702, is suitable for replacement.
Relay block diagram above the gas pedal
| F1 (16A) | Heater fan, rear window defroster, rear wiper and washer system, windshield washer pump |
| F2 (8A) | Steering column switch, windshield wipers, hazard warning lights, breaker relay (in turn signal mode), reverse light, instrument cluster (coolant temperature gauge, fuel level gauge, tachometer, warning lights: turn indicators, differential lock, parking brake, emergency condition of the working brake system, insufficient oil pressure, fuel reserve, battery charge) |
| F3 (8A) | Left headlight (high beam), high beam indicator lamp |
| F4 (8A) | Right headlight (high beam) |
| F5 (8A) | Left headlight (low beam) |
| F6 (8A) | Right headlight (low beam) |
| F7 (8A) | Side light lamps in the left front and left rear lights, license plate lights, side light indicator lamp |
| F8 (8A) | Side light lamps in the right front and right rear lamps, backlight lamps for the instrument cluster, cigarette lighter, switches, heating and ventilation control unit |
| F9 (8A) | Hazard switch, breaker relay (in hazard mode), heated tailgate glass relay contacts |
| F10 (8A) | Sound signal, interior lamps, brake lamps in the rear lights |
| F11, F12 (8A) | Reserve |
| F13 (8A) | Fog light relay contacts in rear lights |
| F14 (16A) | Cigarette lighter |
| F15 (16A), F16 (8A) | Reserve |
| Fuse number and rating | Protected circuit |
| Main unit | |
| 1 (16A)* | Electric windows for front doors Electric side mirrors |
| 2 (16A)** | Air conditioning fan, air conditioning compressor |
| 9 (16A)* | Side mirror heaters |
| 10 (16A)* | Central interior lamp |
| Additional block | |
| 15 (16A)* | Air conditioning fan, air conditioning compressor |
Also interesting: Generator Niva 2121, 21213, 21214: which one is installed, replacement
Located under the glove box on the passenger side.
Source