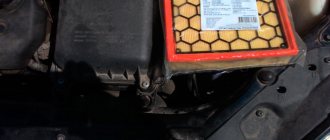
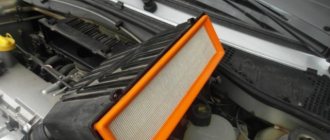
To clean the air entering to form a combustible mixture, a special filter is provided in the design of the VAZ 2115 car. It prevents abrasive particles from entering the combustion chamber. This has a positive effect on the resource of the power plant.
Air filter removed from VAZ 2115
During operation, a gradual decrease in the throughput of the filter element occurs due to its clogging with dirt.
Because of this, the engine loses power, vehicle dynamics deteriorate, and gasoline consumption increases. Therefore, the air filter requires periodic replacement, which is not difficult to do yourself.
To make the stove heat better...
Many motorists decide to tune the VAZ-2105 heater only because in the cold season, travel becomes uncomfortable, the driver and passengers feel cool, and the heating device cannot heat the interior at a decent level. Modernizing the VAZ-2105 stove helps solve all of the above problems.
First of all, it is necessary to dismantle the standard device by completely disassembling it. Then you should cut off the comb and replace the resistor, through which the rotation speed of the factory fan is adjusted. Any motorist who wants to improve his car and, in particular, its heater, must definitely get rid of the comb; this need can be explained by the size of the power unit, since the existing “chisels” are taller than the classic device. A sawed comb will prevent the heating of the feet from being removed; in addition, a properly carried out manipulation will at least double the volume of incoming air.
Do-it-yourself modification of the VAZ-2105 stove should be continued by drilling a hole on the impeller, the size of which should not exceed 7 mm in diameter. The next step is to resolve the issue of connecting the impeller and the shaft of the “seventh” motor. This procedure will most likely have to be done several times, because the main task of the motorist is to position the unit in such a way that noise and vibration disappear.
It is necessary to replace the resistor to switch speed modes because the volume of incoming air depends on it. At the same time, the switch that controls the rotation of the fan should be replaced. As practice shows, a stationary device is not capable of passing a large air flow, as a result of which it melts and, accordingly, becomes unusable.
As a result, tuning the stove “gives” the car enthusiast a fairly warm and well-heated interior, and control of the converted unit is provided through a 3-speed switch that starts working when the ignition is activated.
Causes of pollution
Dust is the main cause of component contamination. Cabin filters deteriorate especially quickly in spring and summer, when there is a large amount of dust on the road.
It is recommended to replace it twice a year (in early spring and late summer). Carbon filters are more durable than ordinary ones, so there is a chance that they will last more than one warm season.
Why change the filter?
If you do not replace a worn-out filter, all the street dust will begin to penetrate into the car interior, and this will make breathing difficult, leading to unpleasant odors and fogging of the windows. In addition, the stove will blow much weaker, which means heating the interior in the cold season will take much longer.
Of course, a filter that has served its service life will not lead to any serious damage, but it will cause quite a bit of inconvenience during the trip. It is better to monitor the condition of this part and replace it regularly.
To protect yourself and your car from substandard parts, you should buy spare parts from trusted suppliers and check their external condition. The part must be clean, intact, and not wrinkled. The presence of a receipt and warranty card also indicates good quality.
The cost of an ordinary filter is from 150 rubles, a carbon filter from 300 rubles.
- Open the hood and disconnect the rubber seals from the clamps.
- Using a screwdriver, unscrew the screws and pull out the plugs.
- Disconnect the frill.
- Remove the plastic mesh.
- We take out the old filter.
- We clean the seat and install a new filter.
- We assemble all the parts in reverse order.
Article number and cost of the original air filter VAZ 2112 and its analogues
The original air filter for the VAZ 2112 with an 8- and 16-valve engine has article number 2112-1109080. Its cost ranges from 240 to 350 rubles.
For the VAZ 2112 car, analogues of the original air filter are available for sale. Some of them are of good quality at a very attractive price.
The table below shows brands that you should pay attention to when choosing a new air filter element
Table - Alternatives to the original air filter 2112-1109080
| Brands of analogues of the original air filter | Article number | Estimated cost, ruble |
| Champion | CAF100505P | 340-440 |
| JC Premium | B2W004PR | 160-220 |
| Japan Cars | B2W004PR | 290-360 |
| Bosch | 1457429061 | 370-410 |
| Brother Star | XDK113 | 350-440 |
| Starline | SFVF2246 | 120-190 |
| Filtron | AP006 | 190-250 |
What to do with a dirty filter
Like any other part, the VAZ 2114 cabin filter is not durable. Its wear and tear is comparable to the mileage of the car. Every six, seven thousand kilometers it needs to be changed or cleaned.
Dirty (old) cabin filter on a VAZ 2114
The picture of a dirty filter is always sad. Some car owners, for reasons of economy, wash, ventilate, dry it and put it back into operation. However, you need to be super skilled to carry out such work without errors. Not only is the material “tired” of use, but its structure is quite fragile. So, washing will most likely lead to new holes appearing on an old, semi-dirty device.
The best thing for the VAZ 2114 is replacing the cabin filter. But how to install a cabin filter on a VAZ 2114 correctly?
Compression check
After checking the compression, you can breathe a sigh of relief or worry, since the cost of the repair depends on the result.
Impaired compression often causes the presence of oil in the VF, and also causes a number of other problems.
Compression check
To work you will need:
- Compressometer;
- A rag in oil, which you will use to determine the compression stroke;
- Adapter for spark plug holes. It is used when checking the combustion chamber for leaks;
- Compressor.
Now let's start checking.
- Warm up the engine to operating temperature, then turn off the fuel supply.
- In the case of a carburetor, you need to remove the hose, clamp or squeeze it with something, or lower it into a container.
- If you have an injector, remove the fuel pump fuse, start the engine and let it run. As soon as the fuel in the fuel rail runs out, it will stall on its own.
- Disconnect the ignition system by removing the center wire from the distributor (on the carburetor). The crankshaft position sensor at the injector must be disconnected.
- Remove all debris from the spark plug wells so that it does not end up inside the cylinders. Unscrew the spark plugs.
- Insert the compression gauge fitting while an assistant starts the engine. The starter should rotate the engine until the pressure gauge needle stops in one position.
- By analogy, measurements are carried out on each cylinder, the results are recorded on paper.
- To calculate ideal compression, use the formula - 1.2 * Compression ratio.
See your owner's manual for the compression ratio of your engine. Please also note that measurements may have some error.
What you need to know about verification
- If the indicator is 12 atmospheres, this indicates that your engine is almost in perfect condition.
- When checking the compression on a cold engine, the compression readings will be significantly lower. Perform the test only on the engine at operating temperature.
- If the battery is partially discharged, the test data will also not be accurate.
- The increase in compression occurs due to the combustion of oil in the cylinders.
What the results say
We take the paper where you wrote down the data of the check, carried out according to all the rules, and study what is wrong with the motor.
- Indicators in the range of 0-4 atm indicate a high probability of burnout of the piston, head gasket or valve.
- Compression of 4-6 atmospheres indicates that the piston rings or the partition between them have broken.
- If you get about 8-10 atm in each cylinder, the cylinder-piston group is worn out. Major repairs will soon have to be carried out.
- 12-12.5 atm - these are the indicators that occur in a new, run-in power unit.
- If the car has serious mileage, and the check data shows numbers equal to or exceeding the norm, oil has probably entered the cylinders due to wear of the cylinder-piston group or valve liners.
Obviously, the presence of oil in the filter does not bode well. But the problem can still be prevented if measures are taken in time.
Loading …
How to remove the air purification filter on an injection VAZ-2110
Before replacing, turn off the engine, put the car on the handbrake and, to be safe, engage first or reverse gear, disconnect the ground wire from the battery.
Behind the filter on the pipe, disconnect the connector with the cable from the air flow sensor by squeezing the plastic latch from below with a finger or a screwdriver.
Unscrew the 4 screws securing the filter housing cover.
Loosen the clamp of the air outlet pipe on the cover mount. The latter is carefully lifted, removing it from the clamp. The cap is turned over and then placed on the battery. During this operation, you must try not to damage the corrugation of the pipe.
Remove the filter element.
Illusory repair possibilities
It should be said right away that repairing throttle position sensors is extremely rare. Firstly, the part itself, even the most expensive one, costs only a few dollars, and it makes sense to spend the money. Secondly, in most cases it is simply impossible to make repairs, for example, to restore a worn-out base layer. However, in some models you can slightly shift the resistive tracks relative to the slider and thereby extend the life of the device.
So, there is a special screw on the sensors. With its help, the position of the tracks is fixed. If they are already worn out, then you should loosen this same screw, this will change the location of the slider a little, and you can be a little patient with replacing the device. But don't count on long-term respite. Naturally, we remember that the contactless sensor cannot be repaired. This completes the adjustment, repair and replacement of the throttle position sensor, now you can operate the car for several more years and not even think about such issues.
To check the supply voltage, disconnect the wire block from the sensor. Turn on the ignition and use a tester to measure the voltage between terminals “A” and “B” of the wire block. The supply voltage should be about 5V. To check the sensor, we connect the block of wires to it and, with the ignition on, measure the voltage (the wires of the block can be pierced with thin needles connected to the terminals of a voltmeter) between the sensor terminals “B” (“ground”) and “C” (slider) - it should not be more than 0.7V. Turning the plastic sector of the drive by hand, fully open the throttle valve and measure the voltage again - it should be more than 4V. Turning off the ignition, disconnect the wire block and connect an ohmmeter between terminals “C” and “A” (or “B”) of the sensor. Slowly turning the drive sector, we monitor the readings of the tester arrow. There should be no jumps in the needle throughout the entire working range. To replace the sensor, remove the throttle body from the receiver studs without disconnecting the coolant inlet and outlet hoses from it (see Removing the throttle body).
Using a Phillips screwdriver, unscrew the two screws securing the sensor to the throttle body...
...and remove the sensor.
The sensor is marked 2112-1148200
Remove the sealing foam ring installed under the sensor.
Install the sensor on the throttle body in reverse order. In this case, the damper must be in the closed position. The tightening torque for the sensor mounting screws is 2 N•m.
The VAZ 2107 throttle sensor, together with a mass air flow sensor and oxygen concentration control, acts as an element that controls the supply of fuel to the combustion chamber depending on the position of the throttle valve. As with any repair to replace electronic fuel injection sensors, they must be checked for functionality. To check, you will need a regular multimeter with the function of measuring resistance in the power circuit and a set of standard tools.
To check the throttle sensor:
- Disconnect the package with wires from the sensor.
- The connector body will be marked. Connect the ohmmeter leads to terminals “B” and “C”. We open the throttle valve; for a working sensor, the resistance will increase from 2.7 to 8.2 kOhm.
- Next, we switch the multimeter to voltmeter mode and connect its negative terminal to engine ground, turn on the ignition in the circuit, and the positive probe will turn on. For a working sensor, the voltage should be approximately equal to 5V, if absent or significantly different from the norm, there is a malfunction in the power circuit or in the computer. After measuring the voltage, turn off the ignition.
After confirming that the throttle sensor is not working and deciding to replace it, you must:
- To remove the sensor, use a Phillips screwdriver to unscrew the two screws securing it to the throttle body and remove it.
- There will be a foam gasket between the sensor and the housing.
At this point, the repair work to check and remove the VAZ 2107 throttle sensor is completed. The installation must be carried out with the damper closed, aligning the protrusion of the damper axis with the groove on the sensor body.
Sources
- https://carnovato.ru/proverka-regulirovka-datchika-polozhenija-drosselnoj-zaslonki/
- https://www.autofizik.ru/VAZ/VAZ-210721047/features-of-repair-of-a-VAZ-2107-20-with-engine-VAZ-2104/checking-and-replacing-position-sensor-d
- https://remont-vaz2106.ru/datchik-drosselnoj-zaslonki-vaz-2107
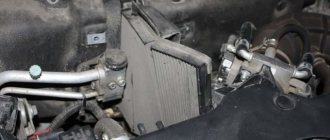
Diagram and order of air movement in the VAZ 2114 injection engine
In an injection car engine, the air movement pattern is somewhat different from that of a carburetor internal combustion engine. Since the injection is controlled electronically, the system has built-in sensors connected to the on-board computer.
- The air driven through the cooling system fan enters a panel-type air filter, unlike the round, large-sized one that was on carburetor engines; this filter is small-sized, but effective in terms of cleaning and creating normal air flow. The fact is that injection engines are very responsive to the quality of the air entering the intake pipe.
- At the outlet of the air filter, between the filter and the corrugated hose of the intake pipe, there is a mass air flow sensor. The mass air flow sensor is designed to measure the amount of air that the engine sucks in, in kg/hour. If it overestimates the readings at low throttle, then the engine operates unstably at idle, stalls after a sharp application of gas, and even problems with starting are possible. If it underestimates the readings at high speeds, then traction drops and fuel consumption increases.
- After the sensor, the air enters the corrugated hose of the intake pipe and is supplied to the receiver. There are several more sensors in front of the receiver, such as the idle speed control and the throttle position sensor. The receiver itself is a mandatory accessory of an injection engine and is designed to accumulate air and compensate for fluctuations in the air mass. There are different receiver designs, including sports ones. It is believed that with the installation of such a design it is possible to achieve a significant increase in engine power. Air is taken from the receiver through a hose to the fuel pressure regulator located on the fuel rail.
The main air mass from the receiver enters the intake pipe of the engine intake manifold.
Replacement frequency
The frequency of replacing the filter element depends on many external factors. During urban use, replacement of consumables is rarely required before 30 thousand km. Using the car on country roads reduces the filter life by several times. It may need to be replaced when the odometer shows 10-15 thousand km.
Urgent unscheduled replacement of the filter is necessary in case of permanent mechanical damage. When a hole appears, dust and abrasive particles freely enter the working chamber. To prevent excessive wear of the power plant, it is recommended to unscheduledly install a new consumable as soon as possible.
An indirect sign of the need for an unscheduled filter replacement is a deterioration in the dynamic performance of the vehicle. With a suboptimal fuel-air mixture composition, the engine is unable to produce all its power. To fix the problem, you need to replace the air filter.
Another indirect sign of the need to replace the air filter is an increase in gasoline consumption. In this case, during engine operation, floating crankshaft speeds and other signs of internal combustion engine instability may be observed. To solve the problem, it is enough to restore the throughput of the filter by replacing it with a new one.
Severe deformations of the filter element can also cause unscheduled replacement. The presence of significant dents is not as significant as compared to ruptures, but if possible, it is advisable to install a new consumable.
It is necessary to replace the air filter outside the normal intervals when purchasing a used vehicle. The strict observance of maintenance intervals by the previous owner is always in doubt, so only by updating all consumables can the new driver be confident in the stability of the power plant.
Purpose and device
Stable and long-term operation of the engine is ensured by lubrication of its rubbing parts: such as main and connecting rod bearings of the crankshaft, timing parts, piston rings and others. This task is performed by the engine lubrication system, which, using a pump, supplies lubricant to all its parts:
- During engine operation, even lubricated parts in contact with each other (the oil film does not cope) gradually wear out
- Therefore, microscopic particles of chips ranging in size from a few to tens of micrometers begin to get into the oil.
- And as a result, over time, oil gradually turns from a good lubricant into an abrasive, leading to increased wear of parts.
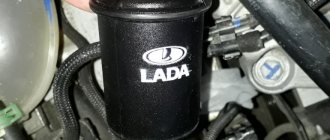
- To solve the problem, an oil filter for the VAZ 2115 is installed in the engine lubrication system, which filters contaminant particles from the oil
- The design of modern elements allows you to retain up to 95% of particles with sizes ranging from 25-45 micrometers
- Additionally, it traps carbon particles and many other contaminants.
- Another useful function is to ensure oil retention inside the line, as well as in the engine channels after stopping it
- This function makes starting the engine safer; in the first moments, the parts no longer spin dry, they are supplied with lubricant from the filter and from the channels
A little history
Oil filters began to be mass-produced and installed on cars only in the 20s of the last century, when it was noticed that the introduction of such a component into the lubrication system sharply increases the service life of the oil (immediately 10-15 times) and the engine (almost 3 times). So:
- In engines without the use of these elements, the oil was changed every 700-800 kilometers.
- Compared to modern ten to twenty thousand kilometers, this is minuscule!
- However, right up until the mid-forties, incomplete flow filters were used; only part of the oil passed through them, so the cleaning, of course, was not entirely of high quality
- And with the advent of full-line filters that purify all oil passing through the lubrication system, it has become possible to increase the service life of the oil to today’s values
Device
Sectional view of oil filter
Now we will tell you about the design of the most common modern mechanical oil filters, which are installed on most cars and other vehicles today. Oil filters for VAZ 21154 consist of the following components:
- Cylindrical body
- The bottom cover, in which there are inlet and outlet holes (if it is non-separable, as in our example, its cover is connected to the body using rolling)
- A filter element (the so-called “curtain”) made of paper, or cardboard, or felt, possibly other porous materials using special impregnation
- Bypass valve (to prevent the filter from being torn apart by lubricant pressure)
- Shut-off valve (prevents lubricant from draining from the filter after stopping the engine)
- Anti-drain valve
- Pressure spring, see photo above
Article number and cost of the original Volkswagen Polo air filter and its analogues
The original air filter for the VAZ 2115 has article number 2112-1109080. Its price ranges from 240 to 300 rubles. Since the cost of the consumable is very low, most car owners, instead of cleaning the filter element with compressed air, opt for replacement with a new one.
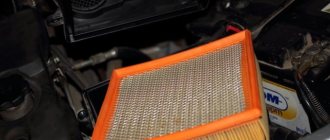
Old and new VAZ 2115 filters
In addition to original air filters, the VAZ 2115 has consumables from third-party brands. Many of them are of good quality at a very attractive price. The best filter elements that perform well on the VAZ 2115 are selected in the table below.
Table - Alternatives to branded air filter 2112-1109080
| Brands of analogues of the original air filter | Article number | Estimated cost, ruble |
| Champion | CAF100505P | 350-450 |
| Japan Cars | B2W004PR | 19-160 |
| Bosch | 1457429061 | 370-410 |
| Starline | SFVF2246 | 150-220 |
| Filtron | AP006 | 200-270 |
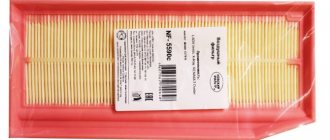
Functionality and appearance
Cabin filter VAZ 2114
The structure of the VAZ 2114 cabin filter is very simple. This is a plastic frame with a special material inside.
Interesting fact: to enhance the cleaning effect, many experienced car owners install an additional, homemade fabric barrier into an existing one.
- Purifies the air entering the car interior from the street.
- It traps debris, dust, and harmful fumes from car exhausts.
- Provides clean and fresh air into the cabin.
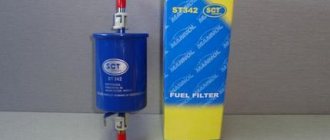
Replacing the air filter:
As the name suggests, the VAZ 2107 air filter (injector) is designed to clean the air supplied to the combustion chamber from dust. A clogged filter creates additional resistance to passing air. As a result, the composition of the air-fuel mixture changes, fuel consumption increases and engine power decreases. If the filter is damaged, it will allow dust particles and grains of sand to pass through, which, when entering the engine, will begin to act as an abrasive, increasing wear on the rings and cylinder surface. Therefore, the filter must have the proper density, which will not allow dust to enter the engine, but will not create unnecessary resistance to air flow.
According to the instructions, the VAZ 2107 air filter needs to be changed after 30 thousand kilometers. But its service life may be shorter due to operation in very dusty conditions or due to poor filter quality. It is advisable to periodically check its condition and change it if necessary. The replacement procedure is very simple and does not require special knowledge and experience. You only need a minimum of tools and 20 minutes of time.
About the “nulevik” resource
But as for frameless “zeros”, they must be cleaned. This is done once every 10 thousand kilometers. But you need to know how to do it correctly. You cannot simply remove and wash the part under water. It won't have any effect.
First, the element is treated with a special impregnation (dry, without soaking). Next, you need to wait a while (usually 10 minutes) and rinse the element in water. It is not necessary to re-impregnate it. Once dry, the element is ready for reuse.
But please note that the FNS should be installed only after it has completely dried, otherwise water will get into the cylinders. To speed up the process, you can use a hairdryer at home.
If you do not change the air filter on a VAZ-2114 for a long time, it may develop the following problems:
- Reduced engine power.
- Increased fuel consumption.
- Acceleration failures.
- Unstable engine operation at idle.
- Long engine warm-up.
When the filter is clogged, the machine stops “pulling” normally. Of course, the car owner will not like this. Therefore, you need to be guided by mileage. After 10 thousand, the car needs to change both the oil and the air filter.
Replacing the air filter on a VAZ 2101-VAZ 2107
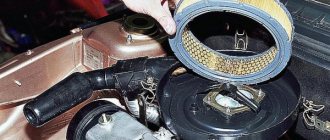
Note! To replace the air filter, you only need one “10” wrench and it is advisable to stock up on a clean rag in order to wipe the dirt off the inside of the air filter housing!
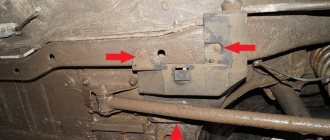
Where is the air filter located?
Immediately after opening the hood of the car, of course, you will not be able to find the air filter, but why? Yes, because it is located inside the case, which you see in the photo below. To clearly see the filter, you will first have to remove the cover of this housing and only then remove it. (For information about the procedure for removing the cover and replacing the filter, read in the same article just below)
When should you change the air filter?
- Firstly, as a rule, there is no such frequency for replacing the air filter! And all because it must be replaced if it is heavily soiled or if it is severely deformed.
- Your memory will help you understand when you need to check the filter status, but why do you ask? Yes, because if the filter is heavily contaminated, the car’s consumption increases by “0.5-1” liters, and since the classics do not have an on-board computer that measures consumption, in this case, use only your memory.
Note! Well, you still look into the engine from time to time to check the condition of the filter and replace it if necessary!
Exploitation
There are no difficulties in the operating instructions, especially if we talk about oil filters for VAZ 211540, which are non-separable. However, there are some features that you need to consider:
- First, use only the filter recommended by the manufacturer.
- You must install only those filters on your car that were recommended by its manufacturer.
- The whole point is that it is designed for a certain pressure in the system, has its own specific throughput, plus the fineness of the fraction filtration and other parameters
- If you use a filter that is the wrong thread and size, this can easily lead to unexpected motor failure.
- Secondly, strictly observe the frequency of filter replacement
- Any car manufacturer indicates how often it needs to be changed; as a rule, such a replacement is performed along with an oil change, after 10-20 thousand kilometers.
- However, if the car is operated in difficult conditions, or with the use of poor quality fuel, with frequent starts and stops of the engine, it should be changed much more often - its price is not high, but it will extend the life of the engine quite significantly
- Third, proper filter replacement is very important
- The oil filter is easily screwed to the engine onto a threaded fitting, so there are usually no difficulties when installing and removing it
- It is better to unscrew it and then tighten it with a special tool
- When tightening, you need to apply some force, which cannot be done by hand - use a special wrench to press it well, but it is also not recommended to pinch it, you can tear off the fitting or break the thread
- Before installing a new filter, you need to wipe its O-ring with oil to improve the tightness and tightness of the fit.
- In addition, fill the housing through the central hole with clean motor oil to a third of the volume so that the engine does not rotate dry when starting
- In addition, the fitting should be cleaned
How to remove an air lock with your own hands:
- Often, after changing the oil, air pockets occur in the system, and therefore the oil pressure cannot return to normal.
- The plug can be easily removed: you just need to slightly loosen the pressure on the filter and turn the engine crankshaft with the starter until lubricant appears from under it.
- After this, you need to tighten the filter and the oil pressure will return to normal.
- It is important to note that in engines that use filters that do not have bypass valves (these valves are located in the engine), then it is necessary to inspect it immediately after replacement
- And if its body is swollen or has deformations that tell us about increased lubricant pressure, we will need to check the condition of the pressure-reducing valves built into the motor housing
If you change filters in a timely manner, and use high-quality gasoline and good motor oil, the oil filter for the VAZ 2115 will provide an increased service life to your engine.
Article number and cost of the original VAZ 2107 air filter
The original air filter for the carburetor VAZ 2107 has article number 2101-1109100. Its price is 80-200 rubles.
A completely different air filter is installed on the injector. Consumables are not interchangeable. The article number of the filter element for the injection VAZ 2107 is 2112-1109080. The cost of such a consumable ranges from 200 to 340 rubles.
Third-party manufacturers also produce filter elements for the VAZ 2107. Among their products, there are many decent options at an attractive price. The tables below present the best analogues, which are recommended to be taken instead of native filters.
Table - Analogues of the original air filter 210101109100
| Alpha-filter | AF0101 | 140-220 |
| Starline | SFVF2189 | 120-150 |
| Bosch | 1457432108 | 440-500 |
| WIX | WA6395 | 140-160 |
| Mahle Original | LX158 | 380-420 |
| Mfilter | A101 | 60-90 |
| Starline | SFVF2189 | 150-180 |
Table - Alternatives to branded air filter 2112-1109080
| Profit | 15121006 | 120-150 |
| Febi | 1510 | 310-350 |
| Starline | SFVF2246 | 140-200 |
| Q-top | QA2004 | 120-145 |
| Japan Cars | B2W004PR | 100-170 |
| VAG | 021129620D | 490-620 |
| Filtron | AP006 | 220-250 |
Replacement frequency
Replacing the air filter on a VAZ 2107 is required every 20-30 thousand km. Installation of a new consumable may be required earlier if:
- end-to-end mechanical damage to the filter element was discovered;
- there are significant deformations;
- the power of the power plant has dropped significantly;
- the car covered a significant section of the road on a dusty dirt road;
- there is no accurate information about the previous mileage at which the filter was replaced;
- There is an increase in fuel consumption, while maintaining the same external factors.
The process of replacing the air filter on a VAZ 2107 with a carburetor
Replacing the air filter on a VAZ 2107 with a carburetor is carried out according to the step-by-step instructions presented below.
Unscrew the three fastenings of the air filter cover.
Remove the filter element.
Cover the pipe that goes into the carburetor with a rag.
Clean the filter housing from dirt.
Install a new filter element. Reinstall the air filter cover
It is important to follow the labels. At temperatures above 5°C, the red mark should be located near the warm air supply pipe
Otherwise, it should point to the air intake pipe, which is marked with the letter “B”. Correct installation of the cover changes the location of the fixed damper with a seal and has a good effect on the operation of the power unit.
Carry out a test start of the engine.
Self-replacement of the air filter on a VAZ 2107
Replacing the air filter on the injection VAZ 2107 is carried out according to the algorithm presented below.
Disconnect the mass air flow sensor. This will protect the wires from breaking.
- Unscrew the clamp that holds the air duct corrugation.
- Unscrew the screws securing the filter cover.
- Remove the filter element cover.
- Remove the filter from the housing.
- Clean the housing from dust and dirt.
Install a new filter element.
Screw the air filter cover into place
It is important to avoid distortions. The appearance of unfiltered air leaks will significantly reduce the life of the power unit. Reassemble everything in reverse order.
Check the operation of the power plant.
Thermostat repair
And if it comes to complete disassembly, then you should take into account that the antifreeze will begin to pour out. To prevent leakage, we close the pipe in every possible way and disassemble it. After repairing the thermostat, it is still strongly recommended to replace it as soon as possible.
After repairing the thermostat, it is still strongly recommended to replace it as soon as possible.
- Inlet pipe (from the radiator).
- Rubber insert.
- Solid heat-sensitive filler.
- Bypass valve spring.
- Inlet pipe (from the engine).
- Bypass valve.
- Outlet pipe (to the pump).
- Main valve spring.
- Main valve.
- Branch pipe (from the expansion tank).
- Piston.
Recently the thermostat on my VAZ 2114 swallow failed. There were no chisel thermostats in the store, but the seller said: “This one will do!” and put a thermostat from a VAZ 2111 on the table.
- The thermostat itself.
- Tee with an outer diameter of “19”.
- A hose 40-60cm long from the Moskvich 2141 stove.
- A couple of clamps.
- Take the "8" key and unscrew the screws securing the air filter.
- Take a screwdriver and loosen the clamps of the crankcase cooling system and the throttle pipe air duct.
- Unscrew the screw of the throttle valve cable bracket.
- Disconnect the electrical connector.
- We remove the rubber cushion of the filter housing from the hole in the bracket and remove the air filter.
- Using a 13mm wrench, unscrew the bolt securing it to the clutch housing and the bolt securing it to the block.
- We only loosen the lower fastening bolt with a 17 key, since the hole in the bracket is made in the form of a fork.
- move the module to the side.
- Using the “13” key, unscrew the plug on the block.
- Unscrew the radiator drain plug by hand.
- pour the “Antifreeze” into the prepared container.
- loosen the four clamps of the thermostat pipes.
- remove the thermostat.
- disconnect the connector.
- Use a 19mm key to unscrew the temperature sensor.
- Using a 13mm wrench, unscrew the nut securing the ground wire of the controller.
- unscrew two more nuts.
- remove the pipe block.
Such a replacement is quite possible on a carburetor engine. In this case, the hole for the temperature sensor in the new thermostat must be securely plugged.
How to replace the air filter on a VAZ 2101-VAZ 2107?
Removal: 1) First, unscrew all the nuts that secure the air filter cover.
2) Then remove the cover from the air filter.
3) Next, remove the air filter from the housing.
4) And then cover the carburetor neck with a clean rag to prevent dirt from getting into it.
5) Next, wipe the inner air filter housing and covers with a rag.
Installation: 1) Install the new air filter in the reverse order of removal.
Important! 1) Make sure that no dirt gets into the carburetor neck when replacing the filter!
2) On some cars there are marks on the air filter cover, according to which the cover must be aligned:
- When the outside temperature is +5 and above, the red mark (indicated by the letter “A”) should be located near the warm air supply pipe, which is indicated by the letter “G”.
- When the outside temperature is -5 and below, the red mark should be located near the air intake pipe, which is indicated by the letter “B”.
Note! 1
If there are no such marks on the filter cover, then pay attention to the fixed damper with a seal, it replaces the red mark! (For information about where the damper with the seal is located, see the very bottom of the article, in the “For Beginners!” section). 2
If there is no sealing flap on the air filter cover, then install the air filter cover as you wish!
2. If there is no sealing flap on the air filter cover, then install the air filter cover as you wish!
For newbies! Question: Where is the air filter cover seal located? Answer:
Additional video: In order for you to better understand how to properly replace the air filter on a classic car, watch the added video below, after watching it you will understand everything clearly and clearly.
Why is the cabin filter adapter useful?
If the cabin filter does not cope with its task on its own, and the air in the cabin is still dirty, you should resort to using a special adapter.
Its capabilities and functions:
- Allows you to install a more modern filter in your car.
- Extends its service life.
- Makes the air in the cabin clean and fresh.
- Eliminates dangerous deposits of dirt inside the cabin.
You can buy such an adapter online or make it yourself using stainless steel drawings. If you are not a jack of all trades, but you like the drawings, look for craftsmen who have already mastered this craft and sell adapters online.
When replacing the filter, you should not rely on the car’s operating instructions and wait until the due date. Check its cleanliness as often as possible.
In any case, it is worth seriously fighting for clean air in the cabin. After all, we spend a good half of our lives in the car.
Replacing the Lada Granta air filter
To replace it yourself you will need: a set of automotive tools, a new cleaning element, a flat-tip screwdriver.
- We install the Lada Granta on a flat surface; there is no need to use an inspection channel or a lift;
- open the hood, on the right side of the compartment, closer to the optics and battery there is an air filter, a plastic housing in which it is installed;
- remove the terminal from the contact of the mass air flow sensor - mass air flow sensor;
- Use a screwdriver to unscrew the four housing mounting bolts and remove the old filter;
- install a new cleaning element, tighten the bolts tightly. We start the engine and check that it is working properly.
The replacement is complete. Upon completion, check the level of engine oil, antifreeze in the expansion tank, windshield washer, and brake fluid in the master cylinder. Such minor, daily checks will help avoid serious breakdowns in the future.
By following the instructions above, you can easily change the air filter on your Lada Granta. Subsequently, follow the recommendations of the specialists regarding replacing the cleaning element at intervals of 10,000 km. mileage