Advice from experienced motorists and repairmen on the topic of the windshield wiper relay for the VAZ 2131 Niva - click. Articles about the design of car systems and do-it-yourself repairs. Reference materials. How to repair a car yourself at home. We will help you with repairs and repair the car yourself. We know how to restore a car with minimal investment. I have attached video instructions.
Category: Do-it-yourself repairs
Laughter on the topic: If you mix beer with champagne at a party, it will be bad, but if you mix it with vodka, it will be sex.
Published by Admin: at the request of Timofey
Reviews from the car owner: Moscow Metro. A mother and her son are sitting, a beautiful girl in a white fur coat is standing next to them, a punk is standing next to the girl, chewing gum, headphones in his ears. The child is trying as hard as he can to dirty the girl’s fur coat with his boots, the girl is trying to move away, but there is a terrible crush in the carriage , there is no way to move away. The girl in the fur coat politely asks the mother of the wild child to do something, saying that the fur coat is getting dirty and so on. The mother, having heard complaints in her direction, begins to scream heart-rendingly: “You are crippling my child’s psyche!” On the face of the girl in the fur coat is righteous indignation and confusion. The mother is going crazy! A guy standing next to a girl in a punkish-looking fur coat takes off his headphones, takes the gum out of his mouth and slowly presses the gum right into the middle of the screaming mother’s forehead! There's a deathly silence, in which the guy's words are clearly heard: “I, too, was not raised until I was five years old!”
Many owners of VAZ Niva-21213 and 21214 cars have encountered a problem when the windshield wipers (windshield wipers) do not work as expected, that is, at a very slow speed. The windshield wiper system operates in two operating modes: continuous and intermittent.
However, on other cars, for example, Moskvich 2141 or VAZ 2108, or on models of modern production, there is a gear motor with three operating speeds: constant slow, intermittent and constant fast.
In our opinion, for VAZ Niva cars versions 21213 and 21214, such a system is a big drawback, since during heavy rain the wipers work with great difficulty.
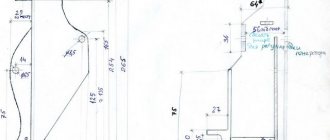
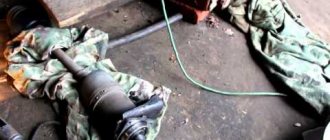
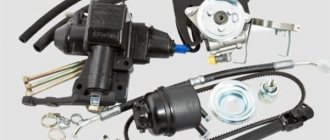
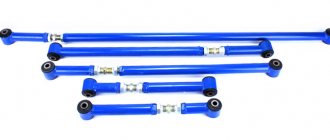
It was decided to modernize the windshield wiper drive by integrating into it a more powerful and faster gearbox from Moskvich 2141 (usually VAZ version 2108 is equipped with a similar system). After taking measurements in Niva, it turned out that placing the updated gear motor on the standard windshield wiper trapezoid would not be a labor-intensive task.
Installation of wipers on VAZ-21213
The electric windshield wiper motor on Niva VAZ 21213 and 21214 cars has two blades, permanent magnets and one speed. It is equipped with a thermobimetallic fuse to prevent possible overloads. Each of the operating modes of the purifier is activated using a switch under the steering wheel. The intermittent (intermittent) mode operates through a relay version PC 514 (attached with two nuts to the side panel located in the foreground on the left).
The relay is designed to provide from nine to seventeen activations of the electric motor per minute, while the temperature should be from negative 20 to positive fifty degrees, with a power system voltage of ten volts.
When the wipers are activated on a Niva 21214 and 21213, each brush is capable of producing a maximum of four double strokes in continuous mode. The degree of resistance of the electromagnetic winding on the relay is 66 +-2 Ohms, and the winding on the breaker is 23 +-1 Ohms.
Wiper blades for VAZ-21213 and -21214
When a car owner wants to install wipers on his Niva, he begins to have a large number of questions regarding windshield wiper blades. How often do brushes need to be replaced? Brush, which type is best? And similar ones.
How often do you need to change the blades installed on your windshield wipers? - every owner of a Niva-21213 or Niva-21214 car must decide this question for himself.
It is very important to remember that excellent visibility is the basis for safe travel by car. Therefore, if the current wipers refuse to properly perform their task, then they should be immediately replaced with new copies.
For example, in the city of St. Petersburg, windshield wipers on cars become unusable during the winter months. It is recommended to equip the Niva with new windshield wiper blades twice a year: at the end of the last winter month and in the first summer month.
How to install adjustable wiper relays in a field
The windshield wiper relay on the VAZ 2121 and Niva 2131 is removed to replace it if it fails.
The relay cannot be repaired and must be replaced with a new one. It is located in the car interior, under the decorative trim of the front left side panel. To carry out repair work, prepare a standard set of tools, and then perform the following sequence of actions: First of all, you need to remove the decorative sidewall trim. To do this, use a Phillips screwdriver to unscrew the screws securing it to the body and carefully remove it from its place.
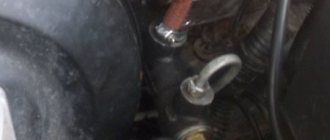
Now, using an eight-inch socket with an extension, unscrew the two nuts securing the relay to the body studs and, having disconnected the block with the supply wires from it, carefully remove it.
At this point, the repair work on removing and replacing the windshield wiper relay on the VAZ 2121 and Niva 2131 has been completed. Replace it, then install in the reverse order.
Incorrect operation of the intermittent wiper mode on a VAZ 21213 car
Quite often situations occur when the wipers do not work correctly on VAZ 21213 and VAZ 21214 cars. The most common problem is the negative functioning of the intermittent wiper mode. The source of its occurrence is burnt contacts of the gearmotor.
If you find yourself in a similar situation, here is the solution:
Windshield wiper relay NIVA with pause adjustment 722.3777-02 Energomash
NIVA 21213; 21214; 2131
| Specifications: | |
| Rated voltage, V | 12 |
| Switching current, A | 6 |
| Weight, g | 70 |
| Overall dimensions, mm | 60x44x32 |
INSTALLATION AND OPERATION INSTRUCTIONS
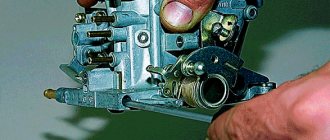
1 Installing the windshield wiper switch
ATTENTION. Work on installing the breaker should be carried out with the battery disconnected.
1.1 Disconnect the wiring harness from the steering column wiper switch by opening the 6-pin connector, which is located behind the instrument panel or inside the steering column housing. 1.2 Connect the terminal blocks of the windshield wiper breaker into the resulting gap in the harness. 1.3 Using a connector, connect the free wire of the breaker to the wire connecting the steering column switch to the washer motor. This is one of the wires of the 2-pin block of the steering column switch, the potential of which, when the washer is turned on, changes from +12 V to 0 V or vice versa (depending on the specific brand of car). 1.4 Using the breaker mounting hole, install it in a convenient place on the car. The windshield wiper switch is ready to operate.
Main and additional fuse blocks
These two blocks are connected to each other. There are 10 fuses in the upper block, and 6 in the lower one. Markings from left to right:
Heater fan, rear window defroster, rear wiper and washer system, windshield washer pump
Steering column switch, windshield wipers, hazard warning lights, breaker relay (in turn signal mode), reverse light, instrument cluster (coolant temperature gauge, fuel level gauge, tachometer, warning lights: turn indicators, differential lock, parking brake, emergency condition of the working brake system, insufficient oil pressure, fuel reserve, battery charge)
Left headlight (high beam), high beam indicator lamp
Right headlight (high beam)
Left headlight (low beam)
Right headlight (low beam)
Side light lamps in the left front and left rear lights, license plate lights, side light indicator lamp
Side light lamps in the right front and right rear lamps, backlight lamps for the instrument cluster, cigarette lighter, switches, heating and ventilation control unit
Hazard switch, breaker relay (in hazard mode), heated tailgate glass relay contacts
Sound signal, interior lamps, brake lamps in the rear lights
Fog light relay contacts in rear lights
| F11 (8A) | Turn signal lamps and relay-breaker for turn signals and hazard warning lights (in hazard warning mode) |
| F12 (8A) | Daytime running light relay, daytime running light bulbs |
| F13 (8A) | Rear Fog Lamps and Relays |
| F14 (16A) | Cigarette lighter |
| F15 (16A) | Spare |
| F16 (8A) | Spare |
Additional fuse circuits in the Urban package:
Fuse number and rating
Electric windows for front doors Electric side mirrors
Air conditioning fan, air conditioning compressor
Side mirror heaters
Central interior lamp
Air conditioning fan, air conditioning compressor
Replacement method
To carry out operations you will need:
- Key head set to “10” (preferably with a ratchet mechanism); Plastic puller or similar device; Pliers; Phillips screwdriver.
Before replacing the Niva turn signal relay begins, disconnect the negative terminal from the battery. Access to the element being replaced is provided by removing the dashboard.
- 1. Take a screwdriver and release the instrument from the two self-tapping screws.
2. Carefully push the shield towards you, overcoming the resistance of a pair of latches located in the upper part of the part.
3. Unscrew the instrument panel using the “10” key.
4. Slowly dismantle the instrument cluster, while simultaneously removing the union nut of the flexible speedometer drive shaft using pliers.
5. Disconnect the wires by pulling out the two terminals.
After establishing the location where the Niva turn signal relay is located, unscrew the nut to “10”, simultaneously disconnecting the 3 ground wires from the stud. Pull the device towards you, and then, swinging it slightly, pull out the block. Replace the breaker with a new one, as shown in the photo .
The assembly process is carried out in reverse order. The performance criterion is considered to be the rhythmic flashing of signals after activation of the shift lever or hazard warning button. A slight deviation of the work rate from the conveyor state 2121 is considered acceptable.
Reg.: 11/18/2008 Messages: 11 From: Novokuznetsk Age: 53 Car: Niva 21213 (1.7) carburetor 2002
Reg.: 12/06/2004 Threads / Messages: 4030 / 23190 From: Moscow Age: 65 Car: 21214M, 2013
Alexey aka ALER.
Reg.: 11/18/2008 Messages: 11 From: Novokuznetsk Age: 53 Car: Niva 21213 (1.7) carburetor 2002
Reg.: 12/06/2004 Threads / Messages: 4030 / 23190 From: Moscow Age: 65 Car: 21214M, 2013
Alexey aka ALER.
Reg.: 11/18/2008 Messages: 11 From: Novokuznetsk Age: 53 Car: Niva 21213 (1.7) carburetor 2002
Reg.: 12/06/2004 Threads / Messages: 4030 / 23190 From: Moscow Age: 65 Car: 21214M, 2013
Sorry, I mixed up the dimensions and direction indicators. It was a hard night - I didn’t sleep at all. If the right ones don't light up, then there's something wrong with the steering column switch. No other place comes to mind.
Added after 12 minutes 38 seconds:
Or in the wiring from the steering column - for example, the steering column could break the wire.
Alexey aka ALER.
Reg.: 11/18/2008 Messages: 11 From: Novokuznetsk Age: 53 Car: Niva 21213 (1.7) carburetor 2002
Knowing the electrical wiring system on your car will save you the cost of visiting a car service center. The electrical circuit on Nivas is quite simple, like all cars. Replacing damaged elements is intuitive and does not require serious knowledge.
Mounting blocks for Lada 4×4 2022
Attention! The relay and fuse layout may vary depending on the equipment and date of manufacture of the vehicle. The current circuit diagrams of the mounting block are given in the operating manual for the date of vehicle release (download from the site for 3d or 5dv.).
Why is the fuse or light relay constantly on or any other? Before replacing it with a similar one, you must first find and eliminate the cause of its burnout. It could be a short circuit, incorrect current rating, etc. Use the wiring diagrams to troubleshoot. Questions on this topic can be asked on the forum.
The turn signal relay (part number 8450082700, 9-pin), as well as the windshield wiper relay, are located under the trim in the driver’s feet, to the left of the fuse mounting block.
NIVA CLUB
International Niva Club
Wipers and where their relay is located
Post by fraer » May 14, 2010, 11:41 am
Re: Wipers and where their relay is located
Post by ALK » May 14, 2010, 11:56 am
Who knows what's going on behind the fence of the zoo? ©
Re: Wipers and where their relay is located
Post by Nikadim » May 14, 2010, 10:02 pm
Re: Wipers and where their relay is located
Post by fraer » May 20, 2010, 10:31 am
Re: Wipers and where their relay is located
Post by _JJ » Jun 30, 2010, 12:06 pm
fraer In the motor, the contacts open and close to park the brushes in the lower position. Constant mode is supposed to work without a relay, there should just be wiring to the motor, gray. But for the intermittent mode to work, you need a relay that is above the left leg.
I moved the driver's wipers 15 cm to the left, the passenger wipers by 5. + the engine is from the 8 and the relay is also clear. I'll post a report with photos a little later. And now this question worries me: I need to install larger wipers 40-45 cm. From what? Foreign cars have a different mount, maybe look with adapters? Maybe from 8 to 9 they have the same mount? Or maybe change them along with the leashes?
Re: Windshield wiper modifications
Post by nick2121 » 02 Sep 2010, 10:13
Re: Windshield wiper modifications
Post by wwm » 02 Sep 2010, 10:20
Re: Windshield wiper modifications
Post by Ghost_killer » 02 Sep 2010, 10:22
Re: Windshield wiper modifications
Posted by kayotte » Sep 02, 2010, 10:37 am
Nowadays a bunch of wipers are sold with different fasteners, I installed 450 mm for myself, the company doesn’t matter; they are one of the cheapest graphite ones in the supermarket, IMHO it’s better to change them once a season and enjoy the quality of work than to drive a BosheChampionevaleo for 5 years
But we also need an appropriate motor, I use a 2110, disassembled the 2108 relay, changed the resistor from terminal J to 1 kOhm (it could have been less) and set the variable resistor to 10 kOhm, got a pause from 1 second to 10, but left the strokes 4 (there was no suitable resistor) well, I protected the relay with a diode, otherwise there were cases of “sticking”, I don’t think it’s advisable for more than 15 seconds, but I also think the standard pause of 3 seconds is large, the budget for rework is 0, everything was found at home
Expedition vehicle, subframe, ShN clutch, Weber synchronous carb, 31 tires, SRPM, reinforcement. in general, any small tuning.
Chevrolet Niva 2011, 80 l. With. - electrical and electronics
Replacement method To carry out the operation you will need: Before replacing the Niva turn signal relay begins, disconnect the negative terminal from the battery. Access to the element being replaced is provided by removing the dashboard. The wire under the left threshold could also have frayed. K8 - Backup relay. F1 5 A - license plate lamps, instrument panel lamps, indicator light on the dashboard, engine compartment lamp, additional brake light lamp, left side marker lamps.
If any of the listed lamps do not work, check this fuse and the lamps themselves, their connectors and wiring. F2 7.5 A - low beam in the left headlight. F3 10 A - high beam in the left headlight, indicator lamp for turning on the high beam headlights on the dashboard. F4 10 A - backup fuse. F5 30 A - electric windows of the front doors and their relays. If, when operating the power window, the window goes down but does not go up, or vice versa, check the button on the door.
relays and fuses
When lowering and raising, the polarity and direction of rotation of the motor are different. It could also be a problem with the window lift mechanism. To get to it, you need to remove the door trim.
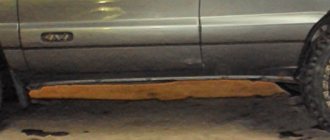
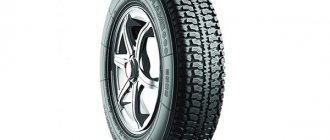
Check that the mechanism does not bite anywhere and that the gears are intact, without broken teeth. Considering that I drive tires a little in the summer and the tire wear is not great. Her pattern is a typical American all-season design.
Cleaning will be mediocre, but you can drive in winter. On the highway it’s also not a contender for leadership. I'd take the Yokohama AT.
These are very high quality tires at the most affordable price. Here it is - universal.
To replace a fuse relay turn signal and hazard Chevrolet - Niva
The rest are all in. Remove the two screws and remove the cover of the fuse and relay box. Remove the screws securing the block. Move the block down so as to gain access to the wire terminals. Disconnect the blocks with wires, having previously marked them.
I don’t know what this is connected with, but, as in the case of fuses, it is impossible to find the required relay in the manuals. It’s much easier to find without a manual, which is what I did. By the way, if anyone doesn’t know, then you need to look next to the fuses under the same cover near the driver’s left foot. Similar relay-breaker for direction indicators and hazard warning lights
Lada 4×4 3D › Logbook › Extras. Niva starter relay
Hello friends! I wrote about my problem with starting the car earlier, the essence is simple: you turn the key, and in response there are only clicks. I didn’t know what it was, the car had this problem since it was purchased in November 2015. Since then, there have been no hypotheses, no matter what has not changed (explosive wires, starter retractor, switch), in addition, all the places where the minus is attached to the body have been cleaned. Nothing helped. We thought and wondered, consulted for a long time - what to do? I asked a question here, they gave me different advice, and so my friend and I decided to install an additional relay on the starter. Maybe it will help! And let me tell you, it helped! To solve the problem, we bought: a 4-pin 30A relay, “mothers, fathers”, 1.5 wire (taken with a reserve), heat shrink. We prepared and assembled everything according to the diagram, all that remains is installation.
Full size did everything as advised
Full size when all the wires have been prepared, all that remains is to connect according to the diagram
Full size opened the main circuit, connected it to the relay, again according to the diagram
Full size of the relay itself secured together with the switch
The full size was made according to this scheme - everything works! It took about 15 minutes to prepare the wires, then we connect according to the diagram and try - everything works! Starts with half a turn! After installing additional relay no matter how much I tried to turn the ignition key, the car always responded as it should! Problem solved, now it's just history!
Bye everyone! ————- Update dated August 9, 2022. During 2 weeks of operation, there were 2 cases when this circuit failed. The day was hot, I drove for a long time (fields and forests, i.e. under good load), the engine compartment got hot like hell, and after I turned off the engine, it did not restart. The relay was cracking and the starter was not spinning. I had to hook it up according to the old scheme (actually connecting the old wires), the car started. Then, as soon as everything cooled under the hood, I connected it according to the new circuit, and everything started up. My mistake is that the relay overheated to the limit. It may be something else, but when everything cooled down under the hood, the new circuit worked flawlessly. ———— Update from 08.20.17. The relay finally cracked. Connecting according to the old scheme works, but, as before, it is bad. In the end, I just bought a new relay, installed it and forgot about the problem. Now everything works.