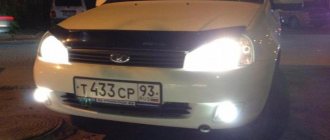
If on modern cars, even in the budget segment, fog lights are basic equipment, then for the VAZ-2114 they are an option. From the factory, fog lights are installed only on luxury equipment, and even then, not always. Installing foglights with your own hands will not cause any difficulties if you know some of the nuances and are able to distinguish wires by color. But first, let's select an installation kit.
We assemble a kit for installing fog lights on a VAZ-2114
Installation of fog lights on a VAZ-2114
Regardless of how the fog lights are attached to the car bumper , to install them you must have a certain set of components, without which installation will be impossible.
The difficulty is that fog lights have quite noticeable power for electrical wiring, so installing a relay and a special button is mandatory.
Be sure to connect via a relay, otherwise you can get a short circuit (short circuit)
If you do not install a relay, but simply connect the headlights via a button, high current loads will occur on the ignition switch and on the terminals , which can lead to burnt contacts, overheating and damage to the insulation, and this is fraught with a short circuit with all the ensuing consequences.
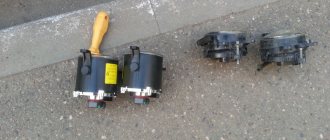
Full set of components
To install a pair of fog lights on a VAZ-2114, you will need to find a certain set of components, or buy such a ready-made set. Its price is from 500 to 700 rubles, depending on the manufacturer (quality), and it includes the following:
- A set of wires with terminals and blocks specifically for the VAZ-2114. There should be three of them - a connecting wire between the headlights, a wire from the switch to the relay and from the relay to the fuse box.
Mounting kit for installing fog lights
Fog light relay
Fog light switch
Ties for fixing wires
And, of course, the fog lights themselves. You can choose them at your discretion, but it is better not to overdo it with power so as not to overload the generator. It has a power reserve, however, it is not designed for high loads, so it is better to abandon xenon light immediately.
Video about choosing the right fog lights
The main causes of PTF malfunction
The most common reasons why the VAZ 2114 fog lights do not work are as follows:
- fuse is blown;
- burnt out light bulb(s);
- oxidation of contacts occurred;
- lost contact with the “mass”;
- the button is faulty;
- the relay has failed.
In addition, some other, rarer reasons are possible, which we will also consider below.
And so, the very first and most common reason is a blown fuse.
Each of the fog lights has its own fuse, namely F9 and F8 in the block, each of which is designed for a maximum current of 7.5 Amperes. In some cases, it happens that there are no fuses responsible for protecting the fog lights in the common block.
This happens when a car is purchased second-hand, and the PTFs were installed independently by its previous owner. In this case, you should inspect the entrance and the board on which the headlights themselves are located. Very often, during self-installation, the fuse is attached in this place.
When replacing, you should use a fuse exclusively for a current of 7.5 A. A fuse designed for a higher current simply will not be able to protect the headlights from a voltage surge, and one designed for a lower one will often burn out.
If both fog lights do not light up at once, then the problem is most likely not in the fuse, since the failure of two protective elements at once is quite rare.
The next reason why the fog lights on the VAZ 2114 do not light up may be the usual burnout of the light bulbs. In order to check this, just unscrew the old lamps and screw in new ones in their place.
Another, no less common reason (especially in the middle climate) is the oxidation of the contact connectors of the headlights themselves. Very often this causes blinking or intermittent operation of the light bulbs. In order to eliminate this nuisance, it is enough to remove oxides by cleaning the headlight contacts with fine-grain sandpaper or wiping well with WD-40, White Spirit or kerosene.
Also, the contact running from the battery negative to the housing (to ground) often oxidizes. If this happens, the joint should be thoroughly cleaned, as described above.
Another reason why the fog lights may not turn on is the failure of the button located on the front panel of the car, which is used to turn on the PTF. You can check its functionality in two ways: connect a new button (if you have one) and try to turn on the headlights, or ring the button with a multimeter. If the button turns out to be damaged, it should be replaced with a new one, since it is practically not repairable.
Failure of the relay may also be the reason why the rear fog lights of the VAZ 2114 do not work. It is checked in the same way as a button - by testing the contact legs or replacing the relay with a new one. If it turns out that it has become unusable, it should also be replaced.
Often the cause of headlight failure can be the headlights themselves. During long-term use, the reflective layer can be destroyed, chipped and fall on electrical elements, thereby interfering with their proper operation. That is why it is worth periodically checking the internal condition of all headlights (not just PTF).
If all of the above reasons have been checked, and none of them have been identified, then the problem is in the wiring itself. In this case, you should ring all the wires used in the fog lamp connection circuit, and also check the correctness of the connection itself.
This can be done using the diagram given at the beginning
In this case, special attention should be paid to the correct connection (to the correct connectors) of the button and relay
Didn't find the information you are looking for? on our forum.
We recommend reading:
VAZ 2109 fuses, carburetor, high panel
How to connect fog lights to a VAZ 2107, installation features, which ones are better to choose, connection diagram
What kind of oil to pour into the VAZ 2115 engine
Lada Vesta which gasoline is 92 or 95. Recommendations from the manufacturer
How to replace the gearbox drive seal on a VAZ 2110
How to connect an alarm system to a VAZ 2107
Ignition switch VAZ 2101. Design, diagram and description of possible malfunctions. Replacement video
How to remove the window regulator on a VAZ 2114, step-by-step description with photos
Do-it-yourself algorithm for connecting PTF to a VAZ-2114
First, you should consider the mounting locations for the fog lights.
The VAZ-2115 bumper already has places for installing additional lights; by analogy, you can cut them out in the VAZ-2114 bumper.
You don’t have to be smart and install the headlights on the brackets without cutting the bumper, and some headlight sets include decorative and protective plugs that are easier to install, and such headlights will look neater.
Now the work progress:
- We install the button in the cabin . On all versions of the VAZ-2114 there is a place for a button on the tide to the left of the driver on the front panel. Although, the power button can be set arbitrarily, as long as it is convenient to use.
The button for turning on the fog lights can be installed on the panel instead of a plug
Connect the fog light button and install it in place
Unscrew the 2 nuts on the mounting block (marked in red)
We carry out the four-pin harness block from the relay to the fuse block
Installing the fog light relay
We connect the wires of the fog lights according to this diagram
The circuit will definitely work when the side lights are on.
The fog lights will be on when the side lights are on.
Connection diagram
The rear lights on the VAZ 2114 are connected to the vehicle’s on-board network using connectors, the pinout of which is given below.
Pinout of the VAZ 2114 rear light block and wire colors
The numbers in the photo indicate:
- turn indicator – blue (right), blue-black.
- side light – yellow (right), yellow-black.
- The brake signal is red.
- fog light – red-black.
- The reverse indicator is green.
Both lights are connected to one harness, which runs along the rear of the body from the right light fixture to the left, then along the left side to the mounting block located in the engine compartment immediately behind the windshield opposite the driver. The complete wiring diagram of the electrical equipment of the VAZ 2114 (injector) will look like this:
Complete electrical diagram of VAZ 2114
In this scheme we occupy the marked positions:
- 20 — reversing light switch;
- 26 — mounting block of fuses and relays;
- 27 — brake signal switch;
- 29 — ignition switch (lock);
- 33 — rear fog light switch;
- 35 - combined switch for side lights and headlights;
- 36 — alarm switch;
- 58 — rear light;
- 60 - additional brake light.
Why do you need PTF on the VAZ 2114?
Fog rarely extends to the ground, so a small layer of clear air remains between it and the earth's surface. Fog lights form a beam of light that is narrow in the vertical plane (but wide in the horizontal plane), which is directed parallel to the road surface. Thus, the PTF VAZ 2114 illuminates the fog from below and the road is well illuminated. A wide beam of light improves visibility of the roadside and side markings, which helps you avoid leaving the roadway. There is a common misconception that effective PTFs can only be made with yellow steles. In reality, both yellow and white headlights illuminate the road equally well. These colors are distinguished by the maximum light energy in the spectrum, in contrast to red, green or other light radiation. It should be remembered that even the best “fog lights” are not a panacea. In heavy fog, with correctly adjusted PTFs, visibility does not exceed 10 meters, but this is quite enough, considering the speed of movement. In some cases, cars are equipped with red rear PTFs, which improve visibility of the car during fog.
Installation and connection algorithm
- Installation of a power button in the car interior.
In the case of the VAZ-2114, the place for the button is on the left side of the driver on the front panel. However, its placement can be arbitrary - the main thing is that it is convenient for the driver to drive the car. Often, PTF power buttons are installed instead of plugs on the control panel. A PTF activation button is installed in the cabin in a place convenient for the driver. - The grille with the speaker is removed from the standard front panel. Behind it there are two connectors - one is for turning on the headlights, the second is for indicating the operation of lighting fixtures and illuminating the key itself.
- The button is placed in a convenient place, and chips are connected to it.
The speaker grill can be returned to its place. The power button is connected, chips are connected to it. - Under the hood there should be a mounting block that combines fuses and relays.
The PTF relay will be mounted in the same place, so the block must be removed: to do this, unscrew the nuts that secure it and lift it. Under the hood there is a block to which the PTF relay will be connected. - On the bottom panel of the mounting block there are two blocks - 7 and 8. Each of the blocks is signed during production at the factory, so it is impossible to make mistakes at this stage.
- The PTF set contains a wiring harness with four contacts.
The mentioned wires are pulled to the fuse block from the fog light relay. The wiring harness connects to the fuse box. - The relay is mounted in the engine compartment of the car.
The PTF relay is located in the engine compartment. - The wires coming from the PTF relay are connected to connectors 7 and 8 of the mounting block: in connector 7, terminal 8 is connected to terminal 30 from the relay, terminal 87 is connected to connector 1, terminal 85 is connected to connector 17 on terminal 7, terminal 86 is connected to ground .
From block 8, terminals 2 and 3 are directed to the left and right fog lights, respectively. PTF connection diagram. - The ground wires are connected to the fog lights: they are usually attached to the nuts of the headlights.
Connection diagram for connectors and terminals of fog lights. The functionality of the entire connection can be checked by turning on the side lights - only then will the fog lights work.
Fog lights function only when the side lights are on. After completing the installation of the PTF on the car, they only need to be adjusted correctly. The flow of light should not blind drivers in the oncoming lane.
Video: instructions for installing and connecting fog lights
Fog lights are essential lighting equipment on any car, making it easier to travel in conditions of minimal visibility. If there is no PTF on a certain car model, you can install them yourself. The installation procedure does not require special knowledge and can be carried out by the driver without the involvement of third parties.
One of the most unpleasant and dangerous natural phenomena for road users is fog. In poor visibility conditions, the likelihood of vehicle collisions increases. Equipping your car with fog lights allows you to drive in any weather conditions. You can install and connect such lighting devices to a VAZ 2113, 2114, 2115 at a car service center, but doing it yourself will cost much less.
How to choose PTF
When choosing fog lights, you should pay attention to two parameters:
- Color. PTF glasses should be either yellow or milky. Rays of this spectrum are most effective in foggy environments. Moreover, the traffic rules allow the installation of PTFs only in these colors, therefore, by installing blue or other “fog lights”, you can receive an administrative fine for violating the rules.
Advice: with PTF with yellow glasses, it is optimal to use white incandescent lamps. And, accordingly, yellow incandescent lamps are suitable for “foglights” with milky glass.
- Marking. The presence of the letter “E” on the headlight (possibly with numbers) indicates that the headlights are certified in the EU. This should be followed by a Latin letter indicating the name and type of the lighting device. For PTF it should be the letter “B”. What is included in the PTF kit
The standard kit for installing fog lights includes:
- headlights with bulbs;
- set of wires;
- electromagnetic relay;
- PTF power button;
- VAZ 2114 PTF connection diagram.
Installation of PTF on VAZ 2114
There are three ways to install PTF on a car:
- Buy a new bumper with installed fog lights. This is the simplest, but most expensive solution. Such a bumper can be purchased at a tuning studio, where they will install it and connect the VAZ 2114 PTF.
- Buy a VAZ 2115 bumper, suitable fog lights and install and connect the parts yourself.
- Buy suitable PTFs with cladding, embed them into a standard bumper yourself and connect them to the on-board network.
To replace or modify a standard VAZ 2114 bumper, it must be removed from the car. The holes in the bumper should be marked using a stencil and then cut with a jigsaw or drilled. It is necessary to insert and secure the headlight trim (glasses) into the finished holes. The fastening must be done as reliably as possible, since poorly secured fog lights will vibrate when moving, which will shorten their service life. When the headlights are fixed in the bumper, and the bumper itself is installed in its original place, all that remains is to connect the VAZ 2114 PTF.
What kind of bulbs are best for headlights?
Headlights are an integral part of the car, which help you see the road at night and in different weather conditions. After purchasing a car, many drivers think about what lamps to put in the headlights, since the available options do not meet the emerging requirements. According to existing statistics, every fifth accident at night occurs due to poor performance of the lighting system. Studies have also shown that almost every third car has problems with headlights.
What kind of bulbs are best for headlights?
When designing optics in modern cars, the basic laws of lighting engineering are used. The car owner cannot influence the design of the headlights, but replacing light bulbs and improving the quality of light is within the power of everyone.
What kind of lamps can be installed in the headlights:
- Standard H4. These lamps have a power of 60/55 W. Given the presence of two filaments, they can operate in two modes, that is, show high and low beam. When choosing branded light bulbs, you can count on a long service life and stable glow. Manufacturers are working to improve this type of lamp.
- All-weather. Thanks to the use of unique technology, you can count on contrasting lighting during adverse weather conditions. They differ primarily in the presence of a special coating on the bulb, which gives the light flux a yellowish tint.
- Lamps with enhanced luminous flux. Considering the use of a unique light bulb arrangement, the emission power is increased by 30-60% than that of conventional lamps. There is one significant drawback - short service life.
- Lamps for increased comfort. Using unique technology, the headlights generate a bright white stream of light. This lighting option is very similar to daylight, which is more familiar to human eyes. Disadvantage: light rays are reflected from drops of rain, snow and fog, which impairs road visibility.
- Increased power lamps. They can only be used off-road, as they dazzle oncoming traffic too much.
To begin with, it is important to find out what kind of light bulbs are originally installed in the car, or rather their type and power, since this is the value you should rely on. The most popular is white simple halogen
When purchasing, experts recommend paying special attention to the markings, since each model is designed for a specific type of optics. You should not save on light bulbs, since their quality depends on this indicator
What lamps are best for fog lights?
To provide drivers with more comfortable driving during bad weather, special bulbs called fog lights were invented.
What lamps to put in the fog lights:
There are options designed for installation on the bumper, in which special holes are cut. Light bulbs can also be mounted below the bumper on brackets, but experts consider this option to be unsuccessful. Fog lights can be integrated into the overall optics system
They are placed below the main headlights. It is important to have adjustable light output, which allows you to customize the light beam to suit your own car. In fog lamps, the color of the light output is of great importance. The most acceptable option is the yellow color of the PF
The worst choice is blue light bulbs. Many people are interested in whether it is possible to install LED lamps in headlights, but in the case of fog lamps this is quite the right decision. Thanks to their use, it is possible to obtain normally directional light.
How to connect PTF VAZ 2114
The PTF diagram of the VAZ 2114 does not change regardless of which method of installing the headlights was chosen. The installation location of the PTF switch is closed with a plug on the dashboard, which must be pulled out and the button included in the kit installed in its place. Before starting work, disconnect the negative terminal from the battery. The procedure for connecting the PTF to the car wiring is as follows:
- remove the decorative grille located to the left of the installation location of the “fog light” switch on the dashboard;
- unscrew and remove the speaker;
- insert the wires with connection blocks intended for the PTF power and power indicator;
- pull out the plug and install the button to turn on the PTF;
- put the wire blocks on the button;
- install the speaker and grille in their original places;
- unscrew and move aside the fuse box located under the hood;
- pass the wires from the relay and fog lights to the fuse box;
- pull out connectors Ш7 and Ш8, intended for connecting PTF, from the block;
- connect pin 86 to ground, and 85 to connector 17 of the Ш7 block;
- connect pins 87 and 30 to connectors 1 and 8 of the Ш8 block;
- connect the positive wires from the headlights to connectors 2 and 3 of the Ш8 block;
- insert the connectors into the fuse block with the free side inside the latter;
- secure the fuse box;
- install the VAZ 2114 PTF relay near the block.
All that remains is to connect the negative battery and check the functionality of the installed fog lights.
Checking the operation of the PTF VAZ 2114
To make sure that the fog lights are working, you need to turn on the side lights and press the PTF power button. The fog lamps should light up. When the “dimensions” are turned off, the PTF lamps should turn off regardless of whether the power button was pressed. Now you know how to connect PTF to a VAZ 2114 and can do the work yourself.
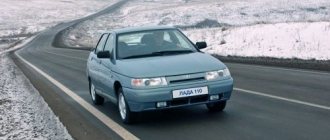
Many car enthusiasts are thinking about the question of how to install fog lights on a VAZ 2114 themselves. This is due to the fact that this brand of PTF cars comes factory-installed only in the luxury version, and even then not in all cases. Today we will talk about how to properly install fog lights and what you need for this.
Possible malfunctions and ways to eliminate them
And finally, let’s look at typical faults that can cause PTF failure:
- Burnout of lamps. We replace them with new ones (see section above).
- The fuses have failed. We open the mounting block and check fuses F8 and F9. If necessary, replace with inserts of the same rating (10 A).
- There is no minus power supply to the lamp. We crawl under the bumper and check the wire connecting the PTF lamp to the car body. Either it is torn, or the place where it is clamped under the headlight bolt has simply oxidized.
- There is no minus power to the relay. We open the engine compartment and check the wire coming from the 86th contact of the relay to the body. Either it is torn, or the place where it is clamped under the bolt has simply oxidized.
- A break or short circuit to the body of the wires supplying the PTF bulbs. In the second case, when replacing the fuse with a working one, the latter immediately burns out. We inspect the PTF power wires, find them, and fix them.
- The headlight relay is faulty. We exchange it for a rented one and check it. If everything works, we buy a new relay.
- The PTF switch is faulty. We remove it, call a tester, change it.
- There is no voltage at the 85th relay contact. We turn on the PTF and measure the voltage with a tester relative to the body. If it is not there, we look for a fault in the mounting block.
On this, perhaps, the conversation about the fog lights of the VAZ 2114 can be completed. Now we know how to install them ourselves, and, if necessary, repair them.
Previous Fog lightsHow to install fog lights on a Gazelle Business Next Fog lightsHow to change a fog light bulb on a Hyundai Solaris
Installation options
You can equip your VAZ 2114 with fog lights in several different ways:
- Purchase a ready-made tuned bumper with PTF already installed. This option is the simplest, but requires the highest financial costs (such bumpers are not cheap).
- Install a bumper from the 15th model on the car with ready-made windows for fog lights (the PTFs themselves will need to be purchased separately).
- Buy only fog lights and install them on your original bumper.
We will dwell on the latter method in more detail.
Installing a button in a panel
To install the button (which comes with the mounting kit), you need to partially disassemble the front panel. Fortunately, the factory came to the rescue and installed wiring for the PTF in all Samar configurations, so all we have to do is remove the center console and find a block in the wiring for connecting the button.
To disassemble the panel, use the article: How to remove the instrument panel and remove only the center console:
None Next, we check the headlights for functionality.
Do not forget that the fog lights turn on only after the side lights are turned on! After installing the PTFs, they need to be configured and adjusted!
- vazweb.ru
- pol-z.ru
- ladaservice.info
- vaz-2114-lada.ru
What you need for installation
To properly install the PTF VAZ 2114, you will need to assemble a certain set of components, without which the installation of fog lights is not only undesirable, but also harmful to the car.
It looks like this:
- wires with terminals (a total of 3 wires are required: from the common block to the relay, from the relay to the switch, as well as a connecting wire between the two headlights);
- mounting pads;
- tie clamps;
- PTF relay;
- button;
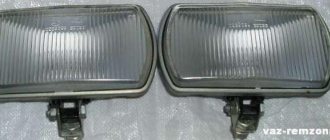
- actual fog lights.
Installing VAZ 2114 fog lights directly, without using a relay, is strictly not recommended. This will lead to an increased load on the on-board network, which, in turn, can cause damage to electronic equipment, short circuits and even a car fire.
In addition, in order to install a PTF on a car bumper, you will need to prepare a simple set of tools, namely:
- electric jigsaw;
- file;
- electric drill;
- roulette;
- marker.
What's the result?
Taking into account the above information, it becomes clear that the decision to install fog lights on a VAZ 2114 or VAZ 2115 allows you to improve road lighting at night, in difficult weather conditions, etc. As practice shows, the presence of fog lights allows for better illumination of the roadside; when driving in conditions of insufficient natural or artificial lighting, the strain on the driver’s eyes and overall fatigue while driving are noticeably reduced.
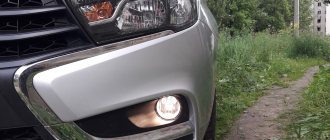
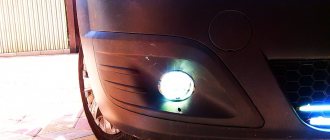
Installing headlights
Before proceeding with installation, the bumper should be dismantled and thoroughly cleaned of dirt. After this, you need to make markings, having previously selected the location of the future fog lights. The best option is to install them directly under the headlights.
The holes for the PTF should be marked taking into account the size of the “glasses” - decorative plastic elements mounted around the headlights. They consist of two parts - outer and inner, fastened together and thus holding the headlights. The outer part has a special protrusion that fits inside the bumper. Its dimensions should exactly correspond to the dimensions of the installation window being cut out.
After the marking is completed, holes are drilled in the bumper for the saw to enter and both mounting sockets are cut out using a jigsaw. Their edges will need to be carefully processed with a file in order to remove all irregularities and burrs (after this treatment, the protrusion on the outer part of the “glasses” should fit into the socket without much effort, but with a certain interference).
After this, all that remains is to secure each of the headlights with a pair of bolts - and their installation will be completed.
Connecting fog lights
After the installation of fog lights on the VAZ 2114 is completed, you will need to connect them to the internal electrical network of the car in the following sequence:
- Mount the power button on the main panel. For this purpose, all trim levels of the 14th are equipped with a special boss, in the place of which it should be installed.
- Remove the speaker grille from the panel and find a pair of unoccupied connectors under it - a large one for connecting headlights, a small one for connecting the backlight of the button itself.
This will complete the entire process of installing fog lights.
After installing the PTF, you should check them. To do this, you need to turn on the dimensions first, and then the fog lights. If you then turn off the side lights, then the fog lights should go out after them (even if the button for the headlights themselves is turned on).
Product change process
Anyone can replace a failed component of the low or high beam system. You will need the following tools:
- awl (thin screwdriver);
- magnet equipped with a long handle (optional).
After this, follow the instructions:
- Open the hood with the car's ignition off. Find the headlight units on both sides of the car.
- Unscrew the protective box of the light source on the headlamp from both sides. After removing the box cover, you will see under it a block with three contacts that are responsible for powering the lighting system, as well as a spring-type holder.
- Disconnect the block, and then, using a squeezing movement of the product fasteners, release the lighting element. You can remove it from the standard mounting location.
To replace and replace with another bright light product, follow the instructions in reverse order.
Which fog lights to choose
When choosing fog lights for your car, do not forget that their power, together with the power of other electrical equipment, should not exceed the capabilities of the generator. Otherwise, it is possible not only for the battery to discharge very quickly while driving, but also for problems, and possibly even failure of devices connected to the network.
The most popular and has earned numerous approvals from car enthusiasts is a set of fog lights produced by the Kirzhach company. It provides moderate energy consumption in combination with high-quality light and uniform illumination of the road.
Speaking about xenon PTFs (which, by the way, many drivers think about), it is worth noting that they consume much more energy, and therefore they are undesirable for the VAZ 2114 with its original generator.
In addition, xenon lamps have a different focusing principle from standard lamps, as a result of which, when they are installed on conventional headlights, the rays are incorrectly refracted, reflected from the road surface and, as a result, blinding drivers of oncoming vehicles.
If you really want, you can try to focus fog lights with xenon headlights (or use yellow headlights), but if this does not give results, then it is better to abandon their use in favor of conventional light bulbs.
Pros and cons of cars
In Russia, the VAZ 2115 became the most popular. It was believed that the sedan body was more popular. However, with the advent of a large number of foreign cars, hatchbacks began to be in demand. Considering the popularity of cars among the younger generation, I want them to be in great demand. Acceleration up to 100 km. faster than the “tag”, because its weight is less. The choice of model should be determined based on your needs. The hatchback can accommodate more cargo. And if you fold the rear seats, the interior volume turns into a large trunk. It is not possible to load large cargo into the sedan.
The advantages of the 2114 include a smaller rear body. Many drivers note the parking factor - it is easier to park than a sedan
Although experienced car enthusiasts say that it is important to feel the dimensions of the car, and any parking will not be difficult
But the presence of a heavy trunk lid should also be considered a disadvantage. While driving, the fastenings become loose and extraneous sounds appear. Moreover, the “fourteenth” model has problems with rear window contamination, and only a windshield wiper can solve it.
The driving parameters are actually no different, because they belong to the same segment of the automotive industry. The cost of spare parts is low, and there are no problems with the availability of one or another part. Relatively inexpensive and the cost of repairs. In the secondary car market, the cost of VAZ 2114 and 2115 is low, which means it is affordable. With proper care and careful operation, the car will bring a lot of positive emotions.
Auto-assistance
When driving a VAZ-2115 passenger car, regardless of the time of day, the side lights, as well as the headlights, must be turned on. This is a requirement of the Russian Traffic Rules that every driver must comply with. Therefore, the electrical circuits of side lights and brake lights operate through the K4 lamp control relay, the task of which is to warn the driver with a light and sound signal that at least one of the lamps of the above listed electrical circuits is not turned on. This will force the driver to get out of the car and determine which side light lamp is not on and begin to search for the problem.
On a VAZ-2115 car, the side light lamps in the rear lights often stop working. This is due to the occurrence of leaks in the lamps, as a result of which moisture gets inside, which leads to oxidation of the plug of the block or the track on the flexible circuit board, through which voltage is supplied to the lamp contacts.
There are cases when, after moving the exterior lighting switch to the first position, not a single side light lamp lights up. The search for such a malfunction will have to begin by checking the presence of voltage at terminal 1 of this switch. It should be +12 volts, even with the ignition off.
If this terminal is de-energized, then you will need to sequentially check the voltage at terminal 6 of connector X8, and then at terminal 6 of connector X1 of the mounting block. If there is voltage at these terminals, the culprit for the lack of power at terminal 1 of the outdoor lighting switch will be the pink wire connecting it to terminal 6 of connector X1 of the mounting block.
Well, if there is voltage at terminal 1 of the external lighting switch, the culprit for the side lamps not turning on may be the switch itself or the K4 lamp control relay. To make sure that the switch is out of order, you need to move it to the first on position and check for voltage at its terminal 2. If there is no voltage at this terminal, then the outdoor lighting switch will have to be replaced.
If fuse F10 (7.5 A) blows, the front and rear side lamps on the left side of the VAZ-2115 car will not light up, and if fuse F11 (7.5 A) fails, both side light bulbs on the right side of this vehicle will not light up. car. The blown fuse F10 can be determined instantly, without even looking into the mounting block, since the backlight lamps for switches, heater control levers, cigarette lighter, and ashtray immediately turn off, because it also protects these electrical circuits.
Criterias of choice
To decide which fog lights to install on the VAZ 2114, you need to know the correct selection criteria.
Durable housing. In the conditions of Russian roads, the headlight housing must be made of material resistant to damage and temperature changes. It is better that the design includes plugs. Reliable fastenings and the presence of wires, relays and fasteners included. Wide light spot, uniform light distribution and minimal losses due to scattering and refraction. Adjustment and adjustment of the light spot vertically and horizontally. No dazzling of oncoming drivers. Easy replacement of a burnt out lamp
When purchasing, pay attention to the lamp replacement instructions section. The easier and faster it can be changed, the less time will need to be spent if the lamp burns out at the most inopportune moment. Ideally, after replacing the lamp, no further adjustment is required. Economical
When choosing headlights, try not to put unnecessary stress on the wiring and generator. In most cases, lamps up to 55 W will be sufficient. Thick durable lenses. Good aerodynamic performance. Compliance with machine design.
Ideally, after replacing the lamp, no further adjustment is required. Economical. When choosing headlights, try not to put unnecessary stress on the wiring and generator. In most cases, lamps up to 55 W will be sufficient. Thick durable lenses. Good aerodynamic performance. Compliance with machine design.
LED PTF VAZ 2114.
Lighting
Since the staff bumper does not have seats, they must be made by yourself. To do this you may need:
- Drill with a drill;
- Electric puzzle;
- File;
- Measuring instruments (tape measure, ruler, etc.);
- Marker;
Removing the front bumper of a VAZ 2114
, installation of PTF in
the bumper
, which does not have space for them. Continuation
On our channel you will always find a solution to your problems that you have when repairing your steel
Installation of fog lights is carried out with the bumper removed. Marking is first done on a bumper that has been cleaned of dirt. The optimal installation location is at the level of the lower air intake, but at some distance from it. It is advisable that the PTF be located strictly under the headlights.
First determine the distance at which the fog lights will be removed from the air intake. Then we'll figure out what size holes to cut. Decorative “glasses” will help with this. They consist of two halves. external (decorative) and internal (fixes the external part and the headlights themselves).
The outer half of the glasses has tabs on the inside to fit into the hole in the bumper. To determine the size of the hole, the dimensions of this mounting protrusion are measured. After we place the markings with the appropriate dimensions on the bumper.
Once the markings are complete, we will continue cutting the holes with an electric jigsaw. After this, the edges of the holes must be adjusted using a file
It is important to make sure that the outer part of the glass fits tightly into the hole
In these holes we fix the fog lights with bolted connections. All that remains is to fix the “glasses” headlights.
After installing the fog lights, we install the bumper on the car. This completes the first stage.