The main features that influence the choice, as a rule, are excellent visibility of the road and optimal brightness, which would not disturb drivers driving in the oncoming lane. The installation of xenon can be done independently; for the work you will need to prepare some materials and tools:
- self-tapping screws;
- alcohol for degreasing;
- rags;
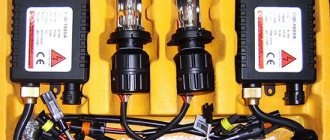
- xenon headlight system.
Installation, of course, can be entrusted to professionals, but self-installation will cost much less.
How to choose xenon
You should choose xenon with extreme caution. Quite often there are models on the market that cannot be called quite high quality, although they are quite expensive. What should you pay attention to first? All car owners are advised to check the brightness level. Too high brightness can lead to the most serious problems for the motorist, because bright headlights can temporarily blind traffic from the oncoming lane.
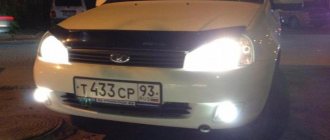
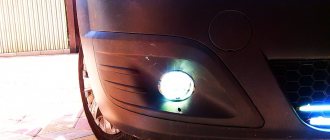
Brightness of xenon lamps
Necessary tools and elements
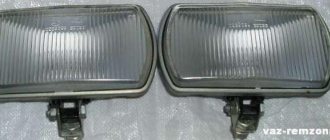
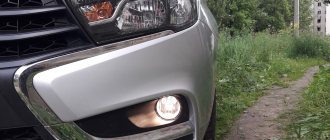
Ready-made fog lights for installation in a VAZ 2110 car
Before purchasing everything you need, decide on the color. Today, white optics are most popular among VAZ 2110 owners, but you can also find classic yellow. Now to the purchase: some people prefer to take a ready-made kit, which includes wiring, while others choose the parts separately. The second option is not only cheaper, but also provides more installation options.
To work we will need:
- Headlight kit;
- Key as well as indication;
- Relay;
- Plastic pads;
- Headlight frames;
- Terminals called “male/female.” Recommended to be purchased separately, no wiring included;
- The terminal that will go to ground;
- Wiring.
Article on the topic: Operating temperature of the VAZ 2110: diagnostics and replacement of the coolant temperature sensor
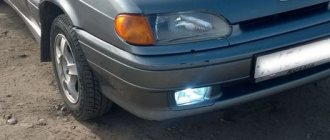
Electronics and wiring for connecting fog lights to a VAZ 2110.
The wires of the VAZ 2110 need to be given special attention. It is recommended to go to a specialized electronics store to get them. We need an option with two copper cores, as well as double insulation. As for the cross section, here you need to build on the power of the lamp. If the power indicator is high, then it is better to take 0.75 millimeters. At normal power, 0.5 mm wires are used.
Installing xenon on a VAZ 2114. Installing the ignition unit
Before starting the process of installing bi-xenon on a VAZ, you need to study the grounding polarity of the car. If we are talking about positive polarity, it is necessary to eliminate contact between the housing and the block as soon as possible. It would not be superfluous to analyze the polarity of the so-called “control veins”. This is required to prevent short circuits. If you forget about this, the consequences can be depressing.
Self-installation of xenon
Also, before starting installation work, you should think about where exactly the xenon control unit will be located. The location for installing this unit directly depends on the position of the wires for powering the ballast and lamps.
How to install ballast
- At the very beginning, you need to arrange special holes. The diameter of each of them should be approximately 3 mm. It should be remembered that the block should be fastened in such a way that its fixation is sufficiently rigid.
- Only after the wiring harness has been laid in the prepared place can you try to fix it with the ties that were taken from the installation kit.
You should also remember that getting to the lamps themselves (during installation) is extremely difficult.
Another nuance that should be taken into account during xenon installation concerns problems associated with dirt. The place where the xenon control system will be installed must be protected from any dirt. It is unacceptable for the system to be located in a place where there are sudden temperature changes.
- To do this you need to get rid of the lid. Only after this can you try to disconnect the lamp wires. Then it needs to be removed.
- Next, you need to make a small hole in the headlight protective cover. It will be needed so that the conductors can be pulled through it. Only after this can you begin installing the rubber band into the hole in the lid. The lid is needed to provide as complete protection from moisture as possible.
- It is also worth remembering that before this you need to treat the lamp bulb. To do this, you should use alcohol. Only after this can you begin installing the xenon lamp in the most suitable location. Don’t forget how important it is to secure it correctly. If this is not done, it may fly off while the car is moving.
Connection diagram
Fine or deprivation of rights?
Until recently, the responsibility for installing xenon or LED lamps in halogen headlights was quite acute. The fact is that the courts imposed punishment in the form of deprivation of rights under Part 3 of Article 12.5 of the Code of Administrative Offenses for changing the operating mode and color of lighting devices.
But from time immemorial this was illegal, because in most cases the color does not change when changing the type of headlights. Only occasionally, when installing “cold” xenon light, does a blue effect appear. But for the courts this was unconvincing.
Why until recently? Because the Supreme Court of the Russian Federation recently put an end to this issue, indicating everything that we described above for lower courts. That is, for the illegal installation of xenon or LED in halogen headlights, only a fine of 500 rubles is imposed under Part 1 of Article 12.5 of the Administrative Code.
Prohibition of vehicle operation List of faults and conditions under which the operation of vehicles is prohibited.
External lighting devices:
3.1. The number, type, color, location and operating mode of external lighting devices do not meet the requirements of the vehicle design.
Note: On discontinued vehicles, it is permitted to install external lighting devices from vehicles of other makes and models.
3.2. Headlight adjustment does not comply with GOST R 51709-2001.
3.3. External lighting devices and reflectors do not work in the prescribed mode or are dirty.
3.4. Light fixtures do not have lenses or use lenses and lamps that do not match the type of light fixture.
3.5. The installation of flashing beacons, the methods of their fastening and the visibility of the light signal do not meet the established requirements.
3.6. The vehicle is equipped with: at the front - lighting devices with lights of any color except white, yellow or orange and retroreflective devices of any color except white; at the rear - reverse lights and state license plate lights with lights of any color other than white, and other lighting devices with lights of any color other than red, yellow or orange, as well as retroreflective devices of any color other than red. Note. The provisions of this paragraph do not apply to state registration, distinctive and identification marks installed on vehicles.
Table of fines for violating traffic rules of the Russian Federation 2009
Driving a vehicle on the front of which are installed lighting devices with red lights or red reflective devices, as well as lighting devices, the color of the lights and the operating mode of which do not comply with the requirements of the Basic Regulations for the admission of a vehicle to operation and the duties of officials to ensure road safety. 12.5 h. 3
deprivation of the right to drive a vehicle for a period of 6 months. up to 1 year, devices and accessories are confiscated + confiscation of the driver's license, prohibition of vehicle operation with removal of the GRZ*
Quite often you can notice that VAZ 2114 owners prefer to install xenon on their car. Xenon on the VAZ 2114 is the best solution for those who often drive in the dark. Which xenon headlights should I install on a VAZ 2114 and how should they be mounted?
Do I need to take precautions when installing xenon?
It should be remembered that installing xenon is by no means the safest activity. As many precautions as possible should be taken during this process. If any damage to the kit is noticed during installation, you must stop all work as soon as possible and consult your dealer.
Xenon installation
Another reason to stop installation work is numerous damage to ballasts and lamps.
Experienced craftsmen advise not to try to do the work with hands that have recently been stained with oil or any other liquid. In this case, you may get an electric shock.
During use, try to keep the headlights as clean as possible. Dirty headlights scatter the light and can blind oncoming drivers.
Xenon lamp
In addition, it is recommended to additionally install a high-pressure cleaner. It will make using headlights even easier.
When is it possible?
And yet there is one possibility when LEDs and xenon can be installed in headlights. But, unfortunately, this opportunity will not make it any easier for us.
The fact is that the mandatory compliance of the light source with the headlight design is enshrined in the Basic Provisions of the Traffic Regulations. There is also a note that if the car is old and out of production, then you can install lighting devices from other models and even brands of cars on it.
Does this mean that VAZ can be equipped with other headlights, including those with xenon or LED? No, that doesn't mean it. According to the Technical Regulations, in any case, such a light source must be certified and tested as part of the vehicle on which it is installed. This means that if the old VAZ provided only halogen lamps, then the headlights will have to be installed only with a halogen light source.
In addition, with such an installation, you will have to go through the procedure of making changes to the design of the machine, which is quite labor-intensive and expensive.
Conclusion
Bi-xenon on the VAZ 2114 will be an excellent solution for those who would like to slightly improve their own car. Such headlights will come in handy if the driver travels frequently and therefore has to be on the road even at night.
Those who are still wondering how to install xenon on a VAZ 2114 should be advised to take safety measures as carefully as possible. Many car enthusiasts ignore them, but if xenon is installed, this can lead to the most serious consequences for human health.
What about LEDs?
The LED light source is also not installed on domestic cars. We have already explained the issue of installing LEDs, when it is possible and when it is not.
In general, this is a more modern type of head light, and has come into fashion quite recently. A number of manufacturers for their models have even begun to provide documentation for the possibility of installing LED lamps in such headlights when obtaining vehicle type approval. These include, for example, Hyundai and Kia. This, of course, does not mean that you can simply replace the halogen lamps in such cars with LED ones. But changes are made in a somewhat simplified mode. In addition, even the most budget models - Kia Rio and Hyundai Solaris - are equipped with xenon.
But we are talking about VAZ cars. And for them, LED lamps in headlights, unfortunately, are prohibited, since the design of their light source module does not provide for the installation of anything other than incandescent (halogen) lamps.
Removal
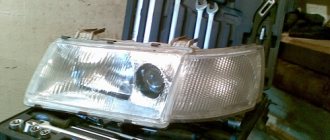
Kit
Of course, without dismantling the old headlights it will be impossible to install xenon devices. Dismantling is performed as follows.
- The vehicle is deprived of power by removing the negative terminal from the battery.
- The connectors going to the headlights are disconnected. All without exception.
- The fasteners are removed from the top mount. The bolts are located there.
- The radiator grille is dismantled.
- The bolt that holds the headlight unit in its lower part is removed. He's there alone.
- Next, pry up the cover using a flat-head screwdriver and remove it.
- Now take a 10 mm wrench and use it to remove the fixing nut to the bracket.
- All that remains is to remove the headlight unit.
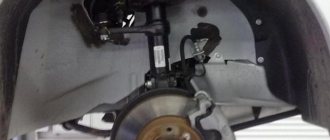
- Do not forget to pry the hydraulic correction cylinder retainer using the same flat-head screwdriver to remove the unit.
- The direction indicators are removed. To do this, simply unscrew a couple of bolts.