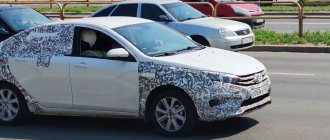
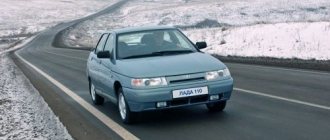
Typical headlight malfunctions
Now let's briefly talk about the malfunctions. In accordance with the operating diagram, Bosch VAZ 2110 or Kirzhach headlights operate on the same principle. The same goes for other optical elements, be it turn signals on a VAZ 2110, Bosch fog lights, DRLs on a VAZ 2110, or brake lights.
So, what malfunctions are typical for optics:
- The rear lights of the VAZ 2110 stopped working. Since these lights turn on when reverse gear is activated, there can be several reasons for their failure. This is the wiring, the inoperability of the lamp itself, as well as the failure of the reverse sensor. If two light bulbs stop working at once, then you do not need to immediately disassemble the rear lights on the VAZ; you need to check the functionality of the sensor.
- The side lights or dimensions in the turn signals of the VAZ 2110 do not work. In this case, you need to check the relay and fuse located in the block. If the problem is not with them, then check the wiring and the lamps themselves.
- The running lights on the VAZ 2110 refuse to work. You should also check the functionality of the fuse and the wiring with the bulbs. But if, in addition to the DRL, all other lights work, it would not be a bad idea to diagnose the steering column switch.
- Feet don't work. Recently, owners of “ten” cars have installed so-called stick lights in their stop signals. The sticks are so called because the glass on them is made in the shape of a hockey stick. And it often happens that the stops do not turn on after replacing the optics. If you have changed the lights, then first of all you should check the quality of all connections and the functionality of the brake light bulbs. If everything is fine with them, look for a problem in the wiring.
- Only the high beam or only the low beam or both do not work. If all optics are working properly, but only the high or low beams are not functioning, check the bulbs first. Further according to the diagram, the wiring, quality of contacts, and fuses are checked. If all components work, it is necessary to diagnose the steering column switches. It is possible that when one or another light is turned on, a contact on the switch circuit comes off.
- If you have xenon installed on a VAZ 2110, then the cause of the malfunction may be a failure of the ignition unit.
Types of lighting devices
Depending on the year of manufacture, the VAZ 2110 can be equipped with either Kirzhach or Bosch headlights. Both of them are a block that includes high and low beam headlights, side lights, and direction indicators.
No matter how much difference there is, there are some nuances:
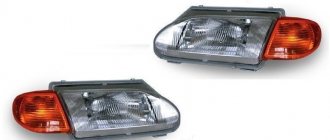
- In Kirzhach, the glass is sealed, so both removing it and replacing it with a new one is more difficult. In addition, the low beam glass has a lens that makes the light output more focused, although limited; Left headlight block Kirzhach
- Bosch glass is secured with latches. They are sealed with rubber gaskets. Their low beam boundary is more blurred, since there is no lens in the glass. Right headlight block Bosch
It’s difficult to say unequivocally which headlight unit is better. But disassembling Boshevskys is definitely easier. In any case, it doesn't hurt to know how to do it in both cases.
To remove the headlight unit, you need to open the hood:
- De-energize the VAZ 2110 (this must always be done during repairs, especially anything related to electricity) by disconnecting the negative terminal from the battery;
- Remove the lining from the radiator;
- Disconnect the block with wires from the headlight;
- Press the latch of the hydraulic corrector cylinder and, turning it 90° to the right, remove it from the socket. There is no need to disconnect the hoses;
- Unscrew the three bolts securing the headlight unit, then move it back;
- After which, move the device to the side, towards the center of the car, until it disengages with the wing hook;
- Loosen the upper bumper bolts;
- Press the pad from below until its flange disengages from the buffer, then remove the pad;
- Unscrew the nut securing the headlight from below;
- By pulling the headlight unit towards you and disconnecting the block from the turn signal, you can remove it.
Having carried out the correct removal without breaking anything, you can replace it with new equipment. Or you can disassemble and perform tuning or independent repairs.
The disassembly goes like this:
- Unscrew the fastening screws (there are two of them);
- Disengage the two hooks on the turn signal from the headlight. Now you can disassemble it into two parts.
Suggested options
As mentioned above, for car owners of the “dozen” the market offers only two options for headlights - domestically produced Kirzhach and original Bosch VAZ 2110 headlights. Of course, most consumers prefer German-made products, especially considering that their cost is lower than Russian optics ( author - channel Aleks B).
Which headlights are better?
Before removing and installing new optics, let's figure out which manufacturer to give preference to. Despite the fact that German-made products have always been famous for their quality, in reality, domestic experts recommend installing Kirzhach flashlights on the “tens”.
Let's see why this is so:
- It is clear that the purpose of the lights is to provide better visibility of the road surface when driving at night, while they should not blind oncoming drivers. These functions are performed normally by both Kirzhach and Bosch devices.
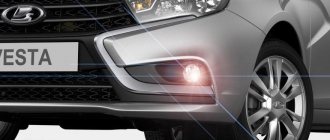
- Russian-made flashlights have a lens for near lighting and a reflector for distant lighting. As for German-made lanterns, they are equipped with two reflectors. The level of illumination of the road surface is generally identical in both cases, but the Bosch ones shine an order of magnitude brighter.
- In any case, lenses are better than reflectors because they provide a clearer line of light. In addition, their operation allows the use of xenon.
- Judging by the reviews of our compatriots, Bosch flashlights have poorer illumination, in particular in low beam conditions.
- German-made devices have an important feature - the road surface is illuminated much better in cloudy weather and rain, unlike Kirzhach. This is ensured by the fact that their design uses a larger reflector. However, due to this same feature, installing xenon in Bosch will be impossible.
Headlight adjustment
Briefly about the adjustment:
- To ensure the correct setting, you need to fill up a full tank of gas, wash the lights, inflate the tires to normal and put everything in the car that should be in it. We are talking about a spare tire, tools, fire extinguisher, etc. The car should be driven to a level fence or wall, and the surface on which the car is standing should also be level. The wall must be marked as shown in the photo.
- Place the car five meters from the wall.
- Turn on the lights.
- The headlamp control should be set to position 1.
- Set up the lighting as shown in the diagram.
Review of lighting market offers for VAZ 2110-2112
If you also agree with the opinion that the existing VAZ lighting system could work better, then you will probably be interested in the next section of the article, dedicated to specific offers that exist today in the automotive lighting market for the VAZ 2110. It is also interesting that the large assortment Alternative headlights allow you not only to modify the lighting system, but also to emphasize the expressiveness of your car thanks to its stylish design.
Wanting to buy original headlights for a VAZ 2110-2112, a motorist comes across branded offers from the domestic Avtosvet plant, known under the Kirzhach brand, as well as imported optics from Bosch. There is no clear answer as to which manufacturer is better for VAZ 2110-2112 cars. But the main advantages of the proposed product items can really be considered.
Headlights KIRZHACH (AUTOSVET)
Let's start with Kirzhach headlights from the Avtosvet plant. They cost about 2,500 rubles for VAZ 2110-2112 cars and differ in that they have a built-in lens for low beam, which significantly improves the focusing of the light flux. Kirzhach headlights lend themselves perfectly to all sorts of tuning and modification options. A big plus can also be considered the possibility of legal installation of xenon lamps in this optics.
Stock headlights from Bosch for the VAZ 2110 (2112) do not have all the above-mentioned advantages. There are practically no possible modifications of this optics for the general public. But they are somewhat cheaper (the difference in price can be up to 400 rubles). If you are not planning on further modification of the optics, they will turn out to be a more rational choice.
Bosch headlights
In addition, the “Bosch” headlights of the VAZ 2110 (2112) are more resistant to pollution, since the working area of the low beam reflector is much larger than that of the Kirzhach headlights. The headlight lens glass from Bosch is mounted on seals, while Avtosvet's is mounted on silicone. Obviously, the first option is much more convenient to maintain. We suggest you make your own conclusion about which headlights are interesting to you.
DIY headlight repair for VAZ 2110
Many motorists, faced with malfunctions of the VAZ 2110 headlight, try to repair the headlight themselves, so to speak, with their own hands, or to improve the performance of the headlight, expanding its capabilities. However, finding high-quality optics is not so easy. Most often, cheap headlights from China or Taiwan come onto the market. Especially xenon headlights or lamps. They do not shine with quality workmanship, and durability leaves much to be desired; according to test results, they are inferior to standard classic copies.
The price of high-quality illuminators is considerable, however, they last several times longer. You can make repairs or modifications to the optics that you already have if you want to save money. You can easily do this yourself; the work does not require special knowledge or additional skills. Headlights for the VAZ 2110 differ in technology and manufacturer. Standard headlight brands:
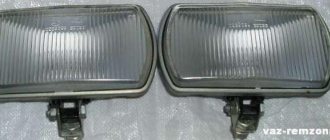
- Bosch headlights (contain reflectors only, no focusing lens)
- Headlights from Kirzhach (including a focusing lens and reflector)
The most common headlight malfunctions:
- Broken hydraulic corrector, which is more practical to replace with an electric corrector;
- Trembling of the light beam;
- Lost adjustment of the light beam.
Review of offers of alternative (tuned) optics for VAZ 2110-2112 from ProSport and Hella
It’s worth mentioning right away that such exotics are quite expensive. On average, this kind of offer will cost 2 or 3 times more than the original optics. But all this pays off with the many design delights and sophistication of tuning offered. With alternative headlights from ProSport and Hella, your VAZ 2110 (2112) will look truly impressive and expressive.
Hella 2110 headlights
The problem is that this kind of optics on the VAZ 2110 often does not have better lighting characteristics and does not guarantee high reliability. Therefore, such headlights for the VAZ 2110 (2112) are good only from an aesthetic point of view. The headlights from the ProSport Aggressor and Hella series have proven themselves best in terms of durability.
If you like the idea of installing tuned optics on your VAZ 2110 (2112), you should also take into account the fact that it is compatible with different modifications of the car. For example, the optics on the VAZ 2112 from ProSport are not installed on coupe-type bodies, and the ProSport series is not suitable for the VAZ 2110 M series.
ProSport Aggressor headlights
Due to the highly controversial advantages of alternative optics on VAZ 2110-2112 cars and its high price, most motorists do not consider purchasing ready-made headlight modifications, preferring to independently tune the original VAZ lighting equipment. In this regard, undoubtedly, TM Kirzhach headlights remain the leader.
Repair of hydraulic corrector for VAZ 2110 headlights
Adjusting the light beam happens quite often, especially when the trunk of the car is heavily loaded; the light shines directly into the eyes of drivers of cars moving towards you. If the reflector has dropped and the adjustment does not work, our instructions will help you repair the headlight hydraulic corrector of the VAZ 2110; the repair will take very little time.
VAZ 2110 headlights Kirzhach - hydrocorrector repair
- Unscrew the headlight fasteners and remove them;
- We disassemble the headlights: carefully remove the glass, then the metal clips (6 pieces);
- Using a knife, clean the glass from the sealant;
- We cut off the convex profile (in the shape of the letter P) on the glass;
- Unscrew the screws (there are 3 of them) from the reverse side;
- Take out the paper reflector;
- Next to the hydraulic corrector hole inside the light housing there is a spring that must be removed ;
- We perform the same actions with two plastic rosettes from two “turntables” securing the reflector.
Note: The hydraulic corrector ball snaps into a plastic groove, and the metal bobbin snaps into the second groove. It stops the adjustment, preventing it from being unscrewed further than itself. If you press the hydraulic corrector when adjusting the headlights, the metal latch will break. The ball will pop out of the plastic and then the headlight will “fall”;
- The repair will consist of replacing the broken latch with a gasket . which will not make it clear that the adjustment has reached its extreme position;
Moving the lens closer to the reflector and modernizing the curtains on the headlights of the Kirzhach VAZ 2110 (2112)
On a disassembled headlight, it is proposed to cut off the low beam lens holders, but no more than 1 cm, since bringing the lens too close to the light source can lead to its overheating. Now the light beam has significantly increased in area, covering a much wider distance of the roadway in front of it and illuminating somewhat further.
We are making a new curtain. Any flat sheet of metal will do. Pay special attention to the central cut that determines the light of the headlight. The curtain is attached directly to the reflector itself. It is advisable to also wrap it in foil, which will significantly increase the luminosity of the headlight on the VAZ 2110 (2112).
Replacing a VAZ 2110 headlight
Sometimes the entire headlight needs to be replaced. The work is done without any problems:
- Disconnect the negative terminal from the battery;
- We take out the radiator trim;
- Remove the block along with the wires;
- Press the latch of the hydraulic corrector cylinder and turn it clockwise 90 degrees until it stops;
- We take it out of the recess without disconnecting it from the hoses;
We take out the block with the wires, take out the hydraulic corrector
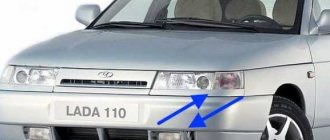
- We unscrew the bolts securing the headlight (shown in the photo with white arrows) and push the headlight itself back;
Unscrew the bolts securing the headlight
- We move the trim about four centimeters to the center of the car so that its hook comes out of the mount with the wing;
- To move the pad, loosen the tension of the bolts securing the buffer from above, push the buffer forward;
Loosen the screws securing the buffer
- We press on half of the lining so that the flange comes out of the mount, and take out the lining;
- Unscrew the nut securing the illuminator from the bottom;
Unscrew the nut from the bottom
- Disconnect the block from the turn signal lamp, pull the illuminator towards you and take it out;
- Unscrew the fastening screws to disassemble the illuminator;
- Separate the headlight from the turn signal;
Separate the headlight from the turn signal
- On the body of this pointer, unhook two hooks from the body of the optics part;
- We assemble in the reverse order to this and install the headlight assembly.
Congratulations! Do-it-yourself headlight replacement is complete, if anything remains unclear to you, I recommend watching the video on request VAZ 2110 headlight repair.
Choosing an optical system for Lada 2110
One of the most popular models of optical systems on the market today is the “Pro sport” system.
However, this model of headlights has a number of disadvantages that cannot be left unnoticed, since the safety of both the driver and passengers directly depends on the quality of the lighting emitted by the car. Based on reviews on the Internet, we can conclude that the “Pro sport” headlight emits low quality lighting and is unable to properly provide visibility of the track at night. Therefore, it is worth considering purchasing a Kirzhach headlight.
Example of headlight packaging
After unpacking the headlights and checking the package, the question arises: “Where to start?” In this case, You Tube will be your best assistant. On this site you can find many interesting videos on the topics of tuning headlights, fine-tuning lights, etc. Even if these videos differ from your vision of the work process, do not be upset, since each master uses a variety of approaches and materials in his work. Your task in this case is to emphasize for yourself the basic principles and approaches to installing headlights and get a high level of motivation, since without it it will be very difficult to achieve the desired result.
see also
The price for headlights of this model ranges from 2350 to 2550 rubles and largely depends on the dollar exchange rate. Also, to the initial costs it is worth adding the cost of a can of paint 200 rubles and masking tape 48 rubles. The approximate amount of initial costs is 5148 rubles.
We carry out preparatory work for installing headlights on fret 2110
Initially, you need to disassemble the turn signals and separate the glass from them. To do this, you can use a stationery knife with a retractable blade.
The difficulty is that the manufacturer solders the glass with the turn signal and separating them is quite problematic. Therefore, this process may take some time, most often from 40 minutes to 1 hour.
Using a utility knife, you need to make a gap between the glass and the turn signal. This must be done carefully so as not to damage the glass. Next, you need to insert a screwdriver into the resulting hole, while continuing to cut the gaps with a stationery knife. The next step is to remove the headlight mask; to do this, insert a utility knife into the hole and cut through the sealant. The procedure is not complicated, and in a few minutes the mask will be in your hands. When working with a stationery knife, you must follow safety precautions to avoid injuries and cuts.
In the process of work, we need a battery; if necessary, it must be recharged.
The masks are coated with chrome plating; sandpaper can be used to remove it; when cleaning the masks, all chrome plating must be removed as much as possible. Let's move on to painting. First you need to prepare and arrange a place for painting masks; any basement is perfect for this. Before painting, seal the glass of the headlight mask with masking tape.
It is better to paint turn signals in several layers; the best result will be obtained by painting in 3 layers. Leave for some time for the paint to dry. We assemble the turn signals and attach the glass to them, we use liquid nails for fastening, this is very convenient in our case, since in the future we will have to re-disassemble the headlight to implant a yellow LED strip into it, or, as it is also called, “angel eyes”.
The work with the turn signals is completed at this stage. Next, it is necessary to fine-tune the headlights, since most manufacturers do not always pay due attention to this small but very important aspect. In the photo below you can see how the new factory headlight shines before fine tuning.
Headlight modernization
Despite the slightly higher performance indicators for the 2110 model, many car enthusiasts want to improve its equipment. The improvement requires disassembling the headlights, which occurs as follows:
- Remove the glass from the headlight, which is attached using sealant. Use the utility knife;
- remove the reflector. To do this you will have to unscrew a few bolts;
- on the back side of the headlight, remove all the wires, as well as the spring that secures the hydraulic corrector;
- remove the module from the headlight by pulling it towards you.
The most popular ways to improve headlights on a VAZ 2110 are:
- shifting the lens closer to the reflector. This is done to reduce the area of the lens on which the light stream is located, which avoids dazzling drivers who are driving in front (through their rear-view windows);
- modernization of curtains. Provides better light distribution;
- changing the shape of the reflector. This is done to change the width of the light stream. Since the reflector is made of sheet metal, it can easily be given, for example, an oval shape;
- adjusting the light flow. It can be done by tightening several screws on the headlight housing, which will change the angle of inclination of the optics of your car and its horizontal and vertical location.
Fine-tuning headlights on Lada 2110
This can be done without disassembling the headlight, but simply by adjusting the curtain. When the location of the curtain changes, the light also changes.
If you cannot achieve the ideal effect right away, you can experiment, for example, turning the curtain while the headlights are on. At the same time, remember at what position of the curtain the light emitted by the headlights suits you best.
As you can see in the photo above, it is necessary to perform various manipulations with the curtain in order to achieve the highest quality light and remove all unnecessary “tails” and “rainbows”.
By following all the recommendations, you can achieve the highest quality light and ensure a good view of the route at any time of the day and in almost any weather conditions. At the same time, spending only 5,148 rubles on such lighting.
After you have set up the light, you need to move on to working with the mask, by which time the paint should already be dry. I would like to add that you need to approach the process seriously, do everything carefully and do it with love. Approximately all work with headlights will take about 4 days.
Installing angel eyes headlights on fret 2110
We move on to the final stage of work - this is the actual installation of the headlights. Before installation, you must carefully check the headlights for flaws and defects. Since it is much easier to find flaws at this stage, because if a defect is discovered after installation, then many problems will arise associated with disassembling the headlights. Installation should begin by drilling 22 mm holes in the covers. This is necessary to remove the wires from the xenon. It happens that it is not always possible to drill holes all the way, so the missing length can be made with a knife.
We insert the wires into the holes and install the lamps in the desired position.
2 xenon lamps and 2 blocks will cost approximately 1850 rubles. You can install them according to the example in the photo below.
We connect all the necessary elements, if difficulties arise with one of the headlights due to a mismatch in the sizes of the holes and fasteners, it can be installed a little lower, since there are usually additional holes for fasteners there.
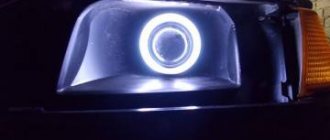
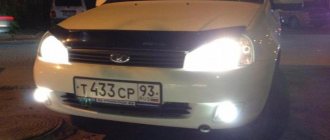
An example of headlights in the daytime.
An example using xenon during daylight hours.
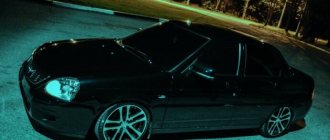
Example in the dark.
Only “angel eyes” are included, without the use of low beam.
Only the right headlight is on.
Only the left headlight.
Both headlights are on.
Work is done! As we can see, installing Kirzhach headlights using xenon lamps and LED strips on a Lada 2110 car is not an easy task. However, anyone can cope with it. The main thing is to pay attention to the little things, double-check the dimensions of the workpieces, identify the presence of flaws and defects, take the work seriously and do it with love. If you follow all the recommendations given in this article, you will become the proud owner of a car with “angel eyes”. And in gratitude for your work, you will receive a comfortable stay on the highway at any time of the day and in any weather conditions, since the use of Kirzhach headlights in combination with LED strips and xenon gives a very large viewing radius on the highway. This reduces the risk of getting into an emergency and also gives you greater confidence when driving. And as we said earlier, the safety of you and your passengers is the most important thing on the highway.
Tuning headlights - main options
Some motorists call the reinstallation of standard halogen lamps to xenon and higher-power halogen lamps the main type of tuning. Factory optics provide minimal light flow and quickly burn out, so many motorists are considering replacing headlights with alternative light sources.
When choosing, it is important to install lamps of the appropriate base and optimal color temperature:
- The Nord YADA “Clear” lamp is a budget option, costs approx. 100 rub. a piece. Service life - 2 - 3 months.
- Beacon H1 12V 55W Super Light +50% “ULTRA” - 240 rub. The optics provide increased brightness, the service life does not exceed the factory one.
- Bosch P1+90. Price - 1000 rub. Durable, suitable for low and high beam. The maximum service life is up to 12 - 18 months.
- OSRAM ULTRA LIFE 12V 55W H1 - inexpensive but good lamps. They last longer than standard ones.
- Osram H1 Night Breaker + 90% is ideal for rainy weather.
- Philips X-treme Vision +130% H1 12V 55W. 130 percent increased brightness. Good glow effect and long service life.
When replacing the lamp in one headlight, it is recommended to change the second one, since the service life of the optics is the same.