It is clear to anyone, not even a car owner, that without the ignition the car will not start or drive (criminal options are not considered). Depending on the car manufacturer, repairs or replacement of parts occur at a car service center or independently. Installing the ignition on a VAZ 21213 NIVA carburetor is one of those processes that the owner can carry out himself. This approach will save money and give you personal experience in repairs.
Ignition adjustment
Reg.: 08/21/2012 Messages: 37 From: Russia, Buryatia, Ulan-Ude Age: 48 Car: 21213, 2000
(I own it since April 2012) Name: Sergey Reg.: 04/07/2016 Messages: 47 From: Tambov Age: 35 Car: VAZ 21213 1999
Reg.: 08/21/2012 Messages: 37 From: Russia, Buryatia, Ulan-Ude Age: 48 Car: 21213, 2000 (I've owned it since April '12)
Sergio
Thanks for the most complete manual. I think, besides me, it will also be useful to subsequent generations of “whys”)))
Name: Alexey Reg.: 06/19/2017 Threads / Messages: 2 / 1709 From: Tula Age: 51 Car: VAZ-21213 1999
Name: Sergey Reg.: 04/07/2016 Messages: 47 From: Tambov Age: 35 Car: VAZ 21213 1999
Name: Georgy Reg.: 12/15/2010 Messages: 1122 From: Moscow Age: 62 Car: VAZ-21213 1997
Reg.: 08/21/2012 Messages: 37 From: Russia, Buryatia, Ulan-Ude Age: 48 Car: 21213, 2000 (I've owned it since April '12)
If I understand you correctly, you mean by the mark (notch) as in the photo?
If yes, then I'll post on it
Name: Alexey Reg.: 06/19/2017 Threads / Messages: 2 / 1709 From: Tula Age: 51 Car: VAZ-21213 1999
Name: Sergey Reg.: 04/07/2016 Messages: 47 From: Tambov Age: 35 Car: VAZ 21213 1999
Name: Georgy Reg.: 12/15/2010 Messages: 1122 From: Moscow Age: 62 Car: VAZ-21213 1997
Name: Alexey Reg.: 06/19/2017 Threads / Messages: 2 / 1709 From: Tula Age: 51 Car: VAZ-21213 1999
Name: Georgy Reg.: 12/15/2010 Messages: 1122 From: Moscow Age: 62 Car: VAZ-21213 1997
Reg.: 08/21/2012 Messages: 37 From: Russia, Buryatia, Ulan-Ude Age: 48 Car: 21213, 2000 (I've owned it since April '12)
Source
The most common causes of malfunctions
One of the most common causes of breakdowns is the secondary winding . Because it is in it that a high-voltage pulse is generated, and there, in most cases, a break or rupture of the turns can occur. This happens because of the following:
- The car's operation took place when the high-voltage wires (high-voltage wires - approx.) were not working.
- The engine was equipped with spark plugs with inappropriate performance parameters.
And also the cause of the malfunction may be a soldering failure; this usually happens due to frequent vibration. Or moisture formed during washing or condensation.
More about breakdowns
Armored wires are marked with arrows
The same high-voltage pulse that appears on the secondary winding must be fully used, that is, if this does not happen (if the integrity of the wire is violated - approx.), then the pulse looks for the nearest “exit” and it finds it, as a rule, in that same secondary winding, which is much thinner than the cross-section of the wires themselves.
Ignition timing is not so simple.
This entry is in my B/F, slightly delayed in publication. So, what could be difficult about setting the ignition timing on a carburetor classic (or Niva), but basically nothing
and turn the distributor. This is provided that the engine and attachments are completely stock. And if the pulleys are installed from the 2123 motor
And the front cover (spare), also from him
It's not so simple anymore. With the TDC mark, in principle everything is clear
In the case of my front cover, the first method is suitable. On the pulleys there are marks for the first
Method I for the second
. But this, let me remind you, is TDC, and where can I get the marks 5′, 10′, and for me to drive on gas, I generally need about 15′. I started to think. And he came up with the idea: Using a compass and a protractor, he drew a disk. Since, apart from the tide under the crankshaft position sensor, there are no other reference points, he drew advance marks on the disk. What difference does it make, either on the front cover make marks to the left of TDC, or on pulley, to the right.
The sector I need, relative to the TDC mark. Using expropriated white nail polish from my wife, I placed a mark 15′ on the gear ring of the pulley
Red and next to white, this is TDC, the second white is 15′. To check the moment, I took a strobe light from a friend
For control, at high tide under the WPC, I made dashes with varnish.
Using this method, I set the ignition timing, under gas, but not blindly. I even made a short video, although it’s a little clumsy, but it’s what it is.
Source
Useful video
The most correct method (not the “poke method”). Remove the valve cover and turn the crankshaft until the mark on the camshaft coincides with the casting at the top (mark on the inside of the sprocket). Expose
the mark on the crankshaft is 9 degrees earlier than the long mark (TDC).
The nearest short mark is 5g, the second is 10g. That is, the mark on the pulley will be almost on the farthest short mark, slightly shifted towards the first short mark. Place the distributor in place so that the slider is directed towards the FOURTH cylinder (according to the inscriptions on the distributor cover). In this case, the latches should be approximately parallel to the motor. Lightly press the distributor with the nut, but so that it can be turned by hand. Place the cover and the wire with the grounded spark plug on the terminal of the fourth cylinder, also put the wire on the coil and on the central terminal (do not forget about the Hall sensor). Turn on the ignition
, but do not start. By turning the distributor slightly, catch the moment a spark appears on the spark plug and fix the distributor. Gather the remaining wires. To be more convincing, you can check the ignition timing using a stroboscope (100% hit).
How to adjust the ignition on a Niva with a carburetor engine with your own hands
Unpretentiousness, ease of maintenance and maintainability are a well-known advantage of all carburetor engines that were installed on cars of the VAZ family, including the entire Niva model range. But here also lies their main drawback, namely the need for periodic manual adjustments. For example, after repairs or when changing the octane number of the fuel used, the driver is required to install the ignition on a VAZ Niva car (carburetor), while injection systems do not require such manipulations.
Installing the ignition on the Niva eliminates the problem of incorrect engine operation
Due to an incorrectly set ignition timing, the engine begins to operate incorrectly and its power decreases. Timely adoption of measures to install the ignition on a VAZ-21213 Niva with a carburetor engine can eliminate the problem. If you decide to make all the adjustments yourself, you can also save on the services of a specialist. To do this, you just need to read the guide below.
Carburetor repair for dips and jerks
Carburetor repair may be necessary if the engine idles unstable, and adjusting the quantity and quality screws does not always help. Often the reason lies in over-enrichment of the mixture, which may be a consequence of incorrect adjustment of the float system or malfunctions in the vacuum economizer system for power modes. In the latter case, a torn diaphragm may need to be replaced or the economizer valve through which fuel is leaking may need to be repaired.
Model 2121 may cause jerking, swaying or dips when moving. In this case, there may be several reasons for their occurrence, which may require carburetor repair to eliminate them. Dips that appear when the throttle valve is slowly opened are often associated with clogging of the idle jet. Here it is necessary to adjust the fuel level and check the level of clogging in the main fuel jets.
If the car gives a deep failure when trying to open the first or second throttle chambers, then in addition to clogged nozzles, the reason may be poor installation of small diffusers in the corresponding sockets.
When the Niva 21213 gives slight twitches at low and medium speeds and accelerates sluggishly, it may be due to poor fuel dosage on the shut-off valve side due to its wear. In this case, repairs are needed in terms of replacing the shut-off valve with a shut-off needle made of metal with a valve that has this needle made of a different material.
Cars of the 2121 series sometimes give failures when any sudden opening of the throttle valves, which then disappear within 5 seconds when the engine is running at the same pace. Often such problems are associated with a malfunction of the accelerator pump, which leads to a lack of or an incorrect drop in gasoline flows. A similar situation can result from a diaphragm rupture, a rubber O-ring on the sprayer holder being destroyed, or the lower part of the valve being destroyed.
If you find an error, please select a piece of text and press CtrlEnter.
How to set up the ignition on a Niva yourself
The most accurate adjustment of the ignition 21213 (carburetor) can be performed using a strobe light. However, this is not the only method available in garage conditions, especially since many car enthusiasts do not have this device at their disposal and do not intend to buy it. Therefore, we will consider two ways to set the optimal ignition timing.
First, let's focus on adjustment using a strobe light. Prepare a “13” wrench and, in fact, the strobe itself for the upcoming work. If everything is ready, you can begin to perform the adjustment operations, following the step-by-step instructions, but first we will make a reservation that for correct adjustment the engine must be warmed up and the carburetor must be properly adjusted. So, the procedure is as follows:
This is exactly how the VAZ-21213 ignition (carburetor) is installed using a device such as a strobe. With its help, you can adjust the moment of ignition of the working mixture no worse than a qualified car service specialist. Next we will consider an option that does not require the use of this device.
How to set ignition timing using a light bulb
This adjustment method does not require the purchase of additional equipment and at the same time allows for fairly accurate adjustments. If it suits you, then before you start adjusting the ignition of the VAZ-21213 (carburetor), prepare a 12 V test light by first soldering it to its contacts along the conductor. And you will also need a “13” wrench and a wrench to manually rotate the crankshaft. During the setup process, follow the sequence of steps described below:
By the way, this method of setting the ignition is suitable for most domestic vehicles with a carburetor engine, including cars of the UAZ family.
After completing the adjustment work, it would be useful to check the operation of the ignition system of model 21213 on the road. To do this, accelerate the car to a speed of 50 km/h, engage fourth gear and press the accelerator pedal all the way. If at this moment you hear quiet detonation sounds, it means that the moment of ignition of the working mixture is set correctly. The absence of sounds indicates late ignition, and if they are too loud, then the timing is too early. In each of these two cases, you will have to re-configure.
This article describes the two most common ways to set the ignition timing, but they are not the only ones. For example, experienced craftsmen are able to make adjustments based on their own hearing. However, this method is only available to those who thoroughly know how to set the ignition on the Niva 21213 (carburetor) and perform such work regularly. For a simple car enthusiast, it will be enough to arm yourself with the above material to achieve a decent result.
Source
We carry out the adjustment ourselves
Niva 21213
may be subject to adjustment of the starting system by the gap at the edges of the valves, if the carburetor is removed, or by the crankshaft speed directly on the machine. In the first case, the gap at the location of the lower edge (in the direction of air movement) from the throttle valve is set to a width of 1.1 mm. It is adjusted with a screw that has a 0.7 cm hexagon on the head and a slot from the shank. This operation is carried out with the cam lever turned counterclockwise from the starting system control (all the way). In the same position, the gap at the lower edge of the air damper is set to 3 mm using a screw in the cover from the diaphragm mechanism in the starting system (you need to loosen the lock nut). At the same time, the rod from the diaphragm must be forcibly recessed completely into the adjusting screw. After adjustment, the screw is fixed with a locknut.
Adjusting the Niva starting system directly in the car saves time:
- You need to remove the air filter from the engine, pull the control lever away from the air damper, and start the engine.
- When the air damper is forcibly opened (by touching a flat screwdriver to a third of its full angle of rotation) using a screw (next to the lever on the axis from the throttle valve from the first chamber), the initial rotation speed is set to 2.08.mar.0 thousand rpm (on a warm engine).
- Remove the screwdriver, lower the air damper and, using the screw stop (next to the diaphragm), set the frequency to be 100 rpm lower than the original one (you need to select the appropriate position of the air damper).
- The screw can then be secured using a locknut.
If you have a gas analyzer, then the carburetor adjustment in the starting system part can be done based on the amount of CO (carbon monoxide) in the exhaust gases. If, with the choke control lever fully extended, the gas rate is 8%, then everything is in order. If there is less gas than this value, then the screw on the cover of the diaphragm mechanism is tightened; if there is more, it is unscrewed and repeated measurements are taken.
It is necessary to adjust the idle speed of the Niva 2121 so that there is less carbon monoxide in the exhaust gases and so that the engine runs stably. At service stations, such work is carried out with gas analyzers on the MV. In the garage, adjustments can be made using the tachometer.
For these purposes, on a warm engine, a plastic plug is pierced with a screwdriver, then the quality screw is rotated in different directions until the maximum idle speed is reached. Then, using the quantity screw (has a ribbed plastic handle), you need to set an increased speed (50-70 rpm more than at standard idle speed). Operations with screws must be repeated two more times. Then on models 2121 or 21213
at idle, at speeds increased by 50-70 rpm, the quality screw is tightened, and the speed should drop to normal (i.e., decrease by 50-70 revolutions).
How to set the ignition of a VAZ 21213 carburetor
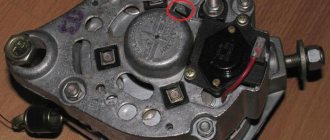
Remove the hose from the fitting of the vacuum ignition timing regulator housing. Remove the cover from the sensor-distributor.
We apply a mark on the flange of the sensor-distributor housing and the cylinder block.
We mark on the housing of the sensor-distributor (or on the cylinder head cover) the place to which the rotor contact is directed.
Using a 13mm spanner, unscrew the nut securing the clamping bar.
Remove the clamping bar.
We remove the distributor sensor from the cylinder block socket
Using a screwdriver, press out the spring clamp of the connector
...and disconnect the connector
Gaskets are installed between the mating surfaces of the distributor sensor and the cylinder block.
We install the distributor sensor in the reverse order, following the marks.
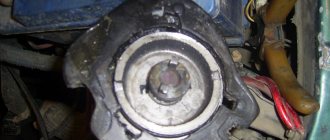
Setting the TDC of the first cylinder
There are three marks in the form of tides on the front cover of the cylinder block.
The first mark along the direction of rotation of the crankshaft pulley corresponds to 10° ignition timing, the second – 5° and the third mark, the longest – 0°.
The top dead center (TDC) mark of the first cylinder is stamped on the crankshaft pulley.
There is a boss at the end of the pulley in this place
If the label was not installed, for some reason, then perform the following operations:
— set the TDC of the first cylinder. The top dead center of the first cylinder is the position of the piston at the top point during the compression stroke.
To determine the compression stroke, unscrew the spark plugs and insert paper rolled up like a cork, maybe a newspaper, into the spark plug hole of the first cylinder.
And by turning the crankshaft pulley using a key, we “catch” the moment when our plug flies out. After the plug comes out, we place a more precise mark on the pulley opposite the tide.
This will be the TDC of the first cylinder.
We install the distributor rotor so that the distributor contact is opposite the contact in the distributor cap of the first cylinder.
Thus, we insert the distributor. You can more accurately adjust the ignition using a strobe light.
Without a strobe light, we make a rough adjustment by starting the engine, and by the throttle response we determine the correct installation.
You don't have to use a plug to set TDC. Then we simply place a mark on the pulley opposite the tide and set the contact of the distributor runner opposite the contact of the first cylinder.
And install the distributor. If the distributor was not installed in the compression stroke of the first cylinder, then during starting there will be a shot into the muffler.
This indicates that the ignition is set to the fourth cylinder (one camshaft revolution corresponds to two crankshaft revolutions).
In this case, you need to make contact with the distributor runner on the first cylinder and turn the crankshaft one revolution until the mark on the high tide coincides.
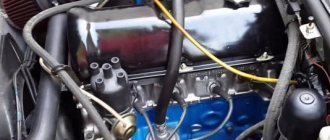
General tips for connecting high-voltage wires.
Checking high-voltage wires. To check the wires, you will need a multimeter tester. Check the resistance of the wires - it should be no more than 20 KOhms (in practice, the longest wire of cylinder 1 has a resistance of up to 10 KOhms). If the wire resistance is more than 20 Kom, it must be replaced. Carefully inspect the wires for chafing on parts of the motor or other wires. In case of significant abrasion, replace the wire. In case of minor abrasion, it is possible to lay the wire so that it does not rub and fix it in this position.
Laying wires. Do not try to connect the wires in a bundle. Disassemble the wiring harnesses, release the wires from the plastic holders. Connect the high-voltage leads to the corresponding cylinder spark plugs. Lay the wires so that they do not rub against each other, engine parts, or hoses. Avoid sharp bends and tension on the wires. After connecting all the wires, secure them into the bundle with special comb holders included in the delivery kit.
The procedure for connecting I/O wires to a VAZ carburetor (2108, 2109, 21099)
The central wire from the distributor cover always goes to the ignition coil (bobbin).
The outlet of the distributor cover, which faces towards the front of the car, is connected to the first cylinder.
The outlet of the distributor cap, looking down, is connected to the third cylinder.
The outlet of the distributor cap, looking rearward, is connected to the fourth cylinder.
The outlet of the distributor cap, looking up, is connected to the second cylinder.
The procedure for connecting high-voltage wires to a VAZ Classic, Niva with a carburetor and distributor.
Central wire from the ignition coil (bobbin)
1 cylinder - above the vacuum corrector. Next, clockwise, the order is 1-3-4-2.
Injection VAZ produced before 2004 with an old-style ignition module (4-pin low-voltage connector)
Actually, on the module body it is already indicated which cylinder the pins correspond to - but we duplicated them in red in case the module gets completely dirty, and you might not be able to see it in the photo.
Injection VAZ produced after 2004 with a new ignition coil (3-pin low-voltage connector)
As with the old-style ignition modules, the new coils are also marked with pins corresponding to the cylinders. But the connection order is different from the order on the old-style ignition module. Be careful.
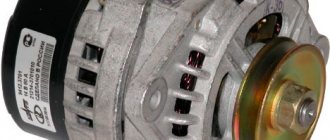
Ignition distributor sensor 3810.3706
1 – roller; 2 – housing of the ignition sensor-distributor; 3 – latch; 4 – contactless sensor; 5 – vacuum regulator housing; 6 – diaphragm; 7 – vacuum regulator rod; 8 – support plate of the centrifugal regulator; 9 – ignition distributor rotor; 10 – side electrode;
11 – cover; 12 – central electrode; 13 – ember of the central electrode; 14 – resistor; 15 – external contact of the rotor; 16 – driving plate of the centrifugal regulator; 17 – weight of the centrifugal regulator; 18 – support plate of the contactless sensor; 19 – screen.
Ignition adjustment
Reg.: 02/13/2014 Messages: 32 From: Russia, Severodvinsk Age: 38 Car: 21213, 2000
Reg.: 11/05/2007 Messages: 5113 From: Novosibirsk Age: 35 Car: Fora, 212180 2002 carb
Name: Dmitry Reg.: 11/05/2015 Threads / Messages: 11 / 751 From: Russia, Bashkortostan, Dyurtyuli Age: 34 Car: VAZ-2121 1982 was, Ford Focus 2 2007, 2 liters, “Gia”
Reg.: 01/31/2015 Messages: 645 From: ufa Age: 59 Car: fora 99
Reg.: 09/07/2016 Messages: 133 From: RF Tambov Age: 66 Car: VAZ 21213, 1996
Reg.: 08/21/2012 Messages: 37 From: Russia, Buryatia, Ulan-Ude Age: 46 Car: 21213, 2000 (I've owned it since April '12)
Problem. Yesterday I installed a new DAAZ carb, at the same time I had to set the ignition at the very least in order to get to the service station. I followed the advice given in this thread.
1. Insert the wine cap tightly into the 4th cylinder. 2. I turned the pulley with a wrench until the plug popped. 3. Turn the pulley as much as necessary (about a quarter of a turn). Once again I was convinced of the presence of TDC in the 4th cylinder by sticking a pencil there. 4. Aligned the mark on the pulley with the shortest mark on the cover (I read here that when driving on 95 gasoline, you should set it to the shortest mark). 5. Inserted the distributor so that the contact of the slider was facing the terminal of the 4th cylinder on the distributor cover. The distributor itself was oriented so that its latching clips were approximately parallel to the engine.
It started on choke almost immediately (considering that I changed the carb and installed the distributor by eye - give or take a bast shoe). I was immediately confused by the slight twitching of the tachometer needle, which had never happened before. It quickly warmed up to operating temperature, which was also confusing - it usually warms up more slowly. I set the speed with a plastic quantity screw to 800. It stands and hums. At first it worked more or less steadily, after about 15 minutes the revolutions began to float a little. It sounded for another 15 minutes, looked at the instruments - atas, the temperature was creeping up to the red zone, there was just a little left to reach it (I took a photo a couple of minutes after I turned off the engine). When I turned it off, it gurgled and bubbled strongly in the area of the expansion tank for about 10 minutes. Then, when it cooled down to the standard 90 degrees, I started it several times just for fun - it started without problems.
Ignition: late and early
Which ignition is better? An experienced motorist or expert will immediately say: optimal. And in itself, late or earlier ignition is already extreme, capable of giving the car owner a lot of headaches.
The stability of the operation of an injection engine directly depends on proper adjustment of the ignition system. This will help increase the power of the internal combustion engine, reduce fuel consumption, and improve efficiency.
Ideally, on a 4-stroke internal combustion engine, the fuel assembly should ignite at the end of the compression stroke. This means that the fuel must ignite at the very moment when the piston reaches TDC. This process is due to the nuance that the fuel assembly needs a specific time to burn, after which the resulting force will push the piston down.
So, late or early ignition implies a delay or advance in the operation of the above process. In other words, the ignition system is configured so that a spark is formed and ignites the fuel assembly not at the optimal moment for this. This happens sooner or later.
Procedure for replacing the timing chain Niva 21214 injector
Setting the ignition timing (ignition timing) on the engines of VAZ 2101, 2102, 2103, 2104, 2105, 2106, 2107, 2121 cars and their modifications. It is logical that a new spare part will be required. The secret of choice is quality control. You need to place it flat on your palm and look at the sagging. If it is more than 1 cm, then you need to look for another part. Additionally, a tensioner, a set of gaskets and seals, and dampers are purchased. Then the hood is opened, the battery is disconnected and the part is changed in the following order:
It remains to check the correct assembly. You need to start the engine and listen. If there is a grinding noise, the procedure will have to be repeated. The sound itself should be standard (rustling).
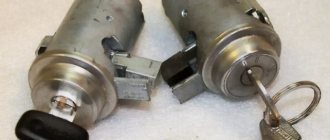
Checking the quality of the ignition switch installation
It is logical that errors are possible when connecting contacts or incorrect installation of the lock itself. Therefore, it is necessary to test the protection in the installed state. You will need an ohmmeter and a voltmeter. Performance diagnostics:
- Checking the resistance between the terminals of the secondary winding: connect the probes to cylinders 1 and 4, then to cylinders 2 and 3. The data should approximately match. An error greater than 100 ohms indicates damage to the secondary winding.
- The wiring is checked with a voltmeter. The first control - one probe is placed on contact A, the second - on ground. Start the engine and record the data. Turn off the car and repeat the procedure with contact B. The readings should be about 12 volts.
- In addition, if there is no voltage, check the fuse, the possibility of broken wiring or corrosion of the contacts.
Adjusting the ignition of a VAZ 21213 carburetor without a strobe light
Correct ignition setting on a VAZ 2107 car
With the advent of various diagnostic devices on sale, it became possible to check the characteristics of regulators directly on the car. To check automatic regulators, you need to know their regulation ranges and characteristics (Fig. 7-21,166,191), which are usually presented in the form of diagrams (graphs) showing the change in the ignition timing angle depending on the crankshaft speed (CB regulator) and vacuum (vacuum regulator ). Before checking the regulators, the initial SOP is always checked.
To check the centrifugal regulator, you need a strobe light and a tachometer.
To ensure that the characteristics of the centrifugal regulator do not overlap with the characteristics of the vacuum regulator, the vacuum hoses are disconnected and plugged (the vacuum regulator is turned off).
The operation of the centrifugal regulator is checked at several characteristic points (usually four are enough). The control points are taken to be the values of the advance angles at the rotation speed: 1000, 1500, 2500 and 3000 rpm.
Start the engine, point the strobe light at mark 3
. Increase the crankshaft speed in steps by 500 rpm. Determine the number of degrees of ignition timing using the crankshaft pulley with marks. Don't forget to subtract the initial SOP from this value. Compare the resulting characteristic of the centrifugal ignition timing regulator with the characteristic in Fig. which are below.
1) The angle of the closed state of the contacts is adjusted, for which it is necessary:
remove the ignition distributor cover; remove the tubercle that usually forms on the moving contact; Use a file to clean the contacts of the distributor; check the tight fit of the contacts to each other along their entire plane; if necessary, adjust the fit by bending the fixed contact; turning the crankshaft by the ratchet, using a special key or starting handle, set the maximum distance between the contacts; unscrew the screw that keeps the contact group from moving and, using a flat probe four-tenths of a millimeter thick, set the gap between the contacts so that the probe moves in it with little force; tighten the screw that secures the position of the contact group.
2) The ignition timing is adjusted. The easiest way to set up a car's ignition is with a strobe light. This is done this way:
connect any car strobe, preferably powered from a 12-volt network, to the corresponding terminals of the battery; put the signal sensor on the high-voltage wire that goes to the spark plug of the first cylinder; disconnect the vacuum corrector hose from the distributor and plug it; start the engine and warm it up to operating temperature; achieve stable idle speed; loosen the bolt holding the distributor from turning; Direct the light of the strobe lamp onto the crankshaft pulley so that the marks on the pulley and the mark on the front cover of the gas distribution mechanism are visible; turn the distributor body clockwise or counterclockwise until the position of the ignition mark on the crankshaft pulley is opposite the mark on the front cover of the gas distribution mechanism; Having established the appropriate position of the marks, fix the distributor body by tightening the fixing bolt.
3) Check the result of the adjustment in the dynamics:
on a horizontal section, accelerate the car to 50 km/h; sharply press the gas pedal, if detonation knocks do not last for more than two seconds, the ignition is set correctly.
Design of the ignition system of the Niva VAZ-2121 car
The ignition system is contactless. Consists of a distribution sensor, switch, ignition coil, spark plugs, ignition switch and high and low voltage wires.
The ignition distributor sensor 3810.3706 is a four-spark type, with a contactless control pulse sensor and built-in vacuum and centrifugal ignition timing regulators.
The initial ignition timing angle at a crankshaft speed of 750–800 rpm should be 1±1° BTDC.
The distribution sensor performs two main functions: firstly, it sets the moment of spark formation depending on its initial setting, the number of revolutions of the crankshaft and the load on the engine, and secondly, it distributes high voltage pulses (“spark”) among the cylinders in accordance with the order of their operation - a rotor (runner) is used for this.
In order to avoid mistakes during assembly, the slider is installed on the support plate of the centrifugal regulator in only one position.
The slider has a 1 kOhm noise suppression resistor.
The operation of a contactless sensor is based on the Hall effect.
When the ignition is turned on, power supply is supplied to the sensor. When the sensor-distributor roller rotates, a steel screen with rectangular cutouts passes through the sensor gap.
How to set the ignition on a Niva
Installing the ignition on a VAZ Niva car (carburetor)
Setting up VAZ 2121 headlights
Unpretentiousness, ease of maintenance and maintainability are a well-known advantage of all carburetor engines that were installed on cars of the VAZ family, including the entire Niva model range. But here also lies their main drawback, namely the need for periodic manual adjustments. For example, after repairs or when changing the octane number of the fuel used, the driver is required to install the ignition on a VAZ Niva car (carburetor), while injection systems do not require such manipulations.
Installing the ignition on the Niva eliminates the problem of incorrect engine operation
Due to an incorrectly set ignition timing, the engine begins to operate incorrectly and its power decreases. Timely adoption of measures to install the ignition on a VAZ-21213 Niva with a carburetor engine can eliminate the problem. If you decide to make all the adjustments yourself, you can also save on the services of a specialist. To do this, you just need to read the guide below.
How to set up the ignition on a Niva yourself
The most accurate adjustment of the ignition 21213 (carburetor) can be performed using a strobe light. However, this is not the only method available in garage conditions, especially since many car enthusiasts do not have this device at their disposal and do not intend to buy it. Therefore, we will consider two ways to set the optimal ignition timing.
First, let's focus on adjustment using a strobe light. Prepare a “13” wrench and, in fact, the strobe itself for the upcoming work. If everything is ready, you can begin to perform the adjustment operations, following the step-by-step instructions, but first we will make a reservation that for correct adjustment the engine must be warmed up and the carburetor must be properly adjusted. So, the procedure is as follows:
To adjust the ignition correctly, the engine must be warmed up.
Using a strobe, you can adjust the moment of ignition of the working mixture very precisely. This is how the ignition of a VAZ-21213 (carburetor) is installed using a device such as a strobe. With its help, you can adjust the moment of ignition of the working mixture no worse than a qualified car service specialist. Next we will consider an option that does not require the use of this device.
NIVA CARBURETOR: WE SET UP AND REPAIR YOURSELF
Carburetor on models 2121, 21213
and other machines have, in general terms, the same device. Functionally, it is located in the propulsion system, and with its help the fuel is mixed to the state of a combustible mixture. A carburetor, as a rule, consists of several main elements - a float chamber, a so-called jet (with a spray), a diffuser, and a throttle valve. It can have from one to four cameras on different cars, sequential or simultaneous opening of the throttle valves, horizontal, downward or upward movement of the working mixture.
How to adjust the ignition on a Niva with a carburetor engine with your own hands
Unpretentiousness, ease of maintenance and maintainability are a well-known advantage of all carburetor engines that were installed on cars of the VAZ family, including the entire Niva model range. But here also lies their main drawback, namely the need for periodic manual adjustments. For example, after repairs or when changing the octane number of the fuel used, the driver is required to install the ignition on a VAZ Niva car (carburetor), while injection systems do not require such manipulations.
Let's look at the differences between contact and non-contact ignition:
How to independently set the ignition on a VAZ 2106
Advantages of contactless ignition:
- since there is no contact group in the distributor, sparking occurs clearly;
- long coil life;
- at medium engine speeds, BSZ creates a spark 4 times more powerful than contact ignition. This is especially useful if the spark plugs are dirty, as a spark will still be produced;
- performs its functions perfectly even in cold weather;
- if the voltage in the electrical network is low, then sparking will still occur;
- thanks to the powerful, stable spark of the candles, the fuel-air mixture ignites faster;
- if BSZ is installed, then fuel consumption decreases and engine power increases;
- improved vehicle acceleration dynamics;
- BSZ is easier to maintain because the device has no moving parts.
Setting the ignition for Niva Chevrolet. How to set the ignition on a Niva Chevrolet
When replacing a chain, installing a new one should be done in several stages: A key for rotating the crankshaft The car is installed on an inspection hole or raised with a jack.
The wheels are fixed with shoes or a stop. Before starting work, you must turn off the fan and unscrew the radiator mounts. All pipes, except the air duct, remain in place; the antifreeze does not drain.
After this, the valve cover is dismantled. After all the fasteners have been unscrewed, you must carefully remove it, preventing dirt from getting inside. To prevent the bolts from falling into the engine sump, use a deep-head wrench or unscrew the bolt by hand. Remove the chain tensioner using a screwdriver. It should be replaced in case of sprains, how to set the ignition on a Chevrolet Niva injector tension, during scheduled maintenance, after a thousand.
The camshaft sprocket is removed. If you pull it towards yourself the distance will be removed along with the chain. The part must be replaced if there are grooves on the leading part of the teeth.
On a working mechanism, the chain moves on the teeth. The scrolling step is one tooth. The sprocket with chain is placed on the camshaft flange.
Timing marks on a Chevrolet Niva car
When the chain moves on the sprocket, its holes will not line up with the pin. Set TDC according to the mark on the camshaft sprocket when installing according to the marks on the crankshaft pulley and how to set the ignition on the Chevrolet Niva injector on the front cover of the camshaft drive chain; in this position the piston of either the 1st or 4th cylinder can be placed. After this, make sure that the marks on the crankshaft pulley and the cover match.
If the shaft marks do not coincide, it means that the valve timing is incorrect; the piston of the 4th cylinder is not installed at TDC. In this case, it is necessary to remove the camshaft drive chain from the camshaft sprocket and rotate the crankshaft until the marks are aligned (see Fig.
Checking and setting valve timing according to marks.
Purchase a special wrench for turning the crankshaft by the pulley nut. With this key you can turn the crankshaft and the radiator is removed from the top of the engine compartment in the photo for clarity. Engage 4th gear and slowly roll the car in the desired direction until the mark on the camshaft sprocket matches the mark on the camshaft bearing housing.
Engage 4th gear and lift one of the rear wheels. Then turn the hanging wheel in the desired direction until the mark on the camshaft sprocket matches the mark on the camshaft bearing housing.
Location of TDC marks The marks are located on the camshaft sprocket, hole a, and on the camshaft bearing housing, protrusion b. In addition, the marks are applied in the casting on the cover, protrusion a and on the ring gear of the crankshaft pulley, hole b on the edge of the crown. For clarity, the photo was taken on a car with the radiator removed, but from a certain angle they are also visible from the top of the engine compartment.
The car's acceleration time increases significantly because the engine does not respond well to pressing the gas pedal.
Acceleration occurs in jerks, during which clouds of black smoke may fly out of the exhaust pipe. Valve wear accelerates many times over, and if the shafts are out of synchronization too much, the valves become deformed and their seats break.
Incorrect adjustment can also lead to a broken timing chain. It, in turn, can puncture the radiator, break the injector and other parts of the engine.
The engine constantly overheats, and the consumption of engine oil and antifreeze can increase significantly.
As can be seen from this article, correctly set timing marks are the key to long and uninterrupted engine operation. There is nothing complicated about this; even a novice car enthusiast can do it. Install it in place of the old one. Now take the timing chain and lubricate it as well. First install it on the crank pulley gears, then on the oil pump and on the camshaft.
Tuning on carburetor modifications of the VAZ 2107
All old textbooks on servicing classic Zhiguli models describe a method for setting the moment of spark formation using a light bulb, although experienced motorists can easily do without it. You will understand why this happens as you read this material, but for beginners it will be useful to familiarize yourself with the old proven technique.
To correctly set the ignition of the “seven”, you need to ensure that the following conditions are met simultaneously:
- the notch on the crankshaft pulley is opposite the long mark on the timing cover;
- in this case, the round mark marked on the camshaft chain drive gear coincides with the boss on its body;
- the piston of the 4th cylinder has completed the compression stroke and is at top dead center;
- the contacts inside the distributor are open;
- The movable contact of the slider faces the fixed contact on the distributor cover, where the wire from the spark plug of the 4th cylinder is connected.
The diagram shows what happens in the cylinders when the marks are aligned
The light bulb is used to control the ignition timing, for which it must be connected with one wire to the “K” contact of the high-voltage coil, and with the second to the vehicle ground. You should know that at the same moment the piston of the first cylinder is also in the TDC position, only there the air-fuel mixture is not compressed, but exhaust gases are released after its combustion. This is why ignorant car enthusiasts often confuse the first cylinder with the fourth when installing the ignition.
Layout of marks on the timing cover
When the above actions occur simultaneously, a spark discharge occurs on the electrodes of the spark plug of the 4th cylinder, as evidenced by the flash of the connected light bulb. To achieve these conditions and set the ignition correctly, follow the instructions:
- Turn the crankshaft with a 36 mm wrench, aligning the notch on the pulley with the long notch on the timing cover.
- If at this moment the engine valve cover is removed, then it is better to navigate by the mark on the camshaft gear, placing it opposite the housing boss.
- Take the ignition distributor, remove the cover and turn its shaft to place the slider opposite the wire leading to cylinder No. 4 (there are cylinder number markings on the cover). Insert the distributor into the engine hole, holding the slider and housing in this position, and then secure it with a 13 mm wrench nut.
- Connect the light bulb wires and turn on the ignition by turning the key. Loosen the nut securing the distributor and slowly turn it by the housing until the lamp flashes, indicating the moment of sparking. Reattach the distributor.
- Turn off the ignition and make sure that the contacts inside the distributor are currently open. Take a 0.35 mm feeler gauge and check the gap between them, if necessary, adjust it by loosening the fastening screws with a screwdriver.
The marks must be aligned by turning the crankshaft with a wrench
The ignition is considered to be set correctly if, after installing the distributor cap and connecting the wires, you manage to start the engine, and then you need to adjust the timing. The non-contact system is installed in the same way, with the exception of checking the gap in the contact group due to its absence.
The mark on the camshaft gear is aligned with the boss on the body
Important point. In most cases, the ignition is set without removing the valve cover, which is why the position of the mark on the gear is not visible. You have done everything according to the instructions, but the engine does not start. This means that a spark is supplied to the 4th cylinder during the exhaust stroke, and compression at this moment occurs in the first cylinder. The problem can be solved simply:
- remove the distributor cover;
- unscrew the nut securing it;
- pull the distributor out of the socket, turn the slider exactly 180° and insert the element back;
- Press the distributor skirt with the nut and install the cover.
Timing chain replacement time for Niva 21214 injector
There are no specific recommendations from VAZ on replacing the chain. Professionals recommend doing this after approximately 100,000 km. However, you need to check the condition regularly. It is likely that problems may arise much earlier. The most common reasons for replacing the timing chain:
These problems are the main reason to change the part. A part that scatters while driving will not only send the car to the parking lot until it is replaced. It is likely that other elements of the power plant will be damaged while driving. And this will logically increase the cost and time of repairs.
Preparing spare parts and tools for timing belt replacement
To adjust the marks you will need the following tools:
- screwdriver;
- wrenches for 8, 13, 10, or heads;
- device for turning the crankshaft;
- sealant;
- shoes for wheels (preferably).
The condition of the mechanism greatly depends on the driving style. The chain is much stronger than the belt, but it also does not like jerking or high speeds. Therefore, driving in a sporty style, with sharp gear changes and acceleration in extreme modes, quickly “sentences” the timing belt. And the engine, transmission, car as a whole. The condition of the chain depends on the condition of the oil, tension, and alignment of the rotating parts. Therefore, when the mileage declared by the manufacturer expires, it is necessary to change not only the chain, but the accompanying parts.
The best way to determine the need for replacement is to visually inspect the timing parts. But since access to details is difficult, we can judge by indirect signs. Such as increased noise, extraneous knocks. They can be caused by wear of the tensioner and damper, sprockets, increased play of the water pump shaft, chain stretching, and other factors. Play in the pump shaft is especially dangerous, since if it breaks down, the engine overheats and dangerous chain beating occurs.
For confident driving, along with a worn chain, it is necessary to change:
- tensioner;
- sedative;
- stars;
- crankshaft oil seal (if necessary);
- cylinder head gasket;
Replacing all of the listed parts together will allow you to confidently operate the car without worrying about the condition of the timing belt.
Peculiarities
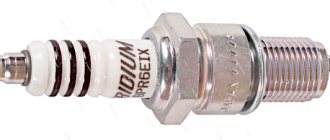
The operation of the Niva 21213 system depends on the condition of its parts. High-voltage wires must have a distributed resistance, the value of which is in a certain range. Too much resistance will result in the ignition coil not having enough power to cause a breakdown. Low resistance increases interference. Although, some install just such wires. Of course, the spark power will increase and engine performance will improve. Spark plugs can lose their properties over time. The electrodes melt and carbon deposits appear.
The high temperature inside the cylinders greatly heats the spark plugs. Therefore, even when the ignition is turned off, ignition occurs from heated spark plugs.
It is important that all spark plugs have the correct gap between the electrodes. This will ensure high-quality ignition of the mixture. The distributor cover must be clean from dirt, since its presence can lead to current leakage.
Choice of BSZ
When purchasing a new BSZ, you should pay attention to the presence of the components of the entire kit. The factory kit should contain:
- Distributor (main distributor). The code for engines 1.5 and 1.6 is 38.37061. For 1.3 engines, the number will be 38.3706–01, because the height of the 1.3 engine block is lower and the distributor shaft is shorter.
- Switch number 36.3734 or 3620.3734.
- High voltage coil (reel). Marking 27.3705
- Thin wires with connectors.
In appearance, the BSZ kit for the VAZ 2121 NIVA is very similar. But it’s better not to install this kit on a VAZ 2107 or a VAZ 2106, because the characteristics of the “six” and “seven” are very different from the “Niva”. Distributor brands for Niva: 3810.3706 or 38.3706–10.
The best manufacturer of electronic ignition systems for old VAZ cars is. The production capacity base is located in the city of Stary Oskol. According to reviews from car owners of classic BSZ SOATE models, this is an excellent option.