Kalina rear wheel mechanism
Every time you jack up the car, you need to check the wheel for play. Especially if, while moving, you hear an atypical hum that does not stop. Most often, this indicates that the rear wheel bearing needs urgent replacement. This humming noise usually becomes louder during turns or when crossing uneven surfaces.
If you do not renew the wheel bearing in a timely manner, it will quickly collapse, leading to seizure. As a result, the tire tread pattern will wear out faster. Also, a consequence of a malfunction may be a loss of stability when moving, which leads to the creation of an emergency situation on the road. A worn bearing will endanger the lives of not only vehicle passengers, but also other road users.
Owners of domestic cars, in particular Lada Kalina, often face the need to replace the wheel bearing. The work does not require any special skills and abilities; it can be carried out by any motorist.
Hub design
The peculiarity of wheel bearings is that they do not require any maintenance during the operation of the car. In other words, they do not need to be lubricated, repaired or adjusted. When worn, the hub bearing must only be replaced.
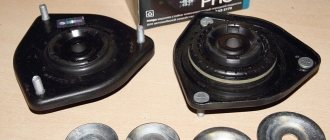
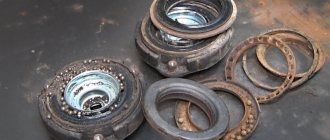
On a Lada Kalina car, the rear hub consists of 9 elements, which are assembled in the following sequence.
- Hub rod.
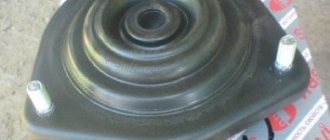
- Dirt protection rim.
- Open retaining ring.
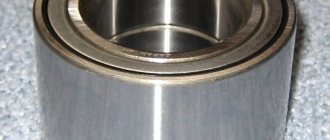
- Wheel bearing.
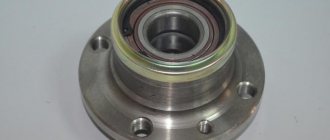
- Hub.
- Intermediate washer.
- Bolt for securing the hub.
- A rim that acts as a seal.
- Protective cap.
Tools that will be required to replace the wheel bearing on Kalina's rear wheel:
- small chisel;
- socket wrench 30;
- special puller for an open ring;
- puller for displacing the bearing;
- universal type puller.
Before you begin replacing the bearing, you need to make sure that the car is securely in place. It is extremely important to follow safety precautions. There should be supports under the other wheels of the car. It is also worth checking the serviceability of the jack. Once you have ensured that the vehicle is securely positioned, you can begin updating the hub mechanism.
Signs of a broken wheel bearing
A reason to check your vehicle's wheel bearing may be one or more of the following symptoms:
- The appearance of a hum (similar to a “dry” crunch) from the wheel. As a rule, a hum occurs when the car exceeds a certain speed (usually this value is about 60...70 km/h). The hum intensifies when the car turns, especially at high speed.
- Often, along with the hum, vibration occurs not only in the steering wheel, but in the entire car (due to beating of the bearing), which is felt when driving, especially on a smooth road.
- Overheating of the wheel rim during prolonged driving of the vehicle. In some cases, the brake caliper overheats to the point where the brake fluid can boil.
- Wheel jamming. For the driver, this is expressed in such a way that when driving in a straight line, the car seems to be “pulled” to the side. This is caused by the fact that the problem bearing slightly slows down the wheel associated with it. The symptoms are similar to those that occur with an incorrectly adjusted wheel alignment. This behavior is already very dangerous, since if the wheel bearing jams, it can break the CV joint , and at speed the disk will cut the tire!
Replacing the wheel bearing
Bearing replacement process
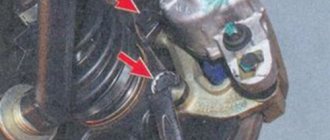
First of all, you need to remove the hubcap, but do not rush to dismantle the rear wheel. Engage first gear and remove the hub protective cap. Now you need to slightly loosen the bolts that secure the wheel to the hub, and do the same with its fastening. The hub nut is screwed on with a large torque, so you will need a metal lever to unscrew it. You can use a small piece of pipe as a lever.
Now you need to raise the back of the Kalina using a jack and fix it at such a level that the wheel rotates freely. Remove the wheel and then the drum brake. After this, you can finally unscrew the hub nut and remove the intermediate washer. Using a puller, you need to dislodge the hub from the rod.
Securely secure the hub in a vice and remove the open retaining ring from it. Using a puller, remove the wheel bearing and thoroughly clean its seat. Place the new bearing and secure it with the open ring. This is a very important assembly point; make sure that the ring goes into the hub contour all the way. Once you are sure everything is in order, proceed to install the hub onto the rod.
During installation, only apply pressure to the central part of the bearing. After securing the hub, you need to thoroughly clean the contact surface between the drum brake and the hub. It should be free of small particles of rust and dirt. Otherwise, when braking, you will hear a loud creaking noise, which may well develop into wheel vibration. To securely secure the bearing, you will need to press it with rims from a new set. If you only purchased the bearing itself, pressing can be done using old rims, but they will need to be thoroughly cleaned.
Helpful advice
When purchasing a new bearing, it is important to check that it contains grease. Often unscrupulous manufacturers do not report it to the required level. As a result, the element is constantly subjected to stress and fails.
It is not uncommon for a part to break down after 3,000 km (especially on UAZ vehicles). The best option is to gut out all the existing grease and apply a new one, purchased separately. Fortunately, specialized lubricants are now sold. They are resistant to washout and do not change properties at high temperatures.
Step-by-step instructions for replacing the rear wheel bearing of Lada Kalina
1. Remove the wheel and unscrew the guides that guide the wheel and press the brake disc. Unscrew it with a key to seven. If you have old-style guides, use a twelve key.
2. Remove the drum. He often gets stuck and it’s not easy to do. Therefore, we take a wooden block and knock down the drum through it from the back side.
3. Unscrew the hub nut with a 30 mm socket. Be sure to use a powerful wrench; the nut is tightened very well.
4. Next you need to remove the hub. The first method is a two or three legged puller. You hook it to the edges of the hub, and place the tip of the puller into the groove on the hub axis and tighten it.
6. There are three ways to change the bearing.
The first is to go to a service station and press out and press the bearing on a press.
The second is to buy a bearing presser like this.
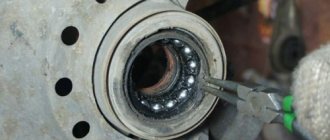
The third is the most extreme. First you need to knock out the old bearing with a hammer. Next, we place the new bearing opposite the seat and place the old one on top. When hammering, we hit the old one and hammer in the new one. If you hit a new bearing with a hammer, you can ruin it even before installation. This method is for those who have few tools, but really want to change the bearing.
Before installing a new bearing, wipe the seat of any debris.
7. Install the retaining ring.
8. We put the hub on the axle until the thread of the hub axle appears (you can lightly tap with a hammer).
Next, screw on the hub nut and tighten it. The hub will seat evenly as the nut is tightened.
Tighten the hub nut securely.
9. Install the drum and guides. Finally we install the wheel.
#hub_bearing #rear_suspension #Lada_Kalina
FakeHeader
Comments 41
soon this one will be covered too, put the graphite where the friction metal metal goes, well, nevermind, I was also mistaken, on the advice of yonnex001 I filled in the VPM water-repellent Rubin lubricant for 60 rubles, and with pressing in the bearing you are of course rude... although in this car it’s the only way, through everything comes with a sledgehammer)))
Yonnex001 just approved my lubricant, and it turned out to be not graphite. For heavily loaded bearings, 11 tkm have already run, there is no play. A sledgehammer and a huge vice are the main argument for repairs)
Put the sledgehammer aside for the future: everything that needs to be pressed in must be pressed in with a press! Smooth, uniform load, and the shock nature will break your landing!
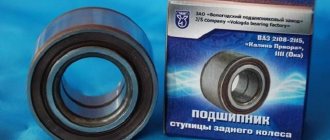
When choosing the bearing, was Koyo not an option?
I wasn't particularly interested. I went to the store, there were three options for 400-600 rubles, and skf is the most expensive, in my opinion 800, so I took it
soon this one will be covered too, put the graphite where the friction metal metal goes, well, nevermind, I was also mistaken, on the advice of yonnex001 I filled in the VPM water-repellent Rubin lubricant for 60 rubles, and with pressing in the bearing you are of course rude... although in this car it’s the only way, through everything comes with a sledgehammer)))
Rubin is a good lubricant for components that do not exclude contact with water, but does not mean that it is the only suitable and best)
I know that it’s the cheapest, I suggested it as an option)
The new bearing is successfully pressed in a vice, pressed to the end by the old bearing, there is no need to pound anything! To reduce mass, I press only the outer ring. The price for the pads is crazy! I bought 3 sets of 299x for this money)
My vices are a little old for this (they don’t open that much. Pads - yes! I try to slow down less, I save money))
The new bearing is successfully pressed in a vice, pressed to the end by the old bearing, there is no need to pound anything! To reduce mass, I press only the outer ring. The price for the pads is crazy! I bought 3 sets of 299x for this money)
The price of the pads is fire of course!