Do-it-yourself replacement of the VAZ 2115 wheel bearing
Problems with the brake system or wheel bearing can be diagnosed by characteristic squeaks or knocking noises in the front (wheel area). If the brake system is in order, you will need to diagnose the wheel bearing and replace it if necessary.
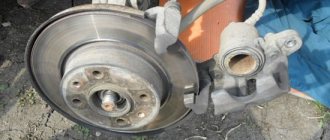
To check the wheel bearing, you need to compare the temperature of the wheel rim at the end of a long trip on the side where the squeaks and knocks are coming from. If the disc is too hot, it means the pads are sticking or the wheel bearing is faulty. The latter can lead to wheel misalignment, which usually leads to friction.
Worth checking out:
- Algorithm for replacing the tie rod end of a VAZ 2114
To check everything more thoroughly, you need to use a lift or jack.
Raise the tire that is causing some doubt with a jack and rock its lower part, holding it with both hands. If you feel play and a dull knock appears, the wheel bearing needs to be replaced.
Who are packers?
Well, the guys have dealt with the monsters of the industry, but there are also so-called packagers - these are companies that do not have their own production facilities, but package “hubs” from third-party manufacturers. A small list of famous ones:
1) Ruville is one of the largest, but indiscriminate, it can pack both serious brands and outright fakes, mainly from Eastern Europe, Romania, Poland, etc.
2) Optimal – Polish packer, worked with IRB, SKF and FAG. However, now it has become an outsider, you can find fake China, Ukraine, etc. You need to look closely.
3) HK – used to belong to FAG, and accordingly only packaged its products, it’s worth taking a closer look.
4) QH - cheap Chinese brands, but not fakes. Medium quality.
5) Corteco - cheap brands are often from China, not worth buying.
Required Tools
To complete the work, nothing unusual is required - most of the tools are already in the car enthusiast’s garage:
- pliers (with their help it will be necessary to dismantle the retaining rings);
- socket wrench. If you have the whole set, great, but for this work, number “30” is especially necessary;
- spanner wrench Again, you can use a set, but one “12” key is enough for the job. Without it, it will not be possible to remove the guide pins from the brake drum;
- special puller (necessary for pressing out bearings);
- Additional tools that may be useful are a hammer, a small wooden block, a pry bar and a chisel.
Step-by-step replacement of the front wheel bearing
- First, you need to place and strengthen the front part of the car in a suspended state, of course this is an obvious disadvantage in this model; you cannot get under the bottom with a jack. In this case, boards will help, which can be used to lift the machine higher and then insert the auxiliary installation. To make it safer, we place stumps of bricks under the bottom. Next, you need to clean the hub nut from rust and dirt using VDS-40 so that it comes off easier.
- Using a 30 mm wrench, unscrew the nut and remove the wheel, then disconnect the drive shaft CV joint from the hub and remove the caliper along with the disc. Remove everything from the hub, first the brake cylinder, unscrew the guide, remove the pads from which the caliper is attached, also need to be removed with the same wrench, then remove the brake disc, first unscrewing the clamping pins, and completely unscrew the hub nut and remove the housing. We unscrew the steering knuckle, here it is better to use a 17 mm L-shaped wheel wrench, it is very convenient to unscrew it.
- We release the drive to make it easier to pull out the grenade, you can turn the steering wheel to the side to remove the hub, you can make an improvised puller from the brake disc and bolts, which go to the engine blog for a penny, these bolts are very difficult to find, so construction ones will do. Certainly; These are not the bolts that we need, the threads do not match, so it is better to take a smaller diameter. Inserting the bolts into the hub itself is not an easy task, but there is an option to press the bolts with the brake disc and knock them down with the wheel itself. Therefore, we press the brake disc tightly so that the bolts are level and use a reverse hammer to insert the wheel itself.
- We put it on the bolts, put two support nuts so that you can press against them normally, and by pulling the wheel towards you several times, the hub should come out with the inner race of the bearing. And the outer one with the balls remains inside. After removing the excess, you need to remove the inner race from the bearing hub. To do this, we take a puller and a wheel to make it easier to remove and nothing will wobble. It will be uncomfortable in weight, it would be better in a vice, so you need to screw the hub to the wheel in order to somehow fix it, and with the help of a bolt and a wheel, the cage will easily come out. To remove the bearing retaining ring, you will need pliers.
- After this, remove the inner ring - this is the part of the puller that will squeeze out the bearing. Place it on the inside, and on the outside there is a sleeve into which the bearing and thrust washer will go. Now all that remains is to tighten the bolt and the bearing will go into the sleeve. Here you can be pleased with the quality of the parts, not the machine itself, but the puller itself. The thrust ring with which we squeeze out the bearing is bent, since the outer radius is needed here, and it just needs to be turned over to the other side and put everything back again. Next, remove the puller and here it is the bearing. There can be considerable pressure there if you see that the washer is stuck to the bearing and is almost aligned.
- We wipe everything away from dirt and impurities, spray with VDS-40 so that the new bearing fits in easier. We put the inner locking ring in place. We also spray the bearing itself and place it straight inside and again use a puller, then we simply squeeze the bearing into the steering knuckle, which is very difficult. As soon as the bearing rests against the retaining ring, remove the puller. We install the outer retaining ring, spray the hub to press it in with the same puller, only now you will need the inner race from the old bearing so that the emphasis is placed specifically on the bearing. We place the inner race of the old bearing on the inner race of the new bearing so that the emphasis is placed specifically on the bearing. Then we put the hub in place and use a wrench to fasten it with its hub nuts. And then we do everything in reverse order.
- There is another proven way to replace a bearing. When the hub nut is 100% unscrewed, getting to the bearing is hindered by the front axle shaft, which must be removed from the splined part of the steering knuckle. For this purpose, you will need to unscrew the two bolts securing the ball joint, then the CV joint can freely come out of its own socket. All that remains is to carefully knock out the hub itself; here it is better to use a wooden guide and a hammer. Usually, strong blows are not needed, the hub sits in the steering knuckle without any tension and is knocked out without much effort, although it happens that it takes more effort and time.
A few tips for motorists
- Reassemble in reverse order (see steps 1-4 at the beginning of this article).
- These videos will make repairs much easier. A step-by-step guide will help you achieve your goal, and in just a few tens of minutes you will be able to enjoy the effect of your work without additional costs and by resorting to a service station.
- It is quite simple to understand that the front wheel hub of a VAZ 2110 is damaged. While driving, occasional grinding, humming and knocking noises are heard.
In order for the camber to remain normal after replacement, it must be replaced without removing the camber bolts.
The plant recommends that car owners replace the front wheel hub units after a mileage of 55,000 km.
Replacing the wheel bearing on a VAZ-2110, 2111, 2112
A wheel bearing is a part that, despite its small size, performs a very important function: it ensures wheel rotation with low friction and supports the weight of the car.
What is a wheel bearing and why is it needed?
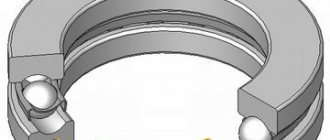
The bearing consists of outer and inner rings, a cage and rolling elements. The structure of all rolling bearings is the same, with the exception of the rolling elements, the type of which depends on the design of the vehicle.
Most often, single-row tapered roller bearings are installed on driven axles. This is due to the fact that they are small in size and durable.
However, they require careful installation and periodic adjustment, otherwise they quickly fail.
Double-row tapered roller bearings are installed on the drive axles, which can withstand a load twice as large as single-row bearings.
In addition, they have a closed design, so they can be used until they are completely worn out without maintenance.
The operating conditions of these bearings can be confidently classified as severe. And if you add frequent acceleration and braking, road surface defects and bad weather, it becomes obvious that you cannot skimp on the quality of this part.
During normal operation, the service life is 100-130 thousand km. Sooner or later on VAZ 2114, 2115, 2110 there is a need to replace the bearing.
Removal and installation procedure
How to determine whether a wheel bearing is faulty?
To do this, you need to drive at least 5 km, and rarely need to brake. After stopping, touch the hub with your hand and if you cannot hold your hand, it means that the bearing has become unusable and requires replacement. Another sure sign of a malfunction is the appearance of extraneous noise from the wheel.
You can cope with replacing the wheel bearing yourself:
First, install the wheel chocks
Next, we tear off the nut and loosen it a little, there is no need to unscrew it completely.
Using a jack, you need to lift the entire front part of the car and place it on supports. Next, you need to remove the wheel, to do this, unscrew the wheel bolts. Using a 17mm wrench, remove the brake pad guide. We remove the caliper, to do this we unclench the brake pads (note that the caliper should not hang on the brake hose, take an ordinary wire and hang it from the body). Take a 12mm wrench and unscrew the two guide pins on the brake disc. Now you need to remove the disk itself, for this it is better to use a rubber hammer
We knock down the brake disc with gentle, not strong blows. Now you can completely unscrew the hub bearing nut, after which we remove the washer. Now you need to pull off the hub. You will need two M12x1.25x130 bolts and a brake disc. We insert the bolts into two holes in the brake disc and screw them into the hub holes to the full depth of the thread. Then, with a sharp movement, pull the brake disc towards you, the hub should pull off. Find the two ball mounting bolts and, using a 17mm wrench, unscrew them. We remove the outer hinge from the hole in the hub. Carefully knock the hub out of the steering knuckle. Then you need to remove the retaining ring.
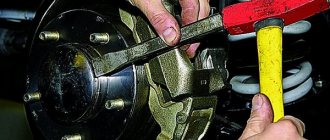
To press out the bearing, it is better to use a special puller. (Sometimes there are problems with this point. To make removal easier, you need to preheat the ring. A portable gas torch works well for this.)
Now you have removed the bearing. Next, you need to check the presence of the dirt ring and clean the inner surface of the steering knuckle.
Apply a large amount of lubricant to the outer ring of the bearing. Now you need to place the bearing in the freezer and heat the steering knuckle using the same gas burner.
These operations will greatly simplify pressing the bearing into the steering knuckle.
We carry out further assembly in reverse order.
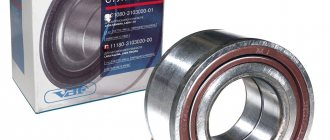
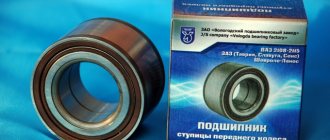
Wheel bearing price
At the moment, the average price of a wheel bearing for VAZ 2114, 2115, 2110 ranges from 300 to 600 rubles. It all depends on the city you are going to buy from and the manufacturer. Car enthusiasts recommend buying domestic ones - Vologda bearings, and imported ones - Swedish SKF and German FAG.
These companies have proven themselves well and are popular. SKF and FAG are also used in the original assemblies of most foreign cars.
Brief summary of bearing replacement
The process of replacing a wheel bearing is quite simple. If you decide to replace it yourself, remember the most important rules: take your time, carefully read the instructions and carefully follow all the steps.
Instructions for replacing the VAZ 2115 wheel bearing at home
Replacing the VAZ 2115 wheel bearing with your own hands
Problems with the brake system or wheel bearing can be diagnosed by characteristic squeaks or knocks in the front part (wheel area). If the brake system is in order, you will need to diagnose the wheel bearing and replace it if necessary.
To check the wheel bearing, you need to compare the temperature of the wheel rim at the end of a long trip on the side where the squeaks and knocks are coming from. If the disc is too hot, it means the pads are sticking or the wheel bearing is faulty. The latter can lead to wheel misalignment, which usually leads to friction.
To check everything more thoroughly, you need to use a lift or jack.
Raise the tire that is causing some doubt with a jack and rock its lower part, holding it with both hands. If you feel play and a dull knock appears, the wheel bearing needs to be replaced.
Necessary tool
Before you start work, you need to prepare all the tools and assemble them in one place:
- Special puller for bearing removal.
- Collar.
- Head at "30".
- Keys or sockets for “17” and “19”.
- Mandrel for knocking out the hub.
- New wheel bearings.
The tool is assembled and ready to use
Preparatory work
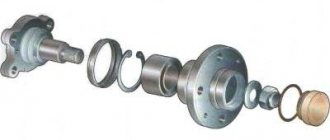
Make sure that the workplace is well lit, and it is best if it is on a viewing hole or a lift. Because this is the only way to talk about high convenience when carrying out such work. It would also be a good idea to familiarize yourself with the detailed diagram of the location of the bearing on the front hub of the VAZ-2112.
Thanks to this illustration, the diagram becomes very clear.
Step-by-step work order
First of all, we place the car in a stationary state, put on the handbrake, and, if desired, install wheel chocks. And while the car is on the surface, we tear off all the bolts on the front wheels.
We unscrew the torn bolts and put them aside. We remove the wheel.
Next, we need to use a “30” wrench to unscrew the hub nut
Please note that during its dismantling, you will have to press the brake pedal, and for this we will need an assistant. Then, using a screwdriver, press out the calipers. When this operation is completed, having the key at “17” at hand, unscrew the calipers from the steering knuckles.
Then, using a screwdriver, press out the calipers. When this operation is completed, having the key at hand at “17”, unscrew the calipers from the steering knuckles.
- Carefully unscrew the brake disc from the hub.
- Then, making gentle blows, we release the hub.
- And then the CV joint from the bearing.
Replacing the wheel bearing
Then, when access to the hub bearing is completely open, there are several ways to replace it.
First way
In this case, it is necessary to have a special puller to remove the bearing.
- First you need to take care of removing the stopper.
- Using this device, you simply remove the old bearing and install a new one in its place.
- After this, we carry out the entire assembly process in the same order as removal.
- The advantages of this method include the fact that during this work there is no need to touch the wheel alignment bolt, therefore, you will not have to add additional work.
- The disadvantages of this method include inconvenience during the process. Because you have to contrive and take an extremely uncomfortable position.
Second way
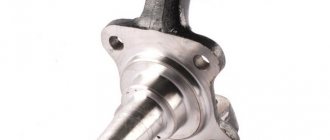
To carry out this work, it is necessary to carefully dismantle the steering knuckle and completely remove the hub.
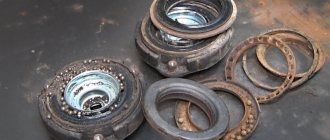
- Moving to the workbench, we replace the wheel bearing.
- To do this, dismantle the retaining ring and knock the bearing out of its seat, or press it out.
- Next, we perform the installation in reverse order, having previously cleaned the surface of the hub.
Advice! Before you begin removing the alignment bolts, mark their position with a marker or chalk. In this case, the marks should indicate the current position of the bolt on the rack and the previous location of the knuckles. Thanks to such marks, during assembly it will be much easier to navigate the position of these bolts. Although it will not be possible to return to the previous state, it will still be possible to minimize it.
Putting marks
- We put marks.
- We knock out all the bolts from the fist.
- Remove the mounting bolts on the lower ball joint.
- This will knock the bearing out of the hub.
- Remove the retaining rings.
- Press out the bearing.
- We mount a new bearing, having previously cleaned the space of the hub and generously coated its surface.
This repair method will be very effective when not only the wheel bearing is subject to repair, but also most of the VAZ-2112 chassis. Such elements include the replacement of steering tips, silent blocks of levers and ball joints.
Third way
To perform work using this method, it is necessary to remove the entire rack completely.
The stand has been dismantled.
- Next, using a vice, we replace the wheel bearing.
- Because this is how the replacement will happen quickly and efficiently.
After dismantling the bearings, we install everything in the reverse order, assemble the rack and mount it on the car.
Do we make the puller ourselves or buy it?
If you do not want to knock out the bearing, you can purchase a special puller in stores, since the entire process of working with such a device becomes easier and the time required for work is reduced. This also applies to bearing installation work.
Hand-made hub puller
Also check out
- Remove the 2 bolts securing the ball joint to the lower control arm.
- Disconnect the lower suspension arm from the steering knuckle and move the lower cavity of the shock absorber strut to the side.
- Use a suitable extension to knock the hub out of the steering knuckle (it is better to use a special puller).
- Using special pliers, first remove the outer and then the inner retaining ring of the wheel bearing.
Secure the steering knuckle to the lower control arm. So that it does not interfere, you need to connect it to the ball joint lever.
Organization of repair conditions
Convenient places for replacing the front wheel bearing on a VAZ 2114 are a lift or a pit. However, you can get less comfortable access to the necessary components on a monolithic horizontal platform.
The initial task of the performer is to open access to the steering knuckle. To do this you need:
- unscrew the hub nut located on the front wheel CV joint shaft (behind the protective cap);
- remove the wheel;
- brake caliper assembly with guides and brake pads;
- brake disk.
Method for loosening the hub nut:
- align the nut shoulders using a narrow chisel;
- tighten the handbrake;
- engage first gear;
- secure the wheel with shoes;
- Loosen the nut using a 30mm socket with a long knob (the clamping force is quite large).
Quite rarely, a nut cannot be unscrewed with a wrench due to excessive tightening or corrosion. In this case, do this:
- drill out the nut from the side almost to the thread;
- carefully use a chisel to open the joint of the part;
- unscrew the element.
After loosening the wheel nuts, you should hang the front of the car. Although replacement can only be done on one hub, both front wheels should be lifted. This is the only way to ensure unloading of the anti-roll bar and create conditions for manipulating the parts of the steering knuckle.
The brake mechanism is dismantled in the following sequence:
- unscrew the two bolts “17” securing the prefabricated structure to the steering knuckle (located near the CV joint boot);
- remove the brake assembly and attach it to the telescopic stand to avoid breaking the hydraulic drive pipe.
To replace a defective wheel bearing on a VAZ 2114, it is necessary to remove the brake disc. You can remove the part by unscrewing the two pins securing it to the hub using a “12” key.
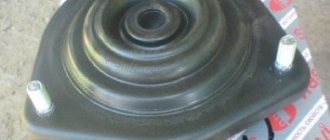
Some owners additionally dismantle the protective casing, creating even more convenient conditions for dismantling the rolling support. This element can be removed after unscrewing the three nuts with an open-end wrench set to “10”, which secure the part relative to the steering knuckle.
Which bearing to choose
As a rule, tapered single-row roller-type bearings are found in the front hub. More complex mechanisms are most often used on front-wheel drive cars. Such bearings can withstand enormous loads, but their prices differ markedly. Closed-type hub bearings are easier to operate - during manufacturing they are filled with a lubricant and there will be no need for replacement. They are completely sealed and cannot be taken apart. Open roller bearings require constant maintenance. If you constantly monitor the condition of the bearings, then the front wheel bearings can easily last up to 130 thousand kilometers.
Causes of wheel bearing failure
It is also important to note that if the hub fails, it becomes very hot. As a result, the brake system fails, and therefore operation is disrupted
However, the work is never disrupted at the same time, unless there is a strong collision with another object. The car may hit a hole, a bump, or drive onto a curb. As a result, the VAZ 2114 may receive serious mechanical damage.
Destruction occurs gradually and the driver can often understand this by the presence of a specific sound when a specific body vibration appears. There may be small shocks, sometimes the car shakes.
There are several reasons why a malfunction may occur:
- Constant driving on off-road or poor quality roads with a lot of uneven surfaces.
- Transportation of large loads.
- The car may constantly fall into mud or slush.
- Some drivers begin to drive aggressively: they brake or accelerate sharply, or drift.
Depending on what cause is present, deformation of the main housing may occur over time, and sometimes the outer housing and bearing rim may crack. Often the lubricant dries out. Dirt, sand, and dust may get inside the rotating parts.
Sometimes there is a malfunction of the rollers and bearing balls. Often this happens not as a result of inaccurate driving, but from the quality of workmanship itself. Spare parts from domestic or European manufacturers last an order of magnitude longer than from Chinese ones. But they can also become unusable over time as a result of constant use of the car.
When a breakdown just begins to appear, it is almost impossible to recognize it in a timely manner. As a rule, for this purpose you need special diagnostic equipment, which is available in auto repair shops or official dealers. If a whistle, strong hum or crunching occurs, you have to provide it yourself or with professional help.
If the breakdown occurs on the front hub, then identifying the fault is much easier. It is enough to pick up a speed of 40-60 km/h and perform simple maneuvers. Most often, a specific hum appears. If the sound increases when turning to the right, this means that the left bearing has failed. The opposite situation occurs with the left side.
If a breakdown occurs in the rear hub, it is much more difficult. So, for example, the sound may come from one part, but in reality the breakdown may be localized in a completely different place.
However, experts advise that in order not to engage in self-repair in vain, it is recommended to carry out diagnostic measures from professionals. If the car enthusiast does not have the relevant experience, then you can ask the person to show how to carry out such events.
Front wheel bearing, where it is located and signs of malfunction
The front wheel bearings in a car are subject to extreme loads - high temperature changes, environmental influences, the formation of shock loads during driving into pits, jerks of the steering, brakes, and drive.
The play should not prevent the wheel from rotating; it is important that it rotates with minimal friction and noise allowed
However, despite the actually colossal loads, wheel bearings are durable and very strong. When braking and accelerating, increased pressure occurs on them, and during movement, not one, but several forces influence them.
Very often, vehicle owners remember about these parts only when excessive noise occurs when the wheels operate. The most common problems are improper operation or installation of the front wheel bearings.
The following signs will indicate problems with the front wheel bearings - a strong hum or noise, which is most noticeable when cornering, the appearance of play in the wheel, which is also accompanied by noise or knocking.
Removing and installing a new part
Next, using round pliers, you need to remove both retaining rings, which are located on both sides of the bearing, after which you can begin to press it out using a puller. The latter consists of two cups, which are connected to each other by a long threaded rod with a 17 mm wrench head. The rear cup has a diameter larger than the bearing race; it must be rested against the steering knuckle.
The front cup is placed on the other side of the holder, the pin is screwed in and they begin to squeeze the bearing out of its seat, turning the rod with a wrench. The latter is pressed in with an interference fit; it is often necessary to apply significant force to move the clip from its place, and this is not very convenient to do in weight. Therefore, it is better to use a lever at first. Then the race will go easier and the entire bearing will come out, the disassembly process is complete.
As for performing work in the absence of a puller, this is also possible, although replacing the bearing becomes more complicated. It is best to completely remove the steering knuckle; it is very problematic to knock out a tightly seated clip from its socket. The removed unit is secured in a vice and, using round inserts of the required diameter and a hammer, the old bearing is knocked out and a new one is installed in its place.
Before this, the seat must be thoroughly wiped with a rag, lubricated with a thin layer of thick lubricant and one retaining ring placed on the back side. Place the new bearing into the seat without distortion, attach a wooden adapter to it along the entire plane and hammer the cage into the seat with a precise blow of a hammer.
https://youtube.com/watch?v=9ke_tgdsUI0
It will not be possible to do this completely using a wooden adapter when the edge of the bearing is flush with the plane of the seat; for subsequent pressing, you can use the old clip as an adapter and a hand vice. Using the latter, press the cage until it becomes possible to install the second locking ring.
After this, the steering knuckle can be put in place. Replacement using a puller is much easier. The bearing is inserted into the seat of the steering knuckle evenly, without distortion. Then the front cup of the puller is placed on it and then the work is done, as was done during extrusion.
Only now, when the key is rotated, the front cup will press the clip into the socket; do not forget to install the locking ring before doing this. After the bearing is in place, the second ring is installed and the entire suspension assembly is assembled in the reverse order. At the end of the work, it is recommended to check the front wheel alignment.
Rear suspension and chassis design
Before proceeding directly to the replacement process, it is worth considering the rear suspension structure in order to understand the location of the part, as well as determine what needs to be removed in order to change the rear wheel bearing.
1. Rear wheel hub; 2. Rear suspension arm; 3. Suspension arm mounting bracket; 4. Rubber bushing for the lever hinge; 5. Lever joint spacer; 6. Rear suspension arm mounting bolt; 7. Body bracket; 8. Support washer for fastening the shock absorber rod; 9. Upper suspension spring support; 10. Spacer sleeve; 11. Suspension spring insulating gasket; 12. Rear suspension spring; 13. Shock absorber rod mounting pads; 14. Compression stroke buffer; 15. Shock absorber rod; 16. Shock absorber protective cover; 17. Lower support cup of the suspension spring; 18. Shock absorber; 19. Lever connector; 20. Hub axle: 21. Cap; 22. Wheel hub nut; 23. O-ring; 24. Bearing washer; 25. Wheel bearing; 26. Brake shield; 27. Retaining ring; 28. Mud deflector; 29. Suspension arm flange; 30. Shock absorber bushing; 31. Lever bracket with eye for mounting the shock absorber; 32. Rubber-metal hinge of the suspension arm;
How are alloy wheels tightened?
To perform such a scrupulous procedure, a special tool is used - a torque wrench. Mechanics also use pneumatic impact wrenches at service stations. And at home, drivers use a wheel wrench.
First of all, you should pay attention to the diameter of the wheel, its width, and then to the design
The number of holes along the rim is also important. They must necessarily have cone-shaped recesses, which are necessary for centering the disk on the hub with bolts and nuts
The number of such holes can be different - from 4 to 6. Some models have more than six
They must necessarily have cone-shaped recesses, which are necessary for centering the disk on the hub with bolts and nuts. The number of such holes can be different - from 4 to 6. Some models have more than six.
For different types of alloy wheels, the tightening of wheel fasteners is not the same. It differs in the sequence of actions. So, rims with 4 holes must be installed in the order 1-3-4-2, and rims with five bolts are secured in the order 1-4-2-5-3, but for rims with six nuts the option 1-4-5 is suitable -2-3-6.
Bearing price for foreign car
You can exclude elite foreign cars from this category, since the price of a part here can vary greatly. It depends on the class of car, manufacturer, year of manufacture.
For budget cars popular in Russia, such as Daewoo, Datsun, Cherry, Lifan, some Renault, Kia, Chevrolet models, the price for spare parts is the same as for domestic VAZs. On average it will be from 500 to 1500 rubles. But for work at a service station they can charge you 500 rubles. more. As a result, replacement along with the part will cost from 1500 to 3000 per wheel .
For an average category car of Asian, American and European production, the part may turn out to be more expensive, ranging from 1000 to 5000 rubles per piece. A complete replacement will cost 2500-6500 rubles .