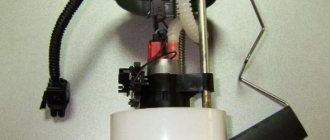
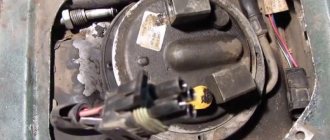
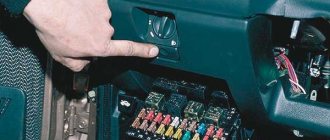
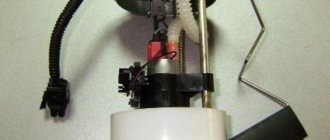
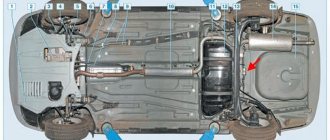
Most of the units and components in cars of the Lada Samara model line can be changed with your own hands. To do this, just stock up on the necessary tools and purchase a new part. This material describes in detail how to replace a VAZ 2110 fuel pump and its filter element - a mesh. The work is quite simple, since installing a new product does not require an inspection hole or a lift. After studying this material, the reader will learn how to change the fuel pump, when it needs to be done and how to determine that the unit has failed. To make sure that the device has failed, you need to measure its pressure - the article contains several ways to perform this action.
Advice! Many Samara owners install a VAZ 2110 Bosch fuel pump. Despite the higher cost, the imported unit has a long service life, and it is easier to maintain when compared with a standard unit.
Car won't start after replacing fuel pump
A common occurrence after replacing a fuel pump is that the car will not start. Let's start with the fact that the car should not start right away, since the pump must first pump up the pressure in the system, which was previously released.
To create pressure in the fuel system, turn on the ignition for a few seconds (the lights on the dashboard are on, but the key does not turn to the “start” position). After this, you can turn the engine with the starter for 5-10 seconds. If the attempt is unsuccessful, you should wait about 30 seconds. and then repeat the procedure.
If the engine cannot be started after repeated cranking with the starter, then this indicates that:
- errors were made when assembling and connecting the fuel pump;
- the new fuel pump is faulty;
- there was a planned blockage or failure in the car’s security system;
During installation and connection of a new fuel pump, various failures can occur, ranging from sticking valves on the pump itself to breakage of contacts, connectors and terminals.
In such situations, you need to determine the nature of the breakdown: mechanical or electrical. It’s easiest to figure out the power supply to the pump, since it’s either there or it’s not. As for a car alarm or immobilizer, the anti-theft system can block the car from starting by cutting off the power to the fuel pump. We should also not forget that the fuel filter may simply become clogged. When the valves on the pump stick, the device may hum and work, but idle.
If such problems occur, gasoline does not flow into the fuel rail and the engine does not start. To accurately determine the cause, you must first make sure that there really is no gasoline in the fuel rail. Then you will need to re-remove and connect the fuel pump directly from the battery or dimensions. This method of connecting the fuel pump directly is optimal for quickly checking the fuel pump yourself if the fuel pump does not pump.
- Replacing the fuel pump motor
The causes of whistling and increased noise during operation of the fuel pump are overheating of the pump. How to diagnose and fix the problem yourself. Tips and tricks. Read more
- Malfunction of the fuel pump relay: checking and replacement
What functions does the fuel pump relay perform, signs of breakdown. Where is the fuel pump relay installed, how to properly check the fuel pump relay. Read more
- How to clean the fuel pump mesh yourself
Why is it necessary to clean the fuel pump mesh? When is it better to change and how to clean the fuel pump mesh? How to properly remove the fuel pump, subtleties and nuances. Read more
- The fuel pump does not pump when the ignition is turned on
How to determine why the fuel pump does not pump or works poorly. Fuel rail pressure, pump diagnostics. Wiring, relays, fuel pump fuses. Read more
- Mechanical and electric fuel pump design
Mechanical and electric fuel pump, design and principle of operation of the device, types of pumps and main malfunctions, operating features Read more
- Replacing the fuel pump mesh with your own hands
Why does the fuel pump grid need to be changed? How to remove the fuel pump yourself to replace the filter. Features of reassembly after replacing the fuel pump mesh. Read more
How to remove the fuel pump
To answer how to change the fuel pump, you need to study the procedure for removing the fuel pump. Removing the fuel pump and replacing it involves dismantling the device. To extract, you will need a special key for removing the fuel pump (puller), open-end wrenches, a tubular wrench, and a set of sockets.
We add that the fuel pump mount may differ on different cars, although the general principle remains almost the same.
You can do this as follows:
- turn off the negative voltage on the battery;
- on the fuel rail under the hood, press the valve through which a certain amount of gasoline will flow out;
You can also go the other way. First, remove the terminal from the battery, then turn off the power to the fuel pump by removing the electrical connector from it. Then the terminal is put back on the battery and the engine is briefly turned with the starter. After a short period of time, the remaining fuel will leave the system. On some cars, the engine may even start and then stall.
So, the fuel pressure has dropped, now we proceed to remove the fuel pump. Remember, the terminal on the battery must be disconnected during work! The first thing to remove from the pump is the chip (electrical connector), if this has not been done previously
Then you need to pay attention to the fuel lines (1 fuel supply pipe and 1 return line to return fuel to the gas tank). On the indicated tubes, loosen the tightening of the clamps and clamps (if any), which are usually used to secure the electrical wiring sections to the lines to supply power to the pump
How to remove the tube from the fuel pump
Now you need to remove the lines themselves from the fuel pump. To figure out how to remove the hose from the fuel pump or disconnect the line, you need to accurately determine the method of attachment to the pump terminals. Often, the standard fastening of the fuel supply line is implemented in the form of a nut (fitting), which must be unscrewed with an open-end wrench. The so-called return line can be secured with a clamp.
Removing the fuel pump and replacing
After unscrewing the fuel lines, you will need to either unscrew the pressure ring of the fuel pump with a special puller, or use a tubular wrench to unscrew the nuts (which depends on the method of mounting the fuel pump on a specific car model).
- Before starting removal, it is worth noting that there are special arrow indicators on the pump and other fixing elements. We recommend remembering their position, which will facilitate subsequent reassembly.
- Then you need to remove the special o-ring. After removing the ring, you can remove the fuel pump from the tank. During removal, care must be taken, since devices for determining the fuel level in the gas tank (float sensor) may be attached to the fuel pump body.
- After removing the pump, there may be a rubber seal on its seat. For example, on cars of the VAZ family this seal is fixed on studs. This seal also needs to be removed by simply pulling it up.
The completion of the fuel pump replacement procedure is the installation of a new fuel pump, as well as the replacement of all rubber seals, which must be included in the kit or purchased separately.
We would like to add that during installation you should:
- Make sure that the pump is positioned correctly. To do this, there are special arrow-shaped markers on the pump itself, covers and pressure rings (depending on the make and model of the car). On some cars the arrows should line up, on others the arrow on the fuel pump should point towards the rear of the car. It is for this reason that it was recommended above to remember the position of the indicated arrows before removal.
- Also, in the process of placing the pump, you should carefully handle the float and other solutions to determine the fuel level in the gas tank. Often, during unprofessional installation, such elements are bent or broken, after which there is a need to replace them.
If the fasteners are over-tightened, they may break. If the fuel pump fixing elements are not tightened enough, then the pump may dangle in the tank, which is unacceptable. After the pump is installed, all that remains is to attach the fuel lines back, connect the pump power connector and the terminal to the battery. This is what replacing a fuel pump with your own hands looks like.
Description of the work
The location of the VAZ 2110 injector fuel pump is in the gas tank located under the bottom of the car, in the area of the rear seat. It is accessible from the cabin, so no inspection holes or other additional devices are required. Only tools needed:
- open-end wrench 13 and 17 mm;
- Phillips screwdriver;
- 7 mm tubular socket wrench.
Instead of a long 7 mm tubular wrench, you can use a small open-end wrench, but this will be inconvenient and take more time. Before starting repairs, you should completely remove and pull out the rear seat to gain access to the gas tank. Two more preliminary operations that are done in the engine compartment.
- Loosen the nut securing it to the negative terminal of the battery, remove the clamp along with the wire.
- Relieve pressure from the fuel line. At the end of the ramp, near the outer nozzles, there is a bleed valve with a rubber cap on it. Having removed it and substituted a plastic cup, you need to press the valve stem. Fuel will leak out from there and the pressure in the system will drop.
Under the bottom of the rear seat there is a square hatch that provides access to the gas tank; it will need to be removed. The subsequent disassembly diagram looks like this.
- Using a Phillips screwdriver, unscrew the 2 screws securing the hatch cover, remove it and put it aside.
- Disconnect the fuel pump electric drive connector and move it out of the way.
- Using an open-end wrench, loosen and unscrew the 2 nuts that secure the fuel line pipes to the fuel pump fittings.
- Pull the tubes out of their sockets. The round rubber rings attached to their ends must be removed and replaced with new ones, since they are designed for one-time use.
- Using a long tubular wrench, unscrew the 8 nuts that hold the flat flange that presses the VAZ 2110 fuel pump to the bottom surface. Remove the flange from the studs.
- There is a rubber gasket on the mounting studs under the clamping part of the body. The latter must be removed from the studs, otherwise it will not make it possible to pull out the fuel supply device. Then carefully remove the fuel pump from the tank cavity along with the float. If the rubber gasket is worn out, then it is better to replace it too.
When and why you need to change/clean the fuel pump screen
Let's start with the fact that general problems with the fuel system (fuel pump in particular) should be divided into the most common groups:
- the fuel pump mesh and fuel filter are clogged;
- the fuel pump itself has failed;
- injector problems;
Let us add that we should also not exclude the possibility of air leaks, that is, airing of the power system. Another culprit of problems may be the pressure regulator in the fuel rail. In this case, engine malfunctions may be partially similar to some of the symptoms mentioned above. For example, a slight ingress of air into the fuel system results in the engine not starting for a long time after parking.
Article on the topic: Which type of tinting to choose?
Let's go back to the fuel pump. Its malfunction means that the performance of the fuel supply system is reduced. If the fuel pump breaks down, then the car becomes unsuitable for normal use. Signs of a fuel pump malfunction are as follows:
- It is impossible to start the engine, the fuel pump does not pump;
- the engine starts, but runs with serious interruptions;
In this case, the service often recommends diagnosing, repairing or replacing the fuel pump. It should also be taken into account that the fuel pump mesh filter may become clogged inside the device. Let us immediately note that it is impossible to accurately answer the question of when to clean the fuel pump stack. Some car enthusiasts clean/replace the fuel pump mesh as needed or as a preventative measure every 50-70 thousand km. mileage, while others are faced with the need to clean the fuel pump grid for the first time at mileages of 150 thousand km or more. and more. Let us add that the operating manual for some models specifically states that it is recommended to replace the fuel pump stack once every 120 thousand km.
It should be added that the loss of dynamics and the appearance of symptoms of a clogged mesh occurs gradually. For this reason, each driver decides to clean the fuel pump himself. On powerful naturally aspirated engines, the gradual deterioration in acceleration is not felt as strongly as compared to highly accelerated engines with a small displacement. For this reason, many owners of large-volume trucks begin to solve the problem after noticeable complications appear. Also, the condition of the pump grid is greatly influenced by the quality of the fuel being filled and a number of other factors and individual operating conditions, which we will talk about a little later.
Article on the topic: “Bus stop” sign - what to do if violated?
How to remove the fuel pump on a Ford Focus 2 with your own hands
This is how I drank it.
Before changing the fuel pump, let's decide on the methodology, since there are two ways to remove the module - officially, the fuel module can only be changed with the fuel tank removed. There is an alternative way: you can cut an inspection hatch in the bottom of the car under the rear seat cushion and thus get to the fuel module. This method is quite popular, but has some disadvantages:
- we violate the integrity of the bottom;
- Interior sound insulation suffers;
- additional pockets of corrosion may appear;
- There is direct contact between the fuel tank and the passenger compartment, and safety suffers, especially during work related to dismantling the fuel module.
Correct method (official)
Let's start with the official method of replacing the fuel pump by removing the fuel tank. In fact, there is not much work, the main thing is to have an inspection hole, a lift or an overpass.
Relieve pressure in the fuel system. To do this, with the ignition off, remove the fuel pump fuse F111, start the engine and, at idle speed, use up the fuel remaining in the pipes. Remove the terminal from the battery. Having placed the car on an overpass or lift, we go under the car. Remove the fuel filter.
Once the pressure has been released, you can remove the fuel filter.
Unscrew the 2 nuts securing the heat-protective casing of the tank with a 10mm head. Move the casing to the side. We remove the tubes from the adsorber, it is located behind the fuel tank. To do this, press the lock button with a screwdriver and simply pull off the hose. At the front of the tank, remove the fuel hose from the tube by prying the white plastic clamp with a flat screwdriver
The fuel is under pressure, so remove the tube carefully as it may spill or splash. Disconnect the filler neck hose. It is fixed to the tank with a clamp
Loosen the clamp by unscrewing the tightening screw and remove the hose. Attention! If the gasoline level is higher than the nozzle, it may overflow from the tank. We disconnect the air outlet thin tube near the filler pipe, freeing it from the clamp. Using a 13mm socket, unscrew the bolts securing the gas tank to the body, but not completely. We pass our hand between the bottom and the front of the tank, disconnect the contact connector on the hatch cover in the upper part. To do this, press the connector latch with a screwdriver and disconnect the contact blocks. We remove the tank by moving it forward and lowering it down.
Let's remove the tank Whoa, but without barbarity and sawing.
We thoroughly clean the surface of the tank from dust and dirt, especially in the area of the fuel module. Unscrew the plastic threaded washer. To do this, take a wooden spacer, rest it against the edge of the washer and, with light blows, unscrew the washer securing the module. Carefully remove the fuel module assembly, inspect the condition of the tank from the inside, look for the presence of suspended matter in the fuel, and, if necessary, rinse the tank.
New fuel pump installed.
We install the new fuel pump according to the marks, aligning the mark on the tank and the arrow on the pump.
Assembling the gas tank and installing it is carried out in the reverse order.
Replacing the fuel pump from the passenger compartment
Be prepared for the fact that when replacing the fuel pump on a Ford Focus, without removing the gas tank, you will have to cut metal.
This method involves replacing the pump without removing the tank from the car, but to do this it is necessary to cut a hatch in the bottom under the rear passenger seat using metal scissors. Work should be carried out either outdoors or in a well-ventilated area to avoid the accumulation of gasoline fumes. We cut out the hatch, focusing on the wiring harness passed into the bottom under the floor covering.
For aesthetics, you can also cut out a circle with a diameter of at least 250 mm.
Having cut out the hatch, we gain access to the fuel pump, but working with the pipes and the threaded locking washer will not be as convenient as with the tank removed. All operations for removing and installing the pump are carried out according to the same algorithm as described above, and the hatch can be closed with a new sheet plate with a diameter of about 300 mm, placing it on short self-tapping screws.
The length of the screws should be such as not to damage the plastic tank.
Replacing the mesh on a VAZ 2110-VAZ 2112
Removal:
1) We talked about cars with a 1.5 liter engine above.
2) Now let's talk about 16-valve cars. Remove the pump, take a screwdriver and remove the retaining ring from the guide (often called the pin). There is only one ring, although there are two guides. It is removed as follows: pry it with a screwdriver and move it to the end of the guide in the direction of the blue arrow in the photo until it is completely removed. Now the main thing is not to turn the fuel pump over, otherwise the housing will fly out spontaneously and the hoses may break.
3) The photo below shows two blocks with wires; they need to be disconnected. If you pull with force and they do not give in, then you are doing something wrong and there is a possibility of breaking the clamps. Press the retaining clips and carefully remove them.
4) Grab the top of the fuel pump with your hand and separate the two housings along the guides. Put one housing aside, continue to hold the gas pump in your hands and use a screwdriver to disconnect the mesh. Remove it and replace with a new one.
Installation:
Proceed in the reverse order of removal. Make sure that the part is securely fixed; it should not fall off. We recommend that you take your time and do not install the fuel pump flap with the rear seat cushion, but rather ask an assistant to turn the key in the ignition for about 5 seconds, and you watch to see if gasoline flows from under the fuel pipes. The tightness of the system is mandatory; in case of malfunctions and leaks, replace worn parts with new ones.
Additional video: Attached below is a video using the example of a VAZ 2114 on the topic of today’s article, we recommend you watch it.
The video below shows the procedure for disconnecting the wire block; if you have difficulties with this, it is useful to watch:
Source
Do-it-yourself fuel pump screen cleaning.
To carry out the work, you need to stock up on the following materials:
- Compressor.
- Fuel pump gasket.
- Nozzle seal.
In order to clean the hard filter, it is necessary to dismantle the fuel pump.
- Turn off the car's power source.
- Unscrew the holders and remove the cover.
- We remove the electric drive.
- We disconnect the fitting and the conductor through which the fuel circulates.
- We also remove the fitting and remove the fuel outlet hose.
- Remove the seal.
- Raise the gasoline compressor and remove the float. Next, together with the mixture level analyzer, we dismantle the fuel pump.
- At the bottom of the pump there is a mesh (coarse filter).
It is quite difficult to determine the contamination of the mesh by visual inspection. Small particles can interfere with the proper functioning of the fuel, while remaining almost unnoticeable. To successfully wash the mesh, you need to let it soak in a special solution. To do this, you need to dilute the detergent one to ten with water. Next, you need to place the mesh in a tank with the prepared composition and leave it there for one hour.
After this, you can proceed to the main cleaning stage.
- To do this, uses the same composition and a brush with fine bristles. Using the specified materials, thoroughly rinse the mesh.
- After this, you need to clean the filter with a stream of air. To do this, we use a compressor.
- Next, you need to wait until the filter is completely dry. After which, you can assemble the fuel pump.
After washing the element, it is necessary to carry out repeated visual diagnostics. The network must not have mechanical damage. Otherwise, further use of the element is impossible and the filter must be replaced.
After completing all stages of work, we assemble the fuel pump in the opposite order. Next, you need to check the correct operation of the fuel system and the success of the operation.
https://youtube.com/watch?v=xnKwDtCtM_0%3F
During the operation of the car, it is necessary to promptly pay attention to malfunctions in the fuel system and regularly replace used filters. Happy renovation!
Happy renovation!
Replacing the fuel filter VAZ 2114 video instructions
Probably everyone knows that proper care of the VAZ-2114 1.6 car, inspection of its technical condition and timely replacement of worn parts reduce the likelihood of breakdowns.
In vehicles, all parts and systems are important, but the fuel system is considered the most capricious, since any malfunction can damage the entire operation of the engine. Its main component is the filter. Its purpose is to eliminate any impurities or rust that may be observed in low-quality fuel. Cleaning is carried out thanks to the presence of special filter paper; as a result, high-quality gasoline that does not contain any impurities enters the car engine. For normal operation of the high-pressure fuel pump, only clean fuel is required so that it does not fail for a long time.
Due to prolonged use, an important component can become heavily contaminated, so a quick replacement of the VAZ-2114 fuel filter will be required. It is worth noting that an injector requires higher quality gasoline than a carburetor, so the fuel filters of an injection engine must be changed more often.
What may indicate a clogged element?
Since cleaning paper allows many impurities to pass through, its cells become clogged over time, which will certainly affect the operation of the motor. A car enthusiast will be able to understand for himself when it is necessary to replace the fuel filter based on the following signs:
- the car began to consume more oil;
- the engine starts to stall if idle speed is selected;
- interruptions in engine operation are observed if the speed increases;
- Difficulties arise when starting the engine;
- engine power is greatly reduced;
- the car may start to slow down even if the brake pedal is not pressed;
- When driving uphill, the engine starts to stall.
The above signs are the main ones, so if they are detected, you should replace the clogged fuel filter as quickly as possible. This process is not very difficult, so the car enthusiast can make the replacement himself.
What tools need to be prepared for this operation?
To replace the filter in the VAZ-2114 yourself, you should prepare the following tools:
- New high quality gasoline filter.
- O-rings that fit the fuel pipes.
- Keys for 19, 10 and 17.
- Containers in duplicate; they will be needed to drain fuel and water.
The first container that will be used to drain gasoline must be clean and completely dry.
Step-by-step replacement of fuel purifier
Replacing a clogged filter is quite simple if you do the manipulations step by step, following the recommendations of specialists:
- all terminals from the car battery are removed to completely cut off the power to the vehicle;
- on the latches of the bolts fixing the bracket, the fixation should be slightly loosened;
- the mount holding the filter should be carefully treated with a special lubricant to simplify the process of removing the part;
- Using two keys, the fitting element is removed. To do this, you need to use a number 19 key to secure the cleaner itself, and use number 17 to unscrew the fitting element related to the fuel supply line. Slowly, so as not to spill, drain any remaining fuel that may remain in the gas line into a dry container;
- the same manipulation must be carried out on the other side of the fuel purifier;
- the fuel wire tubes are disconnected from the base;
- using a 10mm wrench, slightly unscrew the clamp;
- carefully remove the fuel filter. You should not rush through this process so as not to damage other elements of the car’s fuel system.
Assembling the parts is carried out in the reverse order; it is recommended to replace all ring-shaped seals when installing a new filter. If gasoline drops are visible on the new part, they should be carefully removed with a clean rag. Otherwise, the service life of the updated element can be shortened.
https://youtube.com/watch?v=ZBUeKu7vg6E
Replacing the fuel pump motor
The reason for replacing the fuel pump module motor is low gasoline pressure or sudden changes in pressure, which is recorded by a pressure gauge during the diagnostic process. Also, the imminent failure of the motor is indicated by the fact that the fuel pump is humming or whistling.
In this case, it is often possible not to change the pump assembly, which will save money. The device must be removed (similar to the situation with cleaning or replacing the mesh filter), after which it is disassembled. The motor itself is replaced and can be purchased separately. The housing and fuel level sensor can be left from the old fuel pump. At the same time, it is recommended to replace the gas pump gasket and other rubber seals, which are not designed for re-installation after removal, that is, they are disposable.
Selecting a fine filter
The abundance of consumables on the market makes it difficult to choose. Surveys show that more than a third of “ten” owners use the BIG brand. The brands SCT, Bosch, Mann and Nevsky have proven themselves well.
“Experts” recommend assessing consumables visually by opening the casing. It is unlikely that such an “examination” makes sense. The differences are not fundamental; they are impossible to see with the naked eye. Universal advice - buy one that you don’t mind spending money on.
Pump operation and malfunctions
From the name you can understand that the fuel pump supplies fuel from the tank to the engine injectors. Accordingly, if the unit is faulty, then there will be no gasoline injection, and the power unit will not start working. There are options for injector and carburetor. The VAZ 2110 is equipped with an injector; therefore, the fuel pump must be suitable for this system. If the “ten” was modernized by installing a carburetor, then the unit will have to be taken out of stock. The unit is located in the fuel tank - under the left rear door, the electrics go under the rear row seats.
It is quite simple to understand that there are faults in the pump or its network:
- The car won't start. There are many reasons for this malfunction, but before performing a full diagnosis, you need to check whether the pump mesh is clogged or clogged.
- There are noticeable jerks in first gear. There are also many options here, but one of them is a non-working fuel pump.
How to measure the pressure in the fuel system?
We screw the meter hose
The easiest way to measure pressure is with a special device - a pressure gauge. The kit also includes an adapter and drain. Pressure can be determined using an air pressure gauge. This device is present in almost every motorist, as it is used to measure tire pressure. A normally functioning pump in a VAZ 2110 should have a reading of 2.8-3.2 atm. You need to connect the pressure gauge and check what the indicator is with the engine not running, but with the fuel pump on. It must be no lower than 2.8 atm.
Source
snag
In the snag areas of reservoirs you can find pike almost throughout the year, both in open water and in winter (photo 7). This is due to the fact that snags of various shapes and sizes perfectly camouflage the toothy predator during its hunt for small fish from ambush. By the way, in those reservoirs where I have to catch pike with winter baits, in snags the best bait is perch.
In my opinion, this is due to the fact that the striped robber is the most numerous here - in contrast to roach, bream and other fish, which are quite rare here. But further I would like to note one pattern that I was able to derive from two (I will emphasize here) low-flow suburban reservoirs. In the first half and middle of winter, the toothy predator was always present in the snags, often delighting me with its confident bites.
In the second half of winter, there was practically no pike bite here. This did not happen every year, but only in frosty, severe winters with almost complete absence of thaws. I believe this is due to the fact that even with the minimum positive values of water temperature inherent in the winter period, processes of rotting and decomposition still occur in the aquatic environment. And under a thick layer of ice in the snags, numerous woody remains rot, and as a result, the amount of oxygen dissolved in the water is significantly reduced.
Of course, during this period, pike and other fish leave these places unsuitable for life to areas of the reservoir with a more acceptable oxygen regime.
Hunting for pike in snags is fraught with certain difficulties and requires making some changes to the equipment of the trap. When fishing for toothy fish in such places, I use exclusively tees of relatively small size (I like Kamasan Pike No. 6 and 8 according to the Japanese classification), while catching the bait on the back. This allows you to immediately make a hook after the pike bites, when the fishing line is just starting to come off the reel. This practically eliminates the possibility of the predator getting the entire rig into a pile of snags at the bottom and then breaking it off on a dead hook.
Also, when fishing in snags, I try to be in close proximity to the placed girders in order to make a timely hook when a bite occurs and begin timely fishing.
Reasons for replacement
Characteristic signs of a fuel pump malfunction:
- power drop;
- failures when sharply pressing the gas pedal;
- difficulty starting the engine;
- when you sharply press the gas pedal to the floor at low speeds, the engine begins to “choke”;
- increased noise level when the motor is turned on;
- “dips” are observed, a loss of power some time after the start of movement, and if the engine is allowed to cool, interruptions in operation disappear for a short period.
Before you begin replacing the fuel pump, it is important to make sure that engine interruptions are related to the fuel supply and not to the ignition system, ECU, or power supply to the pump motor. It is necessary to measure the pressure in the fuel rail
If the value obtained at the time of interruptions in engine operation differs from the standard values, you can begin diagnosing the power system. https://www.youtube.com/watch?v=JX5cP994JTU The symptoms described above can be caused not only by a faulty fuel pump, but also by a clogged mesh or fine fuel filter.
Also, do not forget that the cause of interruptions in the fuel supply may be poor contact in the motor power supply circuit (torn wires, oxidation, etc.)
For your own diagnostics, it is important to know the structure and operating principle of the fuel pump.
Where is TN
On the vast majority of passenger cars, the fuel pump is located inside the tank. A fuel pump with a coarse mesh, a fuel pressure regulator, a fuel level sensor and a critical fuel level sensor, and in some cars also a fine filter, are held inside the tank by the fuel section.
Design features of some cars
After reading the guide on how to replace the fuel pump yourself using the example of a specific car, you can easily replace it on any other car. But do not forget that in some cases the power system design will make adjustments to the replacement method.
For example, on the Ford Focus I and Chevrolet Cruze, there is no technological hole under the rear seat cushion for access to the fuel section cover, so to replace the mesh and the fuel pump itself, the tank will have to be removed. For ease of further maintenance, owners often cut holes above the fuel module themselves.
On the same Chevrolet Cruze, the manufacturer does not suggest a separate replacement of the motor and even the fuel filter (they are simply not in the catalog of original spare parts), so if the fuel pump fails, the fuel module will have to be replaced entirely. If you want to save money, you can pick up the engine, for example, from the related Opel Astra, but it will have to be adjusted a little. You can learn about this kind of design features from the repair and operation manual or from publications on specialized forums of the owners of your car model.
Tools
Replacement often requires only a socket with a wrench, Phillips and slotted screwdrivers, and pliers. In some cars, the cover of the service hole under the rear row of seats is mounted on a sealant, which will need to be cut off to access the fuel section (in most cases, the plug is screwed on with screws).
Important points
After stopping the engine, pressure remains in the fuel lines for a long time. Before you begin manual replacement, the system must be emptied. To do this, you can pull out the fuel pump fuse with the engine running. Stopping the fuel supply will stop the engine, after which replacement can begin. Modern fuel hoses are secured with self-clamping fittings
To remove them, you need to press the clamps on the sides of the latches, after which the hose should come out of the fitting relatively easily. If the fuel pump is replaced in cold weather, you should be extremely careful when unsnapping the plastic clips and removing electrical connectors. At subzero temperatures, the plastic becomes very fragile. The fuel section must be removed with care, since the free exit will be hampered by the FLS float. When disassembling the fuel module and removing the fuel pump, pay attention to the presence of sealing collars, which must be installed during assembly without distortions or deformations. After you have replaced the fuel pump and installed all the elements back, turn on the ignition a couple of times so that the fuel pump pumps gasoline into the line and ramp. At this time, you can check the tightness of the connected hoses.

