The VAZ 2110 was equipped not only with an injection engine, but also with a carburetor. Great popularity and the rest of the years of production, the tenth Lada model was produced with an injection engine. The injector helped the “ten” improve its technical characteristics, increased the reliability and stability of the internal combustion engine. As you know, injection engines are equipped with a large number of different electronics and sensors aimed at maintaining the operation of the entire car. With the advent of the injector, the VAZ 2110 began to work much better, softer, and the dynamics began to please. Fuel was injected into the combustion chamber under pressure using fuel injectors; the fuel was atomized under pressure, which was pumped by a fuel pump.
Quite often, fuel injectors become dirty due to poor fuel quality, which makes their flow rate slightly lower and leads to a lack of fuel and loss of vehicle power.
In this article we will talk about fuel injectors on the Lada 110, namely their purpose, design, location, signs of malfunction, methods of washing and replacement.
What injectors are installed on VAZ 2110–2112 cars
The main advantage of injectors for VAZ cars of the tenth family is that they are interchangeable. There are only two types of sprayers - produced by Bosch and Siemens. And each of them, regardless of marking and year of manufacture, can be replaced with another.
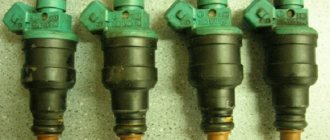
Bosch injectors are traditionally manufactured in black housing
When selecting, there is only one limitation - engine size. 1.5 injectors are not suitable for 1.6 liter engines.
The Siemens injector has a blue tip
Both Bosch and Siemens injectors of any marking can be installed on 8-valve and 16-valve engines.
Table: how to select injectors for VAZ 2110–2112 by marking
| Siemens | Bosch |
| Injector DEKA VAZ 6238 | 0 280 150 996 and 0 280 158 110 |
| Injector DEKA VAZ 6393 | 0 280 158 502 |
| Injector DEKA VAZ 20734 | 0 280 158 017 |
| Injector DEKA VAZ 20735 | 0 280 158 022 |
| Injector DEKA VAZ short 20734 | 280158017 |
| Injector DEKA VAZ short 20735 | 0 280 158 022 |
Cleaning methods
There are three main ways that will allow you to clean your injectors. Decide for yourself which one to use.
Way
Peculiarities
Quite effective, but financially expensive. Plus, working with chemicals is risky because it is very dangerous to your health. Cleaning is carried out only in full compliance with safety regulations
Car services will now do everything for your money. But you'll have to pay a lot. Don’t forget that finding a really good, responsible and inexpensive service station is something out of the realm of fantasy. Therefore, either questionable quality of work, or impressive money for effective cleaning
The most economically profitable way to save money and complete the task efficiently. You should choose this option only if you have an idea about the design of the motor, the location and functions of the injectors
Do not carry out cleaning yourself if you have never climbed into the engine compartment yourself to replace or repair engine components. Trust trusted specialists, do not take risks.
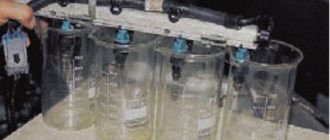
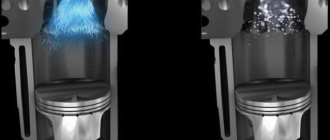
Before and after cleaning
Method for replacing injectors on 8- and 16-valve engines
Car owners cannot always diagnose faults in the fuel system. Often, failures in engine operation or unstable idle speed can be explained by completely different reasons, and not just interruptions in the fuel supply.
Symptoms of a problem
If all car systems are operating normally, then the following symptoms will directly indicate injector problems:
- failures in engine operation;
- increased fuel consumption;
- instability of idle speed;
- loss of power;
- black exhaust gas, etc.
Video: how to replace oil nozzles if they leak
Is it possible to determine the cause of the malfunction yourself?
The causes of injector malfunction are often clogged . When using low-quality fuel, the injector nozzle becomes clogged with gasoline deposits over time, which is why its throughput gradually decreases. Accordingly, the engine no longer receives enough fuel, so the engine power sharply decreases and the car’s dynamics deteriorate.
In addition, the rubber seal or ring may lose its tightness. In this case, the nozzle will leak, due to which the necessary pressure will not form in the system.
It should be noted that the service life of injectors on the VAZ 2110–2112, set by the manufacturer, does not exceed 150 thousand kilometers.
Video: how to disassemble and change injectors on a VAZ 21102
Video
The procedure for cleaning injectors is presented in the video:
Source auto-wiki.ru
If the car injectors become dirty, the engine will gradually lose power. As the car accelerates, engine problems will begin to become more noticeable and fuel consumption will increase. The injectors will need cleaning.
Only a small number of problems arise due to contamination, which is why the VAZ 2110 injectors must be washed on time. This is done when you do not see any obvious deviations, but the car’s mileage has already exceeded 100 thousand km. The main signals that there are problems with the engine are the following factors:
- its launch is difficult;
- works unstably, it lacks the previous stability;
- it begins to stall after working for a certain time;
- the crankshaft begins to make more revolutions;
- the engine does not have enough power;
- when the car moves, it works jerkily;
- gasoline is consumed inappropriately over the distance, and the injector itself is significantly dirty;
- processed gas waste contains an increased amount of CO and CH compounds (this can be found out when inspecting the car at a car service center);
- the injectors become leaky, producing drip ignition.
Procedure for removing oil injectors
Before you begin removing injectors from any car of the tenth VAZ family, you will need to relieve the pressure in the fuel system. Removing any element that is under pressure in any way can result in personal injury.
How to get rid of excess fuel
To relieve the existing fuel pressure, you need to turn off the fuel pump and exhaust the remaining gasoline:
- Fold down the cushion from the back row of seats.
- Below it is the fuel tank hatch.
- Unscrew the screws securing the hatch.
- Disconnect the wiring harness from the pump housing (the wires supply power).
After this, start the engine and wait until it stalls. It is recommended to turn the ignition on several times to ensure that there is no gasoline left in the system.
Next, you can begin to remove the injectors. It is recommended to prepare the necessary tools in advance:
- open-end wrench 17;
- a flat screwdriver with a narrow blade;
- Phillips screwdriver;
- hex key 6;
- rags.
All elements of the repair kit are usually at hand for any driver
How to remove parts from the engine
- Remove the air filter box (it will interfere with free access to the engine).
- Remove the wiring harnesses from the injectors.
- Then you will need to disconnect the wires from the idle speed control and from the throttle sensor.
- Next, remove the vacuum seal from the pressure regulator (it has a white braid).
- Using a 17 key, unscrew the bolts that secure the fuel frame to the body. To make it more convenient, you can remove the gas cable.
- It is better to unscrew the fasteners of the plate with which the ramp is pressed using a hexagon.
- The fuel rail must be removed very carefully, with the nozzles facing up.
- On a 16-valve engine, dismantling will take longer, since the ramp has a more complex structure and several types of fasteners.
- Next, you can remove the injectors themselves - to do this, disconnect the fastening brackets of the electrical connector with your finger, and then the injector bracket. During removal, gasoline may leak; it is recommended to place a cloth under the ramp.
To install a new injector, the socket is first thoroughly cleaned of dirt and fuel, and only then can the product be screwed in. It is better to drop a few drops of gasoline onto the rubber ring before installation - this will make the nozzle fit into the mounting hole more easily. All work is then carried out in reverse order.
How to clean injectors without removing them from the engine?
Usually, the most common problem with TFs is their improper or untimely cleaning, as a result of which they become clogged. There are three types of cleaning:
To clean the injectors without removing them, it is usually enough to select and pour a chemical composition into the fuel tank that can normalize operation. From time to time it is recommended to accelerate the engine to high speeds and speeds of 110–140 km/h on flat sections of the road. When covering a distance of 10–25 km in this mode, the system undergoes “self-cleaning” under load.
However, such methods are effective only for minor stains. Large lesions must be removed using ultrasound or high pressure. And in order to prevent this, it is necessary to wash the fuel filter every 40–50 thousand kilometers.
You can visually familiarize yourself with the technique of checking injectors with your own hands in the video:
To carry out work on checking the injectors you will need: A wire 2 meters long, electrical tape, a multimeter.
- Remove the decorative trim from the 1.6 engine.
- Disconnect the injector wiring harness connectors.
- Turn on the ignition and use a voltmeter to measure the voltage at terminal E of the wiring harness block. The voltage must be at least 12V.
- After taking measurements, turn off the ignition. If, as a result of measurements, it turns out that there is no voltage on the block or it is less than 12V, then you need to check the battery charge, the power circuit and the serviceability of the computer.
- We check the electrical resistance of the injectors, for which we use an ohmmeter to alternately measure the resistance between terminal E and the other four terminals of the block (2). The block terminal marked with the letter B corresponds to the injector of the first cylinder, and terminals C, G and F correspond, respectively, to the injectors of the second, third and fourth cylinders. For serviceable injectors, the resistance should be 13 ohms.
- When performing the following operation, do not apply voltage more than 12 V to the terminals of the block, and after performing the test, do not leave the terminals under voltage, as this may lead to burnout of the injector windings.
- Using two wires directly from the battery, we briefly apply 12 V voltage to the terminals of the block (2) - connect terminal E to the positive terminal of the battery, and terminals B, C, G and F in series with the negative terminal of the battery. For a working injector, a characteristic click should be heard when the valve opens.
- We replace faulty injectors.
Repair of injectors VAZ 2110–2112
Repairing injectors means cleaning the product and replacing the O-rings. Simple measures to restore the functionality of the injectors can significantly increase the car’s power and make cold starts easier. Injector repair is possible in the following cases:
- there are no visible deformations on the body;
- the nozzle has not yet exhausted its service life;
- the car owner wants to optimize the operation of the power unit.
In all other cases (cracks and deformations, long service life), it is recommended to replace the nozzles with new ones.
How to blow out and clean oil molds
On cars of the tenth family, injector cleaning may be necessary after 40–50 thousand kilometers. In this case, it is best to carry out the procedure yourself, since you can always observe for yourself the true condition of the motor and its elements, and also save a significant amount on service station services.
Many drivers prefer to use the simplest method of cleaning injectors - fuel additives. Special liquids, along with gasoline, are poured into the tank and pass through all elements of the fuel system, cleaning them. This measure is justified for new cars in which the degree of pollution is at a minimum level. But additives will not be able to properly clean injectors and other elements of the system.
Video: a simple way to clean injectors using a repair kit
Symptoms of a problem
If you clean and maintain the injector assembly in a timely manner, they can last quite a long time. But when to clean the elements is difficult to determine, so there are a number of signs of malfunction.
- Starting the engine with difficulties or not the first time.
- Loss of power and traction.
- Troubling is a clear sign of uneven fuel supply.
- Increased consumption.
- Jerking of the vehicle in the winter season.
If the above symptoms occur, it is necessary to urgently clean the injectors. After the procedure, the performance of the car engine should return to normal. If this does not happen, then you should look for reasons in another place, such as the fuel pump, fuel filter or cylinders.
Procedure for cleaning and replacing rubber seals
It is best to remove the injectors from the fuel rail and blow and clean each of them, and at the same time inspect them for wear on the rings. This method has a huge advantage over using an additive, since you can visually check how well the restoration work was carried out.
What tool can you use to make repairs?
To dismantle and replace seals you will need:
- diamond key 8;
- carburetor cleaner;
- a can of compressed air;
- rubber hose (you can use a vacuum cleaner);
- syringe with outlet diameter 10 mm;
- wire approximately 2 meters long;
- standard set of rings for injectors (includes eight products);
- rubber seals for fuel lines.
The repair and cleaning process is as follows:
- Remove the rubber seal from the nozzle.
- Place the rubber hose on the tail part of the nozzle.
- Connect the wire to the battery (you can choose any terminal).
- On the reverse side of the hose, connect an aerosol tube through a syringe to flush the carburetor.
- Holding the entire structure with your hands, spray the cleaner several times until the jets emitted become uniform.
- After cleaning, it is recommended to use the same principle to blow out the injectors with air from a can.
- Next, it is recommended to immediately put new rings on the product, after moistening them with gasoline.
In the photo the nozzle is in critical condition
The injector repair procedure can be considered accessible to beginners and inexperienced drivers. The only difficulty is dismantling the fuel rail, since you will have to first relieve the pressure in the system. Cleaning and replacing the rings on the injectors with your own hands gives the driver the opportunity to carry out the highest quality repairs of these elements and be confident that repeating the procedure will not be necessary for a long time.
Source
What injectors are installed on VAZ 2110–2112 cars
The main advantage of injectors for VAZ cars of the tenth family is that they are interchangeable. There are only two types of sprayers - produced by Bosch and Siemens. And each of them, regardless of marking and year of manufacture, can be replaced with another.
Bosch injectors are traditionally manufactured in black housing
When selecting, there is only one limitation - engine size. 1.5 injectors are not suitable for 1.6 liter engines.
The Siemens injector has a blue tip
Both Bosch and Siemens injectors of any marking can be installed on 8-valve and 16-valve engines.
Table: how to select injectors for VAZ 2110–2112 by marking
| Siemens | Bosch |
| Injector DEKA VAZ 6238 | 0 280 150 996 and 0 280 158 110 |
| Injector DEKA VAZ 6393 | 0 280 158 502 |
| Injector DEKA VAZ 20734 | 0 280 158 017 |
| Injector DEKA VAZ 20735 | 0 280 158 022 |
| Injector DEKA VAZ short 20734 | 280158017 |
| Injector DEKA VAZ short 20735 | 0 280 158 022 |
Method for replacing injectors on 8- and 16-valve engines
Car owners cannot always diagnose faults in the fuel system. Often, failures in engine operation or unstable idle speed can be explained by completely different reasons, and not just interruptions in the fuel supply.
Symptoms of a problem
If all car systems are operating normally, then the following symptoms will directly indicate injector problems:
- failures in engine operation;
- increased fuel consumption;
- instability of idle speed;
- loss of power;
- black exhaust gas, etc.
Video: how to replace oil nozzles if they leak
Is it possible to determine the cause of the malfunction yourself?
The causes of injector malfunction are often clogged . When using low-quality fuel, the injector nozzle becomes clogged with gasoline deposits over time, which is why its throughput gradually decreases. Accordingly, the engine no longer receives enough fuel, so the engine power sharply decreases and the car’s dynamics deteriorate.
In addition, the rubber seal or ring may lose its tightness. In this case, the nozzle will leak, due to which the necessary pressure will not form in the system.
It should be noted that the service life of injectors on the VAZ 2110–2112, set by the manufacturer, does not exceed 150 thousand kilometers.
Video: how to disassemble and change injectors on a VAZ 21102
Options for solving the problem
Removing the injectors
Today, every vehicle owner can choose one of three possible options for cleaning injectors:
- use automotive chemicals;
- resort to the services of a service station;
- Remove and clean the injectors on the VAZ 2110 yourself.
In our article we will dwell in detail on the third option for resolving the issue. Self-cleaning is safer and more effective compared to the effect that occurs after using automotive chemicals. The economic benefits of cleaning injectors yourself are also an obvious fact, given the prices prevailing at service stations. It is recommended to carry out this procedure yourself only if you have at least a general understanding of the internal structure of the machine. Otherwise, it is advisable to entrust cleaning of injectors to specialists.
Replacement technology
On VAZ 2110 cars, replacing injectors is carried out as follows. The first step is to disconnect the battery. Then you will need to remove the air filter. After this, disconnect the vacuum hose from the fuel pressure regulator. Next, press the plastic latch of the throttle position sensor connector and disconnect this connector. The same is done with the connector going to the idle air control regulator.
Now you need to unscrew the two bolts that secure the fuel rail, as well as the screw securing the fuel pipe holders. Then remove the holder itself. The fuel rail will need to be carefully moved along the axis of the injectors. The ramp should be removed from under the receiver with extreme care, as there is a risk of damaging the injectors.
The next stage of work is to check the condition of the injectors. It is best to place them in transparent containers, first connecting them to the battery via wires. Next, you will need to turn on the starter and check the atomization of the fuel injectors. Each of them should spray the same amount. If one of the nozzles sprays less than the others, then most likely it needs replacement. In addition, it will be necessary to conduct a thorough inspection of the remaining devices for leaks.
A fuel injector that does not spray fuel needs further inspection. Perhaps it simply does not receive electrical power. It is necessary to disconnect the connector with wires from it. After this, you should directly connect the battery to the injector contacts and turn on the ignition. If in this situation the device begins to spray fuel, this will mean that the malfunction is hidden in the electrical circuit.
Troubleshooting
After you remove the injectors, proceed to carefully inspect them. When the removal of the VAZ 2110 injectors is completed, you can see that one of them remains in the inner pipe of the engine. It will be necessary to replace its retainer and the rings responsible for the seal. In addition, injectors are also replaced when the rings lose the elasticity of their coating or when there are cracks.
Check how the injectors spray. Connect the harnesses and attach everything to the battery. Then place the nozzle in a glass container and turn on the starter to see if the gasoline is spraying correctly. Each nozzle must have at least 4 jets, in addition, the gasoline that is carried through them in containers must be at the same level. If the sprayer begins to leak, the nozzle needs to be replaced.
If it does not spray at all, you need to check whether the nozzle is receiving power. If it does not pass gasoline, disconnect the wires leading from the block and connect the battery directly with the ignition on. If it starts spraying gasoline, it means there is a problem in the electrical circuit. After the injectors have been replaced or cleaned, they will need to be reassembled, but before that, lubricate each ring with gasoline.
If the car has low-quality fasteners, they will also have to be replaced. To do this you will need to move them to the edge of the ramp. If you need to replace the fuel rail, unfasten all the wires and harnesses and install a new one, connecting all the parts in the reverse order. Good luck!
Procedure for removing oil injectors
Before you begin removing injectors from any car of the tenth VAZ family, you will need to relieve the pressure in the fuel system. Removing any element that is under pressure in any way can result in personal injury.
How to get rid of excess fuel
To relieve the existing fuel pressure, you need to turn off the fuel pump and exhaust the remaining gasoline:
- Fold down the cushion from the back row of seats.
- Below it is the fuel tank hatch.
- Unscrew the screws securing the hatch.
- Disconnect the wiring harness from the pump housing (the wires supply power).
After this, start the engine and wait until it stalls. It is recommended to turn the ignition on several times to ensure that there is no gasoline left in the system.
Next, you can begin to remove the injectors. It is recommended to prepare the necessary tools in advance:
- open-end wrench 17;
- a flat screwdriver with a narrow blade;
- Phillips screwdriver;
- hex key 6;
- rags.
All elements of the repair kit are usually at hand for any driver
How to remove parts from the engine
- Remove the air filter box (it will interfere with free access to the engine).
- Remove the wiring harnesses from the injectors.
- Then you will need to disconnect the wires from the idle speed control and from the throttle sensor.
- Next, remove the vacuum seal from the pressure regulator (it has a white braid).
- Using a 17 key, unscrew the bolts that secure the fuel frame to the body. To make it more convenient, you can remove the gas cable.
- It is better to unscrew the fasteners of the plate with which the ramp is pressed using a hexagon.
- The fuel rail must be removed very carefully, with the nozzles facing up.
- On a 16-valve engine, dismantling will take longer, since the ramp has a more complex structure and several types of fasteners.
- Next, you can remove the injectors themselves - to do this, disconnect the fastening brackets of the electrical connector with your finger, and then the injector bracket. During removal, gasoline may leak; it is recommended to place a cloth under the ramp.
How to clean injectors
There are many different methods for cleaning injectors. The use of a specific option will depend on the degree of contamination of the holes. For preventive cleaning or removing light blockages, special chemicals can be used, the use of which does not require removing the injectors.
Cleaning injectors with additives
This method makes it possible to clean not only the injectors, but also the fuel system in general. However, this method is effective only with the systematic use of cleaning chemicals.
It is worth noting that additives must be used every 17,000-20,000 kilometers. To clean, the fuel injection line must be connected to a reservoir through which the cleaning agent is transferred under pressure, and the standard fuel pump must be turned off.
The engine must be started and should be idling for the next fifteen minutes. Then you need to turn off the engine and wait about fifteen minutes.
After this, the engine should be started again, but this time the speed should be increased to the maximum speed to remove sludge fragments. In this mode, the internal combustion engine should run for about thirty minutes.
Manual cleaning
If we are talking about an advanced case, when cleaning with additives is virtually meaningless, it is necessary to dismantle and subsequently replace the injectors.
To clean the injectors manually you will need:
- Clean rags;
- Can of cleaner;
- Syringe 5-7 ml;
- Set of spanners;
- Screwdriver set.
In order for the event to be a success, you must adhere to the following algorithm:
- Dismantling the clamps securing the air pipe and its subsequent removal;
- Dismantling the throttle cable locking mechanism;
- Removing the accelerator cable and its bracket;
- Dismantling fuel lines and pipe fasteners;
- Removing the vacuum brake booster hose;
- Dismantling the fuel line brackets;
- Removing the intake manifold brackets;
- Removing the fuel rail mounting bolts;
- Loosening of the injector mounting harness;
- Removing injectors with fuel rail.
Cleaning should be carried out according to the instructions on the packaging of the chemical product.
Fuel rail can be removed
- This is how it looked:
- Soaked them in carburetor cleaner:
- While the injectors were soaking, I put together a diagram for cleaning them:
The light bulb in the circuit was 10 W, a simple halogen. I brought the button without locking and the wire from work. I didn’t use anything to supply the cleaner to the nozzle - I just put the nozzle on the can and it fits quite tightly.
ready-made cleaning scheme
- The injector is connected as follows: the left contact is positive, and the right contact is negative.
Then I cleaned each nozzle in two passes of 10-15 sprays. I didn’t take a video or photo of the spray torch - it was inconvenient to take pictures, because... he did everything alone. In principle, the nozzles were not dirty - the spray pattern did not change much, and from the very first presses it sprayed normally. Then I checked the winding resistance of all injectors. Values in the region of 11.9-12.2 Ohms are within the norm.
You can start assembling, but before that you replaced the O-rings on the injectors - replaced 4 out of 8, because half of the rings were in excellent condition (at the injector-ramp transition). I removed the ones to replace:
- Assembling the ramp with injectors:
At the same time I cleaned the cylinder head cover
- Before installing the receiver with the throttle valve, I also cleaned the valve; since the last cleaning it has become quite dirty:
- Also, when removing the receiver, two pillows to which it is attached fell apart - I had to go get new ones:
- We collect everything, check it and start it.
Started with half a kick. Since in general the injectors were not dirty, I didn’t expect much of an effect, but here I was pleasantly surprised. According to the first sensations, the engine began to run more softly, and responded somehow better to the gas pedal. Let's check whether this procedure helped during a cold start in the cold winter. But the most unexpected effect was a decrease in average consumption by almost a liter.
If before this my average consumption recently was consistently 9.2-9.4 liters per 100 km, then after five days of commuting to work the average consumption is already 8.6 liters per 100 km. And at XX it used to be 0.8-0.9 l/hour, but now it’s 0.7-0.8 l/hour. So it was not in vain that I climbed into the injectors and spent several hours.
Repair of injectors VAZ 2110–2112
Repairing injectors means cleaning the product and replacing the O-rings. Simple measures to restore the functionality of the injectors can significantly increase the car’s power and make cold starts easier. Injector repair is possible in the following cases:
- there are no visible deformations on the body;
- the nozzle has not yet exhausted its service life;
- the car owner wants to optimize the operation of the power unit.
In all other cases (cracks and deformations, long service life), it is recommended to replace the nozzles with new ones.
How to blow out and clean oil molds
On cars of the tenth family, injector cleaning may be necessary after 40–50 thousand kilometers. In this case, it is best to carry out the procedure yourself, since you can always observe for yourself the true condition of the motor and its elements, and also save a significant amount on service station services.
Many drivers prefer to use the simplest method of cleaning injectors - fuel additives. Special liquids, along with gasoline, are poured into the tank and pass through all elements of the fuel system, cleaning them. This measure is justified for new cars in which the degree of pollution is at a minimum level. But additives will not be able to properly clean injectors and other elements of the system.
Source
Possible malfunctions: causes, manifestations, consequences
Naturally, fuel injectors require periodic inspection and cleaning, and, if necessary, even replacement. Problems can be identified by a number of symptoms, including:
- The appearance of uncharacteristic failures when starting the power unit and when it is idling;
- Increased consumption;
- Uncharacteristic exhaust color.
After the first manifestations of the problem, we can talk about the presence of sulfur deposits on the system elements, corrosion, wear of filters and some working parts. As a result of the influence of each process, the fuel mixture supply system becomes clogged, and, consequently, a loss of power and high consumption.
