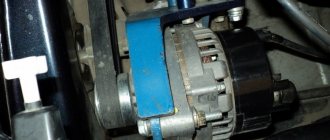
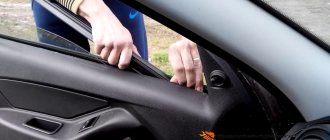
The appearance of a creaking or metallic grinding sound during operation of a car engine is a sign of wear on the generator bearings on the Lada Grant. The malfunction is common on domestic cars.
The reasons for the squeaking are different: defects, violation of operating rules, damage.
Fixing the breakdown will not be difficult for the average driver. The operating principle is intuitive.
In order to provide methodological assistance to inexperienced drivers, we will consider the algorithm for replacing bearings with your own hands.
Stage No. 1: dismantling the generator on the Lada Grant 8-valve
- Disconnect the terminals from the battery to prevent a short circuit in the circuit.
- We unscrew 6 bolts from under the bottom and remove the oil pan protection;
- We disconnect the rubber protective cap and unscrew the terminals from the contact board on the converter.
- The key is set to “13”, unscrew the nut of the upper fastening, and use the mounting tool to move the converter to the side. Access to the lower mount is provided.
- Unscrew and remove the lower fastening bolt.
- Using a mounting tool, we remove the generator belt from the pulleys.
- We remove the converter assembly and fix it on the surface of the workbench.
Related link:
Replacing the pump on the Lada Grant. Recommendations from the selection specialist
What bearings are on the VAZ 2110 generator?
The “tens” generator has two bearings – a larger front one and a smaller rear one. In this case, it is the front one that most often requires replacement, since it experiences more significant loads. But, over time, you also have to change the rear one, although it is better if you change it, then both at once. They can be sold as a set or separately. New bearings are selected depending on its size.
Bearing sizes for generator
The bearings of the VAZ 2110 generator have different sizes depending on the year of manufacture of the car, as well as whether it is carburetor or injection. They differ in diameter for the landing shaft.
| Dimensions of original VAZ 2110 bearings | ||||
| Year of manufacture of the car | Bearing | vendor code | Catalog number | Dimensions, internal diameter / external diameter / width, mm |
| Before 2001, carburetor | Front | 180303 | 6302 | 15×42×13 |
| Rear | 80202 | 6202 | 15×35×11 | |
| After 2001, injector | Front | 180302 | 6303 | 17×47×14 |
| Rear | 80203 | 6203 | 17×40×12 | |
Sedans of the first years ( before 2001 ), which are most often equipped with a carburetor, have old-style generators. In such a generator, the front bearing has dimensions of 15×42×13 mm, and the rear bearing – 15×35×11 mm. The first has catalog number 6302 and original article number 180303, the second has number 6202 and factory article 80202. Foreign-made parts will be marked 6302-2RS and 6202-2RS, respectively.
Dismantling the generator on a Lada Grant with air conditioning
At the preparatory stage we will need the above tools and materials.
Sequencing:
- We hang the front part of the car with a hydraulic jack, unscrew the bolts, and remove the wheels.
- In the opening of the wheel arch on the right side, unscrew the tension roller and the engine mount mount.
- Lower the jack a few centimeters lower until the converter is level with the wheel arch opening.
- We carry out the subsequent algorithm by analogy with the 8-valve modification of the engine.
Modification of the Lada Granta generator mounting
If you don’t care about the warranty, you can slightly upgrade the generator mounts. You will need: a grinder, a sharpener, the top bolt of the generator (2cm longer than the original one).
Thus, we have the opportunity to slightly adjust the belt tension.
Sequence of actions when replacing Lada Granta bearings
- We place the converter on the surface of the workbench, unscrew the three mounting bolts on the rectifier block (key set to “14”).
- Using a screwdriver, release the spring clamp and hold the winding with your hand.
- We bring out six winding ends.
- Unscrew the nut on the power block.
- We remove the rectifier from the generator housing.
- We use a multimeter to determine the negative diodes. To do this, connect the positive terminal of the multimeter to the negative plate. We connect one by one to the other diodes. In good condition, the diodes have a resistance value of 550 - 640 Ohms. Deviation from the norm is a sign of a malfunction.
- If the arrow tends to infinity, the diode is broken; if the needle tends to “zero,” the diode is broken.
- By analogy, we check the positive diodes, only in this case we reconnect the terminals to the “B+” terminal.
- Additionally, we check the converter housing with a multimeter for open circuits or short circuits.
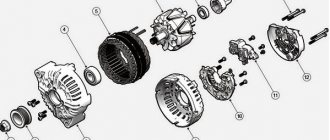
- We fix the generator in a vice, unscrew the nut from the back, and remove the pulley. We first apply markers to the relative placement of the lids.
- We unscrew the four coupling bolts, pry them up with a screwdriver, and remove the generator cover.
Related link:
Replacing the air filter on a Lada Granta with your own hands
- Remove the rotor shaft from the bearing.
Note to the driver! If necessary, use a wooden spacer to press the rotor shaft out of the bearing race. Often, during work and rotation, parts become stuck.
- We inspect the stator and its surface. In good condition, there should be no traces of the armature touching the stator. Otherwise, replace the bearings.
- Using a multimeter we check the integrity of the converter winding.
- We inspect the cover from the drive side. When rotating the axis, you will feel some play between the rings. The latter must be replaced with new ones due to wear.
- There should be no cracks on the inside of the generator cover. We replace with new ones as needed.
- Unlock the bearing and lightly hit the spacer with a hammer to press the part out of the cover seat.
- We carry out troubleshooting of parts and the converter cover. We replace components with new ones if there are signs of wear or defect.
- Use a wooden spacer to press the new bearing into the seat of the cover. Be sure to check that the winding leads do not come into contact with the converter cover.
- Check the condition of the slip rings. If there are burrs, scratches, or signs of wear, replace them with new ones.
Note to the driver! Some craftsmen practice not replacing the rings with new ones, but grinding them with sandpaper or turning them on a lathe. We remove the minimum layer of metal and then sand it with sandpaper.
- Using a tester, we check the winding resistance by applying the terminals to the slip rings. Gravity towards infinity is unacceptable, as this indicates a break in the rotor winding. The latter requires replacement.
- Finally, we check that the housing is not shorted to the rotor. The tester's arrow goes to infinity.
- Use a three-fingered puller to press out the rotor shaft bearing.
- Using a frame we press a new, serviceable bearing onto the rotor shaft. The main force is directed to the inner ring of the bearing.
- We assemble the structure in the reverse order, having previously lubricated the bearings with graphite grease. We tighten the generator cover with a force of 39-62 Nm.
Do-it-yourself replacement of generator bearings on the Lada Grant is completed.
Related link:
Adsorber Lada Granta: signs of malfunction, solutions, replacement
Generator replacement
Almost every owner of a Lada Granta knows that the standard generator often fails. And you can verify this by starting to operate this car. The reason for the failure lies in the unfinished design, which the manufacturers know about and which they do not want to correct.
Usually, it is not the generator itself that fails, but its support bearings or brushes, resulting in extraneous noise and an unpleasant grinding sound of parts rubbing against each other during a trip. It is also worth noting that in almost all Lada Granta models the generator is located in the engine compartment on the left side.
To eliminate the annoying sound and, in principle, get rid of the problem, you will need to dismantle the generator, diagnose the device and system, and, if necessary, replace worn elements or the entire generator. When viewing, it is important to pay attention to the electrical and mechanical components.
The procedure for replacing the generator depends directly on the vehicle configuration. However, in any case, the process involves carrying out preparatory and basic work. A detailed description of the replacement for each Lada Granta configuration is presented below.
Signs of generator malfunction, solutions
| Sign | Diagnostics, elimination |
| When the engine is running, the battery low indicator indicates | Checking the belt tension and power cable contacts. Replacement with new one |
| Rapid discharge / battery charging / boiling over | Insufficient / excessive tension of the converter belt |
| Insufficient brightness of headlights | The current in the circuit is below the minimum permissible parameter 14 - 16V. Generator dismantling, winding integrity check, repair |
| Weak sound when the engine is running | —/— |
| Increasing the brightness of the headlights when the engine speed increases | —/— |
| Engine operation is accompanied by extraneous sounds, squeaking, and metallic grinding sounds. | Bearing wear, rotor shaft defects. Dismantling, troubleshooting, replace worn bearings |
What generator is installed on the Grant?
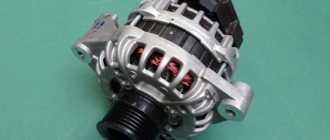
The Granta is supplied from the manufacturer's factory with a KZATE generator with a maximum current of 115 Amperes. This generator is a fairly reliable element and, when used correctly, rarely fails.
The KZATE generator can be damaged by simply tightening the belt. Due to the strong tension, the bearings are constantly working under load, which soon leads to their wear and unpleasant noise when the internal combustion engine is operating.
Characteristics of KZATE 115A:
| Maximum generated current, (A) | 115 |
| Rated voltage, (V) | 14 |
| Power, kWt) | 1,6 |
| No-load speed (rpm) | 1200 |
Cost of generator KZATE
The price of a standard 115A Granta generator reaches 6,000 rubles, which is not cheap. There are also analogues on the market that meet the same characteristics as a standard generator.
Review of producer prices. Catalog articles of installed bearings
| Manufacturer article number | Price, rub.) | Resource (thousand km) |
| KZATE 9402.3701-03 | ||
| Brushes 1127014022 | From 150 | 85 – 95 |
| Voltage regulator 844.3702 | From 600 | —/— |
| Diode bridge BVO4-105-01 | From 510 | —/— |
| Bearings 6303, 6203 | From 350 | —/— |
| Bosch 0 986 041 850 | ||
| Brushes 140371 | From 200 | 85 — 105 |
| Brush holder 235607 | From 250 | —/— |
| Voltage regulator IN6601 | From 1000 | —/— |
| Diode bridge INR431 | From 1500 | —/— |
| Bearings 140084, 140093 | From 200 - 300 | —/— |
| 180302 | From 250 | —/— |
| 180201 | —/— | —/— |
*prices are current as of October 31, 2018.
Grant generator prices
Below is a table with prices for generators for Granta.
| Name | vendor code | Price, (rubles) |
| StarVolt | LG 0190 | 7300 |
| Auto tycoon | AM-05G | 4400 |
| HOFER | HF 633623 0119-78 | 4650 |
| ATE | 9402.3771-14 | 4000 |
| ELTRA | 5162.3771 | 4500 |
List of online stores providing goods (Moscow, St. Petersburg, Kyiv region)
| № | Name | Address |
| 1. | "NovaTon" | https://novaton.ua/ |
| 2. | "ZapchastKom" | https://www.zapchast.com.ua/ |
| 3. | "How much" | https://www.avtostore.spb.ru/ |
| 4. | "AutoWall" | https://www.avtoall.ru/ |
| 5. | "SV-Parts" | https://sv-parts.ru/ |
| 6. | "AvtoPiter" | https://www.autopiter.ru/ |
Replace the KATEK generator with a Bosch
From July 24, all Grant cars began to be equipped with new Bosch generators (2170-3701010-13 (F000 BL0 652)) with a capacity of 110A. This generator has an increased current output compared to the 2170-3701010-10 generator, especially at idle speed (55-60A at 800 rpm of the crankshaft). Another advantage is increased reliability.
Reviews
| № | Positive |
| 1. | Vasily: drove over 80,000 km, no comments on the operation of the converter. At the 45,000 km mark the belt whistled, took it to a service center and had it tightened. Since then everything has worked like clockwork. |
| 2. | Gennady: I don’t complain about the car, since it’s a budget option. Breakdowns happen, but they are not so critical and can be fixed on your own. |
| 3. | Kirill: at 50,000 km I replaced the converter belt, the old one was defective. There are no comments on the other units. I made no investments except for the purchase of consumables and filters. |
| 4. | Ivan: during a run of 110,000 km, I replaced the generator and drive belt. I think that the interval is quite acceptable for domestic transport in the budget segment. |
| 5. | Alexander: I won’t slander Grant. Mileage over 95,000 km, no investments. Works like a watch. |
| 6. | Lesha: after a year of active use of the car, I can say that it is worth the money. There were no critical breakdowns, and I fixed small things on my own. |
| 7. | Vitaly: this is the third year after buying the car, I replaced the generator once, rebuilt the chassis, changed oils and filters. There are no complaints about the build quality of the Grant, because it is a budget model. |
| Negative | |
| 1. | Victor: the converter, along with the bearings, was not used for even 60,000 km, I bought a new one from BOSCH. I don’t know how long the Indian unit will last. |
| 2. | Vladlen: problems with the car started at 35,000 km and continue to this day. Decided to sell. Friends advised me to take Renault Logan. |
| 3. | Ivan: during the two years of operation of the car, it was unscheduledly repaired at a service station three times. Fortunately, Grant had a factory warranty and it cost minimal investment. |
Related link:
Device diagram and step-by-step instructions for replacing the clutch on a Lada Grant
Technical regulations for Lada Granta cars
In order to be sure that the car will not fail on the road, you should monitor its technical condition and comply with technical regulations. Maintenance consists of diagnosing vehicle systems and components, identifying and troubleshooting problems. But even if everything is in order with the car, it is necessary to carry out the routine operations provided for in the vehicle’s operating manual.
Experts recommend doing a technical inspection when purchasing a used car and every 15 kilometers. During a visual inspection, you should check the systems and components for leaks, check the reliability of fasteners, the generator voltage regulator, belt tension, and their condition. If necessary, change filters, oils, working fluids, and consumables. In order to bring the car into good working order, you need to buy all the necessary consumables in advance so that they can be replaced during inspection.
The accessory strap is a consumable item that needs to be replaced periodically. In the Lada Granta manual, the manufacturer recommends replacing the belt every 30 thousand km. Experienced drivers advise checking the condition of the belt drive at intervals of 15 thousand km.
The frequency of replacement of consumables is influenced by the following factors:
- terms of Use;
- driver's driving style;
- quality of consumables;
- serviceability of components and mechanisms;
- climatic conditions.
If the machine is operated in difficult conditions, then diagnostics should be done more often. It is recommended to do a technical inspection before a long trip so that the car does not fail along the way.
Replacing a generator on a car with a 16-valve engine
Dismantling and subsequent installation of the device on Grant modifications with a 16-valve power unit have their own characteristics: there is a belt tensioner. Therefore, the procedure for removal and installation is somewhat more complicated. As in the previous case, you will need a standard set of tools, and before starting work, the negative terminal of the battery is disconnected. It is necessary to remove the engine protection, if any. After this, you can begin to remove the unit by following these steps:
- Disconnect the wiring harness from the generator.
- Remove the cap covering the power wire.
- Using a “10” wrench, unscrew the nut that holds the wire tip.
- Use a key set to “13” to loosen the tension bar nut.
- Loosen the belt by unscrewing the adjusting bolt to the left.
- Move the generator to the right and remove the belt.
- Unscrew the adjustment bolt completely and remove it.
- Remove the tension bar.
- Unscrew the fastening nut from below.
- Remove the bushing and remove the bolt holding the lower mount.
- Remove the generator.
To install, do all the steps starting from the end, then tighten the belt.
Replacing bosch generator bearings
The procedure is applicable for cars:
Volkswagen Passat B5.5 / Volkswagen Passat B5.5 (3B3) 2001 - 2005 Volkswagen Passat Variant B5.5 / Volkswagen Passat Variant B5.5 (3B6) 2001 - 2005
Volkswagen Passat B5 / Volkswagen Passat B5 (3B2) 1997 - 2001 Volkswagen Passat Variant B5 / Volkswagen Passat Variant B5 (3B5) 1997 - 2001
Volkswagen Passat B4 / Volkswagen Passat B4 (3A2) 1994 - 1997 Volkswagen Passat Variant B4 / Volkswagen Passat Variant B4 (3A5) 1994 - 1997
Volkswagen Passat B3 / Volkswagen Passat B3 (312) 1988 - 1994 Volkswagen Passat Variant B3 / Volkswagen Passat Variant B3 (315) 1988 - 1994
Volkswagen Golf 4 / Volkswagen Golf 4 (1J1, 1J5) 1997 - 2004 Volkswagen Bora / Volkswagen Bora (1J2, 1J6) 1999 - 2005
Volkswagen Golf 3 / Volkswagen Golf 3 (1H1, 1H5) 1992 - 1998 Volkswagen Vento / Volkswagen Vento (1H2) 1992 - 1998
Volkswagen Golf 2 / Volkswagen Golf 2 (191, 192, 193, 194) 1984 - 1988 Volkswagen Jetta 2 / Volkswagen Jetta 2 (165, 166, 167, 168) 1984 - 1988 Volkswagen Golf 2 / Volkswagen Golf 2 (1G1) 1989 - 1992 Volkswagen Jetta 2 / Volkswagen Jetta 2 (1G2) 1989 - 1992
The information is suitable for repairing other cars as well.
Replacing Bosch generator bearings. VW Vento 1994, ADY engine, Bosch 90 amp generator. 1. Remove the generator from the car. 2. Unscrew the 3 small screws that hold the cover. 3. Remove the cover. 4. Remove the brushes. 5.
Photo 1.
7. We gain access to the rear bearing. Remove the plastic casing from it.
Photo 2.
8. We tighten the bearing using a puller. This puller failed to cope with the second bearing. I had to run after another, more serious one.
Photo 3.
9. Unscrew the nut securing the pulley, because in 4 stores there was no sprocket/hexagon; on 8, a gas wrench was used.
Photo 4.
10. Next, I unscrewed the four screws securing the bearing cover.
Photo 5.
11. Using a puller, I pushed the bearing with the rotor out of the housing.
Photo 6.
12. Using a puller, I pulled the bearing and retaining ring off the shaft. I had to sharpen the paws a little to fit under the bearing.
Photo 7.
13. All bearings have been removed. I put the rotor in the freezer. Temperature -24 degrees. After half an hour I take it out and both bearings with a whistle slide onto the shaft simply by hand. I push them in a little more tightly through the tube. Don't forget the retaining ring.
Photo 8.
14. I heat the front cover over a gas stove and easily put it on the bearing. I cool it with a hairdryer so that the bearing does not heat up too much.
Photo 9.
15. I insert the plastic rear bearing housing into the back cover. I wet it a little and connect both halves of the generator.
16. All that remains is to tighten the 4 screws holding the generator together, install the brushes, put on the cover and screw it on.
Addition from Kelevra:
As for the BOSCH 65A generators on the second Golfs, such a trick will not work there. The front bearing with the upper part of the generator housing refused to be removed together with the housing. It broke in small pieces in two places. I had to drill the bolts and unscrew them with the broken drills inward.
During assembly, I placed new screws on the nuts, so that later they could be easily tightened. The bearings were FAG, 203 and 201, respectively. I don’t recommend saving on bearings. I also had a problem with M5 110 mm screws. I twisted the splines on one, bought 90 mm bolts from hardware, they fit without problems. It probably makes sense to fill it with WD40 overnight.
Addition from TPN:
Front bearing SKF 6303, rear SKF 6203. Be sure to take with covers.
If the generator is an old model, then the rear bearing will be 6201. The author of the topic’s photo of the generator shows that the pulley for the poly V-belt and, most importantly, the rear bearing are large and stand between the rings and the rotor winding. And in old generators, the pulley for the ridge belt and the bearing are two times smaller and are located at the end of the shaft.
Another sign (I missed it) is that the cooling impeller is near the pulley, and not inside. Here, in short, is the “old” generator. By the way, when replacing the rear bearing, it would be a good idea to replace its “bed” as well. Old/new generators also differ in their top mounting.
Addition from GNZ:
It happens that the main cause of friction between the rotor and the stator is wear on the outer surface of the plastic liner of the rear bearing, which is accompanied by a characteristic noise. Can be repaired by increasing the size using good quality tape. The main thing is to accurately adjust the size to a tight fit. It has been serving without problems for more than 4 years.
Addition from TPN:
Replacing collector rings in a Bosch generator: Remove the rotor, remove the rear bearing, remember the distance from the rings to the bearing seat (approx. 2mm). One wire is soldered from below, and the other runs in the groove under the rings and is soldered from above (i.e. to the top coll. ring).
Using a sharp chisel, cut out the place of soldering with a piece of call. rings and carefully unsolder them from the wires, being careful not to break them. We remove the textolite base and clean the shaft. We press on new rings (with the protrusion down!), paying attention to the distance to the bearing, insert the wires into the slots and carefully solder them.
Addition from Ivanado:
After using the gas key, the pulley can begin to eat your belts with great appetite. Only VISE - for the rotor! The nut can be easily unscrewed with a 24 mm spanner or L-shaped wrench and an M10 spline (asterisk) wrench. A gas wrench is not exactly a car tool. To remove the front bearing (the largest one), I used a separate puller.
True, to use it we had to bend the fan impellers. Other pullers either did not fit through or broke. Yes, it is best to unscrew the bolts connecting the two halves of the generator housing with an impact screwdriver. At first I tried a regular cross.
Addition from Boring:
I'll tell you that vinegar (and if there is essence, then even better) will be better than WD 40. So don't beat and bend this pulley, tear off the edges on the nut and break the hexagons. I placed it vertically and poured it directly into the pulley so that the nut was covered, using a spray bottle, and placed it on the balcony, otherwise it would be difficult to breathe in the room.
If you have not found information on your car, look at the cars built on the platform of your car. Most likely, the information on repair and maintenance will be suitable for your car.
