Every grant driver knows about the problems of the standard generator on the Lada Grant. However, they are in no hurry to eliminate the defect in mass production. Support (rolling) bearings often fail. While driving, extraneous noise appears, a metallic grinding sound.
To eliminate the defect, it is necessary to dismantle the generator, carry out an inspection, and replace worn elements. Most often, the causes of failure are associated with an electrical or mechanical component.
Replacing the generator on Lada Granta 16 valves
At the preparatory stage, we will need the same tools and materials as in the case of the 8-valve Granta.
The design of the 16-valve modification of the Lada Granta has an alternator belt tensioner installed. This must be taken into account during repairs.
Algorithm of actions:
- The car is in the perimeter of the repair area, the battery terminal has been removed, the oil pan is protected.
- By analogy, we disconnect the power terminals from the converter and the protective cap.
- The key is set to “13”, release the upper lock of the generator, move it to the right until it stops.
- Remove the belt from the pulley.
- Unscrew the lower fastening and remove the bushing.
- We remove the generator from its regular place.
We check the condition of the alternator belt ourselves
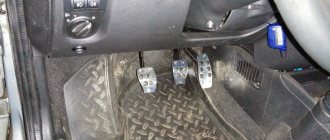
To make sure that the belt is in good condition, you need to perform simple steps. Initially, fifth gear is engaged. On it, leaning on the front bumper, we try to push the car back. At the same time, we are trying to conduct a visual inspection of the belt along its entire length.
There, according to the general rule, there should be no cracks, even the smallest ones, as well as ruptures and peelings that occur due to long-term use of rubber products.
If such problems are found, the belt must be replaced. The timing belt is checked in the same way.
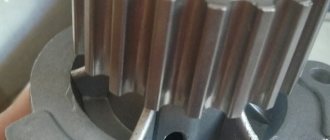
It is also a good idea to check the external condition of the generator itself, since its quality raises questions. Don't forget to inspect the generator roller.
Alternator belt replacement process
- The length of this belt is 823 millimeters.
- You can find it in the catalog by name or by your own unique number 1118-1041020-07.
- The marking on the box will indicate the index 6РК 823.
In addition, prepare in advance a sufficiently long screwdriver, as well as a “13” key. You may also need a knife to remove the old belt.
- To begin with, we remove the old belt, or what is left of it. As we have already said, this needs to be done every thirty thousand kilometers, even if the condition of the belt appears to be completely satisfactory. The belt can be removed with a simple knife.
- Now we find the bolt for the lower mounting of the generator. Try to unscrew it literally a few turns, which will help with the “13” key.
- Use the same key to unscrew the nut, after which the bolt for the upper mounting of the generator is completely pulled out.
- Now you need to be very careful. You must try to rotate the generator so that the upper eye exactly goes beyond the surface of the protrusion located on the bracket. We confidently press the generator to this bracket and fix it there with ordinary wire. It is best to tie it to the cylinder head cover mounting nut.
- Now carefully put the belt on the generator pulley, as well as on the surface part of the generator drive pulley.
- We engage fifth gear again, while simultaneously pressing the belt against the pulley. In this position, we try to push the car back until the belt is completely in place.
- Now you can untie the wire and start squeezing the generator with a screwdriver in the place where it came into contact with the bracket. Don't forget to insert the top bolt that mounts the generator.
After this, all that remains is to take care of tightening the lower bolt and the nut of the upper generator mounting bolt. This will be enough to set everything in place.
Alternative options
Of course, many car enthusiasts are well aware of the consequences of not having a belt tensioner. The fact is that the belt, quite often, is overtightened, which leads to too rapid wear of the generator bearing. You can recognize this problem by a characteristic sound reminiscent of a howl. This design flaw can be eliminated by installing a generator belt tensioner. The most common option is to install a tensioner from the Lada Kalina.
Installing the alternator belt tensioner
The reason for abandoning the tensioner is simple. The manufacturer tried to save additional money by making the car one of the most affordable in the world. And this is typical only for the cheapest trim levels (standard and norm), which are supplied with eight-valve power units.
To make it easier to control the belt tension, you can simply replace the generator bracket by pre-modifying it.
In the standard bracket you will not find holes for the tensioner pulley. Instead, you can assemble a new bracket, which will be based on the base of the first generation Lada Kalina. As we already said, we will need:
- the bracket itself is from the specified car,
- tension roller,
- tensioner pulley bracket,
- as well as the alternator belt itself, all from the same Lada Kalina of the first generation.
- In addition, do not forget about purchasing a screw tensioner, the corresponding bushing and bolt.
The price of this entire set reaches two thousand rubles, for which you can significantly improve the design of the car and extend the service life of individual parts.
The replacement process itself is similar to replacing standard Lada Granta parts. However, if you do not have the appropriate technical knowledge, then you should contact a service center to assemble the structure.
Replacing a generator on a Lada Granta with air conditioning
At the preparatory stage we will need the above tools and materials.
Sequencing:
- After unscrewing the converter mounts, hang up the front of the car, unscrew the bolts, and remove the right wheel.
- Through the opening in the wheel arch we unscrew the tension roller and the engine mount mount.
- We lower the car with a jack until access to the generator opens.
- The further dismantling algorithm is no different from that described above.
We carry out preventive maintenance, replace the unit with a new one, and assemble the structure in the reverse order.
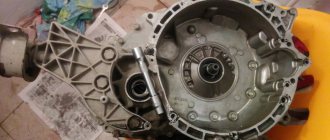
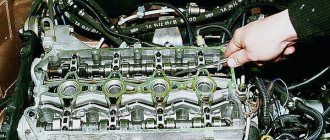
Where is the generator located on the Lada Grant?
On cars of the Lada Granta family, the current converter is located in the engine compartment, on the left side.
Engine compartment When carrying out repairs, you may experience difficulties with access to the converter mounts. For convenience, remove the oil pan protection and hang the front of the car.
Expert answer
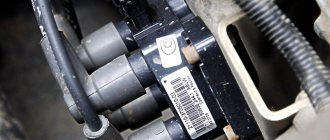
KZATE 115 Ampere
A 115 Ampere KZATE generator is installed from the factory. Its quality is truly below par. The diode bridges on it are lit “only on the road.” Very poor build quality.
Due to poor contact, the pad on the original generator burned out; all you had to do was tighten one bolt well
Bosch 135 Ampere
The most common replacement option is a Bosch 135 Ampere, especially since starting from 2016, all Grants are equipped with this particular model.
This is already a Bosch generator, it is what all Grants have been compiled with since 2016
The cost of a Bosch generator is about 5,000 rubles, but it is a very reliable manufacturer.
It is possible to restore an old original generator, but the master simply does not want to take on the work. This generator is made “disposable”; when disassembling it, it falls apart, and it is very difficult to roll everything back. Moreover, the wear and tear of the old “gene” could already be critical, and there the repair kit would cost like new.
Bulgarian generator 135 Ampere
I would recommend listening to the opinion of your master and purchasing a new one. I have a Bulgarian 135 Ampere generator installed, the flight is normal . When replacing, I recommend installing a bracket with a tensioner from Kalina, it is more thoughtful and convenient.
I would like the generator to be more powerful...
Mileage: 23000 km
Signs of generator malfunction, ways to eliminate them
| Sign | Cause/remedy |
| The warning light on the dashboard does not light up | Open circuit in the power supply from the converter to the battery. Check the integrity of the electrical circuit |
| The warning light does not go out after the engine starts | Insufficient belt tension, insufficient tension in the chain. Measure the voltage in the circuit. |
| —/— | Worn brushes, faulty diode bridge. Measure the voltage with a multimeter and replace worn elements with new ones. |
| Short to ground | The insulation of the power cable is damaged. Check the condition of the insulating coating. |
| The converter does not produce the proper voltage of 14 V | Oxidation of terminals, cleaning with a metal brush, replacement |
| —/— | The battery is worn out, replace the battery |
| —/— | Loose belt tension. Adjust the tension. |
| —/— | Diode (rectifier) bridge is unusable, replace with a new one |
| The battery is not receiving a charge | Replacing the diode bridge with a new one |
| —/— | Rectifier failure. Replacement of components |
| Voltage drop in the network (circuit) | Checking the quality of connections of terminals and clamps. Tightening, replacing with new ones |
Related link:
How to make an armrest for a Lada Granta yourself. Recommendations from professionals
Overrunning clutch
An overrunning clutch is a mechanism that prevents the transmission of torque from the driven shaft to the drive shaft when the first one rotates too quickly. Does Grant need to be equipped with such a device? Let's try to figure it out.
As you know, the engine produces torque in jerks - when the fuel mixture is burned, the crankshaft begins to rotate rapidly, after which it slows down. Also, accelerated wear is caused by the generator itself, which is caused by the inert rotation of the armature. As a result, the belt is exposed to constant pulling forces, which significantly reduces its service life. To prevent such phenomena, overrunning clutches are installed. Its advantages include the ability to significantly reduce the negative inertial influence and ensure silence and a minimum of vibrations during engine operation.
The installation process is simple. First, remove the generator itself (according to the instructions above), after which the generator pulley is removed. To do this, fix the pulley with an adjustable wrench, and then unscrew the nut with a 24mm wrench.
Then install the coupling, having previously treated the threads and seat with graphite lubricant. Having installed the part in its proper place, tighten the nut with a special wrench. The installation of the generator completes the work. The entire replacement process takes approximately one and a half hours.
Replacing the Lada Granta generator - KZATE with Bosch. Comparative characteristics and disadvantages
| Characteristics | KZATE 115A 2170-10 | Bosch 2170-13 |
| Maximum current (output) at 14.5 V / 6000 rpm | 115 | 110 |
| Voltage setting limits at a speed of 2500 rpm and a current of 5.0 A | 13.6 – 15.2 | 13.6 – 15.2 |
| Gear ratio according to the principle: motor - converter | 1 : 2.4 | 1 : 2.4 |
Due to its smaller height, Bosch 110A is 10 mm lower than its analogue. Despite the minor advantages, BOSCH has one “fat” drawback - there is no possibility of quick (cold) replacement of the diode bridge in the event of its failure.
The electrical contacts are soldered into the bridge; quick replacement of the rectifier on the road will not work. At KZATE it is quite possible and acceptable to replace the rectifier on the road.
Addresses of companies providing generator replacement services (Moscow, St. Petersburg, Kyiv regions)
| № | Name | Address |
| 1. | "Autopoints" | Moscow, Varshavskoe highway, 33 https://avtotochki.ru/ |
| 2. | "ZenitAuto" | Moscow, metro station Perovo, Kuskovskaya st., 20A (next to the Enthusiasts Highway) https://www.zenitauto.ru/ |
| 3. | "RemZone" | St. Petersburg, Vasilievsky Island, st. Uralskaya, 17A https://www.spb-remzona.ru/ |
| 4. | "Autopoints" | St. Petersburg, Lesnoy Avenue, 78 https://spb.avtotochki.ru |
| 5. | "Dzigora Complex" | m. Darnitsa, st. City Shalet 1A https://dzigoracomplex.kiev.ua/ |
| 6. | "VseSTO" | Kyiv, st. Kikvidze 43 https://vse-sto.com.ua/ |
Difference between belts of 16 and 8 valve engines
For Lada Granta models, an alternator belt with the following markings is used:
- 1118-1041020-07: search index 6RK 823, length 823 mm, thickness 3.0 mm;
- 6PK1123 with air conditioning;
- 6PK1113 without air conditioning, with power steering;
- 6PK745 without air conditioning, without power steering.
Principle of operation
In order for the generator to supply current to the load, the field winding must be energized. This, in fact, happens when we turn on the ignition. Next, the crankshaft of a running engine causes the armature to rotate. At this time, electricity begins to be generated in the stator winding, which is sent to the on-board network.
In VAZ-2110 cars, the generator produces alternating current, and all consumers are designed for direct current. To convert it, a rectifying diode unit is used.
But that's not all. The fact is that the voltage produced by the generator constantly changes depending on the number of crankshaft revolutions. To stabilize it, a voltage regulator relay is used.
As a result, at the terminals of the device we have a constant electric current of stable voltage.
Review of prices of generator manufacturers for the Lada Granta
| Manufacturer article number | Price, rub.) | Resource (thousand km) |
| KZATE 9402.3701-14 | From 4900 | 90 — 110 |
| BOSCH 21700-3701010-13 | From 5300 – 5500 | 90 — 110 |
Related link:
New body modifications of Lada Granta 2022
*prices are current as of October 30, 2018.
Recommendations for choosing a converter
In order to ensure stable operation of the power supply system, replace the standard KZATE converter with a BOSCH one. Despite identical technical characteristics, the workmanship of the latter is better.
Also, the BOSCH generator better “transfers” loads in the network from activated equipment, optics, and heaters.
The service life of both KZATE and BOSCH is within 90 – 110 thousand km. mileage Moderate loads and average driving speeds will increase the service life by 10 - 15%.
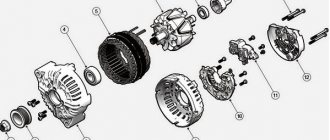
Design Features
The stator core has a cylindrical shape. A three-phase winding is wound on it according to a star circuit, the ends of which are brought out to the rectifier block. The stator is protected from above by a housing consisting of two covers fastened together with four bolts. There is an anchor inside it. It is mounted on two ball bearings. Their purpose is to ensure uniform rotation of the shaft.
At the rear of the generator there is a rectifier module consisting of six diodes, as well as a voltage regulator with a brush holder and brushes. For protection purposes, these elements are covered with a steel casing.
List of online stores providing goods (Moscow, St. Petersburg, Kyiv region)
| № | Name | Address |
| 1. | "Autopasker" | https://avtopasker.ru/ |
| 2. | "TopDetail" | https://topdetal.ru/ |
| 3. | "Close" | https://spb.blizko.ru/ |
| 4. | "Avtosklad" | https://www.avtostore.spb.ru/ |
| 5. | "Almaz-Auto" | https://almaz-auto.com.ua/ |
| 6. | "Doka-Market" | https://doka-market.prom.ua/ |
Bearings
A faulty bearing in a VAZ-2110 generator is easy to recognize by the sound it makes. Usually it hums or rustles. This sound is a clear sign of wear on the device.
The front bearing of the VAZ-2110 generator is pressed into the “seat” of the cover. It is impossible to remove it from there, since it is rolled up. It changes along with the front cover. The rear bearing is packed onto the armature shaft and supported by a cover. Its replacement is possible if you have a special puller.
Reviews
| № | Positive |
| 1. | Victor: This is my second year driving a Lada Granta, there are no comments, the mechanisms work properly. At 35,000 km I tightened the converter belt. I didn’t contact the service, I did everything on my own. |
| 2. | Vitaly: I’ve been actively using the car for three years now, I haven’t made any special investments, only the purchase of consumables, oils, filters. I think it is important to comply with technical inspection deadlines and buy original parts. |
| 3. | Ivan: I bought a car at the dealership, the managers recommended strictly observing the maintenance deadlines. I don’t break rules, I always put down marks on time. I take care of my equipment and treat it with care. |
| 4. | Kirill: at 45,000 km I tightened the converter belt and visited the service center. The master assured that the old one was still worth several tens of thousands. |
| 5. | Valentin: during the year of using the car, the converter creaked once, I thought about changing it, but the creaking disappeared on its own. There are no complaints about quality, all mechanisms work properly. |
| 6. | Ignat: at 97,000 km I replaced the converter belt. I consider the resource quite worthy of a domestic car. |
| 7. | Vladislav: I’ve heard negative criticism of the Lada Grant, but I can’t confirm it, since the car works like a watch. I systematically carry out inspections, fill in high-quality oils, and do not exceed the speed limit. |
| Negative | |
| 1. | Gennady: for the first time the converter flew 40,000 km. I visited the service center and they replaced it under warranty. We'll see how long the new one lasts. |
| 2. | Vasily: despite the manufacturer’s warranty of 100,000 km, my generator lasted only 60,000 km. The workmanship is low. The Granta model is raw, not run-in. |
| 3. | Ignat: I do not recommend the Lada Granta, since during the year of use I visited the service station twice unscheduled for diagnostics and replacement. In addition, the generator failed ahead of schedule. |
If the belt breaks on the way
We need to wait for the car to cool down. Next, remove the right side of the mudguard. Then the belt scraps are removed. After this, put on a new belt in stages, first on the crankshaft pulley, then put the other part of the belt behind the pulley, pressing it against it, and begin rotating the crankshaft clockwise. But if you don’t have a spare timing belt at hand, you can replace it with improvised materials.
In cases where tights don’t work out, elements from a men’s wardrobe are perfect. Leather belt of trousers or bags or a tie. In this case, the length of the future product is measured in proportion to the worn-out belt. This approach is due to the fact that leather and fabric products can be overtightened, which can cause damage to the mechanism. In this case, repairs will be much more serious than just replacing the alternator belt.
Many Lada Grant owners are faced with the problem of a generator that fails after several thousand kilometers (some earlier, others later). The case is under warranty, but you will have to wait about 2-3 weeks for a new part, and during this period the dealer may prohibit the use of the car.
If the belt tension is excessive, this can lead to destruction of the generator bearings (unfortunately, bearings are most often installed in China, the quality of which leaves much to be desired). If you find that the belt on your Grant is too tight, there are several ways to loosen the tension a little.
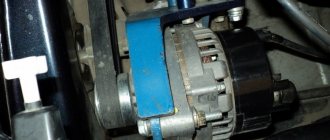
To everyone who has a problem with the generator, redo the mount, and everything will be fine for you, like me. Now I will show you what the generator looks like on Kalina and Grant. The grant has a bracket with number 2190 without holes for the tensioner and tensioner pulley, so you need to unscrew it and install bracket 1118-1041034, tensioner pulley, tensioner bracket, bushings, belt from 1118 instead. The issue price is 1,700 rubles.
Sources
- https://www.granta-service.ru/news/generator_snjatie_ustanovka_i_remont/2012-09-07-132
- https://1ladagranta.ru/harakteristiki/natyazhitel-remnya-generatora.html
- https://www.lada-granta-club.ru/reshenie-problemy-s-generatorom-na-lada-granta/
Rectifier module
The rectifier module is designed to convert alternating current into direct current. It is based on six silicon diodes (gates): three positive and three negative. They are located on two horseshoe-shaped plates. To smooth out voltage surges, the terminals of the positive and negative diodes are connected through a 2.2 μF capacitor.
How to check the generator on a VAZ-2110 for the functionality of the rectifier unit with your own hands? To do this, you will need a regular car tester or test lamp. The essence of the test is based on the ability of diodes to pass current in only one direction. A faulty valve either does not pass current at all, or passes in both directions.
So, first you need to remove the casing of the rectifier unit. Next, connect the first wire of the test lamp to the “B+” terminal of the generator, and the second to the ground of the device. If the unit is working properly, the lamp should not light up. If it lights up, there is a short circuit in the rectifier and it needs to be replaced.
Don't be lazy to check the capacitor as well. Turn the tester into ohmmeter mode (1-10 MOhm) and measure its resistance. For a working capacitor, it should first take a minimum value and then gradually increase. If this does not happen, replace the capacitor.
Content
Car generator
- a device that converts the mechanical energy of rotation of the crankshaft of a car engine into electrical energy.
A car generator is used to power electrical consumers, such as the ignition system, car lighting, on-board computer, diagnostic system and others, as well as to charge a car battery [1]. Car generators are subject to high reliability requirements, since the generator ensures uninterrupted operation of most components of a modern car. The typical power of a modern generator in a passenger car is about 1 kW.
Voltage regulator
The regulator performs the function of a kind of stabilizer. Thanks to it, the voltage of the vehicle’s on-board network is the same, regardless of the number of revolutions of the running engine.
Essentially, a regulator is a relay that closes and opens a circuit. It happens like this. The voltage dropped below the required value, or rose above the norm - the relay disconnected the generator from the network. The voltage has reached the desired range - the regulator connected the device.
There are no electromechanical elements in the VAZ-2110 generator relay. It is built on semiconductors. In addition, its design also includes a brush holder with brushes. It is almost impossible to repair the regulator on your own. It's easier to replace it with a new one.
Checking the functionality of the relay takes no more than five minutes. Yes, and there is no need to disassemble anything here. The diagnostic procedure is as follows.
- We start the engine and warm it up to operating temperature.
- Turn on the low beam headlights and the heater fan.
- Using a tester turned on in voltmeter mode, we measure the voltage at the battery terminals.
The voltage should not go beyond 13.2 - 14.7 V. If it is higher or lower, the relay is faulty.
A regulator is considered faulty if its brushes are damaged or excessively worn. The minimum length of brushes is 5 mm.