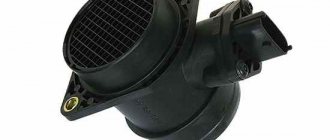
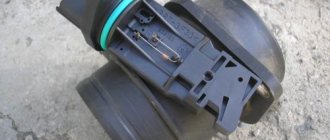
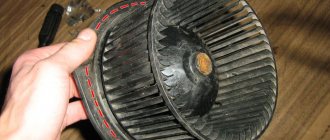
The mass air flow sensor is an electronic device; its operating principle is to correctly count all the air entering the cylinders from the filter.
The volume of air passing through the sensor, over a period of time, transmits information to a special unit due to a pulse signal. Here the ratio of air and incoming fuel is calculated, and the injection of the injectors is controlled.
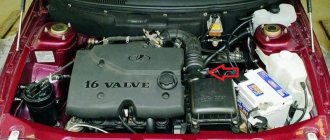
This sensor is located on the air filter pipe, which is connected to the corrugation.
Features, diagnostics and replacement of elements of injection systems on VAZ cars
Below we will look at the main controllers!
Hall
There are several options for how you can check the Hall sensor of a VAZ:
- Use a known working device for diagnostics and install it instead of the standard one. If after replacement the problems in engine operation cease, this indicates a malfunction of the regulator.
- Using a tester, diagnose the controller voltage at its terminals. During normal operation of the device, the voltage should be from 0.4 to 11 volts.
The replacement procedure is performed as follows (the process is described using the example of model 2107):
- First, the switchgear is dismantled and its cover is unscrewed.
- Then the slider is dismantled; to do this, you need to pull it up a little.
- Remove the cover and unscrew the bolt that secures the plug.
- You will also need to unscrew the bolts that secure the controller plate. After this, the screws that secure the vacuum corrector are unscrewed.
- Next, the retaining ring is dismantled and the rod is removed along with the corrector itself.
- To disconnect the wires, you will need to move the clamps apart.
- The support plate is pulled out, after which several bolts are unscrewed and the manufacturer dismantles the controller. A new controller is being installed, assembly is carried out in the reverse order (the author of the video is Andrey Gryaznov).
Speeds
The following symptoms may indicate a failure of this regulator:
- at idle, the speed of the power unit floats, if the driver does not press on the gas, this can lead to an arbitrary shutdown of the engine;
- the speedometer needle readings float, the device may not work as a whole;
- fuel consumption has increased;
- the power of the power unit has decreased.
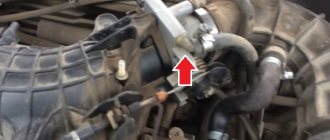
The controller itself is located on the gearbox. To replace it, you only need to jack up the wheel, disconnect the power wires and remove the regulator.
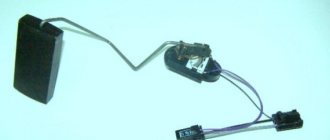
Fuel level
The VAZ or FLS fuel level sensor is used to indicate the remaining volume of gasoline in the fuel tank. Moreover, the fuel level sensor itself is installed in the same housing with the fuel pump. If it malfunctions, the readings on the dashboard may be inaccurate.
The replacement is done like this (using the example of model 2110):
- The battery is disconnected and the rear seat of the car is removed. Using a Phillips screwdriver, unscrew the bolts that secure the fuel pump hatch and remove the cover.
- After this, all wires leading to it are disconnected from the connector. It is also necessary to disconnect all the pipes that are supplied to the fuel pump.
- Then the nuts securing the clamping ring are unscrewed. If the nuts are rusty, treat them with WD-40 before unscrewing.
- Having done this, unscrew the bolts that directly secure the fuel level sensor itself. The guides are pulled out from the pump casing, and the fasteners need to be bent with a screwdriver.
- At the final stage, the cover is dismantled, after which you will be able to gain access to the FLS. The controller is replaced, the pump and other elements are assembled in the reverse order of removal.
Idle move
If the idle speed sensor on a VAZ fails, this is fraught with the following problems:
- floating speed, in particular, when additional voltage consumers are turned on - optics, heater, audio system, etc.;
- the engine will start to stall;
- when the central gear is activated, the engine may stall;
- in some cases, failure of the IAC can lead to body vibrations;
- the appearance of a Check indicator on the dashboard, but it does not light up in all cases.
Verification methods
To test the device, you will need a multimeter, which must be switched to voltage measurement mode and the limit limit is two volts. Further course of action:
- Find the yellow wire in the connector (the signal goes to the controller through it) and the green wire (conducts the signal to ground);
- Connect the probes of the device to them: green “minus”, yellow “plus”.
- turn the ignition key without starting the engine;
- take readings from the multimeter.
The device is considered to be operating normally if the meter needle is between 0.0099 and 0.02 volts. If the readings reach 0.03, this means that the mass air flow sensor is already worn out and it is advisable to replace it. If the arrow is at the border - 0.0095 or 0.05 volts, then there is a chance that the functionality of the mass air flow sensor can be restored by washing.
If you don't have a multimeter at hand, you can use another testing method. Disconnect the wire connector, start the engine, increase the rpm to 2000 and take it for a ride. If it seems to you that the car is moving much more dynamically, then the problem is that the sensor is dirty.
The role of the mass air flow sensor
DMRV sensor VAZ-2112 16 valves signs of malfunction: check
The task is to create a mixture of gasoline vapors and air. The sensor is capable of measuring two indicators that are strongly related to each other:
- Reaction time;
- Amount of air used.
Receiving accurate data, the meter determines the optimal amount of components to create the proportions of air with fuel vapor. If the mass air flow sensor begins to produce incorrect values, the mixture will not correspond to the operating mode of the engine in which it is currently operating.
As a result, power drops, fuel consumption increases, response decreases, and acceleration takes much longer. Depending on the sensor, its delay may manifest itself in the form of dips during acceleration or floating speed at idle.
Optimal air flow
Since we are talking about the VAZ 2114, we should determine what air flow rate is optimal for its engine.
A working sensor under operating conditions of a 1.5 liter engine at approximately 900 rpm, the amount of air consumed will be from 10 kg with an error of 0.5 kg per hour. If you raise the speed to 2000, then the consumption will increase to approximately 19-21 kg.
When the amount of air decreases at the same speed, the dynamics will immediately begin to decrease, but at the same time fuel consumption will decrease. If the air flow increases, the dynamics will increase, and fuel consumption will also increase.
The sensor should not be allowed to deviate by more than 2-4 kilograms, since under such circumstances the operation of the engine will be very capricious and unpredictable.
Causes of failure
In fact, air flow sensors can only fail for reasons that are hidden in the crankcase ventilation.
This ventilation system is dual-circuit; it is responsible for operating in two modes - with the throttle valve closed or open. If the damper is closed, gases from the crankcase exit through the line. But a certain proportion of gases accumulates inside the idle line. In this case, the gas comes into contact with the resistor of our sensor, although it is covered with a film. Due to the resin that settles on the resistor, the mass air flow sensor begins to produce incorrect information. From here a chain of malfunctions arises.
Signs of breakdown
If the sensor fails, a variety of symptoms may appear, but ultimately this will lead to a malfunction of the motor. At first, the engine’s appetite for gasoline may increase, then floating speeds will be observed, etc.
There are several characteristic signs that indicate a breakdown of the mass air flow sensor:
- Dips are observed when the engine is running under load and at idle;
- The car begins to accelerate more slowly, the dynamics noticeably suffer;
- When changing gears, the engine turns off;
- Power drops;
- Fuel consumption increases;
- When the engine is hot, the engine is difficult to start;
- The Check Engine light comes on on the dashboard.
If the sensor does not show even the slightest signs of life, the lamp on the panel may not light up. In this case, the breakdown is determined by the operation of the on-board computer and errors.
You can perform diagnostics by determining the sensor signal level. If the level is low, this indicates:
- No sensor connection;
- Breaks in the circuit;
- Oxidation and breakage of mass in the chain;
- Malfunction of the electronic engine control unit;
- Short circuit or breakage of signal wires;
- A failed mass air flow sensor.
Even if you discover a breakdown, do not rush to purchase a new mass air flow sensor, since this sensor costs from 1.5 to 4 thousand rubles.
In some situations, simply checking and cleaning the air flow sensor can help. Moreover, it is not at all necessary to contact the service center. You can easily complete the task with your own hands.
This is interesting: The gearbox howls on a VAZ-2114, what to do, consequences
When is it time to clean?
But regardless of the type of sensor, over time it begins to function incorrectly due to contamination - the platinum measuring elements become covered with dust. Therefore, the question of how to clean the mass air flow sensor will always be relevant.
Why does this happen? The main reason for sensor contamination lies on the surface - the unsatisfactory condition of the air filter. If the filter element is of poor build quality, then it is not able to trap microscopic particles of dirt and dust that settle on the sensing element of the mass flow sensor.
As a result, the device is not able to accurately measure the amount of air and sends incorrect data to the ECU. It's not hard to imagine what this might lead to. Here we gradually approach some characteristic signs that may indicate that the sensor is clogged and needs to be cleaned:
- The need to clean the mass air flow sensor on a VAZ or other cars arises when the engine idles intermittently, in some cases they are too high - up to 1500.
- The car may jerk and have difficulty accelerating.
- Sometimes the engine does not start at all.
- Increased fuel consumption - sometimes up to 15 liters per 10 km.
- Check Engine light on the dashboard.
However, the above signs do not always accurately indicate contamination of the air flow sensor. A variety of situations can arise, and among them is one when the sensor itself is fine, but the fault lies in the hose that connects the device to the module.
In other words, although there are many obvious signs that a particular part of the car is faulty, they can indicate any other problem.
How to clean the mass air flow sensor on a VAZ 2110-VAZ 2112?
Find out how and how to clean the VAZ 2114 mass air flow sensor: 3 best options
Note! Many people stop and say there is no need to clean this sensor, in fact, everything is true because it is very sensitive and if you make some mistake, you can forever be left without this sensor and go to the auto store for a new one, so when cleaning, be careful and proceed with it Only if you are 100% sure that this particular sensor has failed, then we do not recommend that you touch a working sensor at all, otherwise you can simply damage it and go to the auto store for a new one!
1) At the beginning of the operation, you will first need to remove the sensor itself, in fact, the sensor can be removed quite easily, for more detailed instructions on how to remove it, read the article called: “Replacing the mass air flow sensor on a VAZ”, everything is described there.
Note! The article linked above also describes how to properly check the sensor for functionality, so study it in more detail and only then proceed to this article!
2) Then, when the sensor has already been removed, you will need to disassemble it, for disassembly you will need a special asterisk key, in the same case, if you do not have one, then using pliers you can carefully remove the two screws that secure the sensor itself, to do this, take hands with pliers and use them to unscrew the two screws that secure the sensor itself to the body (The screws are indicated by arrows), but you need to unscrew the screws in this way: first, firmly tighten the screws themselves with the pliers and then turn not the pliers, but the body itself in the desired direction and turn until the screws will not move, but then you can easily unscrew them with your hands.
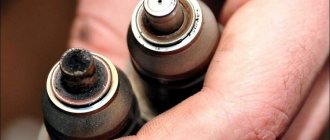
Note! When all the screws are unscrewed, very carefully without damaging anything (there are spirals on the sensor itself and one of them, which goes for heating, is not protected by anything), so when you pull out the sensor, do not damage this spiral, they are very delicate, there are even cases when after wiping their rag will immediately damage the sensor, so keep this in mind! (By the way, you can see the same spiral that is not protected by anything in the photo below, it is shown with an arrow on it)
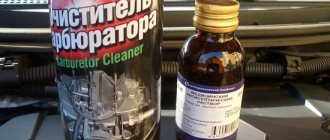
3) Now take a carburetor cleaner in your hands (How to choose the right cleaner was shown in the video at the end of the article) and use it from top to bottom (Make sure first that the pressure coming from the cleaner is not too strong if there is a lot of pressure in the cleaner and therefore, the jet hits very, very strong, then in this case we recommend that you wash the sensor at a decent distance so as not to damage it) clean the sensor, you don’t have to splash too much on the sensor body (But still the body gets the most dirty) but still apply a little liquid , and pay special attention to the platinum spirals, which you will need to clean from dust and dirt accumulated on it
Note! This procedure is best done gradually, that is, not like this, sit down and clean the sensor in 5 minutes of continuous cleaning, it’s better to sit down and gradually clean the sensor in 10-15 minutes, using a pause between approaches, that is, remove all the dirt from it for the first time (Work with the sensor for about 1 minute), then let it dry and again, around 1 minute, remove all the remaining dirt from it, and for the third time, just let it dry the same way and rinse it from this dirt and after that you can collect put the sensor back and see if it works for you or not! (When you clean it for the last time, make sure that the drops flow from it cleanly and only then stop cleaning it)
Additional video clip: You can see more detailed information on how to clean the sensor in the video below, everything is explained in detail, but for example the sensor from a Niva car is taken, but despite this, all air flow sensors that are installed on cars are very similar to each other, so you don’t have to pay much attention to the car.
https://youtube.com/watch?v=Y8vgjd5QYcw
Note! If you are wondering which carburetor cleaner to choose to clean the sensor, then check out the video below:
https://youtube.com/watch?v=5h—RY3K4zI
https://youtube.com/watch?v=_TbZzliyHbc
Compound
Designed to effectively remove oil, dirt, small fabric fibers and dust from the sensor without damaging it. The main components of MAF sensor cleaners are:
- Hexane, or its rapidly evaporating derivatives.
- An alcohol-based solvent (usually 91 percent isopropyl alcohol).
- Special additives that manufacturers (the main one is the Liqui Moly trademark) use to protect their copyrights. They mainly affect smell and density.
- Carbon dioxide as a retardant for the composition in a can.
The mixture is usually sold in the form of an aerosol, so the substances must be highly dispersed, not irritate the skin and not have a harmful effect on the environment. The physical and mechanical characteristics of the most commonly used compounds (for example, Luftmassensensor-Reiniger from Liqui Moli) are:
- Density, kg/m 3 - 680...720.
- Acid number – 27…29.
- Ignition temperature, º C – not less than 250.
How to clean the mass air flow sensor
Replacing the clutch on a VAZ 2110 with your own hands
Before you begin, here are a few notes to be aware of:
- Some manufacturers recommend replacing the MAF rather than cleaning it if the hot wire or sensing elements are dirty because cleaning the wires will not restore the sensor to its original performance. However, cleaning a dirty MAF sensor may work fine in most cases.
- If your sensor is around 100,000 miles or more, you may want to consider a new replacement, especially if engine performance seems a little sluggish after cleaning.
Unlock the tab to disconnect the MAF electrical connector.
Now, if you are ready to start, make sure the ignition switch is in the "Off" position. Then set the parking brakes and open the hood.
- Disconnect the MAF electrical connector. Be careful. You may have to press down on a plastic tab or latch to release the connector.
- Remove the bolts, usually two, that hold the sensor in place. On some models it is located inside the air filter box. If necessary, consult your vehicle's repair manual.
- Remove the sensor from the air intake trunk lid or air filter box.
- Check the rubber gasket that seals the MAF to its housing. If damaged, replace it.
- Do a visual inspection. Check the sensor for overheating and, if installed, cold wires for traces of dust, dirt, debris or insects.
- Place the MAF on a workbench or similar surface and leave it on the rag. The rag will help you catch the cleaning solution runoff as you spray the sensor.
- Wear safety glasses and latex gloves.
- Clean the sensor by spraying it with cleaning solution. Follow the instructions included with your product. Whatever you do, avoid touching sensitive wires. They are fragile and can break easily.
- If the hot and cold wires are covered in dirt or debris, you can use a brush to wipe them off.
- Spray a small amount of sensor cleaning solution into a small, clean cup.
- Soak a small brush in the cleaning solution.
- Use a brush to remove dirt and debris from the wire(s).
- After cleaning the MAF, allow it to dry completely for a few minutes.
- Meanwhile, remove dust and debris from the air filter housing and air ducts. If there is dirt or debris in the ducts, the unit forces air through the air filter.
- Install the air filter correctly and close the air filter box and air duct.
- Install the MAF, make sure the rubber seal is installed correctly, and secure the sensor with the mounting bolts.
- Connect the MAF electrical connector. Make sure the tab is locked.
- If necessary, clear fault codes using a scan tool.
- Start the engine and listen to it at idle speed.
Depending on your specific model and the trouble codes set in your computer's diagnostic memory, you may need to drive several miles to improve engine performance. For example, you may still notice a rough idle. The ECM (Engine Control Module) may take some time to adjust to the new input parameters.
If cleaning does not solve your engine's performance problems and you suspect a problem with the sensor, you may want to check the MAF sensor or replace it.
A couple of recommendations:
- If you find dirt or debris attached to the wires or sensing elements, this may indicate a faulty self-cleaning circuit. You can test the "off" relay and, if necessary, the circuit. Refer to your vehicle's repair manual.
- Some manufacturers recommend replacing the air filter after cleaning the MAF.
Securely secure the clamps of the air filter assembly to prevent air leakage.
Why clean
How to check the DMRV on Lada cars with your own hands
While MAF problems can vary, a common problem is dirt or debris getting into the sensor housing. Foreign substances can end up coating the MAF's sensing elements, such as the hot wire, interfering with its operation.
Cleaning the MAF is a simple procedure. This is often all you need to fix rough idling and other engine performance problems.
Therefore, if you suspect that the MAF sensor is dirty or you are receiving a MAF-related trouble code such as P0171 or P0174, try the following procedure. In most cases, all you need is a can screwdriver and cleaner to get the job done.
The main causes of failure of the mass air flow sensor
The most common causes of sensor failure are:
- dust ingress;
- oil contamination;
- short circuit of the wiring due to damage to the insulation or plug;
- mechanical damage to active elements.
A common cause of incorrect operation of the mass air flow sensor is the failure of electronic components, which increases the sensor’s response time to changes in air flow. A working sensor monitors changes at a speed of 0.5 ms, and if it breaks down, the response time increases by 20-30 times. The defect is detected only by recording the operation graph with an oscilloscope. Such a sensor cannot be repaired; it must be replaced with a new one.
What factors disable the mass air flow sensor?
Factors causing failure of the air flow sensor:
- Dust may be caused by improper installation of the sensor on the filter, which causes the sealing ring to become distorted. With this defect, a thin coating of contamination will be present on the sensor input grid. Another cause of dust is a clogged air filter, so regular maintenance will prolong the life of the air flow sensor.
- Oil is thrown onto the sensor if the level in the crankcase is high or if the oil separator in the ventilation system is clogged. An additional negative factor is engine wear, which causes lubricant to actively enter the crankcase ventilation.
- Contact with sharp objects on the insulation, oiling. Such impacts are the result of careless repairs.
- Damage to the sensor is possible during vehicle maintenance (impacts to the body) or during improper cleaning of the active part.
Video “Cleaning the air flow sensor”
The easiest way to consider cleaning the mass air flow sensor is using the example of a VAZ 2110 car. To return the air flow sensor to its former functionality, you must first turn off the ignition and disconnect the connector from the regulator. Unscrew the bolts (or 1 bolt) securing the air flow sensor to the air filter housing with a wrench and remove the pipe.
To quickly remove the mass air flow sensor, you will need a star key of the appropriate size.
Sometimes you can find oil deposits on the device; you can use any of the means described above to remove it. If finances allow, buy liquid from Liqui Moly, but if you don’t have money, you can also use carburetor cleaning products. After this, look inside the removed device, you will see several sensors in the form of a wire, fixed with a special resin.
A special Liqui Moly cleaner or carburetor cleaner should be carefully sprayed onto these sensitive components. Be careful not to damage the film. After this, wait until the cleaning agent dries completely and evaporates. If contamination remains, the procedure can be repeated several more times.
We invite you to read: How to smooth out the leather on a jacket... Remove wrinkles at home
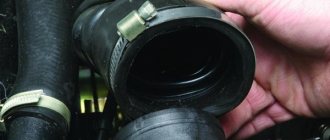
When you start cleaning the regulator yourself, you should also pay attention to the air filter hose mesh and its internal surfaces. They, as well as the air flow sensor pipe, can also be cleaned
The pipe sometimes needs to be replaced if, upon visual inspection, you find traces of mechanical damage, cracks and other defects.
This completes sensor cleaning. All you have to do is install the device back. When performing this work, you can replace the filter elements; experts assure that this can significantly improve the operation of the unit.
Cleaning the flow meter can be done in a garage; there is nothing complicated about it.
Depending on the car model, the procedure for removing the sensor can be carried out in different ways; consider an example of cleaning with a domestic “Ten”:
First, you should turn off the ignition and, just in case, reset the battery terminal. Open the hood and find the mass air flow sensor, then disconnect the connector from it. There is a pipe connected to the flow meter; it must be disconnected. Using a wrench, you need to unscrew the screw that secures the device to the air filter, or rather, to its housing. The flow meter itself is removed from the corrugation; in the case of the “ten”, an asterisk wrench is required to dismantle the sensor. Use it to unscrew the screws and then remove the device from the seat. If, after removal, you notice that there is an oil deposit on the device, you will need to rid the case of this. Any product from those described above is suitable for cleansing. As practice shows, there is no fundamental difference between these means. On the sensitive element, usually made in the form of a film, there are several controllers, they are made in the form of a wire and mounted on resin
Using the same cleaning agent, you will need to carefully, not in abundance, spray it on the sensitive element. At this stage you should act with extreme caution, as there is a possibility of damage to the film.
After the sensitive part has been treated, you need to wait a little until the product takes effect. If there is a lot of contamination, then it may make sense to repeat this procedure once or twice. In order to ensure faster evaporation of the substance, you can use a pump or compressor device. But keep in mind that too much pressure can destroy the sensitive component, so don't overdo it.
Price issue
The cost of Liqui Moly cleanser is currently about 700 rubles. A cheaper analogue, liquid for cleaning carburetors, will cost the buyer about 70-100 rubles. As for WD-40, the cost of a 100 ml can today will be approximately 180-220 rubles.
Liquid key
This product from a domestic manufacturer is sold in the form of a spray. It is designed to get rid of frozen contaminants on various components and assemblies of vehicles.
Absolutely every car enthusiast is familiar with this product, regardless of experience. In addition, all other people who are not directly related to cars know about it. Over the course of its existence, WD-40 has proven itself to be excellent, and there is no doubt about its effectiveness.
For this reason, it is used not only to remove “deposits” from bolts, but also to clean the mass air flow sensor.
Routine cleaning work
The air flow sensor is cleaned every six months or when changing the oil. Experts also recommend cleaning the device when the air filters are changed. Replacing the sensor at service centers costs $300, but if you clean it regularly, you can avoid car repairs. For this purpose it is recommended to use special means. The MAF cleaner costs about $7. The cheapest option is to take the air flow sensor and place it in a plastic bag filled with alcohol or a special cleaning fluid. Necessary tools for the process:
- 4-in-1 screwdriver;
- digital camera;
- Torx tool;
- MAF cleaner.
After cleaning with cleaning agent or alcohol, allow the device to dry for 20 minutes. Only a completely dry air flow sensor can be installed in a vehicle. Algorithm for cleaning the device:
Before you go to the store for materials and parts, you need to remove the air duct to see how the sensor is attached. If it is held on by Torx screws, then you will need to purchase a Torx tool and a can of cleaner. It is not recommended to use other cleaning agents; they may damage the air flow sensor. Do not use the cleaner with the engine running and the key in the working position. This will cause serious damage to the sensor. With the engine turned off and cooling, disconnect the mass air flow sensor.
Locate the sensor between the air filter box and the throttle body
Before removing the sensor, you should use a digital camera to record settings and connections. Carefully remove the sensor from the air duct and disconnect the electrical connector. Then remove the air intake pipe and mass air flow sensor. Most sensors are connected to hose clamps, so you need to loosen the clamp and remove the device box. Place the air flow sensor on a dry towel. Spray the cleaner onto the inside of the body and the working element 10-15 times. When doing this, you need to be careful not to touch the wires, as they are quite thin. Spray the product onto the entire surface of the air flow sensor, including connectors and terminals. Install the sensor in the car and wait a few minutes before starting the engine until the chemicals evaporate.
Liqui Moly Cleanser
Liqui Moly is a special active solvent for cleaning the air flow sensor for all brands of engines. The cleaner removes contaminants on the hot wire or air flow sensor plate. Suitable for use in gasoline and diesel engines. The cleaning procedure is simple: you need to disconnect the electrical connection of the air flow sensor and remove it by spraying the solution on all dirty areas.
Multi-functional product WD-40
WD-40 is used to wash the sensor and metal surfaces of the car from rust and dirt. The cleaner penetrates boiling deposits, displaces moisture and lubricates almost everything. WD-40 is also great for removing grease, dirt, and other marks from most surfaces. It is an iconic multi-purpose product for general or spot applications.
WD-40 cleans and protects auto tools and mechanical equipment from rust and corrosion, removes grease, dirt, tar, rubber, scratches, water deposits, etc. It is able to penetrate deep into deposits, loosen rusty parts such as nuts, bolts , valves, locks, etc. WD-40 binds and displaces moisture from engines, spark plugs, power tools and vehicle fuel systems.
GDI fuel injector cleaner
Get Clean is a comprehensive cleaning fluid for engine and air sensors. The product is ideally formulated to restore performance, increase horsepower and torque, improve idling and reduce emissions for improved engine performance. Using this product helps to quickly and easily remove even the hardest deposits on the sensor.
If cleaning the air flow sensor with a cleaning solution does not solve the problem, then:
- The self-cleaning circuit may fail.
- Air leakage around the cleaning assembly bypasses the air filter.
- A low quality filter allows material to pass through and stick to the sensing element.
- An air leak around the air filter housing, caused by a crack, an improperly installed cap, or loose clamps, introduces unfiltered air and contaminates the sensing element.
The efficiency of the equipment after washing is guaranteed for 10 thousand km. Free sensor deposits mean optimal fuel system performance, which equates to improved engine performance, quick throttle response, smooth starting and fuel economy.
Liqui Moly
How to clean the MAF sensor? One option is cleaning fluid from Liqui Moly. The company is known to many car enthusiasts as a manufacturer that makes only high-quality products for cars. In addition, the ratio between reliability and price is at an optimal level. As for the use of liquid for cleaning the mass air flow sensor, most vehicle owners have already become convinced of its effectiveness. This has not been proven by a single procedure. And if the sensor is in working condition, then even after cleaning it will last no less.
The liquid can be used for both diesel and gasoline engines.