Having individual design features, replacing the VAZ 2109 starter bushing differs from similar repairs on other VAZ car models. The “Nine” was equipped with 3 types of starters - with an end-mounted collector, with a cylindrical-type collector and with a gearbox in the form of a planetary mechanism.
In other parameters, all three types of starters are similar, both in design and in mounting locations.
Replacing the VAZ 2109 starter bushing is complicated by the fact that on all three types, it is pressed into the crankcase cover and is the end support point for the shaft. The bushing itself is made of a metal-ceramic alloy, although this fact does not protect it from wear and damage under constant load.
As noted by auto experts
with the basic profile for domestic cars, the starter on model 2109 can last trouble-free for a maximum of 6 years, after which it needs to be changed.
Removing and replacing starter bushings on VAZ 2108, 2109, 21099
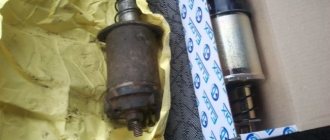
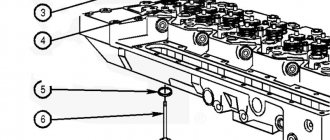
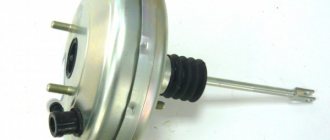
Hello, in this article you will learn how to replace starter bushings on VAZ 2108, 2109, 21099 cars. The starter on these car models has 2 bushings, one of them is located in the rear cover of the starter housing, and the second in the clutch housing. Most often, the bushing wears out in the clutch housing. When one of the bushings wears out, extraneous noise may be heard from under the hood, especially from the gearbox and starter. This noise is caused by the fact that the armature shaft rotates with a certain amplitude that is unusual for it, due to play in the bushing. First, remove the starter from the car. Now visually determine the condition of the bushings. To replace the bushing in the rear cover of the starter, simply knock out the old bushing and install a new one
If the new bushing is difficult to insert, then it needs to be sanded, thereby reducing its outer diameter; if the bushing is pushed in with great force, the cover body may burst. When replacing the bushing in the clutch housing, the situation is more complicated. There is no through hole here and knocking out the bushing will not work. We will need an M14 tap with a handle welded to it. You can also put some kind of metal, heavy clip on the tap, but in principle you can do without it
Now we screw the tap into the sleeve and pull the tap handle, or knock it out using the clip on
Before installing the new bushing in place, check whether the starter shaft fits into it freely; if it is difficult, then it is better to increase the inner diameter of the bushing before installing it, since usually when the bushing is pressed into place, its diameter decreases slightly.
Source
vtulka_0.jpg
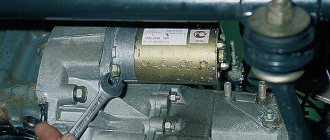
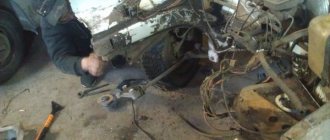
How can you get it out yourself? If you were able to notice that the starter sometimes cranks your power unit with tension when the battery is fully charged, then the culprit for the phenomenon is the armature, which touches the stator. A small problem is enough for the starter shaft to become slightly misaligned: the narrow gap disappears completely. But sometimes the reason lies in severe wear of the bearing (front). You can sleep peacefully for a day: this problem can be quickly solved. To eliminate it, you need to prepare a tap of suitable size, find a drill chuck, take a long bolt and an old bushing, a jar of nuts and a box of nails. Now it’s worth disconnecting the battery, the starter, and then removing it from the “coat,” that is, removing the wiring. Happened? Proceed to unscrew the lower bolt of the device and remove the remaining fasteners from the starter.
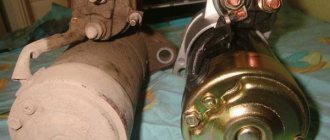
We take the sword and install it in the chuck of a hand drill: let's try to make a thread in the sleeve. Carefully! Carry out the following actions at low speeds. A marksman is like a girl: the object is fragile. Excessive force or slight misalignment can break it. God forbid this happens: you have to fork out money for a new product. Although you can carry out resuscitation using a long threaded bolt, turning out new grooves. Once they are ready, you need to insert the nails so that their tips protrude no more than a centimeter above the end.
It turned out to be a real masterpiece of futurism! We mount it into the bushing, perform manipulations, trying to pull out the fragment, while doing everything smoothly, without distortions. As soon as we succeed in cutting the revolutions, we pull out the tap, then insert a bolt of a suitable size and pull the sleeve out. This operation can be performed several times. The starter likes to be capricious due to the misalignment of the shaft, so after some time it will again be difficult to hold the bushing. What to do? Definitely don’t wipe the sweat from your face, finish repairing the VAZ 2109 starter, repeating monotonous actions. Get ready for a shopping trip. While you are enjoying the smell of iron, your significant other will buy a magazine where they will read an article about the history of the VAZ 2109 brand and regret that they purchased a non-domestic unit at a lower price.
Well, what can I say... the story is cool, and so are the conclusions. I'll summarize. NL, but your hands are crooked.
You select the tap so that it can be screwed in without damaging the old bushing. You screw it in, it rests against the crankcase wall and the bushing comes out. You take it (the tap along with the bushing) and go home. Warm at home. drinking tea.