LED illumination of the glove compartment of VAZ 2170
Standard glove compartment lighting Priora:
To get rid of the yellowish lighting in the glove box, you can change the lamp to an LED one. We use a flat screwdriver to hook up the glove compartment light and remove it. We install a lamp with LEDs and check the operation. Polarity is important for such a lamp, so if the glove compartment light does not light, turn the lamp over.
If such lighting is also not enough, then it is proposed to install an LED strip in the glove compartment. We fix it with double-sided tape, and connect it to the standard lampshade. Ready !
Improved connection of Priora glove box lighting
Now that we have improved the glove compartment lighting, there remains one more unresolved problem. It lies in the fact that the glove compartment lighting only works when the car’s dimensions are turned on. To create independent lighting, you need to turn off the power from the glove compartment lamp and extend “constant + 12V” from the ignition to its space, there are several options:
- take the constant plus (+12V) from the ceiling lamp.
- take the plus after turning on the ignition from the ignition switch (thick blue wire with a dark stripe, “15” is written near the wire).
By the way, the standard navigational lighting device of the Priora also needs improvement.
Source: xn—-8sbabr6ahc3e.xn--p1ai
How to remove the glove compartment of a Priora car - {instructions}, cooled box
Glove box, glove box, or glove box - all these words mean one important space for storing small items in a Lada Priora car. It contains everything: from wet napkins to a small set of tools and wires for charging mobile devices. This is a much needed compartment integrated into the passenger side instrument panel.
The small storage compartment on the car's dashboard is equipped with an electronic light bulb - in the dark, by its light you can find everything you need.
Serial number and part numbers
Before you begin repairing the cigarette lighter and disassembling the central tunnel, you need to buy a suitable spare part. There are different device options for the Lada Priora on sale, both original and not. Cigarette lighters from the AvtoVAZ factory have article number 21230-3725010-00.
When purchasing, you need to pay attention to the cost of the spare part. A cigarette lighter price that is too low indicates the use of low-quality materials. Such a part may burn out within several weeks after replacement. In addition, the item must be well packaged and have a certificate of conformity.
How to remove the glove compartment on Priora 1 and 2
To remove the glove compartment of a Priora car, you do not need to make any preparations. It's simple and can be done in 2 minutes leisurely. Usually the glove compartment on Priora 1 and 2 is removed when you need to get to the diagnostic connector. There is only one goal - to find out what errors have arisen in the operation of the machine. But it’s not enough to simply remove the glove compartment on a Priora – you need to install it correctly.
If a fastener is damaged, it is unlikely that it can be found anywhere. Therefore, you will have to go in search of a new storage compartment, which will take your time and cause inconvenience. Removing the glove compartment on a Priora car use the following method:
- Open the glove compartment.
- Stretch your hand inward, closer to the right edge. Press down on the right stopper and remove it from its engagement.
- While holding the cover, disengage the left stopper.
- Pull the glove compartment cover towards you, slightly downward, while moving it away from the fastening axes.
The glove box is part of the “torpedo” - the facing parts of the interior. The glove compartment lid allows you to keep all the contents in one place without creating a mess in the car's interior. The Priora is not a spacious car, so get ready to save space here too.
Video for Lada Priora 1
Video for Lada Priora 2
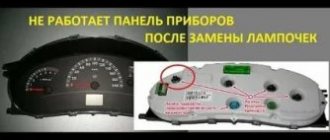
If the light does not come on, how to change the light bulb in the glove compartment
A small lamp in the storage compartment, built into the device panel on the passenger side of the Lada Priora, works to perform a useful function. At night, instead of illuminating a place with a flashlight and trying to get something important with your other hand, you can quietly use the light that this small source provides. When the Priora's glove compartment light doesn't come on, it becomes quite out of habit.
Some car owners go further - they install additional lighting, like a little tuning, so that the contents of the pocket are much more visible. If the light isn't working, there could be several issues at play. The lampshade is “recessed” inside the system, and therefore you will have to get close to it.
When the glove compartment light is not on, we are talking about two items - the limit switch and the lampshade. The glove compartment switch of the Priora car wears out over time. In such cases, even if everything is fine with the light bulb, there will still be no light inside the box. When the light does not light, they begin to disassemble the structure.
see also
Comments 10
where should the mass be attached? I specifically removed the standard radio for this purpose, but I couldn’t find anything there
Is there any power to it at all?
Guys, sorry for the stupid question! But my glove compartment light is constantly on in the interior, along with the dimensions. And I only found out from this topic that there is a limit switch))) Where is it located?
It's right behind the glove compartment! Closer to the radio, just stick some kind of gasket on it and it will turn off the lights! I did it to myself!
two options: easy, try spilling the limit switch with water. difficult: try another mixture
Has the radio been changed recently by chance? There is a mass of glove compartment light going through the radio harness. I solved this problem somewhat in this place.
same problem, changed the radio, the light doesn't come on now
Has the radio been changed recently by chance? There is a mass of glove compartment light going through the radio harness. I solved this problem somewhat in this place.
What could be there? Can the mass come off? and where to connect it then?
Personally, my mass was destroyed by the previous owner when installing music. Call and look for the masses. The mass can be connected at any known point, or directly to the body (some kind of pin).
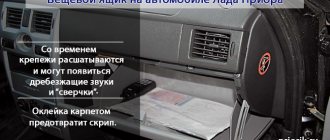
What to do if the glove compartment (glove compartment) rattles
For a used Lada Priora, the issue of eliminating crickets becomes a pressing issue - since the fasteners become loose, unnecessary sounds occur very often. The glove compartment on a Priora can become one of the causes of discomfort, because it will make “squeaking” sounds that you want to get rid of.
Noise sources may include the following:
- Iron axles holding the lid. They fit tightly to the plastic, which is why they make an unpleasant sound. The problem can be eliminated in this way: the axles can be covered with electrical tape, and the plastic cells can be filled with bioplastic, which will soften the manifestation of the friction force.
- It is worth mentioning separately that if the axles make squeaks near the mounting points, you can use electrical tape, or solve the problem completely using glue.
- The highest part with metal fastenings. Pasting with an anti-creaking material will help - the same madeleine will do.
- The inside of the drawer lid may also squeak. It will be enough to cover its inner surface with anti-squeak to solve the problem.
Covering with carpet
To cover the inside of the lid with a carpet that will prevent squeaking, first of all, you need to remove the plastic part according to the instructions. It will be awkward to strengthen the carpet by reaching inside with your hands; in this case, you can skip an important section or glue it completely crookedly.
For installation, you will need a carpet (1 m by 1 m in size) and ordinary glue for plastic. The size of a piece of carpet is justified by the fact that first you will have to create a “pattern” to cover the entire inside of the lid, and then close the “sides” so that the lid looks organic.
The principle of operation is simple: when the pattern is ready, cover the glove box lid with glue and place the carpet to size. Without it, only the fasteners (arc-shaped slide) and the lock should remain.
Life hack: upholstery of the glove compartment on a Priora – tools – material, {instructions}
For the owners of 2170 there is a set prepared in advance. There is no need to measure or cut anything. KozhDesignAvto LLC, which is located in Tolyatti, produces a set with ready-made carpet parts. The back of it is covered with wide strips of double-sided tape, so no tools are needed.
The manufacturer recommends gluing at a temperature of 15°C with average humidity. In order for the cover to fit correctly on the box lid, you should dismantle it, first attaching the carpet to check the sides.
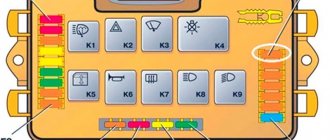
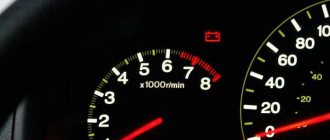
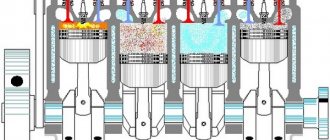
Icons on the factory dashboard
All indicators should light up like a Christmas tree for three seconds when the engine starts. If some icon remains, it means the system is signaling a breakdown. To make it easier to understand all the indicators, here is a schematic picture:
1,5,9,10 are already known scales that display the main parameters that can change. 19 – on-board computer display. Further:
How to create a cooled glove box on a Priora: {instructions} - homemade
The glove box can be made even more convenient. Since documents need to be carried with you and tools are often relegated to the trunk, you can ditch the cooler bag. It is enough to connect the cooling unit to the glove box. To carry out the work you will need:
- headlight corrector handle;
- insulation (about 2m by 1m);
- two fittings, two connecting rubber bands;
- a hose about 0.5 m long, suitable in diameter for a fitting;
- an ancient, unnecessary disc box;
- two clamps.
To create a cooling glove box for the Priora, do the following:
- Remove the glove box cover.
- From the disc box, cut out the core - a round valve gate. It has a central hole. Without the help of others, it is necessary to create holes in the form of sectors, which will occupy about a quarter of the total area of the circle opposite each other.
- Next, from the same box, cut out two strips in the shape of the letter “L” and use them to make a stand for the resulting plastic blank. Label the letters “G” with “Moment”.
- Attach the resulting installation to the square handle rod. Strengthen the connections using a stapler. Cover the valve with madeleine (otherwise it will creak during operation).
- Inside the box, in the round recess, make two holes in the shape of sectors - literally the same as on the valve.
- Also screw two screws into the round recess to secure the valve in place.
- Place the valve, additionally securing it with a screw. It is driven through the central hole of the valve. The valve handle must turn easily, without squeaking.
- The fittings must be brought to the required dimensions using a knife (in accordance with the hole that appears). Attach the fitting using glue.
- Cover the inside of the glove box lid with insulation.
- Make a hole in the upper passenger air duct by inserting a fitting.
- First attach the hose to one fitting. Then cover its “body” with madeleine so that there are no squeaks. Connect the hose to the second fitting. Tighten the connections with clamps.
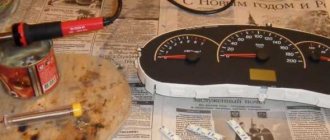
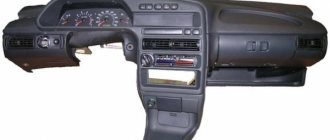
Panel device
- To carry out work with electrical wiring, you should be safe and disconnect the negative terminal from the battery.
- The steering column covers are decorative. They need to be separated from the dashboard.
- The car steering wheel is removed. The horn plate remains unchanged.
- The switches that are located under the steering wheel must be separated from the vehicle.
- When disconnecting them, you will need to disconnect the wires and their connection element.
- The headlight range control has a regulator (a specific position switch). It needs to be dismantled.
- The next step is to unscrew the nut, which is located under this regulator.
- The mounting block is opened.
- This opens access to the location of the fuses (they can blow out, and therefore it is necessary to check their serviceability) and the relay block. It may be enough to replace them. Here you need to unscrew the screw securing the bracket. It is located on the left side.
- The wiring block is disconnected from the ignition system. It is also necessary to unscrew the screw that secures the bracket.
- The tips, two in number, are disconnected from the brake signal switch.
- The console trim has two screws. You need to remove them from the car.
- The console bracket is released.
- The screw securing the instrument panel and air duct must be unscrewed.
- The panel wire mount is disconnected from the rest of the power supply system.
- The immobilizer sensor must be disconnected, namely its wires.
- Similar actions occur on the right side of the panel.
- The nut securing the bracket is removed.
- The wires coming from the cigarette lighter are disconnected.
- The same operation must be done with the fog lamp wires.
- The glove box has a bolt at the top. It must be removed from the connector.
- Both screws of the lower fastening of the instrument panel are unscrewed.
- The seal is removed from the front left pillar.
- Plastic holders are dismantled.
- The same technology is applied to the right pillar.
- The ventilation grilles are removed.
- There are two bolts underneath that need to be unscrewed and removed.
- The dashboard extends slightly, about 10 centimeters, into the interior.
- Once the instrument panel remains in the cabin, you need to disconnect the remaining wires near the left door pillar and next to the steering column.
After completing these steps, you can safely begin replacing sensors, backlights and other components of the dashboard. The assembly process occurs in the opposite order of disassembly. The corresponding video and photo will help you do everything right with your own hands. Of course, if you do everything as the instructions require. Parts, light bulbs, fuses, etc. can be purchased at a special store. The price for them is not too high. You may have to spend time selecting parts. Their diversity can lead to a lot of different situations. Sometimes, parts simply do not fit a particular mechanism. The best option would be to use an old part as an example.
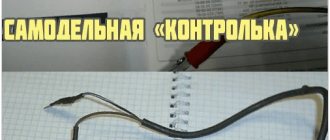
LED illumination of the glove compartment of VAZ 2170
Standard glove compartment lighting Priora:
To get rid of the yellowish lighting in the glove box, you can change the lamp to an LED one. We use a flat screwdriver to hook up the glove compartment light and remove it. We install a lamp with LEDs and check the operation. Polarity is important for such a lamp, so if the glove compartment light does not light, turn the lamp over. If such lighting is also not enough, then it is proposed to install an LED strip in the glove compartment. We fix it with double-sided tape, and connect it to the standard lampshade. Ready !
Improved connection of Priora glove box lighting
Now that we have improved the glove compartment lighting, there remains one more unresolved problem. It lies in the fact that the glove compartment lighting only works when the car’s dimensions are turned on. To create independent lighting, you need to turn off the power from the glove compartment lamp and extend “constant + 12V” from the ignition to its space, there are several options:
- take the constant plus (+12V) from the ceiling lamp.
- take the plus after turning on the ignition from the ignition switch (thick blue wire with a dark stripe, “15” is written near the wire).
By the way, the standard navigational lighting device of the Priora also needs improvement.
Source: xn—-8sbabr6ahc3e.xn--p1ai
Luggage compartment
Since the luggage compartment can be considered part of the car interior, it is necessary to clarify that there is also a flashlight here. It can be used to illuminate the contents of the trunk. In some situations, his work is irreplaceable. To access this mechanism, you must perform the following actions:
- The exterior lighting in the car is completely turned off.
- To release the lantern from its location, you must use a tool. For this purpose, you can use a simple screwdriver. She needs to remove the flashlight from the interior trim.
Note: To dismantle the lampshade, it is necessary to disconnect it from the two power wires. In order to eliminate the possibility of a short circuit when using this lighting device, it is necessary to insulate its connections with special adhesive tape or other sealant.
- The lamp is removed by pressing on the connecting elements. It occurs by analogy with the previous description of removing lamps from the socket.
- To turn on a new lamp, it is necessary to install it. It is pressed into the cartridge mount until it stops.
- To install the flashlight in its original place, you need to insert one end of the lampshade into the connector of the casing, and apply slight pressure on the other. A slight click will indicate that the light is fully connected to the connector in the luggage compartment.
To watch online, click on the video ⤵
The light in the Prior's glove compartment does not go out. One of the circumstances. More details
Do-it-yourself illumination of the glove compartment in a Prior Read more
Replacing the glove compartment lamp with an LED from China Unpacking the Vase Read more
Replacing the cigarette lighter on a Priora and its backlight More details
Lada Priora backlight does not light up Read more
How to remove the center console on a Priora Read more
Additional trunk priority button Read more
Replacing Priora lamps in 5 minutes Read more
We eliminate the rattling of the checkpoint handle (Checkpoint is a point designed to control passage (visit) and access to the territory of any facility)
by car Lada Priora Read more
Illumination in the checkpoint handle (Checkpoint - a point designed to control passage (visit) and access to the territory of any facility)
Priors with your own hands. More details
A Trick to Upgrading the LADA GRANT LIGHT Read more
Priora BRZ #3. Let's tune the interior lighting!! Lada Priora. Part 1 Read more
Lada Priora: We will reprogram the standard alarm Read more
Lada Priora: How to remove the glove compartment Read more
PRIORA: Awesome interior lighting for 50 rubles! Tuning the interior lighting. More details
Replacement of license plate lamps and trunk lighting on Lada Priora. More details
Priora interior lighting do-it-yourself repair More details
The trunk release button on a Priora does not work Read more
Operating principle of limit switches
Depending on the configuration, the Lada Granta can be equipped with one limit switch (driver's door only) - Standard equipment, or 4 limit switches - Norma+ and Luxury equipment.
Indeed, many Lada Granta car owners have replaced the limit switches in the threshold with switches in the door lock. In winter, limit switches in thresholds often do not respond to door opening due to loss of elasticity of the rubber cap. Also, sometimes there are cases when the limit switches of a Lada Grant in the thresholds themselves trigger when the car turns sharply, when the door may move slightly away from the body.
Switching to limit switches in the door lock eliminates these problems, and it can be done in-house. This will require additional wiring and plugs.
Removing the old limit switches
The old limit switches in the thresholds are removed quite simply. Depending on the design, they are attached either to rubber antennae or to a self-tapping screw.
- In the first case, you just need to carefully pull them towards you, since the switches are held in place by fixing tendrils.
Limit switches with “antennae” type fastening, such limit switches are located on the driver’s door
In the second case, you need to unscrew the end screw.
Self-tapping screw for fastening the end switches, pay attention to the gaps from the end switch to the body
Driver's door switch
On all four doors the principle of removing the limit switches is the same. True, on Grants in the “Standard” and “Norma” trim levels, only the driver’s door limit switch is installed from the factory, while the rest have rubber plugs in the thresholds. The same plug can also be used to seal the empty hole from the left front door end switch removed from the threshold.
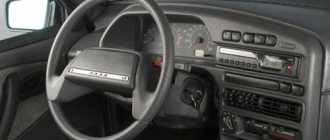
front panel illumination in Priora
- experienced forum member
- Group: Users
- Posts: 1,838
Post edited by Uruguayan: 05/07/2011 – 17:47
- JDM-Style
- Group: Users
- Posts: 293
- ON-Style
- Group: Users
- Posts: 2,426
- voodoo people
- Group: Users
- Posts: 751
tehnologmax (05/07/2011 – 20:29) wrote:
- JDM-Style
- Group: Users
- Posts: 293
Post edited by tehnologmax: 05/08/2011 – 14:39
Source: teron.online
Glove box
We open the glove box and on the left side we look at this small lamp that needs to be removed. To do this, insert a flat-head screwdriver into the groove on the right side of the cover, as shown below:
And we insert the screwdriver until the lid opens, after which we take it out. The result of this action is shown in the picture below:
And to get to the light bulb, you need to remove the snow-white upper base; to do this, press on the plastic latch of the lamp cover (in the picture above this latch is clearly visible in the left corner), and pull up the base:
Now you can take out the light bulb and install a new one without any problems. Then we put everything in the reverse order of removal. At the same time, you can remove some extraneous sounds that appear in the glove compartment area specifically from the plastic part given to us. I did everything very simply, glued small pieces of sound insulation to the sides, and inserted halves of matches into the wire plugs.
I think that everything is clear about this, and no one should have any questions. Now let's talk about the trunk.
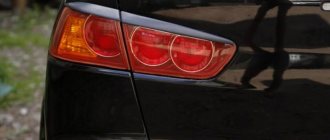
Trunk
Here everything is done in virtually the same order. We open the trunk and on the left side we see the lamp itself, which can be removed literally in the same way as in the glove box, but in this case there is no need to remove it, because on the reverse side there is access to the lamp itself.
Because access to the lamp is free, it will be even easier to change it than in the glove compartment, simply by spreading the contacts, taking it out, and putting the new one back.
Changing any of the lamps in the headlight unit of a Lada Priora is quite easy. Our step-by-step illustrated {instructions} will help you cope with this task. There are differences in the procedure for replacing lamps in the headlights of cars manufactured before and after 2013, which we will show.
LADA > Priora
Attention! Lamps for far and near light are halogen. You should not touch their glass test tubes, because when the test tube is heated, fingerprints will darken. You can remove dirt from the test tube with a clean rag soaked in alcohol.
Replacing headlight bulbs on a car manufactured after 2013
Why did it happen so?
Perhaps the automatic requests do not belong to you, but to another user accessing the network from the same IP address as you. You need to enter the characters into the form once, after which we will remember you and be able to distinguish you from other users exiting from this IP. In this case, the page with the captcha will not bother you for quite a long time.
You may have add-ons installed in your browser that can make automatic search requests. In this case, we recommend that you disable them.
It is also possible that your computer is infected with a virus program that is using it to collect information. Maybe you should check your system for viruses.
If you have any problems or would like our support team, please use the feedback form.
Many owners of VAZ 2110 cars have encountered the following problem - it becomes very difficult to open the glove compartment, especially in winter. In some cases, in severe frost, you have to use a special tool to open a tight glove box. This problem can be solved by lubricating it.
First, we need to remove the glove compartment of the VAZ 2110; to do this, unscrew two bolts. We disconnect the connectors from the glove compartment lamp and pull it out from there in a slightly ajar state. In order to get to the glove box lock mechanism, we will have to unscrew the small bolts from the inside of the glove compartment. Turn the lid over and with a little force remove the latches from the grooves. Next, take out the metal rod and remove the buttons.
Most likely, the factory grease has already turned into a black thick mass, which is what makes the lock difficult to operate. We completely remove the old lubricant and apply a new one, for example, graphite lubricant, to the rod. If desired, you can slightly enlarge the holes in the buttons to ensure better glide. Before installing the glove compartment in place, we check the operation of the lock. If everything is in order, we reassemble the glove box, this is done in the reverse order. If you don’t want to repair the glove compartment, but you still need it, then you can put another one in its place; this element is sold in specialized stores. You can also change the lighting in the glove compartment, for example, to LED.
This article is from the website https://lada2111.rf/ - there is the most up-to-date information on tuning 2111