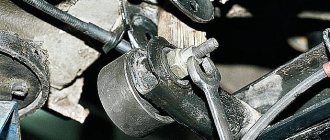
This simple operation takes about half an hour on one side.
The photographs were taken when replacing springs on a VAZ-2131. The jack eyes on this example were used for attaching the hinged thresholds, which made the process somewhat more complicated. Usually a standard jack is sufficient for replacement.
Secure the car by placing stops at the front and rear under the front wheel on the side where the spring is being changed, and the other rear wheel:
Clean the nut of the lower shock absorber mounting bolt with a steel brush and pour it with “liquid wrench”:
Push out the bolt (you can use a hammer through a soft metal spacer), remove the spacer sleeve and spacer washer (shown by arrows in the right photo):
Jack up the car, place it on a stand and remove the wheel:
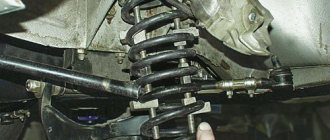
Usually the rear axle sags so much that the spring simply comes off. Remove the spring from the bottom cup, then lower it to remove it from the top support:
For the right wheel, it is convenient to remove the spring forward as the car moves (photo on the left), for the left wheel - backwards (right photo):
If the spring does not release, you need to press the brake drum with your body weight.
Use a screwdriver to stir up the dried dirt in the bottom cup and sweep it away with a brush:
Use a screwdriver to pry and remove the upper rubber gasket of the spring:
Insert the upper rubber gasket into the new spring, aligning the step in the gasket with the beginning of the first turn of the spring. Lubricate the inner surface of the gasket and its seat with engine oil:
Place the upper end of the spring onto the seat, then insert the lower end into the lower cup:
Turn the spring together with the upper gasket (it is more convenient to do this counterclockwise) so that the lower end falls into the recess under the lower coil in the cup:
Jack up the side of the axle so that the lower end of the shock absorber is against the eye (if you are using a standard jack, you can place a wooden block under the brake drum and lower the car):
Expensive and cheap options
An exact answer to the question: “Which shock absorbers are better to install?”
- does not exist, since each Niva owner has his own driving style and conditions, and the selection of these parts is not always large in Russian stores. The best products are considered to be from KONI, which in Germany have a lifetime warranty for one car under one owner. They need to be tuned frequently (30-40 thousand km). Red part numbers significantly improve ride quality without any loss in handling. The cost of one shock absorber can exceed a hundred dollars. Popular products for Niva
Parts from American are known for being produced in a single-pipe version, very rigid and of high quality. The cost goes up to $140 each. On Niva you can find a budget option around 30-40 dollars. Shock absorbers from BOGE and SACHS cost about $30-50 (manufactured in Germany) and are considered to be of lesser quality. Two-pipe hydraulic samples from Rancho (USA) with a reinforced chrome-plated rod, a special boot and an all-weather corrugated cover are considered approximately equal in quality to SACHS. Considered less comfortable than SACHS.
For lovers of measured driving on asphalt roads, very inexpensive products from SAAZ may be suitable. The plant produces oil-based twin-pipe shock absorbers with the following standard characteristics:
- length when retracted - 31.5 cm;
- stroke 18.15 cm;
- casing diameter - 5 cm;
- upper end - eyelet, 2.55 cm;
- lower end - eyelet, 2.55 cm;
- rebound force 114-146 kg;
- compression force - from 22 to 36 kg.
- length when retracted - 22 cm;
- stroke 8.35 cm;
- casing diameter - 5 cm;
- upper end - pin, 1.4 cm;
- lower end - eyelet, 2.8 cm;
- rebound force 129-154 kg;
- compression force - from 17 to 31 kg.
What are the best shock absorbers to install?
Since native hydraulic (oil) ones are not comfortable - they are prone to swinging, breakdowns, rolls - Niva 21214 owners try to purchase products from foreign manufacturers: 1) Koni Special (gas) - unlike the original, they have a 10 mm longer maximum length in front and on the 70 mm - rear. They also have adjustable stiffness depending on the preferred driving style. They are characterized by increased rigidity and reduce the vehicle’s reaction time to steering movements. 2) Bilstein Sport (gas) - suitable for those who are not used to feeling sorry for their car. Extremely resistant to breakdown, forgives serious piloting errors. 3) Sachs Superturing (oil) – provide a balance between comfort and controllability, which allows you to feel the car well on the asphalt and not get tired when overcoming a grader. 4) KYB Excel-G (gas) – popular among lovers of comfortable driving on all types of surfaces. Resistant to frost and heat, reduces acoustic load. 5) BOGE Turbo24 (gas) - eliminate longitudinal rocking, allows you to receive 100% information about the road and just as accurately set the direction of movement. 6) Monroe Adventure (gas) – similar in characteristics to Sachs, but allow above average rolls, while willingly “swallowing” large potholes. It is worth considering that opinions about which rear and front shock absorbers are better are in most cases subjective. You can make an approximate conclusion by driving a car with the corresponding model of struts.
DIY replacement
Tools and materials
Installing a power steering on a Niva 2121. How to make your life easier and install a hydraulic booster or electric power steering on a Niva?
photo gallery “installation assistance” To carry out the replacement work, you will need the following tools and materials:
- Set of wrenches.
- Jacks and stops.
- New set of springs.
Work progress
Replacement of the front elements should be carried out in this order:
1. Jack up the SUV and remove the wheel. Set the stop. 2. Unscrew the nut securing the lower arm axle using an open-end wrench.
The process for replacing rear springs is as follows:
1. You need to disconnect the lower shock absorber hinge from the rear axle and move it to the side.
The entire replacement process takes no more than an hour for one wheel.
Rear suspension instructions
Replacing the rear shock absorber is carried out in almost the same way as when repairing the front suspension. If it is possible to install the car above the inspection hole or raise it on a lift, then you can do without removing the wheel. In this case, the work can be done as follows.
- The car should be raised on a jack or lift.
- Unscrew the lower fastening.
- Unscrew the top bolt.
- Remove the shock absorber.
When the faulty shock absorber is removed, a new product is installed. At the same time, it is necessary to ensure high-quality tightening of the threaded fastening.
Attention! Before installing new shock absorbers, it is recommended to bleed them manually.
Springs on the field, practice
What seats are suitable for the Niva? how to choose front and rear seats for a Niva
springs for the Niva family Let's divide the problem into two small problems. Let them be called shorty and crocodile
And it doesn’t matter whether it’s Niva Classic, Niva-M or Niva-U. Before turning to the Swedes, a little more history
When in 2008, the classic Niva was replaced by the Niva-M, and in 2020 by the Niva-U, the plant proudly announced that they were aware of the problem of the front springs and that they would install a new type of spring, with a thicker coil and 20 mm longer. The result is written at the beginning of the second paragraph.
Shorty option. The front of the car is very overloaded. And if a winch or air conditioner (Niva Urban) is also hung on the front end, then it becomes completely sad. Therefore, according to our many years of experience, in all cases we install springs from a long-wheelbase Niva, that is, a crocodile. The rear springs for the shorty and crocodile are the same. I can recommend springs 4047001 (short wheelbase) only if you constantly drive alone and without a load, so we actually don’t keep them in stock. For the sake of fairness, I note that my family field rode on these springs for more than 7 years, until the first signs of spring sagging.
Crocodile option. There are two time-tested options. The first option is the standard. In front 4047006, behind 4247002. But there is one Russian, BUT. Few people buy a crocodile to ride alone or without a load. As a rule, this is hunting, fishing, 3-4 men, a bunch of luggage and a box of vodka, or an off-road “truck” (a very common option). In this case, we put rear springs from a Chevrolet Niva on the rear. In terms of geometry, they are exactly the same, but in terms of rigidity they are approximately 20-25 percent greater. A legitimate question, why not reinforced springs for the Niva? The answer is price. For some reason they are more expensive than springs from Shnivy. And please do not forget that if you want to make a suspension that is comfortable for yourself, then you need to consider the issue comprehensively, together with high-quality shock absorbers and silent blocks.
Compatibility of springs from Niva and Shniva
The time comes when the springs on a Chevrolet Niva need to be replaced. First you need to figure out which suspension elements are best to install so that they provide the expected properties.
The springs on the Chevrolet Niva from the regular Niva VAZ-2123 are not suitable. The reason for this is the differences in length. Let's consider the main technical parameters of these elements.
| Parameter name | VAZ-2121 Niva | VAZ-2123 Chevrolet Niva |
| Front | ||
| Bar diameter | 15.2 mm | 15.7 mm |
| Length | 278 mm | 313 mm |
| Rigidity | 74.42 kg/cm | 75 kg/cm |
| Load | 815 kg | 815 kg |
| Rear | ||
| Bar diameter | 13 mm | 13.9 mm |
| Length | 434 mm | 410 mm |
| Rigidity | 22.44 kg/cm | 30 kg/cm |
| Load | 483 kg | 483 kg |
From the comparison table it is clear that the free length of the parts in question does not correspond, which is the reason for the impossibility of installation, since the springs from the Niva are shorter.
When to change?
Universal spacers for springs
Let me refer to quotes from the forums: look at how your lower control arm is relative to the ground, measure the distance from the edge of the wheel to the arch, and the like. Of course, there is some truth in all this, BUT these are all consequences. We need to look at the reason, that is, at the spring itself. The next legitimate question is: where to look? The photo shows springs from the same car, one side before replacing the springs, the other after.
when to change springs?
For some reason I remembered the magazine “Murzilka” with pictures on the topic, find 10 differences)). Red circles indicate where to look. Why do springs in this condition need to be changed and why is this criminal? Different alloys have different physical characteristics. In particular, spring steels do not withstand shock loads at all. When the coils of the springs close to full contact, an impact occurs. Stress tends to accumulate, and at some point the spring bursts. If this happens at low speed, the face of the car will simply fall down. The fuse will be the shock absorber, which will bend, and if the swing was stronger, then the body will lie on the wheel. It is much worse if this happens at speed or somewhere on the descent from a hill. I saw a short video from the Ladoga Trophy, when a short Niva drives down a hill, bounces a little and turns over. What can be seen in the slow motion replay: when flying up, the suspension dissolves. Then, the face of the car goes down, the spring bursts, the body falls on the wheel... and the car does a somersault through this wheel, since the kinetic energy has not gone away.
Replacing front shock absorbers
To perform repair operations you will need:
- jack (preferably hydraulic);
- WD-40;
- hammer or sledgehammer;
- socket wrench 17 mm;
- socket head 19 mm;
- open-end wrench 6 mm;
- collar
Before removing the front shock absorber, it is advisable to treat the connections with a penetrating lubricant. Moreover, it is recommended to do this 15-20 minutes before the start of the main work. Lift the car in a convenient way until the wheel is completely free.
Unscrew the fastening from the top, holding the rod firmly with a 6 mm wrench.
Remove the washer by hand.
Remove the rubber damper.
By moving the rack downward, release the rod from the body bracket.
Move to the spring cup and use two 17mm socket wrenches to unscrew the lower mount.
Remove the shock absorber from its seat, first removing the bolt.
You can replace the front shock absorber with a new one in the reverse order. In this case, the final broaching is carried out with a naturally loaded axis.
Springs Kilen-Lesjofors, coating
I cannot help but note the issue of spring coating. The most important difference from other manufacturers is not the paint. Primary coating is made with zinc phosphate, secondary with epoxy powder. Let me note an important thing. Spring coating isn't just about "beauty" - it's about long-lasting performance. Metal whose structure has been penetrated by rust is, in most cases, scrap metal. In St. Petersburg conditions, the coating lasted more than 7 years before the first chips appeared on the springs.
Number:
11917 Front suspension spring
6 reasons to buy from us:
- You can trust us. Make sure of this >>
- Quality and Return Guarantee
- Pickup points in 400 cities
- Delivery by courier, mail, transport company >>
- More than 10 convenient payment methods
- A large assortment
Organizations:
We work with VAT
News
06.07.2019
The full range of LIQUI MOLY products is in stock in Yekaterinburg.
more details 06/17/2019
New catalogs for selecting spare parts on the PlentyCar.ru website.
more details 06/11/2019
Congratulations on the holiday June 12, 2022 and office work schedule. more details
In the Plenty Car online store you can buy auto parts for Japanese cars (Toyota, Mazda, Honda, Isuzu, Lexus, Mitsubishi, Nissan, Subaru, Suzuki), European cars (Ford, BMW, Citroen, Peugeot, Alpha, Lancia, Fiat, Land Rover, Mercedes, Opel, Renault, Rover, Volkswagen, Audi, Skoda, Seat, Volvo, Saab, Jaguar), American cars (Chevrolet, GM, Chrysler, Cadillac, Hummer, Infiniti, Jeep, Pontiac) and Korean cars (Daewoo, Hyundai, Kia, SsangYong). If you were unable to find spare parts for your car yourself, contact our specialists. All information on the site is for reference only and is not a public offer as defined by Article 437 of the Civil Code of the Russian Federation.
The section “Suspension Spring” contains the following details:
- suspension springs
- spring kits
- spring plates
- spring mounting
Please note that prices and terms are based on delivery to the region
Reinforced rods
The appearance of cracks between the rod base and the lugs will shorten the service life of the parts. This problem can even cause an accident - the car suddenly pulls to the side when the traction breaks.
To avoid unpleasant surprises, special reinforced parts are installed in the rear suspension. They are made of alloy or cold-rolled steel and differ from conventional ones in the diamond-shaped section of the base and powerful welding seams that hold the lugs.
Reinforced rods differ from standard ones in the following characteristics:
- Reduced weight of parts.
- Improved paint coating that prevents corrosion of elements.
- High strength welded seams.
- Increased resistance to torsion, compression and tension.
Installation of reinforced rods is recommended for full use of the Chevrolet Niva off-road. They don't offer much benefit for city or highway driving. Under gentle operating conditions, the strength of standard rods is quite sufficient, so there is no point in overpaying for reinforced parts.
Types of breakdowns and their causes
The parts are made of high-strength alloy steel, so they are practically not subject to deformation.
The jet rod can only bend as a result of hitting large stones or tree stumps off-road.
More often, car owners have to deal with other problems:
- Cracks in the welds between the rod base and the eyes. If a breakdown is not detected in time, the part may fall apart while moving.
- Corrosion of rods. A rusted base loses strength and is easily deformed or broken.
- Wear and damage to rubber bushings of silent blocks. Over time, rubber dries out and cracks. This process is enhanced by physical activity. As a result, play appears in the connection of the rod with the bridge and the body. This worsens the car's directional stability and can lead to the lugs coming off.
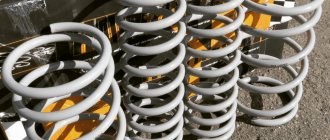
Front suspension springs SS20 VAZ 2121-2131 /Niva/ (2 pieces)
Springs SS20 for VAZ suspension.
We carry out a selective selection of pairs (within a class) with the most identical characteristics, which ensures the best contact of the car with the road surface, stability, controllability, reliability and comfort.
Advantages of VAZ suspension springs from SS20:
100% quality control;
the most identical characteristics ensuring the best traction, reliability and comfort;
high resistance of paint coating.
Spring class value.
Standard test method: after manufacturing, the spring is compressed to a control height, determining the load required for this. According to it, springs are sorted into classes, which are marked on the coils with paint of different colors (“ VAZ
") or risks ("Moskvich"). As in any production, control of springs (sorting by class) is accompanied by various tolerances and these tolerances are quite “wide”, i.e. the height of two springs of the same class (under control load) may differ by 16 mm, which means the body is skewed.
The height of the body on the right and left with springs of the same class installed in the car suspension should not differ by more than 4 mm. Studies of springs from various manufacturers have revealed a number of significant shortcomings.
Advantages of SS20 springs.
NPP Sistema Technologies LLC carries out a selective selection of pairs (within a class) with the most identical characteristics, which ensures the best contact of the car with the road surface, stability, controllability, reliability and comfort.
LLC NPP "Sistema Technologies" carries out 100% quality control, the geometry of springs, support and working coils, conducts life tests, therefore SS20
remain operational for at least 5 years.
Springs SS20
have increased resistance of the paintwork to abrasion, chips and scratches, which is very important, since the springs operate in fairly aggressive conditions (water, sand, crushed stone, salt from the road surface). Special spring steel (60S2G), from which really high-quality springs are made, contains a large amount of carbon, i.e.
any scratch will lead to rapid oxidation (rust), which will negatively affect the resource.
Springs must be replaced in pairs, even if only one spring is defective. It is allowed to install springs of the same type with the same characteristics on one axle. Springs SS20
are installed instead of standard ones and do not require modification of other suspension parts.
Springs are replaced when one of them breaks or excessively settles, or when they all “sag” during operation. The defect of one spring can be easily determined by the obvious distortion of the body, and it is necessary to take into account the condition of the supports, silent blocks, and tires. Frequent activation of the suspension up to the travel limiters (“breakdowns”) is also a sign of “sagging” springs.
Checking the validity of springs:
install new springs;
after a run of 2 thousand kilometers, measure the vertical distance from the wheel axis to the wing;
If this distance decreases during operation by more than 20%, the spring must be replaced.
Measurements should be carried out on a flat, horizontal area, taking into account the condition of the dampers of the supports and silent blocks.
Rear springs SS20
SS20 springs do not require any modifications to other suspension parts and are installed instead of standard ones.
We recommend using springs using a protective polyurethane braid. The braid will protect the spring coils from impact and destruction, eliminate knocking and increase the service life of the suspension springs.
How to check the status
To diagnose shock absorber struts, 3 methods are used:
- Place the car on a level surface. Grasp the rear and front bumpers alternately and swing them forcefully. Serviceable shock absorbers will dampen vibrations in no more than the third time.
- Using a vibration machine, perform tests and analyze the vibration graph according to the standard. Additionally, this method will allow you to identify problems with springs, silent blocks and other suspension elements.
- Remove the lower rack mount, then manually bleed it. The compression of the rod should occur without jerking or excessive force.
Different positions of the front and rear of the body
One of the unconcealed signs of a collapsed spring or a pair of “front” or “rear” at once will be purely aesthetic rejection. The car will either have the trunk pulled up or the engine compartment pulled up. Or even the body will be completely askew if you accidentally “run out” of one spring in the front and back, and even on different sides of the car.
In general, the ideal option is to replace the springs each time along with the shock absorbers. Especially if the car is used in what is called “both the tail and the mane.” But an appropriate and safe compromise is to change the springs once every two shock absorber changes or at a mileage of just over 100 thousand kilometers. That is, the struts were changed for the first time at about 50 thousand mileage, drove the same amount and with a clear conscience immediately prepared the shock absorber supports along with the springs.
Purpose
Chevrolet Niva comes from the factory with springs, both front and rear. The main purpose of these devices is to absorb all the shocks of the suspension that occur when the wheels hit potholes and bumps. They are located in the gap between the wheel and the frame of the car, due to which shocks from the road are smoothed out.
Also interesting: Renault Duster and Chevrolet Niva - video tests
For their manufacture, special high-strength steel is used. The number of turns of the device affects not only the quality of shock absorption, but also the distance of the body from the suspension.
Is the “spring-shock absorber” connection so important?!
Torsion bars, cushions or springs are used with shock absorbers to dampen body vibrations as quickly and effectively as possible. When driving on an uneven road, the car’s wheels may briefly lose traction with the surface - as if “falling” into the recesses. At such moments, the spring straightens, rushing behind the wheel, and very, very quickly manages to “pick it up” in order to prevent a strong imbalance of the entire suspension. What comes next?
The body, under its own weight, quite quickly rushes into the hole following the wheel, and then the spring compresses, taking a noticeable blow. If engineers had left even the most durable shock absorbers alone with such vibrations on bumps, without springs they would not have had a single chance to survive.
How to replace the rear suspension shock absorber of a VAZ-21213
You can verify the performance of the shock absorber without special equipment by vigorously shaking the car body down.
The body should return to its original position without oscillating
The fastening of shock absorbers should not have any play, and no leaks of working fluid are allowed on their bodies.
Rubber bushings for mounting shock absorbers must be free of damage and local bulging.
A more accurate characteristic of the performance of shock absorbers can be viewed on a dynamometer.
Removing the shock absorber
We carry out the work on an inspection ditch or a lift.
Using a 19mm spanner, unscrew the nut of the shock absorber lower mounting bolt, holding the bolt from turning with a wrench of the same size.
Before removing the bolt with the rear axle beam suspended (when working on a lift), it is necessary to place a support under the part of the beam where we remove the shock absorber so that the suspension spring is compressed.
Remove the spacer sleeve.
Remove the bolt and spacer washer.
Using a 19mm spanner, unscrew the pin nut of the upper shock absorber mounting
After removing the upper eye from the pin, remove the shock absorber.
The lower eye of the shock absorber has two rubber bushings and a metal spacer bushing.
There are two rubber bushings in the upper eyelet
Install the shock absorber in reverse order.
We finally tighten the shock absorber mounting nuts in the “car on wheels” position.
The tightening torque of the shock absorber mounting bolt nut is 38.2 – 61.7 Nm (3.9 – 6.3 kgf m).
What do we know about Kilen springs
In May 2022, PartReview had a mixed opinion about Kilen springs.
PR score - 76 out of 100, based on 37 reviews and 121 votes. 25 reviews are positive, 7 are neutral, and 5 are negative. The average review rating is 3.9 (out of 5). The votes were distributed as follows: 92 - for, 29 - against.
In the ranking of the best spring manufacturers, the spare part occupies 10th position, behind such manufacturers as NHK and Phobos, but ahead of ASOMI and KNK springs.
Users also had their opinions on the qualities of Kilen springs:
- Elasticity - the ability of springs to maintain or lose elasticity over time - is assessed positively. 3.7 points out of 5.
- Corrosion—the ability of a spare part to resist corrosion—is assessed negatively. 2 points out of 5.
RIF front springs Niva 2121, 21213, 21214, 21214M +60 kg lift 50 mm
Description RIF springs are made of high quality steel and are designed specifically to prepare an SUV for harsh operating conditions. They allow you to “lift” an SUV and increase its carrying capacity, while compensating for the weight of installed additional equipment - power bumpers, trunk, winch. After installing RIF springs, the off-road vehicle's cross-country ability improves, and the car's behavior on broken roads becomes more stable - directional stability improves, and the likelihood of suspension breakdown decreases.
RIF springs are made on the basis of many years of experience in the preparation and operation of various four-wheel drive vehicles on various types of road surfaces in various climatic zones.
When selecting a complete set of RIF springs (front + rear), pay attention to the last letter of the article: front and rear springs must only have the same letter - B or C. We do not recommend combining sets B and C when installing - this may cause longitudinal roll of the car , due to different spring stiffnesses
Fans of domestic cars " Chevrolet
», «Niva-2121
" and other all-wheel drive representatives of the
VAZ
(Lada) family, sooner or later they are faced with the need to completely or partially replace the suspension - in this case, it is better not to change individual elements of the
front and rear shock
absorber struts, but to install the entire
lift kit at once. By strengthening the Niva's suspension
, you make the car more durable and provide you with peace of mind on long, long trips over difficult terrain. The reinforced suspension will withstand not only measured driving on a broken country road, but also chasing a hare through a forest clearing, and will not let you down either in swampy areas or on a winter road.
AUTOBANKA.RU can offer SUV owners several options for reinforced rear
or front springs
, as well as complete
suspension
lift kits for
Chevrolet Niva
,
Niva-2121
, etc. – which one
to buy
is up to you, but one of the optimal ones is the “RIF” suspension:
- · firstly, it is inexpensive - for comparison, a complete elevator kit from Russia will cost almost 3 times less than, for example, a similar one made in Australia;
- · secondly, the reinforced lift suspension
of this manufacturer has proven itself well among the owners of various
VAZ
4x4,
Chevrolet
and Lada-
Niva
; - · thirdly, RIF products are designed and manufactured with the Russian operating conditions of SUVs in mind.
The reinforced Niva suspension allows for good grip on both asphalt road surfaces and off-road conditions, maintaining vehicle controllability, stability and comfort.
Suspension lifting Niva VAZ 2121 21213 21214 2131
We will tell you how to properly perform tuning modifications in this material.
Do-it-yourself elevator - drawings, diagrams, sizes, types of kits. Lifting varies in the degree of intervention in the standard structure. For some, it is enough to raise the SUV by a few centimeters, and for others by as much as 20.
Extreme tuning – maximizing cross-country ability for traveling on severe off-road conditions.
- Regular jack
- Hijack jack
- Spring puller
- Balloon wrench
- Ratchet socket set
- Set of open-end wrenches
- Mount
- Wooden deck (stump)
It is advisable to perform such work with a partner. First of all, it's safer. Secondly, some lifting work is performed with four hands. Let's take the front suspension as an example.
Raise the front end. You can safely cling to the standard bumper, only the jack is installed under the pipe securing it. By removing the wheel, we get full access to the lever and spring. The front suspension 21214 is made using a double wishbone design, which simplifies the task.
The lever travel is limited by the shock absorber. Unscrew its fastening and move it to the side. Next you need to free the suspension from the anti-roll bar. The mounting bolts may become stuck due to corrosion, so we will use a penetrating liquid (such as WD-40). The stabilizer silent block clamp can be pryed off with a pry bar.
Then disconnect the hub from the lower arm. To do this, you need to jack up the suspension and fix the steering knuckle of the wheel. You can tie it with wire. Then unscrew the 3 mounting bolts and release the ball joint.
We fix the spring with ties and lower the jack. We remove the old elastic element. In some cases, it is enough to simply lower the lever with your foot, and the spring will come out without the use of ties.
Remove the upper support rings from the old springs. With their help, the elastic element is centered in the cups.
They come together easily with a hammer and screwdriver. We install the rings on new, longer springs. We put the elastic elements in their regular places and jack up the lower arm until it is completely aligned with the lower cup. At the same time, an assistant centers the shock absorber eye and moves the steering knuckle to the mounting location of the lower ball joint. We tighten the ball “triangle” and attach the shock absorber mounting axis.
By manipulating the jack, we “catch” the mounting holes for the stabilizer bar clamp. With its bolts it should get into the normal place without distortion. After such modernization, the clearance increases by 30-50 mm. This is enough to install wheels of larger diameter, and the bottom will still rise above the ground.
The rear axle of the Niva can be lifted by installing spacer supports of increased height. When using a size of up to 50 mm (according to changes in front end height), no modifications to the rear axle are required. By lifting the rear axle, maintenance can be carried out on the axle and brake system.
The handbrake cable may need to be replaced. It is lengthened by a couple of centimeters. Otherwise, the Niva lift will lead to increased wear of the brake pads in the rear drums. Disconnect the lower shock absorber mounts and lower them until the springs stretch.
We take out the elastic elements and knock off the support rings from them. We clean the upper cup and carry out anticorrosive treatment. We install new supports of increased size and seat the springs using a jack. We fasten the shock absorbers, assemble the axle, and mount the wheels.
Such a lift will not arouse suspicion among traffic police inspectors, and the cross-country ability of your NIVA 2121 will improve. No drawings, much less homemade parts, are required. You buy new springs and about the rates, the rest is a matter of technology. Labor costs for an elevator of one NIVA are two people/one day off.
For lovers of hunting, fishing and country travel, as well as those eager to try themselves and their own “Niva” in driving a vehicle in difficult-to-pass places, we have the opportunity to offer an increase in ground clearance, which increases the cross-country ability of your car.
Niva tuning – suspension lifting.
At the moment, there are at least 6 types of suspension lifting for Niva and Sh/Niva, each is interesting in its own right and is negotiated during the preparation of the car for “off-road” at the request of the visitor, taking into account the distinctive features of the operation of his car and the sizes of wheels and tires he uses wants to put it on his car.
Also interesting: Amount of oils and fuel fluids VAZ 4×4 2121 Niva
We often use a kit from the Russian club 'Korovka' as a base. This lift kit was made at the factory and was tested at competitions in Russia. The ground clearance increases by 5 centimeters, which actually makes it possible to install R15 235/75 or R16 235/70 tires (on the right wheels). In addition, this will provide a rise of another 4 centimeters.
In total, the increase in ground clearance will be 9-10 cm! In this version, “NIVA”, without loss of comfortable qualities, has the ability to be used both on paved highways and off-road, being in no way inferior to foreign-made SUVs.
Consequently, at the lower point of the RZM the clearance is 25 cm, and at the cut of the threshold - 44.5 cm.
Front suspension lift.
The lift is performed by installing targeted washers under the lower spring pad (they create a sufficient angle for the front spring). Under the upper arm (between it and the ball) another spacer washer is placed (i.e., we unload the arm).
The levers of the steering knuckles are swapped and the tips of the control rods already go from top to bottom (since subsequently the work done before, when the rod is fully turned, they will rest against the stabilizer, although at the request of the visitor it is possible to leave it as it was by changing the fastening of the stabilizer).
During lifting work, it is often necessary to change shock absorbers, springs, and resins on request. spacers, internal CV joint boots on tuning suspensions modified for this type of lift and create adjustments. spring bumpers.
Lifting the Niva suspension at the rear.
The lift is carried out by installing new rear spring cups, which are bolted on top of the standard ones, and brackets for moving the mounting points of the rear shock absorbers up 5 centimeters (bolted).
The short upper rods of the rear axle are lengthened or made adjustable (for easy rotation of the shank, so as not to bite the crosspiece), the reaction rods of the rear axle are either reinforced with an angle or installed double; at the request of the visitor, a rear axle stabilizer “Tehnomaster” (Tolyatti) is added, although it will be needed adjust to the elevator machine, digest.
Similarly, it is preferable, on lifted cars, to use a rear CV joint. Those who begin to lift old or worn-out cars need to remember about the internal CV joints (the balls leave their place) and will need to prepare for their replacement. The solution to this difficulty is quite possible by reducing the drive angle by untying the front axle.
The outer CV joints are too little susceptible to this, it will be worse for them if the wheel becomes larger in offset, width and weight, and then they can “crunch”. Although even then the hub bearing has a hard time, especially if it had play before.
Although we have avoided this problem, since we install steering knuckles with 2 ball bearings (from the rear axle shaft), they do not need to be adjusted; they are tightened all the way, although it is much better with a torque wrench. The unit comes out maintenance-free, the hub is unloaded, rolling is easier and the dynamics of the car are much better. Steering knuckles are naturally of domestic production and with a guarantee.
When installing wide wheels after a lift, you will need to keep in mind the ball ones (when the weak ones “fly”), the pendulum will also be able to fly, and the installation of the latest gas shock absorbers results in a stiffening of the upper bracket of the lane. shock absorber (otherwise it tears, especially when the front end is heavier), the mounting of the rear shock absorbers can also be strengthened. It is preferable when lifting, replace the suspension with p/urethane instead of rubber.
Economical Niva suspension lift of 1.5-2 centimeters. In such a situation, we resort to replacing the rubber spacers for the springs with tuning ones (of greater thickness), installing washers, spacers for the upper ball joints and adjusting the spring bumpers (at the visitor’s request). In this implementation, the Niva gets wheels (correct) in size R15 215/75.
The Chevy Niva bridge is held in place using five parts. To prevent longitudinal and transverse displacement, four longitudinal rods (two each: front and rear) and one transverse rod are used. At the ends of the products there are eyes into which silent blocks are inserted to prevent knocking in the suspension. One end of the rod is attached to the bridge, the other to the car body.
The parts have the same diameter and differ only in length. The longest is the transverse thrust. The length of the elements ensures vertical mobility of the rear axle. Thanks to this, the silent blocks do not twist, even if the suspension moves by the full stroke of the shock absorber.
Replacing rear springs Niva 21213
This simple operation takes about half an hour on one side.
The photographs were taken when replacing springs on a VAZ-2131. The jack eyes on this example were used for attaching the hinged thresholds, which made the process somewhat more complicated. Usually a standard jack is sufficient for replacement.
Secure the car by placing stops at the front and rear under the front wheel on the side where the spring is being changed, and the other rear wheel:
Clean the nut of the lower shock absorber mounting bolt with a steel brush and pour it with “liquid wrench”:
Push out the bolt (you can use a hammer through a soft metal spacer), remove the spacer sleeve and spacer washer (shown by arrows in the right photo):
Jack up the car, place it on a stand and remove the wheel:
Usually the rear axle sags so much that the spring simply comes off. Remove the spring from the bottom cup, then lower it to remove it from the top support:
For the right wheel, it is convenient to remove the spring forward as the car moves (photo on the left), for the left wheel - backwards (right photo):
If the spring does not release, you need to press the brake drum with your body weight.
Use a screwdriver to stir up the dried dirt in the bottom cup and sweep it away with a brush:
Use a screwdriver to pry and remove the upper rubber gasket of the spring:
Insert the upper rubber gasket into the new spring, aligning the step in the gasket with the beginning of the first turn of the spring. Lubricate the inner surface of the gasket and its seat with engine oil:
Place the upper end of the spring onto the seat, then insert the lower end into the lower cup:
Turn the spring together with the upper gasket (it is more convenient to do this counterclockwise) so that the lower end falls into the recess under the lower coil in the cup:
Jack up the side of the axle so that the lower end of the shock absorber is against the eye (if you are using a standard jack, you can place a wooden block under the brake drum and lower the car):
Complete video instructions for replacing jet rods on a Shnivy
The work is carried out on an overpass or inspection ditch. To replace jet rods you need to prepare:
- hammer;
- a pair of spanners 19;
- metal brush for cleaning threads;
- mounting blade;
- WD-40 liquid.
Reaction rods need to be changed in the following sequence: transverse, front, rear. You should not lift the rear axle with a jack, otherwise there will be difficulties in aligning the holes of the silent blocks and mounting brackets.
Work order:
- Clean threaded connections with a wire brush and spray with WD-40.
- Unscrew the lower mounting nut and move the shock absorber to the side so that it does not obstruct access to the transverse link nut.
- Unscrew the threaded connections holding the silent blocks and remove the transverse rod.
- Install a new rod and screw it on the top side.
- Align the holes in the silent block and the bracket, insert the bolt and tighten the nut.
- Unscrew the fasteners, remove the front rod and replace it with a new one.
- Repeat the previous step for the remaining front and two rear links.
If the rods have not rusted or bent, or cracks have not appeared on them in the area of the welds, you can only get by by replacing the rubber-metal bushings. In this case, you can save on buying new rods and get by only with silent blocks.
To replace the bushings you will need a vice, a thick screwdriver, a pair of tubes and a special tool for pressing. The diameter of the first tube is 60-80 mm. The thickness of the second should correspond to the diameter of the metal bushing of the silent block.
The pressing device is a metal rod, the thickness of which is slightly less than the inner diameter of the rubber part of the silent block.
There is a thickening on the rod that presses on the rubber bushing. The diameter of the thickening must correspond to the outer diameter of the silent block.
Replacement of bushings is carried out on removed rods.
You need to start by dismantling the old silent blocks. Press the tubes on both sides into the hinge: the thin one into the metal bushing, and the thick one into the rubber bushing. Clamp the structure in a vice and tighten it. The metal bushing will come out of the silent block and the rubber will be easy to remove from the eye using a thick screwdriver.
Before installing a new silent block, it is necessary to clean the inner surface of the eyelet and lubricate it with a solution of soap or detergent. Oil, which is recommended for use in some assembly instructions, will shorten the life of rubber bushings.
After this, all that remains is to insert the pressing device into the rubber bushing of the hinge, lean it against the eye of the rod and compress the structure in a vice.
The metal sleeve is pressed in with the same device. To facilitate installation, it must be treated with a soap solution.
Replacing silent blocks alone takes more time than replacing the assembled jet rods. However, if the condition of the rods is satisfactory, you can leave the old ones. In the absence of extreme loads, they can travel 100 thousand kilometers or more.
Springs on the field, theory
There is a complete mess going on on forums and in people’s heads regarding the selection of springs. I won't dwell on factory springs for a long time, I'll just say one thing. My friend bought himself a Niva Urban Crocodile in 2022. The lower coils of the front springs closed at 20 thousand and the standard wheels began to bite the locker. Now one rhetorical question for fans of factory springs: it is known all over the world that the best quality goes to the assembly line, and everything else goes to the spare parts market. If conveyor springs are of such quality, then what do they offer you with all sorts of different stripes? Among the branded springs, another manufacturer has appeared on the market - Kayaba. All their adult lives, the guys made shock absorbers, and then they took up springs... and failed. They decided not to increase their production, but placed orders from a third-party manufacturer. Quality floats like a violet in an ice hole. At one of the technical seminars held in St. Petersburg, Kayaba representatives avoided questions about springs as best they could and emphasized in every possible way that these are different units and there is no need to equate them.
Now for the “Swedes”. There is complete obscurantism going on on the forums and the drive of numbers and articles. They say there are springs for M-ki, there are already 006 springs for urban and other fabrications. Meanwhile, just look at the official Kilen-Lesjofors catalog for everything to fall into place. The manufacturer offers springs for the field in four articles. 4047001 – front springs for a short wheelbase (three-door), 4047006 – front springs for a long wheelbase, 4247002 – conventional rear springs, 4247010 – reinforced rear springs. All! There are no other options
I do not take into account the Kilen numbers, since the essence and springs will be the same
Rear shock absorbers for Niva 2121, 21214
The rear shock absorbers on both generations of Niva also do not differ from the installation side, and have the same serial number. As is the case with the front ones, the rear struts of the VAZ 2121 are slightly smaller than the shock absorbers of the Niva 21214. And they are also interchangeable. As for quality, the problem is still the same - uncomfortable driving on off-road and uneven roads. The dimensions of original spare parts are shown in the table.
| vendor code | Rod diameter, mm | Case diameter, mm | Body height (excluding stem), mm | Rod stroke, mm | price, rub. |
| Dimensions of rear shock absorbers for Niva VAZ 2121 | |||||
| 21212915402 | 12 | 41 | 310 | 182 | 600 |
| Dimensions of rear shock absorbers for Niva VAZ 21214 | |||||
| 21214291500400 | 12.5 | 45 | 315 | 198 | 1000 |
Also, some drivers install original front shock absorbers from UAZs on the rear wheels of Nivs. This solution is most effective if the car is operated in severe frosts (from -30 to -45 degrees Celsius). In other cases, it will be more effective to install analogues.
Analogues of rear shock absorbers for Niva 4×4
The popularity of various replacements for the rear struts of the Lada Niva is similar to that for the front struts. Analogues also, although different, are interchangeable. The table below shows the most popular ones.
| Manufacturer | vendor code | price, rub. |
| Analogs for rear shock absorbers Niva 2121 | ||
| SS20 | SS20224 | 2600 (2 pcs.) |
| Fenox | A12175C3 | 550 |
| Alca | 842340 | 500 |
| Analogs for rear shock absorbers Niva 21214 | ||
| SS20 | SS20224 | 2600 (2 pcs.) |
| Trialli | AG01514 | 1000 |
| Hola | SH40-413G | 850 |
Which shock absorbers for Niva VAZ 2121 and 21214 are best to buy? For normal city driving and relatively smooth highways, the original spare part is sufficient. If the car will be used off-road, then it is better to install Trialli (the most popular brand among Niva owners). Or you can install racks from the Russian SS20 “Comfort” series. They are moderately tough and behave well on uneven surfaces.
Shock absorbers on Niva are changed depending on their condition.
As is correct, the original strut does not last too long - up to 50 thousand km. And when operating a car off-road and on bad roads, the period decreases depending on the intensity of their use.
Hi all ! Not long ago, an acquaintance of mine fitted the front springs from his Bronto 2022 at maximum speed (mileage 10 thousand)) I have a Niva 21214m. I haven’t found any information on Bronto springs, so I’m writing this post, maybe it will be useful to someone. I was afraid to install them right away because I thought, what if they are the same as a Chevy Niva, and riding on springs from a Chevy is still a pleasure (like on a stool). Then I decided to confuse myself and compare the springs. One friend had new springs from a Chevy (2123) lying in his garage, they compared the Bronto springs with them and the difference was visible to the eye. Chevy springs are longer and their rod thickness is greater. I didn’t want to take mine out of the Mki yet, and it so happened that another friend bought new springs from the Mki and didn’t have time to install them yet. Today I came to him and compared the conclusion: the springs on the bronto are 21214m) They are the same in length, thickness and coils. That's it . But I’ll still put it on Bronto, they’re fresh and mine have already gone through more than 106 thousand.
Replacing rear shock absorbers yourself
Usually the rear shock absorbers on a Niva last quite a long time. Based on the example of many of my friends, up to 100,000 km is considered a completely normal service life. Of course, everything largely depends on the quality of the roads where you operate your car and on your driving style. Removing and installing at home is not difficult, and to perform this repair you will need the following list of devices:
- Two 19mm wrenches, one of which is required - a head with a long powerful wrench
- Ratchet handle for easier dismantling
- Hammer and wooden block

